This week’s Ural notes relate to the brakes and clutch system - or, as I like to say, “Stopping and Going.” Some of this is regular maintenance, some of this is upgrades, all of this is horrifically messy if you’re not a fan of being covered in brake fluid and oil. If you’ve ever wondered why you shouldn’t use ball bearings as thrust bearings on a flat surface, this carnage should answer your question… but I’ll get there in a bit.
Front Brake Pad Replacement
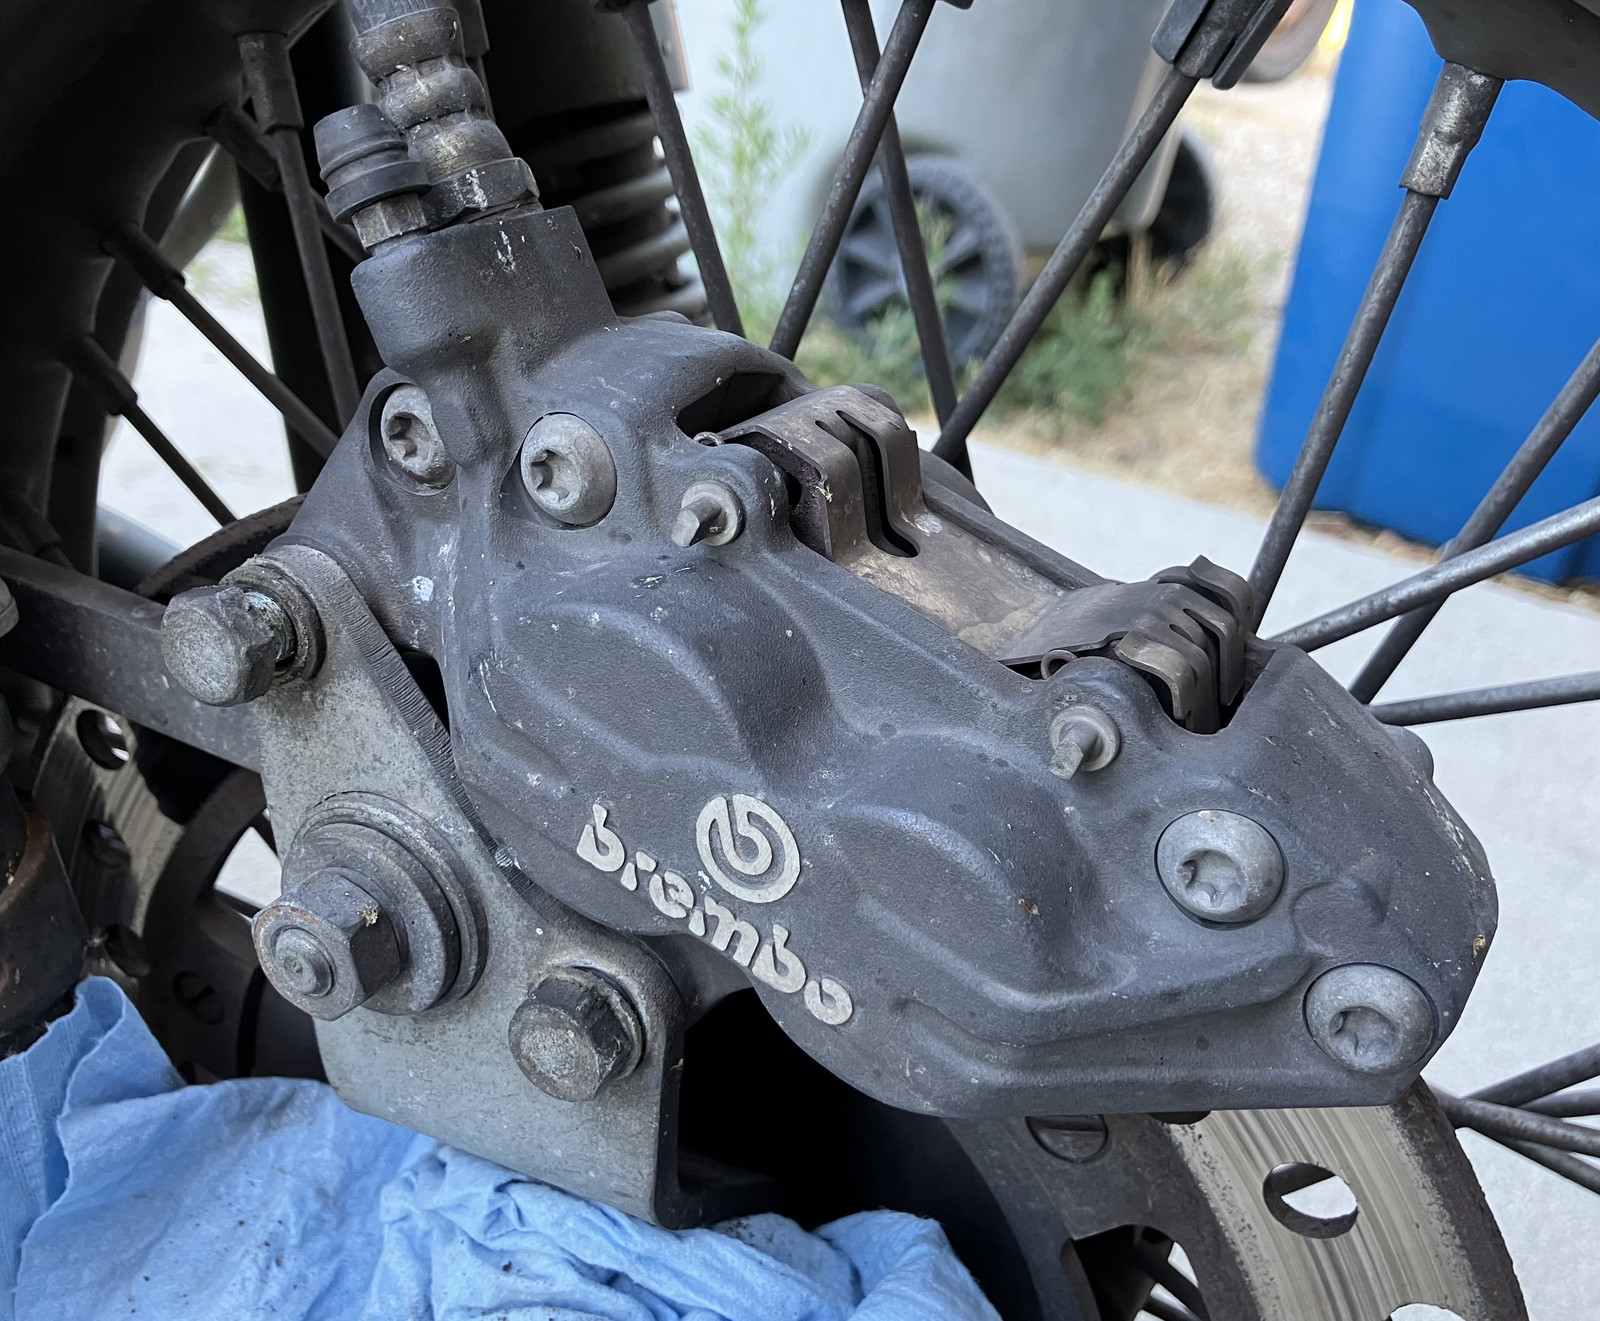
Ever confusing to the “This is obviously a BMW from the 1940s!” people, my Ural has a front disc brake. It’s a standard enough Brembo caliper, and it is an absolute pain to bleed if you get air into the system. So don’t do that. The primary problem is that the caliper is mounted sideways - it’s intended to have the bleeder at the top, not the back. This isn’t a big deal, until it is. Keep spare brake pads around, and check them every oil change - a Ural is pretty hard on the front brakes. There’s a lot of bike to stop, and most of that effort goes through the front wheel. You’re not going very fast, but there’s still a lot of energy to deal with.
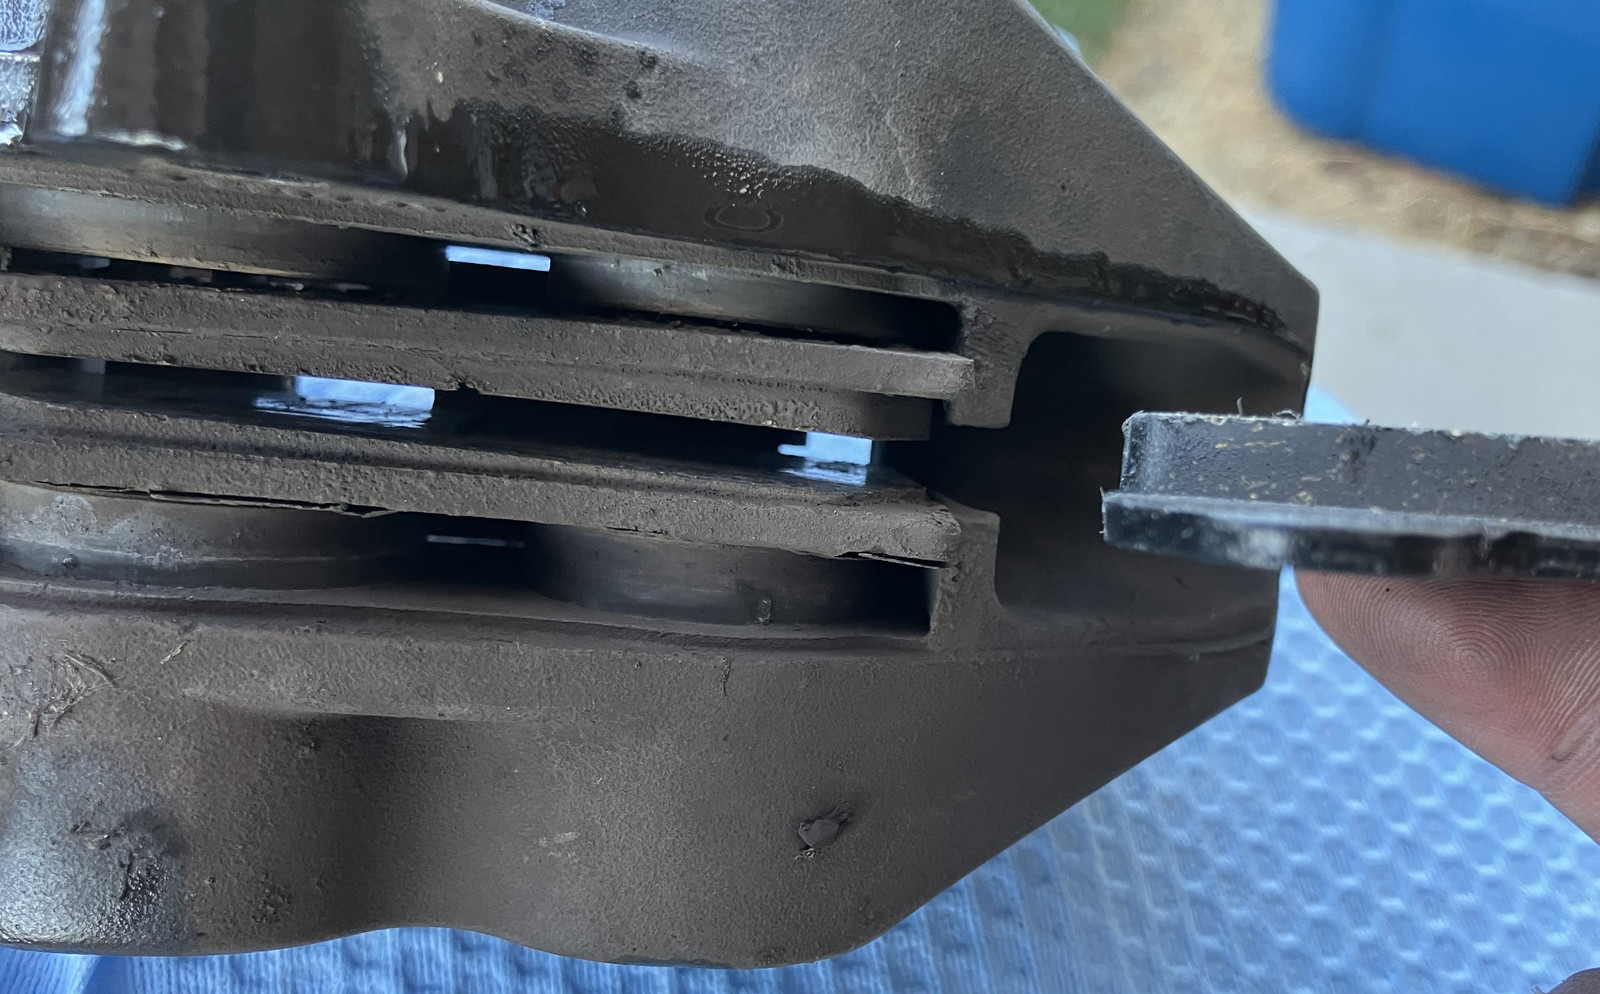
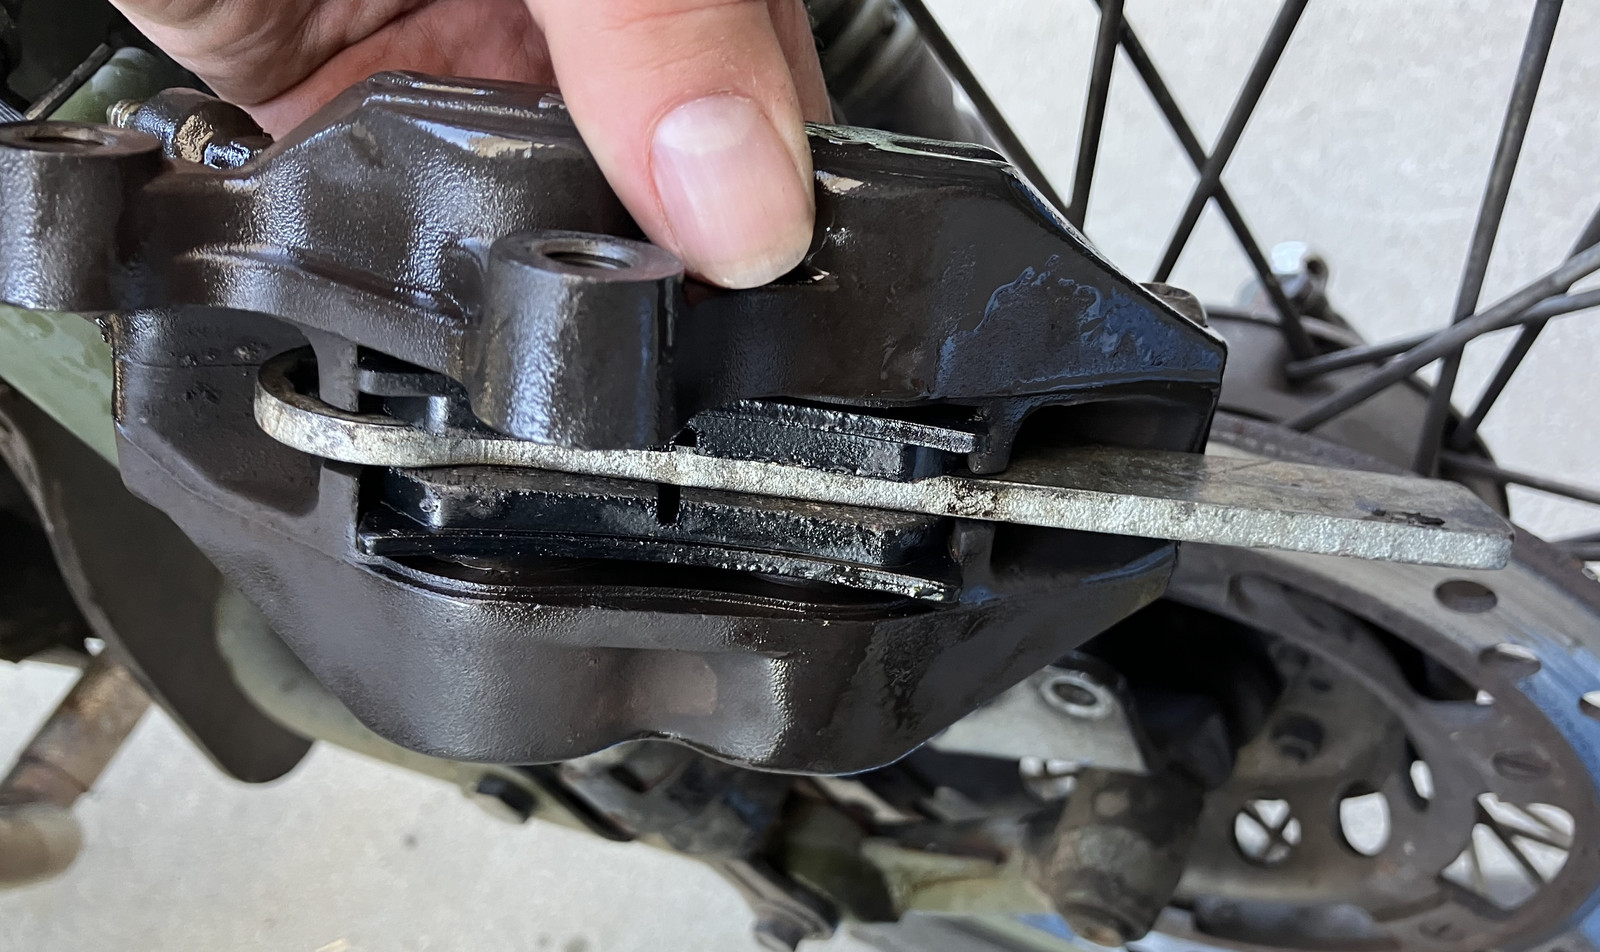
I’d been suspecting for a while that my pads were getting pretty badly worn. I didn’t realize they were quite this badly worn. Whoops. Not much time left to metal on metal noises. The new pad is on the right as a demonstration of the original pad thickness. The paper thin pad on the lower left is, shall we say, “almost entirely utilized.” And the uneven wear means I probably need to rebuild this caliper at some point, because it’s not applying pressure quite evenly to both sides. I should get around to that.
I am in the habit of loosening the bleeder screw when I push the pistons back in. This is fine, until you forget to put a hose over it and it does the motorcycle version of “changing a diaper without covering the child,” and makes a tremendous mess all over everything. It’ll seem totally fine, right up until it decorates the motorcycle, pavement, and probably you with older brake fluid than you’ll admit to having in a brake system that ought be bled annually.
Done with the bleeder too loose, this will also let a lot of air into the system that will be basically impossible to get out. The caliper will not bleed properly on the bike. So, the solution is to bleed the caliper off the bike - but, also, you don’t want to just let the pads press into each other. You need something about the same thickness as the rotor - and, it turns out, the Ural toolkit (at least on my bike) has exactly such a piece! The thin wrench thing used for removing the nut on the rear axle is perfect to use as a caliper-substitute when fighting with the brakes! Put it in, and you’re golden. Just remember to hose everything down with brake cleaner before you put the brakes back together.
The bleeder needs to be facing up. You need to pump the front brake lever, build whatever pressure you can, loosen the bleeder, let the fluid (and hopefully air!) out, and then tighten the bleeder. While holding the caliper. You have two hands… and my solution was to wedge the bleeder wrench between the spokes. This way one hand can pump the front brakes, and the other holds the caliper, twisting as needed to loosen the bleeder. Don’t forget to keep an eye on the fluid level up top - you don’t want to suck more air, and, let me tell you, that sucking sound is exceedingly unwelcome when you realize you’ve just made your problems worse! But, I did eventually (an hour and a half later…) manage to get pressure back in my front brakes. Don’t do it this way. Buy a pressure or vacuum bleeder. Seriously. And a Speed Bleeder.
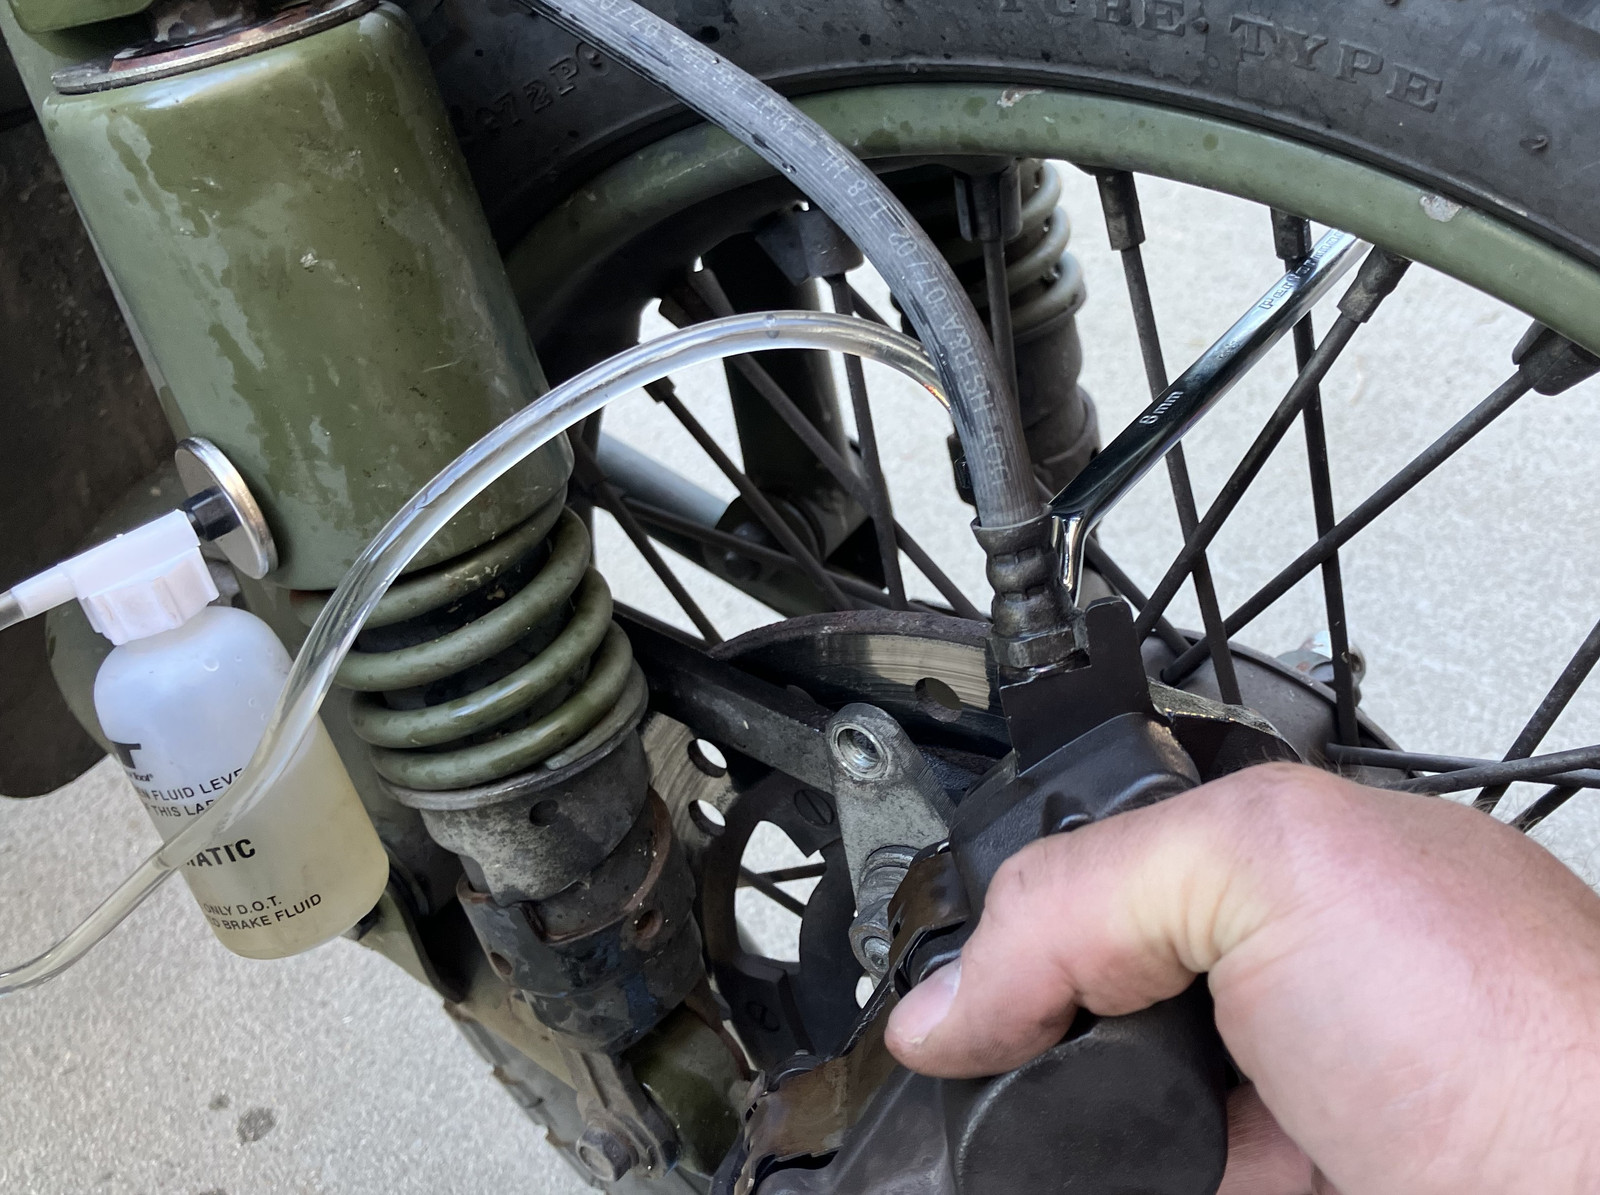
I got it decently bled, but it was far from perfect. I also didn’t care, as the next weekend involved yet more brake work that required bleeding - and there was no way around that.
Front Brake Line Replacement
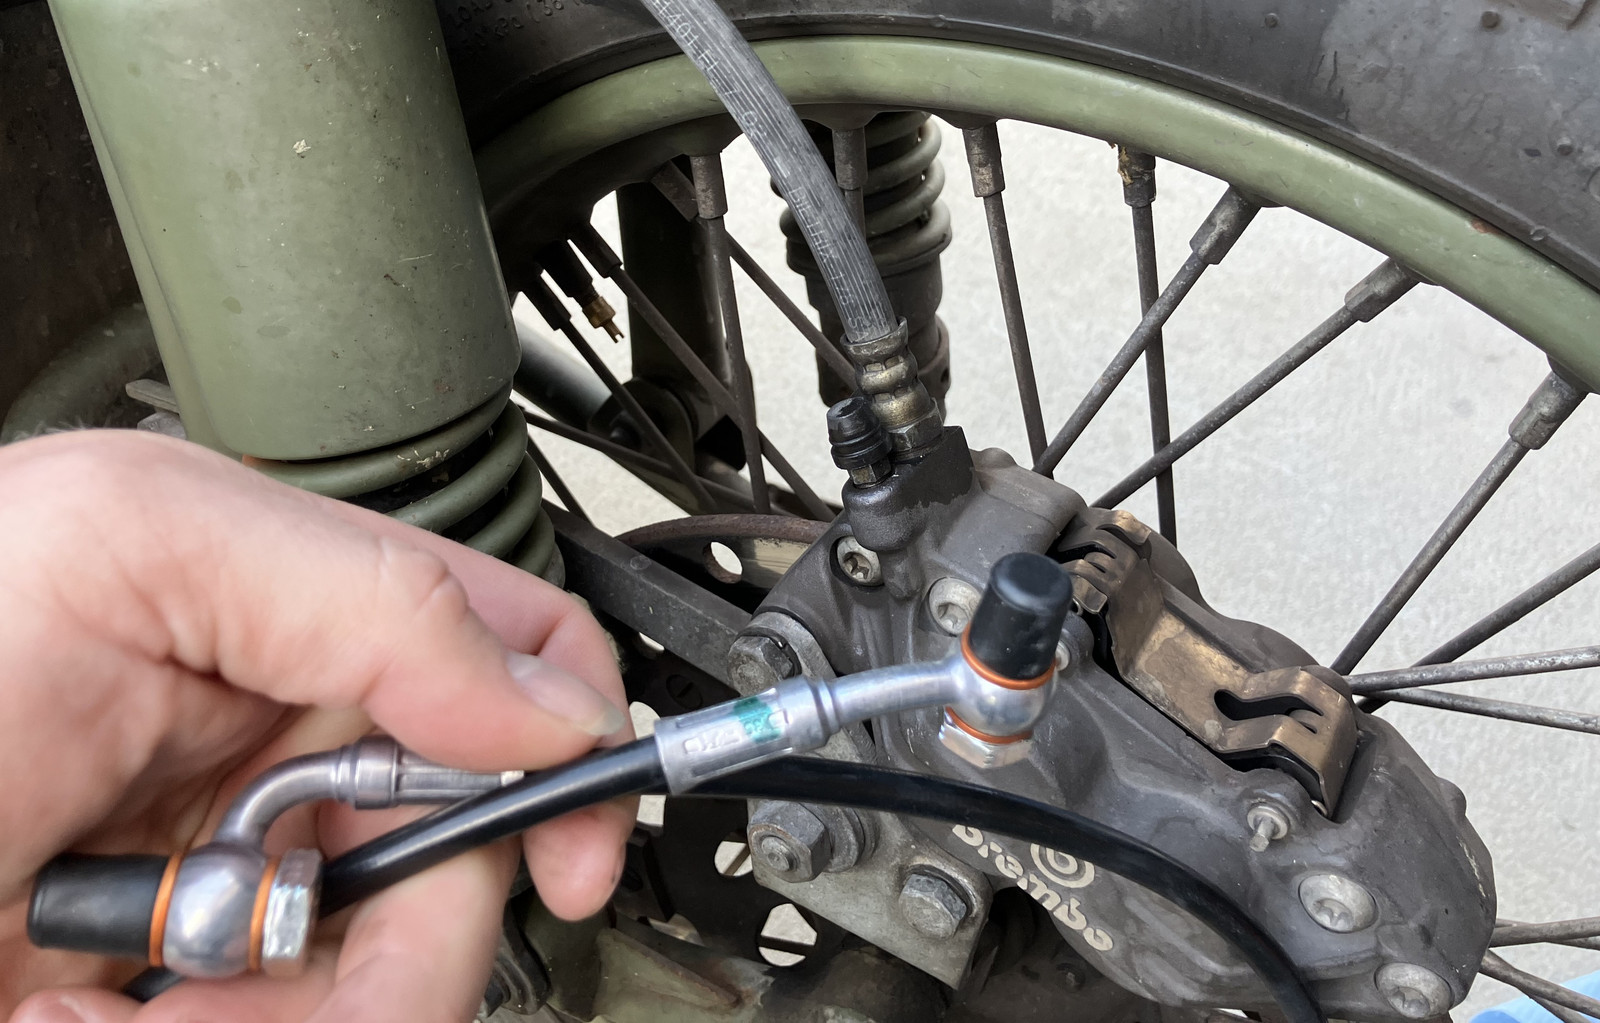
I’ve replaced my 20 year old front (rubber) brake line with a newer generation line that is harder and stiffer. If you’ve ever put stainless steel braided lines on a vehicle, you know the concept. My old line was working well enough, but I start questioning rubber at 20 years, and the line was moving rather more than I think it ought as pressure built in it. Brake lines shouldn’t move around under pressure, and this one was. Knowing how bad bleeding the brakes was before, I picked up a vacuum bleeder to make life simpler this time around.
This is a Russian evolution of a German bike, so what size wrench do you need to get the line off the front Brembo caliper? If you said 5/8”, you’re right! That took some work to figure out, because it wasn’t 15mm, and it wasn’t 16mm either. The process is simple enough. Remove old line, install new line. Bleed.
If you’re opening up a Ural front brake system, I can now state with experience that you will want a vacuum bleeder. This “sucks brake fluid and air” through the system, and makes your life a lot easier. Make sure you assemble the catch bottle correctly, or you’ll rapidly start sucking brake fluid into your hand pump. It is directional. Vacuum hand pumps don’t appreciate being doused in brake fluid.
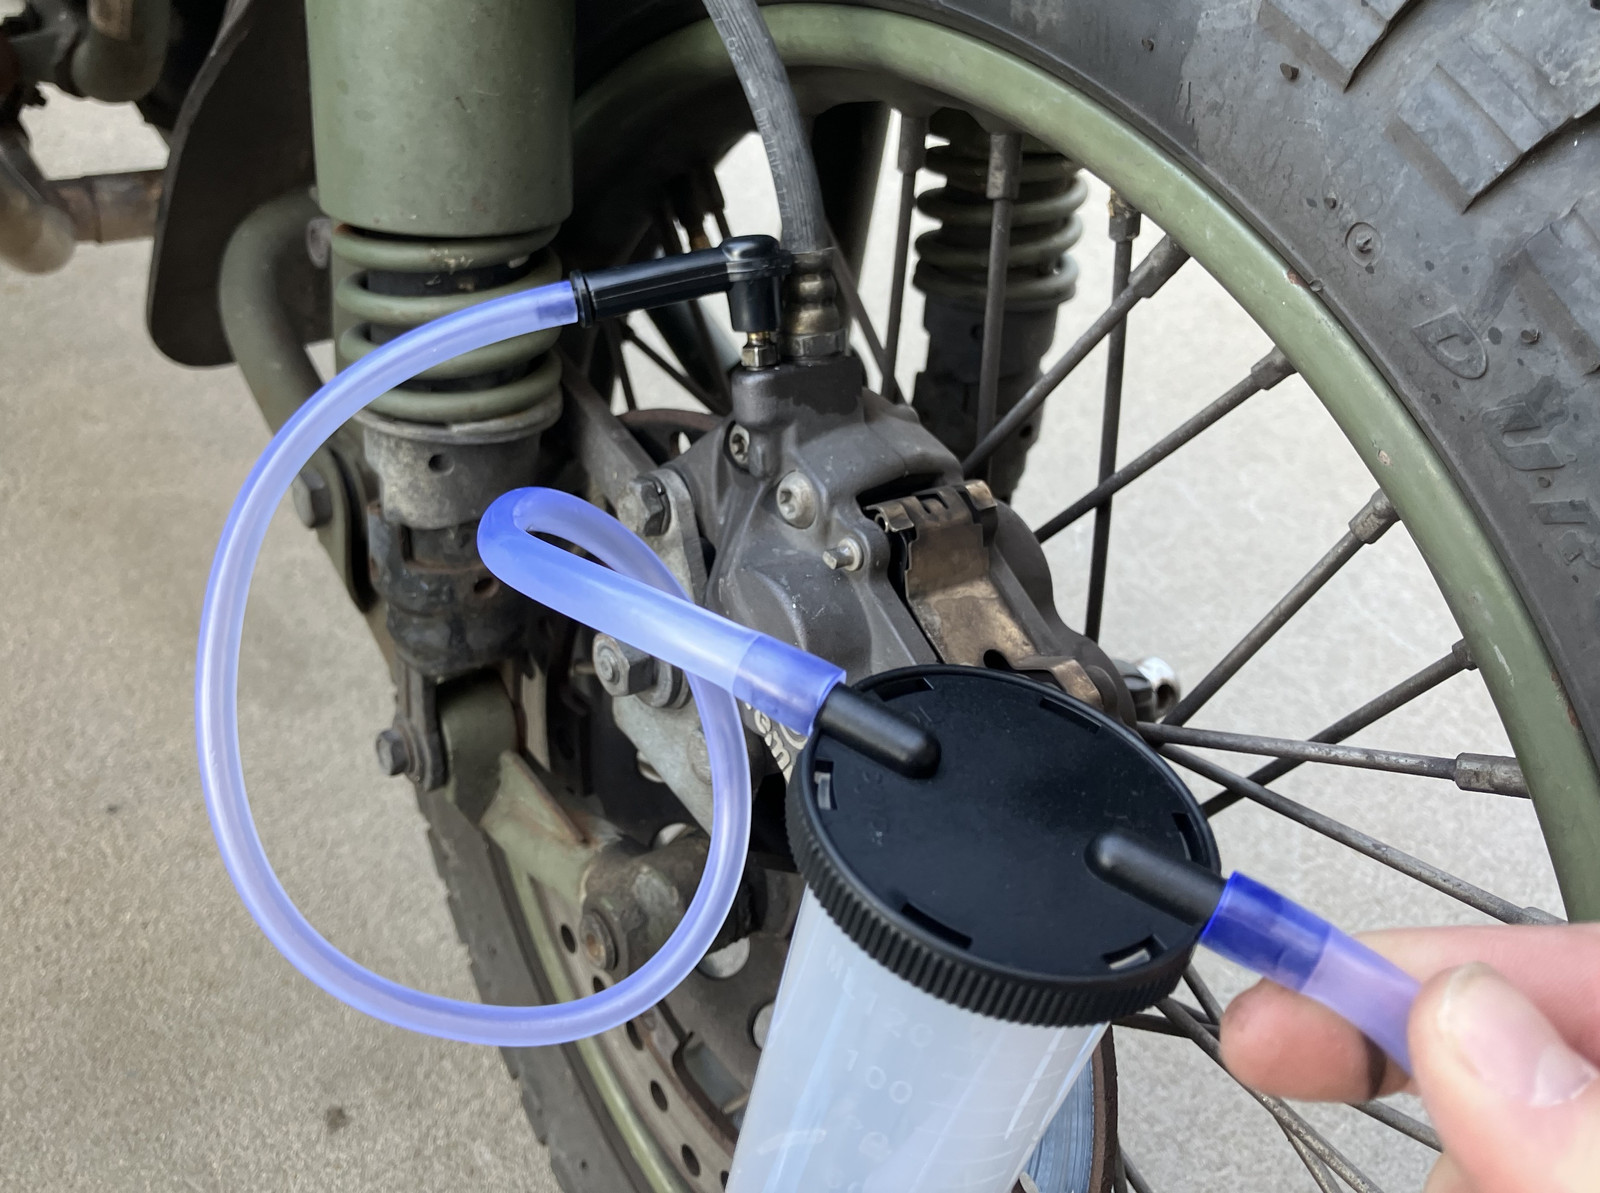
Mess made, I ran about half a bottle of brake fluid through the system under vacuum, then switched to a normal “pump and crack the bleeder” style pressure bleed. The results? Very nice! The brake line doesn’t move any more, and the front brakes are quite a bit stiffer. It was never a concern over function (beyond the risk that the line would burst), but they now feel far better, and this is worth doing if you’ve got an older Ural. You’re still applying braking torque to a narrow wheel on a heavy bike, so don’t expect magic, but at least the handle will be stiffer and you can feel the brakes as something more than “spongy mush.”
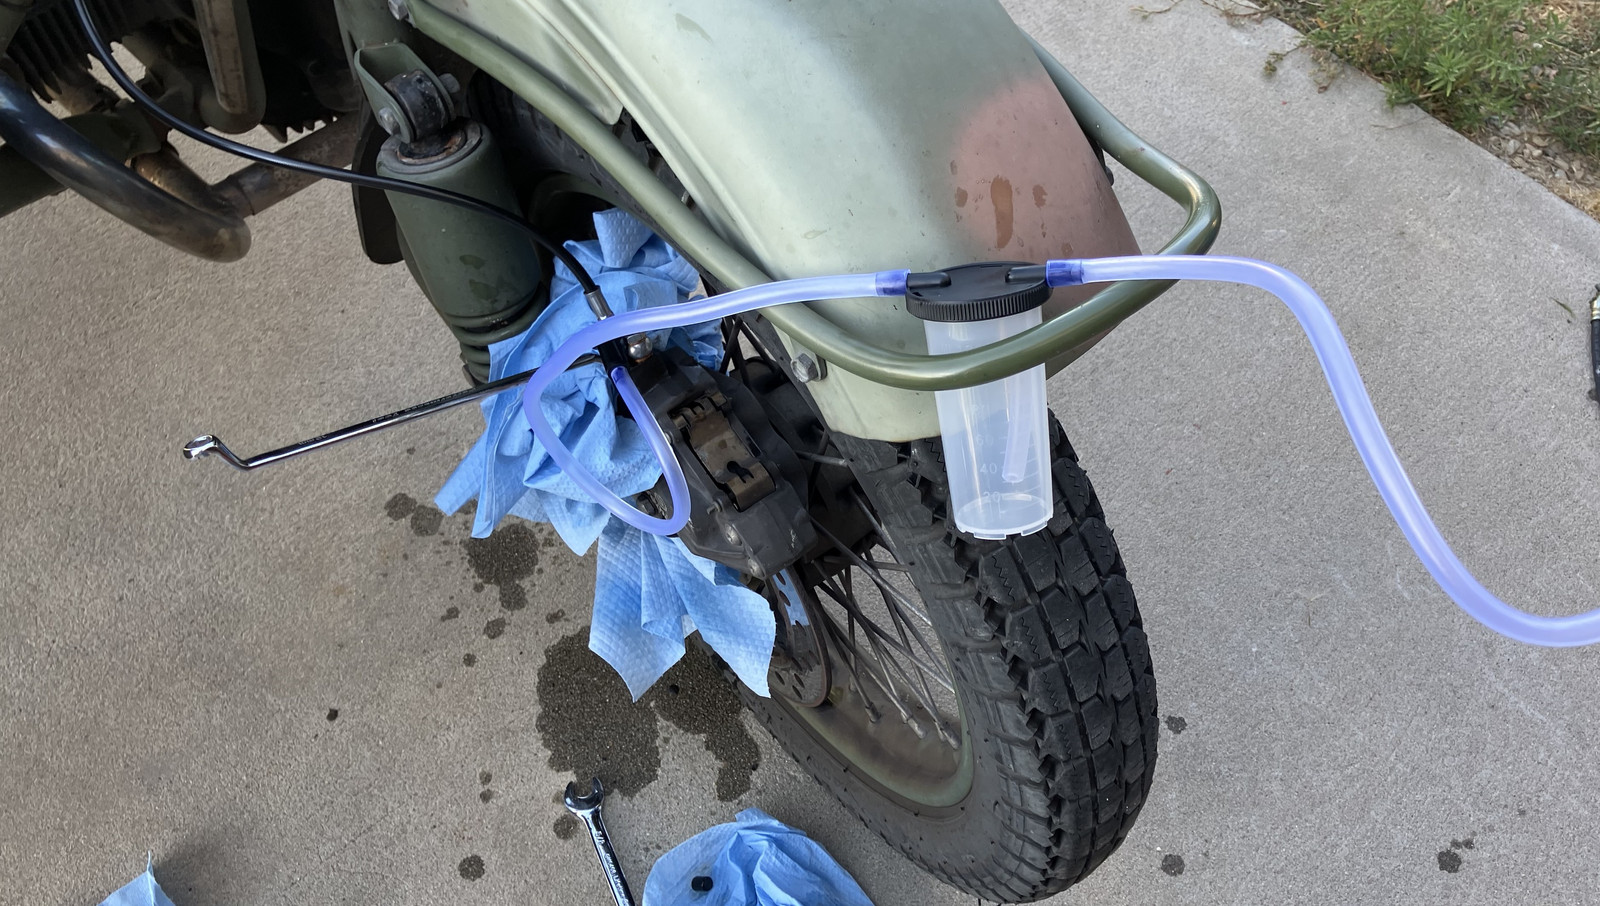
Zip tie the new line out of the way - it seems slightly less prone to follow the bike than the one that’s been following the bike for 20 years. The result is really, really nice, though. The front brakes are hard and stiff, and you can feel when the pads make contact!
Of course, there are downsides to this too. You’ll realize, for instance, that your front wheel bearing is a touch loose by the problem of “pad kickback.” Now that the brakes don’t feel connected to the wheel by a loose rubberband, you can tell if the first brake application requires more travel than it ought to start slowing the bike. The usual cause for this is that the bearings are loose, the wheel rocks back and forth during cornering, and this “kicks” the pads further “back” in than they should be. It’s a distinctive feel - your first application after cornering takes more lever travel than usual, but the brakes are firm once they engage. Subsequent applications don’t have the extra travel, and feel properly stiff too. If you’re getting this behavior, repack your front wheel bearings! And probably the rest while you’re at it…
Wheel Bearings
I have tapered wheel bearings. They need repacking with bearing grease on occasion. Pull the whole stack out, clean the old grease off, use a bearing packer to put new grease in, pretension the bearings, and you’re done. Of course, it’s a tremendous mess, but it’s a thing you need to do every now and then if you’ve still got tapered wheel bearings. I will refer you to the excellent “Unofficial Ural Service Manual” page on the matter, because I’ve not worked out how to pack wheel bearings and take pictures of the process at the same time. Yes, i could convert the wheels to sealed bearings. No, I don’t see a good reason to bother doing so. Buy a bearing packer. They’re awesome.
Rear Brake Notes
“Every now and then,” you should also check your rear brakes out and adjust them. A good time to do this is when you’re replacing tires or packing wheel bearings, but it’s also worth doing if the rear brakes just aren’t behaving quite right. They need some adjustment at intervals to reset for wear and allow the actuating rods to be adjusted back to their neutral positions.
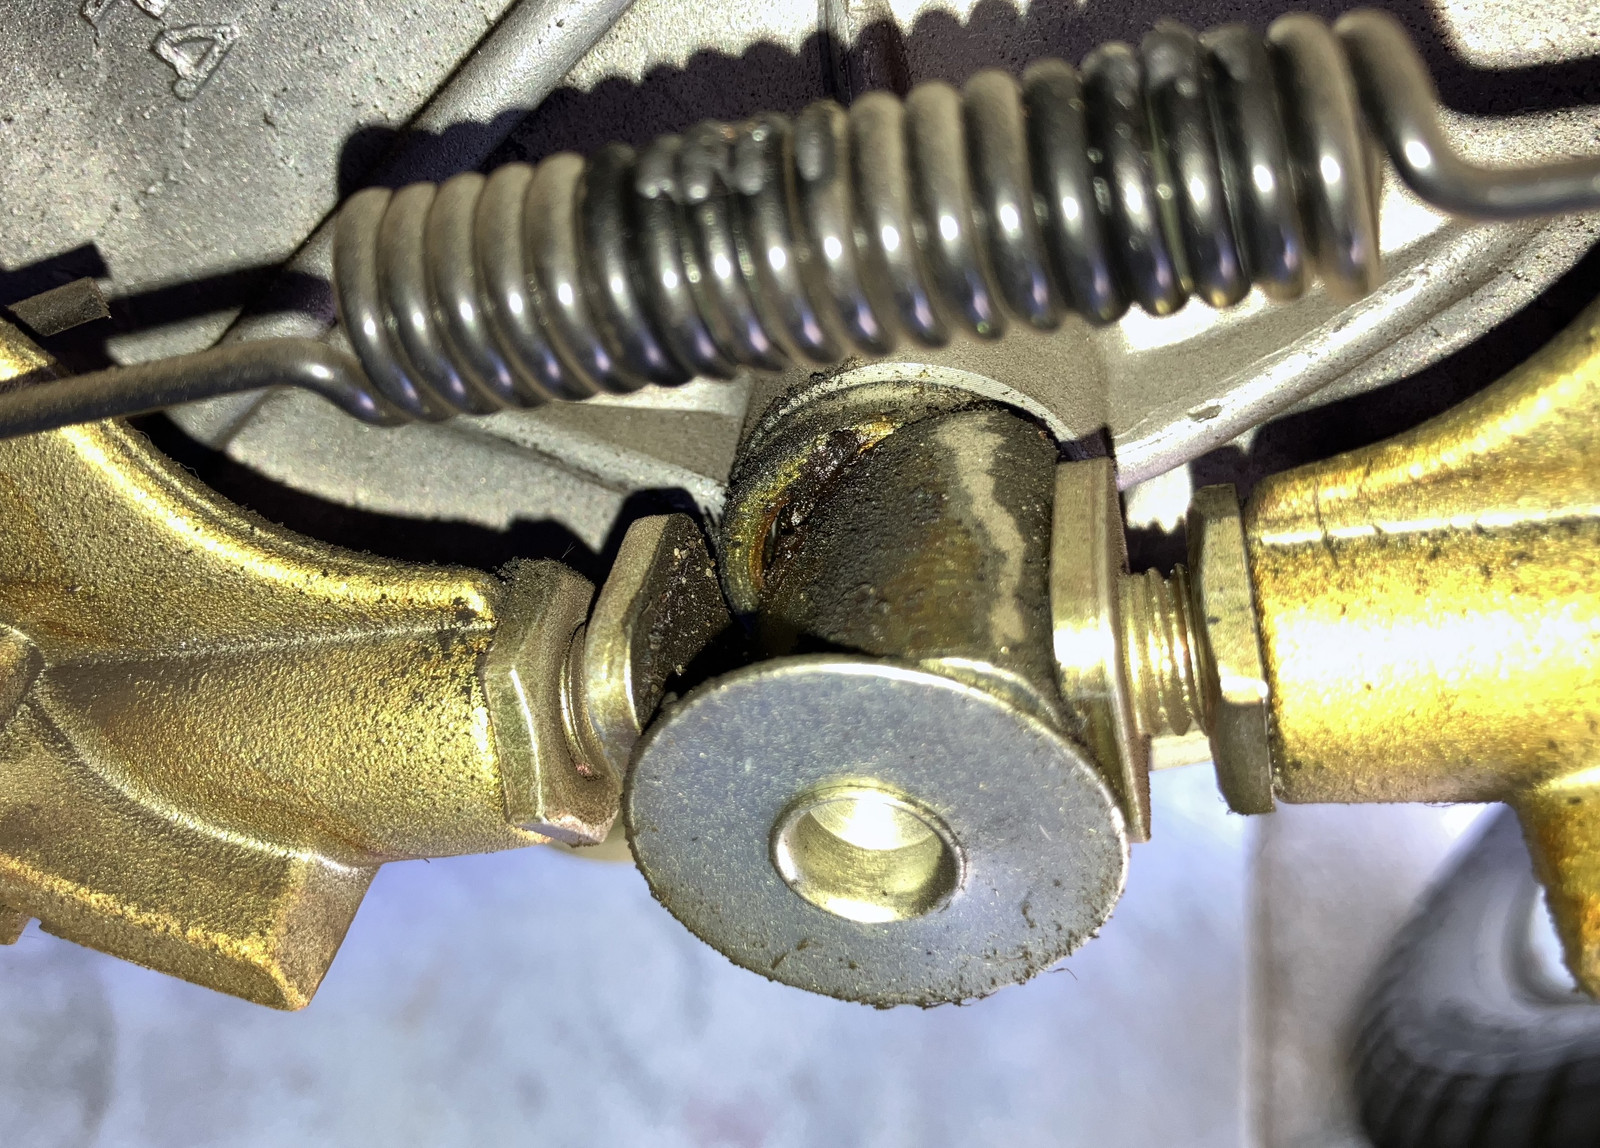
Think of a typical car drum setup, but without hydraulics, and without any sort of automatic slack adjuster (not that those tend to work well in cars, in my experience). The pads pivot at one end and ride on an oblong cam at the other end. When the brake rod pulls on the external lever, the cam rotates (clockwise, here, on the sidecar wheel), the pads get pushed out, rub the drums, and gradually slow the bike! On either side of the cam here you’ve got some threaded slack adjusters - this is what needs to be tweaked to reset things. I’ve loosened the lock nuts on the threads here (the hex nuts), and the square shoes ride on the cam.
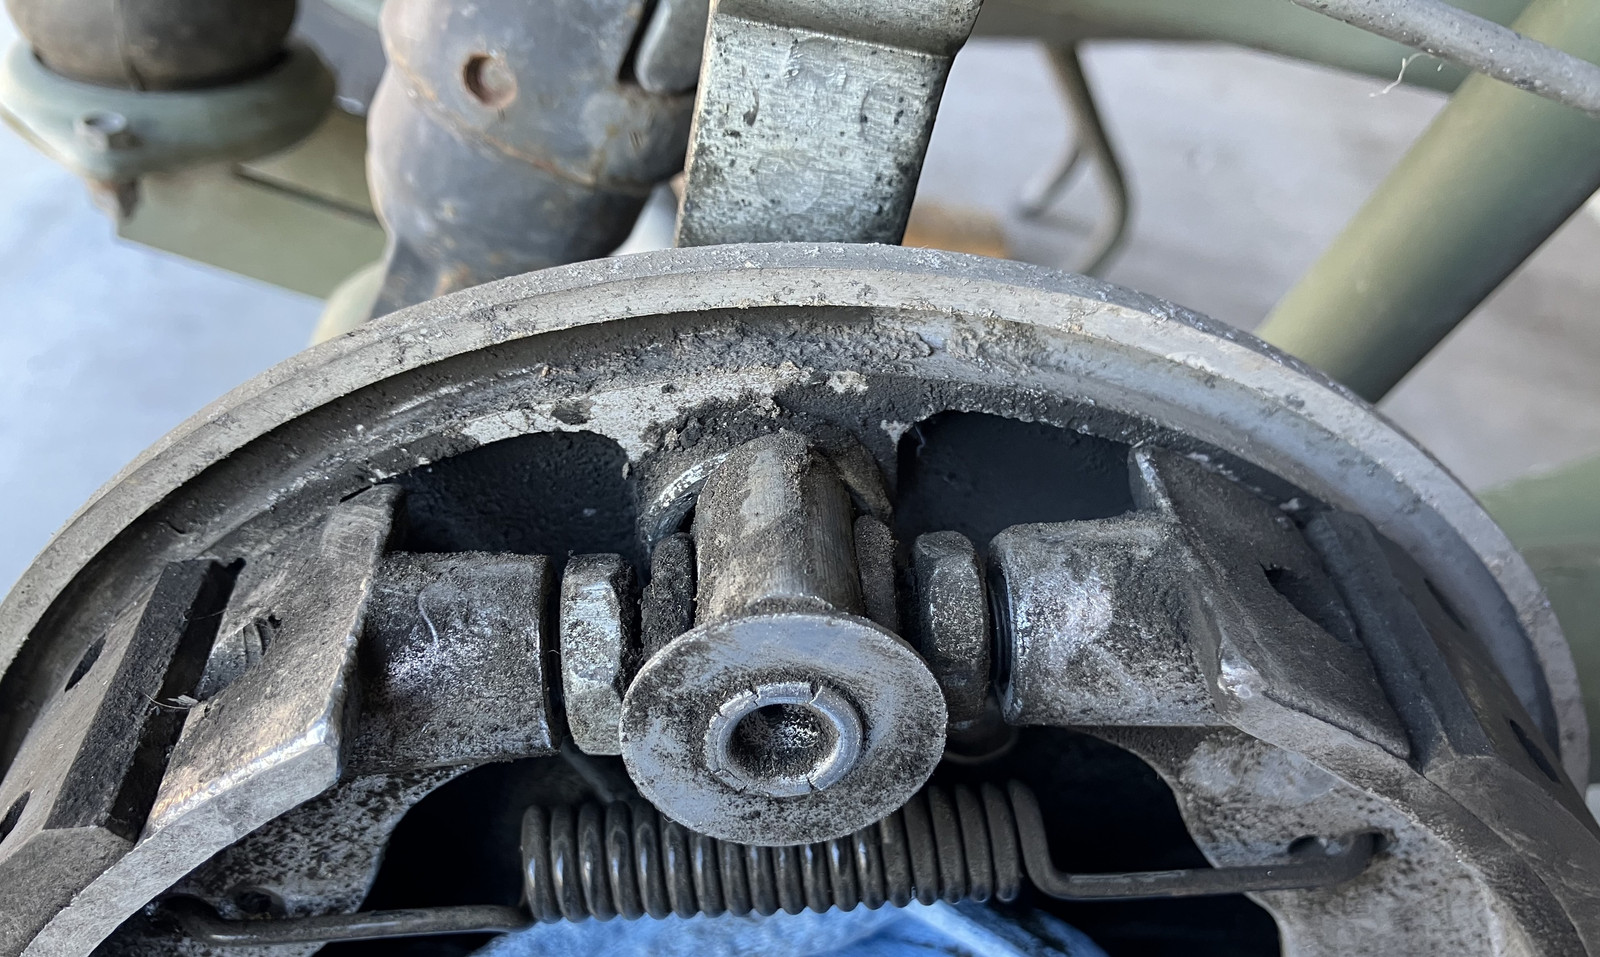
Adjustment is pretty simple. Back off the lock nuts, back off the external threaded adapter, and expand out the adjusters until the brakes are not quite rubbing on the drum. Tighten everything back up and make the final adjustments with the external nut. To tighten things back down, shove a screwdriver from your tool kit behind the adjuster square and it should hold it well enough to let you tighten the locknut.
Adjusting the slack requires unloading the shoes from the cam, and there’s no reason to get fancy and undo the springs or anything - just use a screwdriver, pry the pad back a bit from the cam, and the foot should rotate freely by hand. Adjust a half turn or so at a time and dial it in. Also worth noting, the drive (“pusher”) wheel needs the axle through it to properly check for the brakes dragging. It will “droop” if you just set it in place and drag the brakes when it would spin freely on the axle. Put a touch of grease (not too much, this is the brake system!) between the followers and the cam when you’re done adjusting things.
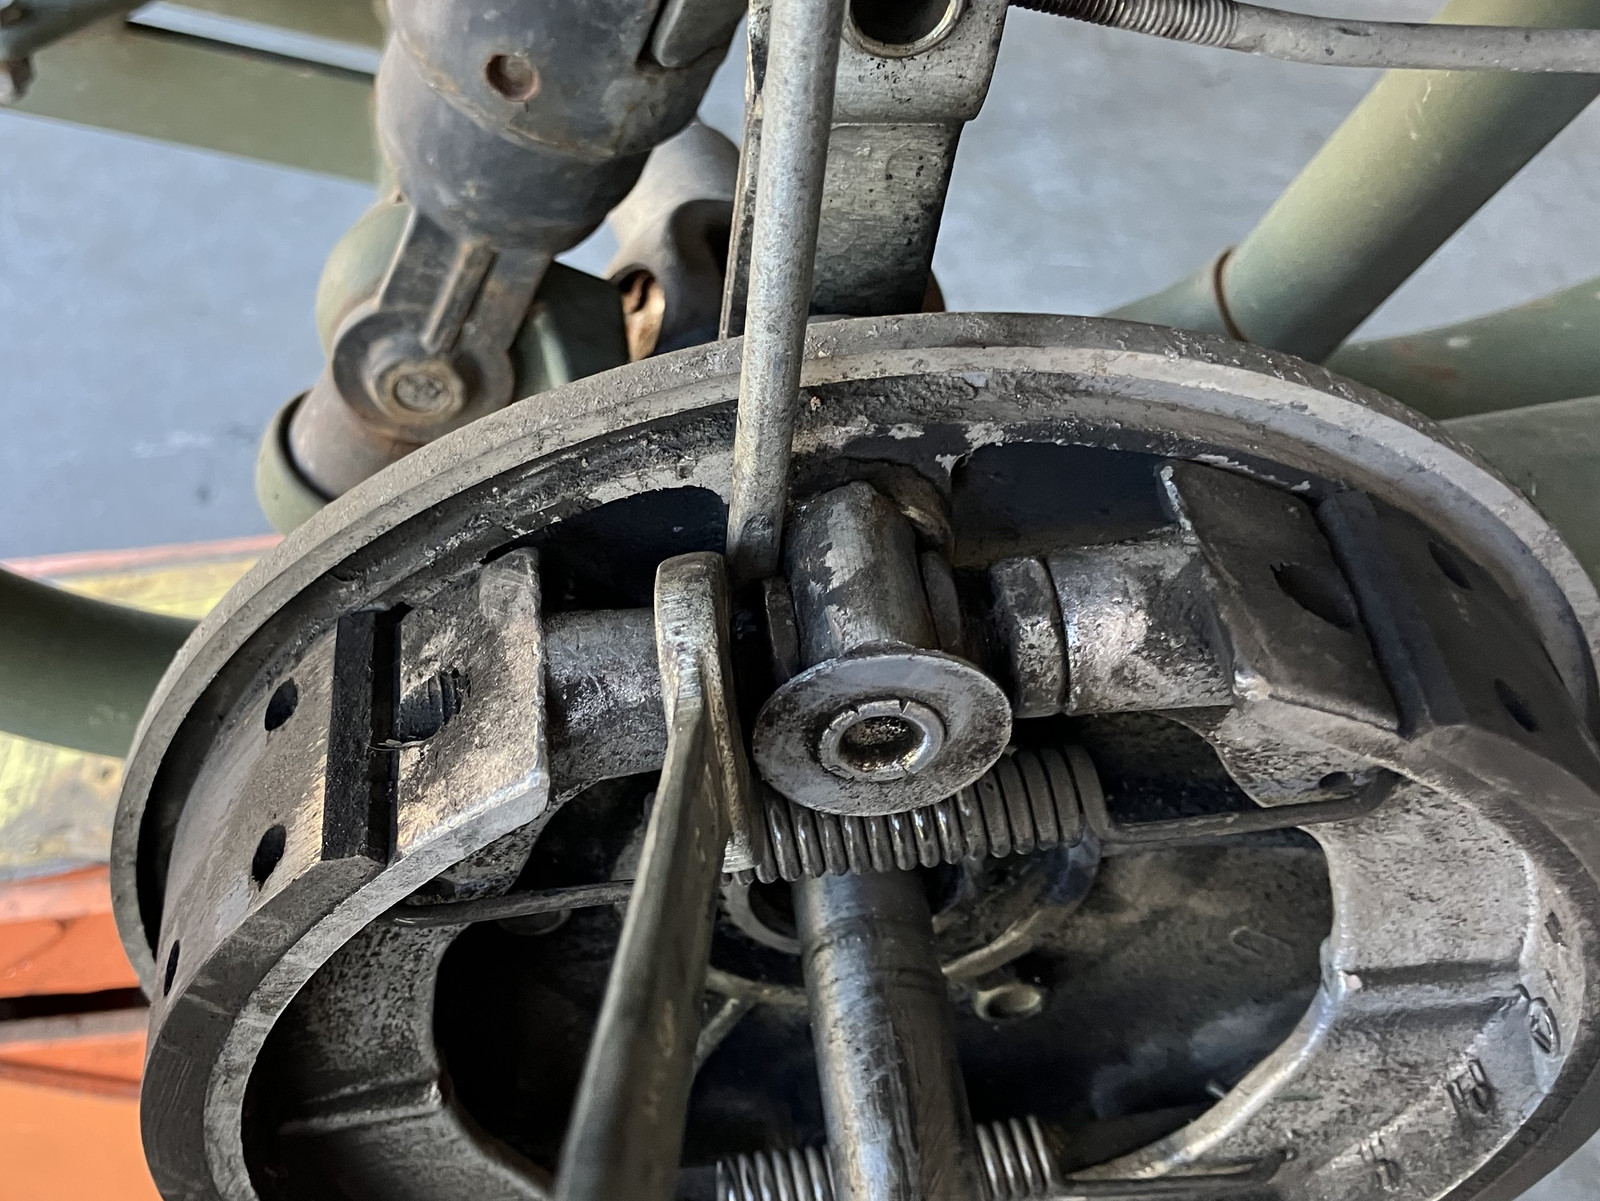
Before putting the wheel back on, grease the splines. You want to use some variety of molybdenum paste or grease for this - I’ve been using Honda Moly Paste for years on spline drives (I have yet to own a chain drive motorcycle), and there are a range of moly greases that should do a good enough job. Load the splines up, both sides, before putting the wheel back on. Also be careful of the sidecar wheel spacer (a washer looking thing that either won’t come out, or will come with the wheel and fall somewhere you don’t notice it). That’s required to keep things that shouldn’t rub from rubbing.
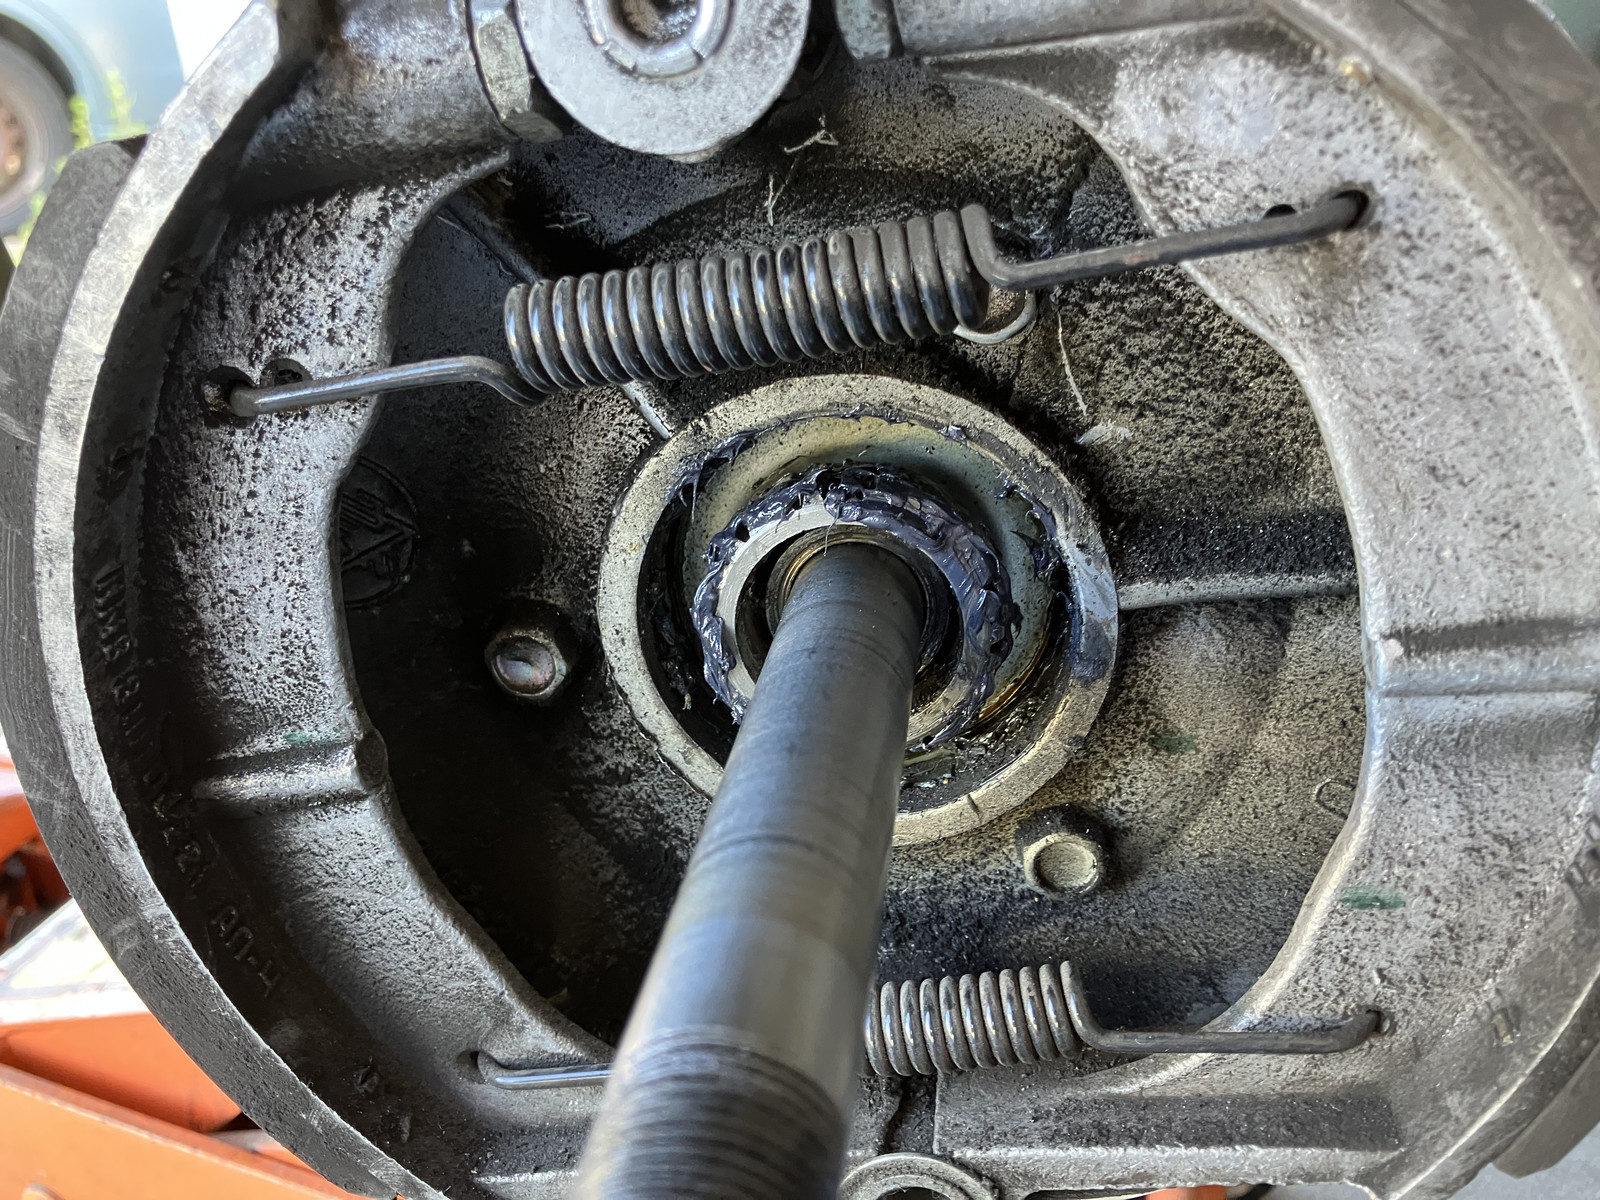
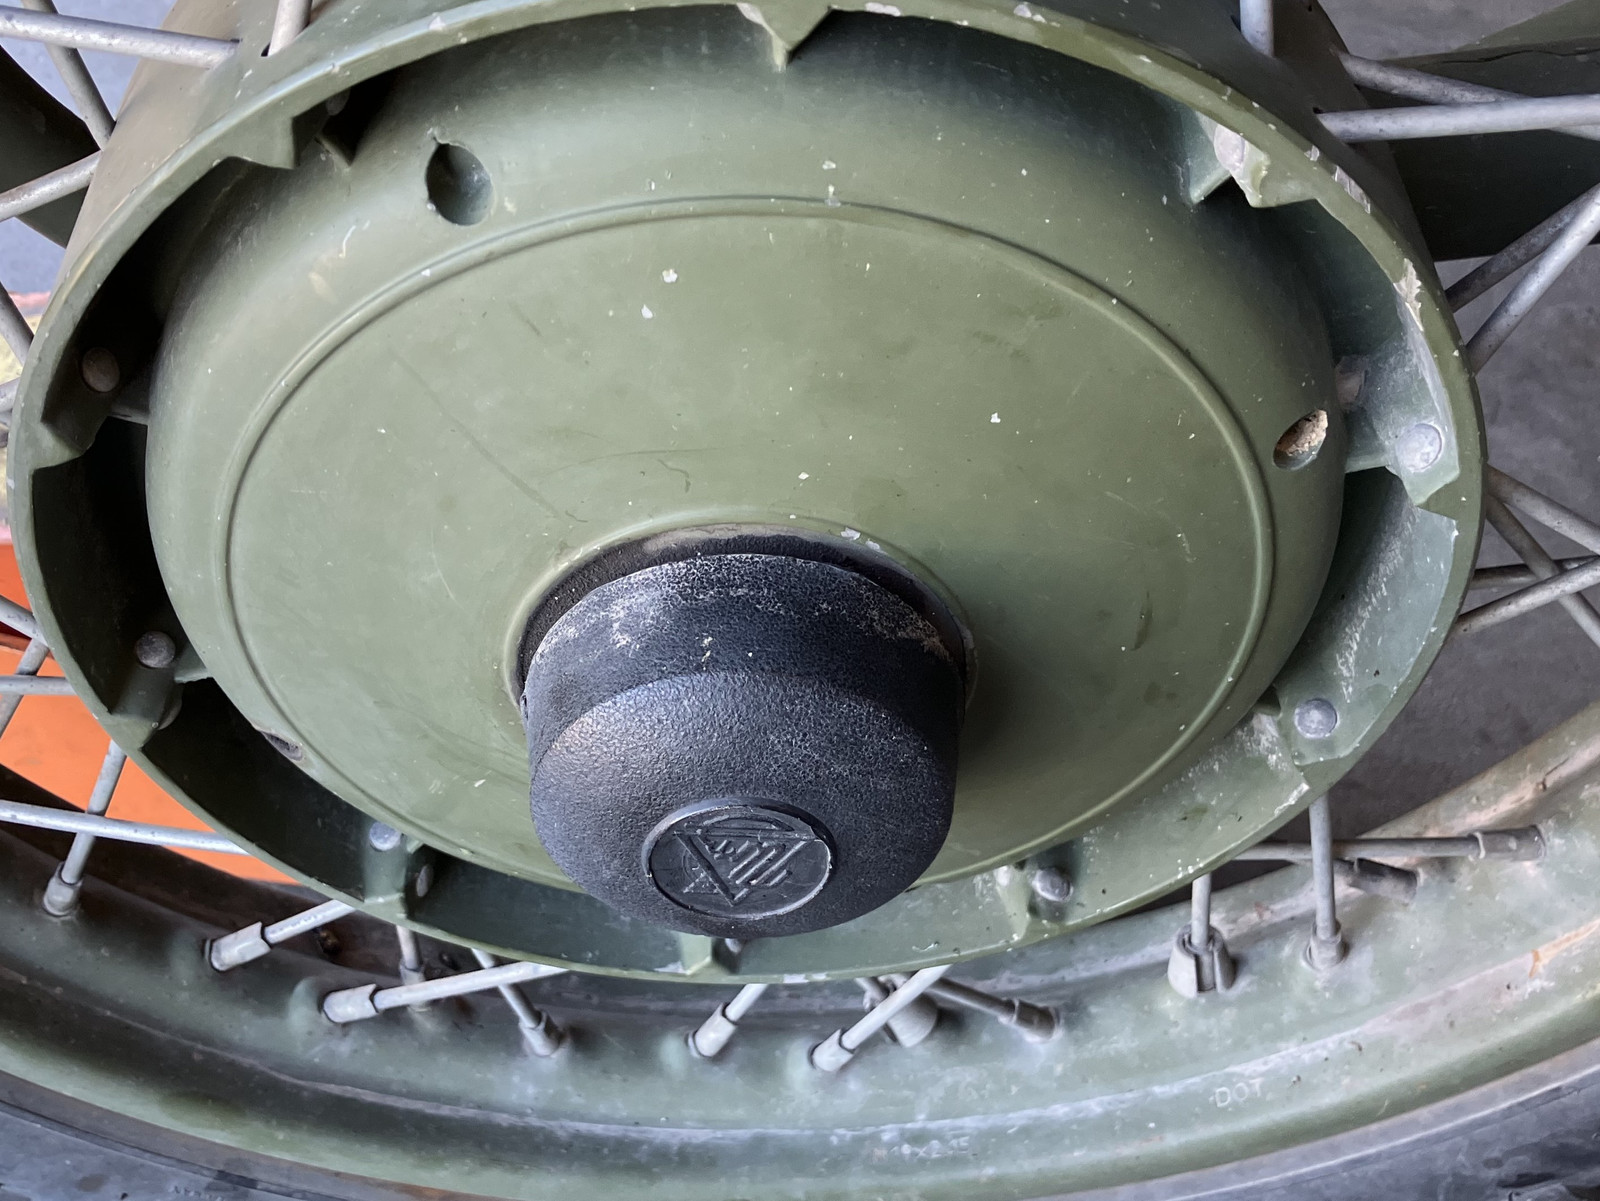
Tighten everything back up, and you should be good! I didn’t realize this until recently, but it’s worth checking to see if your hubcap spins freely - if it moves relative to the wheel, pop it off and tighten your castle nut down, because it won’t spin unless things are somewhat looser than they ought be in there. Loose wheels make for funky handling and some unusual wear within the system.
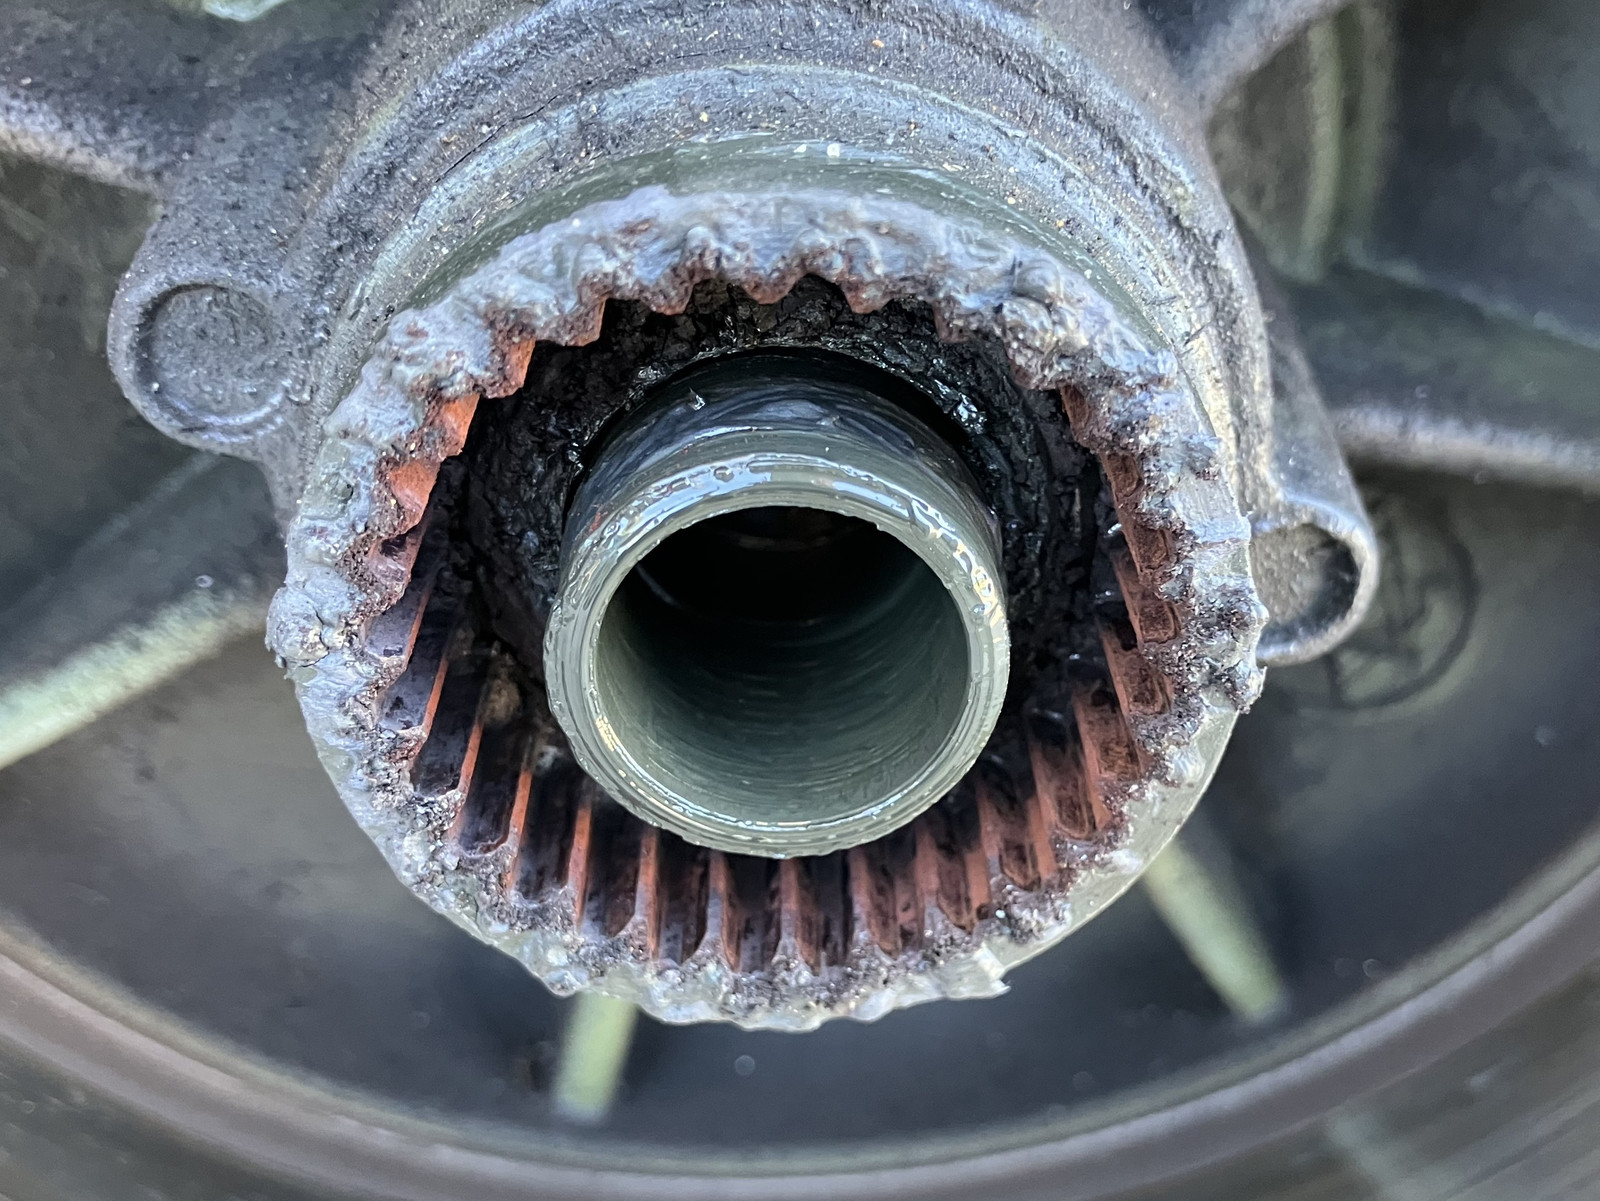
Why should you grease your splines? Because if you don’t, they’ll wear and rust! I have no idea where this picture came from, but it’s someone’s pusher wheel, and some splines that are quite a bit drier than they ought be. Apparently someone forgot to lube the splines after replacing their final drive, and… anyway. Grease your splines, okay?
I wasn’t able to get the adjustment quite as neutral as I prefer on the final drive brakes, because the actuating rod simply isn’t long enough. But other than things being “upside down” compared to the sidecar, the same adjustments apply over here. If you’re being particularly clever, you can get a dial micrometer and make sure both pads are the same exact distance from the central axle, too!
Clutch Throwout Bearing Replacement and Seal Replacement
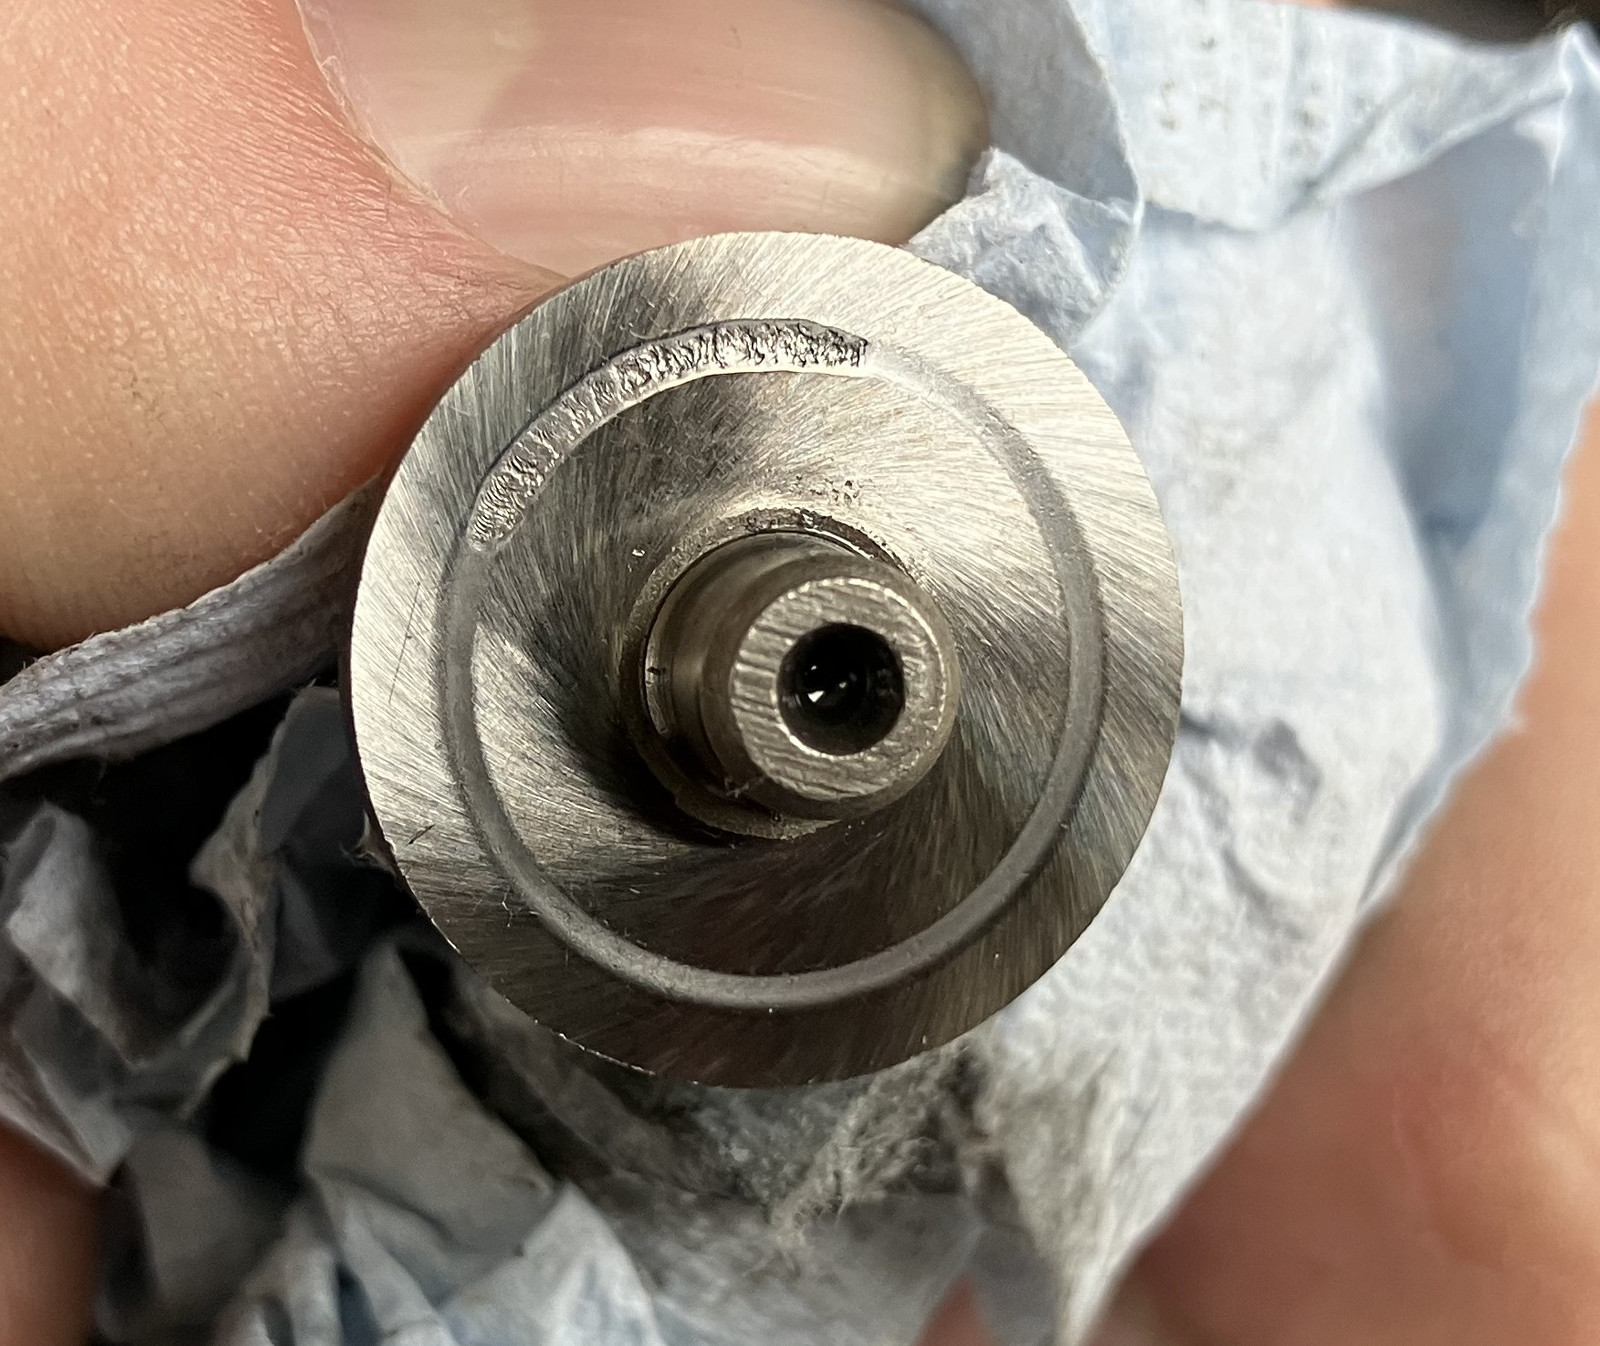
And now, if you’re curious about the opening image… clutch bearings! If you have a 2006 or later Ural, enjoy not needing to worry about your clutch throwout bearings, because they should be something resembling a proper thrust bearing. If you have a 2005 or previous, pay attention, because I’m about to show you what will happen when a ball bearing is improperly used as a thrust bearing! Yes, you can use ball bearings as thrust bearings, and later Urals do this. They have a proper track, not just some flat plates.
On the other hand, your clutch pusher piston O-ring is probably leaking, so while you won’t have to go as far in as I did, you may still find this useful.
Keep an eye on the back of your gearbox. At some point in a Ural’s life, it will probably start looking something like this - not just the normal “dry-ish grunge” of a Ural, but actively wet, glistening glop. This is a good indicator that you’ve got a seal leaking somewhere, and the most common seal to leak back here is the o-ring on the clutch pusher. The mechanism is simple enough - a rod extends through the gearbox to the clutch to disengage it. You push this piston on the back, and a rod pushes out the front. There’s a bearing in here between the pusher and the rod that is a problem on the older bikes, but the seal on the piston will wear over time regardless of what you have as a bearing. When it gets too bad, it leaks, and makes a mess.
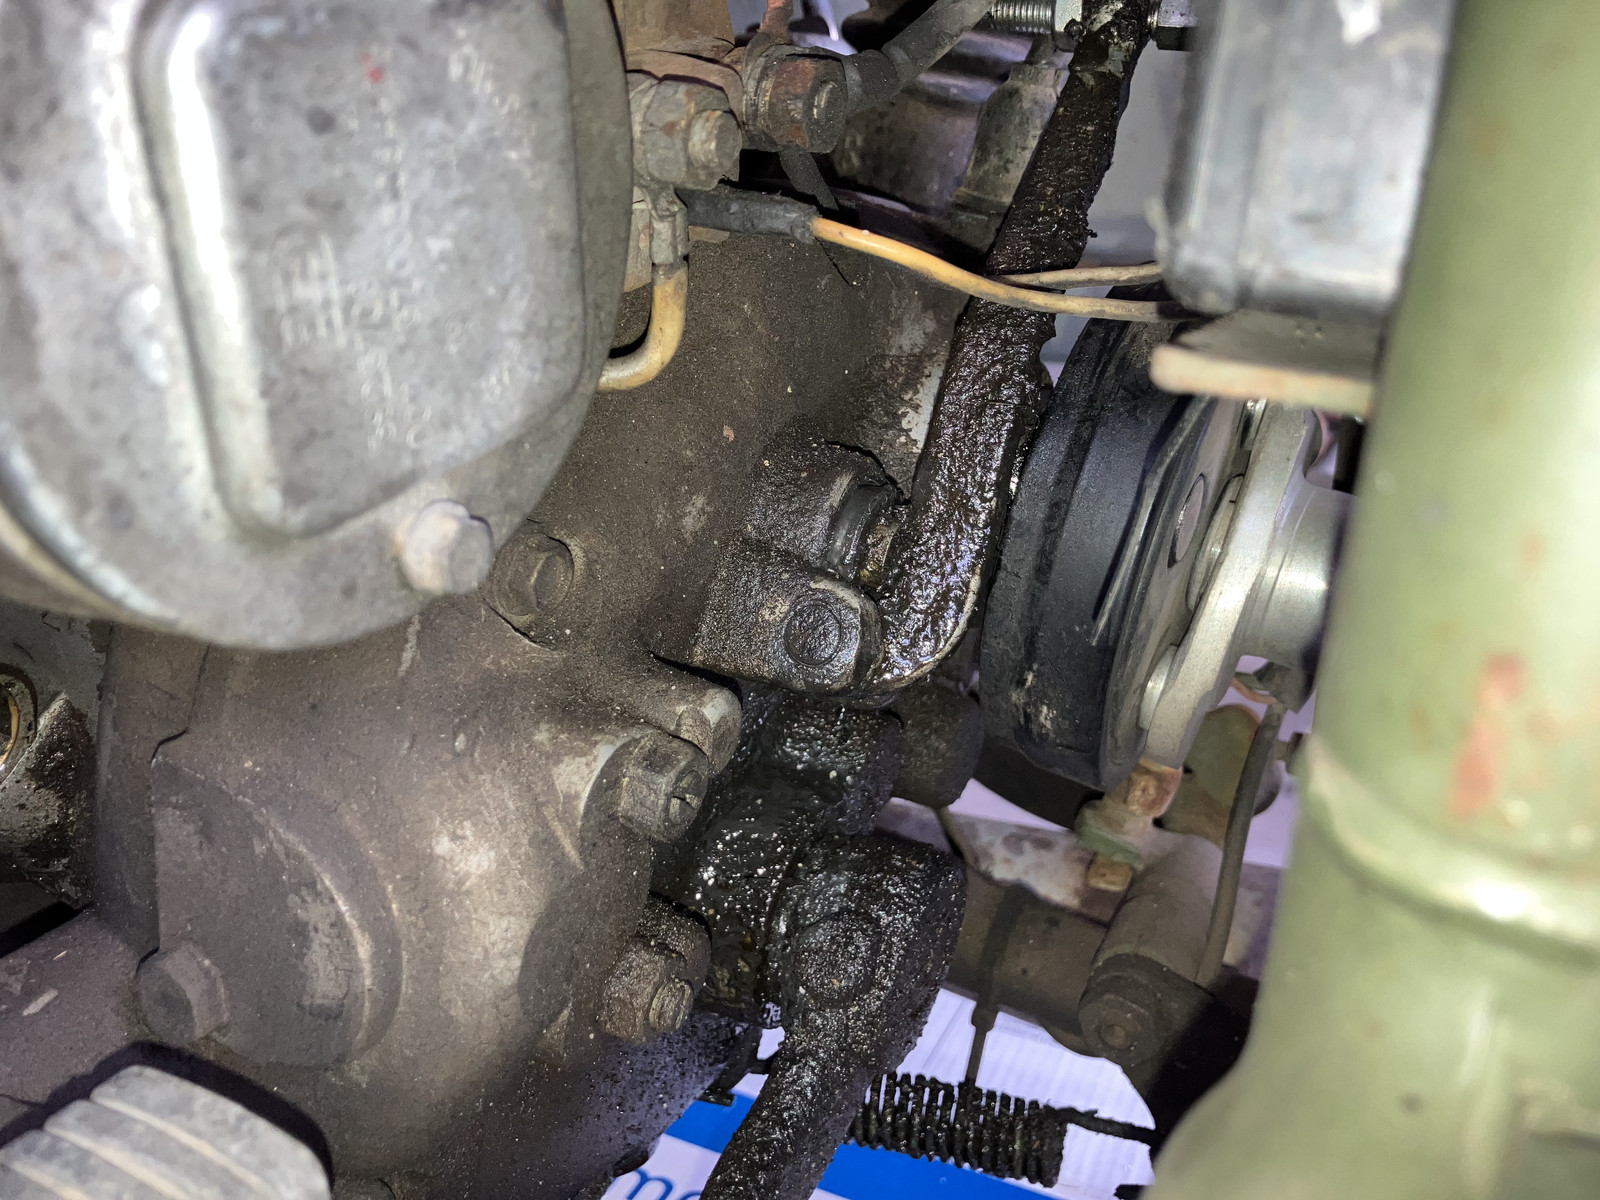
Cleaning things up is always a good start. If you’ve not stared at the back of a Ural (or suitably old BMW) gearbox before, the bottom green lever is the kick starter. I’ve wedged it down out of the way to work back here. Above that, slightly shiny, is the clutch pusher piston, and the lever pushing on that is the clutch actuation lever. Removing this is simple enough - there’s a cotter pin on the back of the rod it pivots around. Remove that, remove the rod, and remove the lever. If you’ve been clever, you’ll even have remembered to loosen your clutch cable before getting started to give you more slack to work!
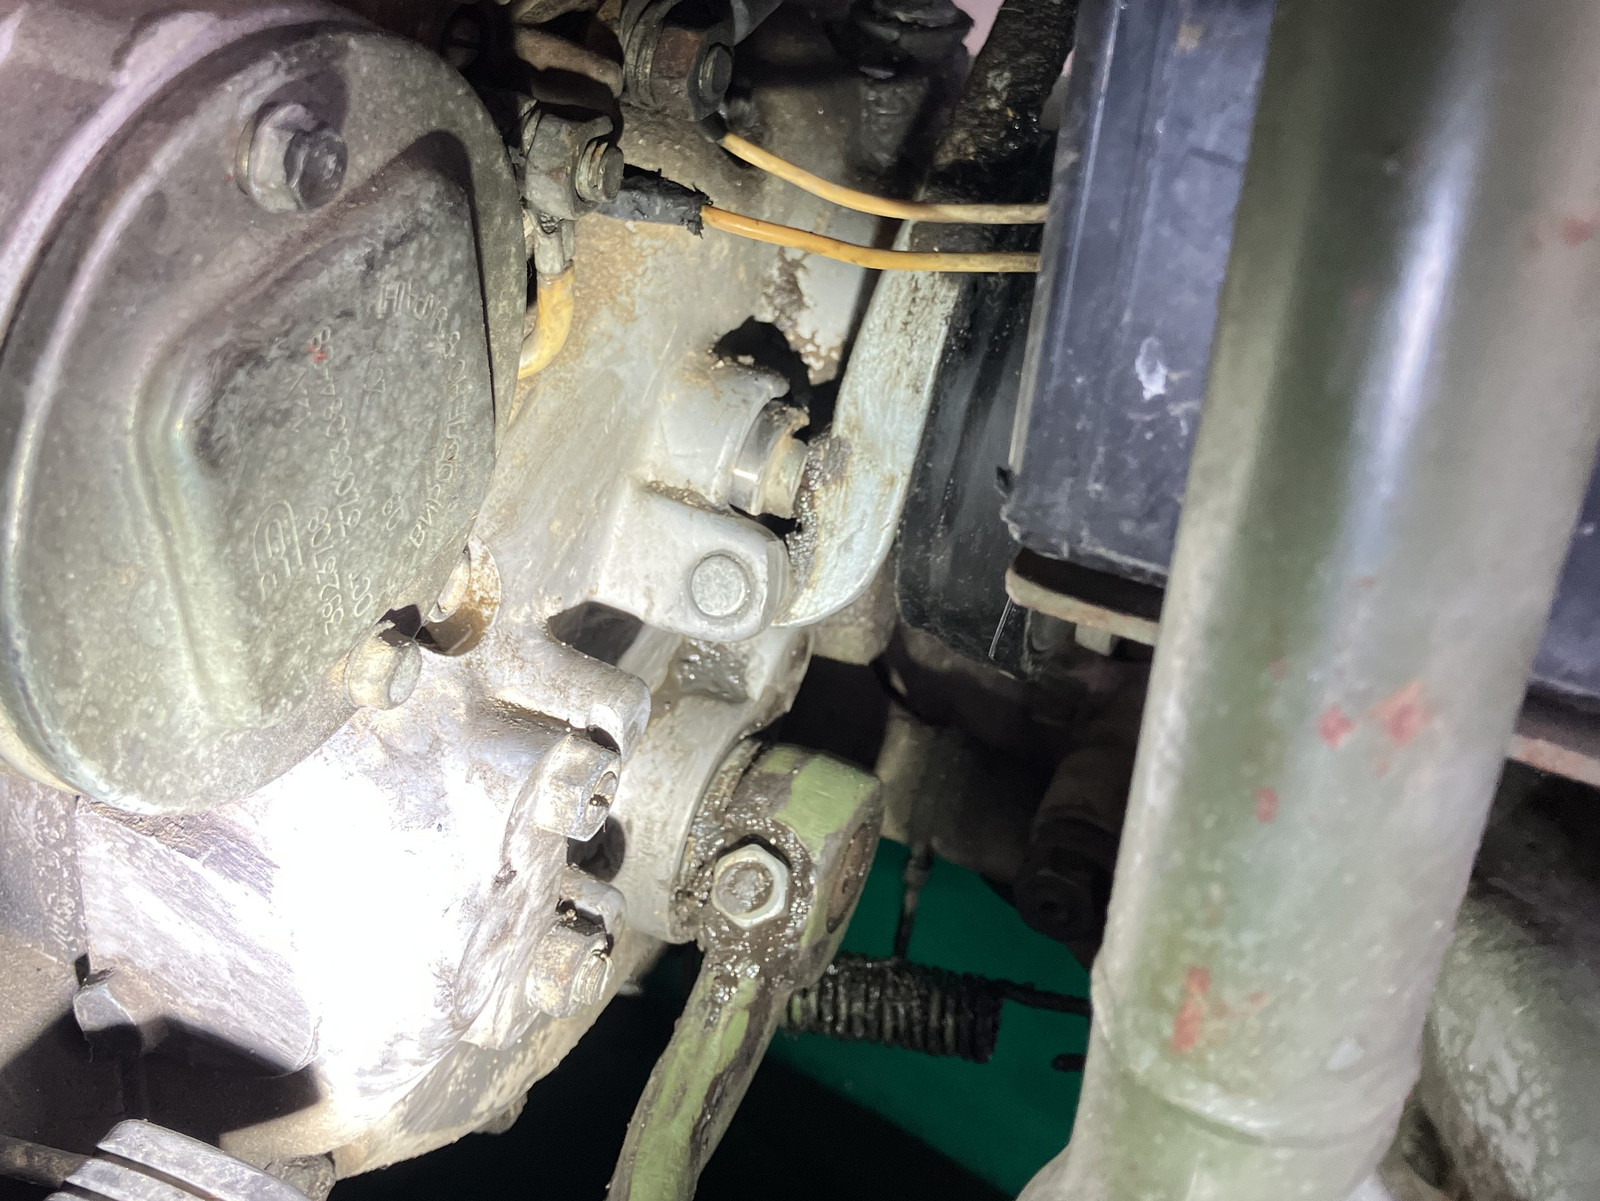
I’m fairly certain this is not one of the levers from later years known to bend and cause clutch problems. This is a solid hunk of metal and I fully expect the clutch cable would snap before it could bend this bit of Russian iron!
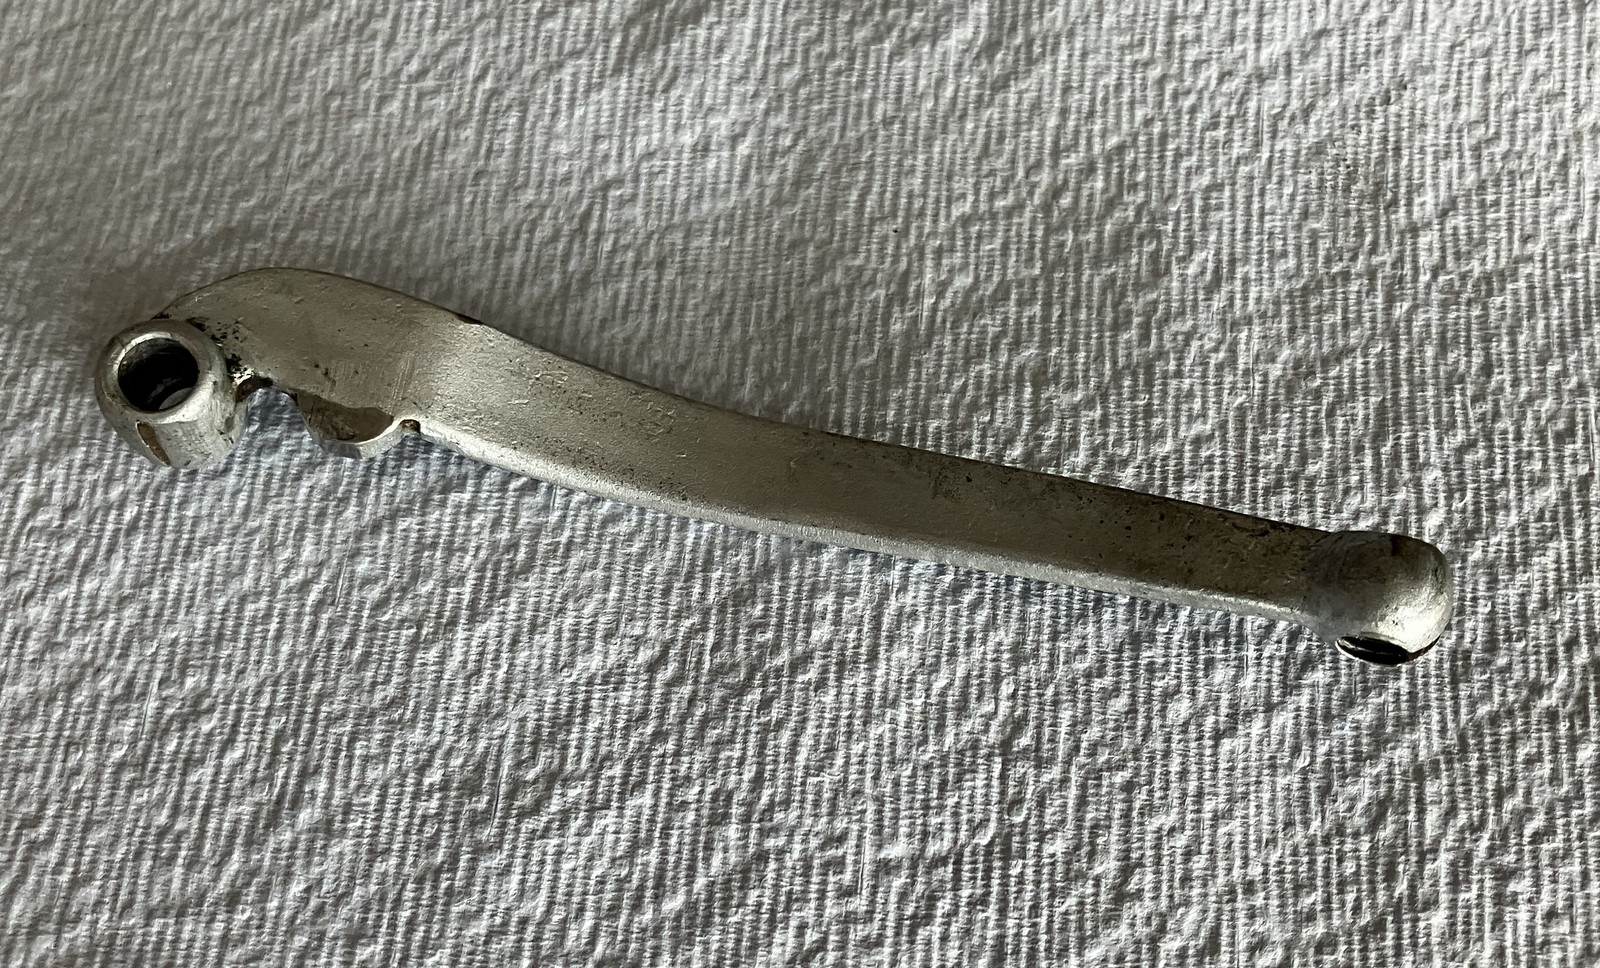
With the lever out of the way, remove the piston! You may care to find a pair of pliers to help remove it, though depending on how worn the O-ring is, fingers will probably work well enough too. Caution, the corners are sharp! However you do it, twist and pull until the piston pops out.
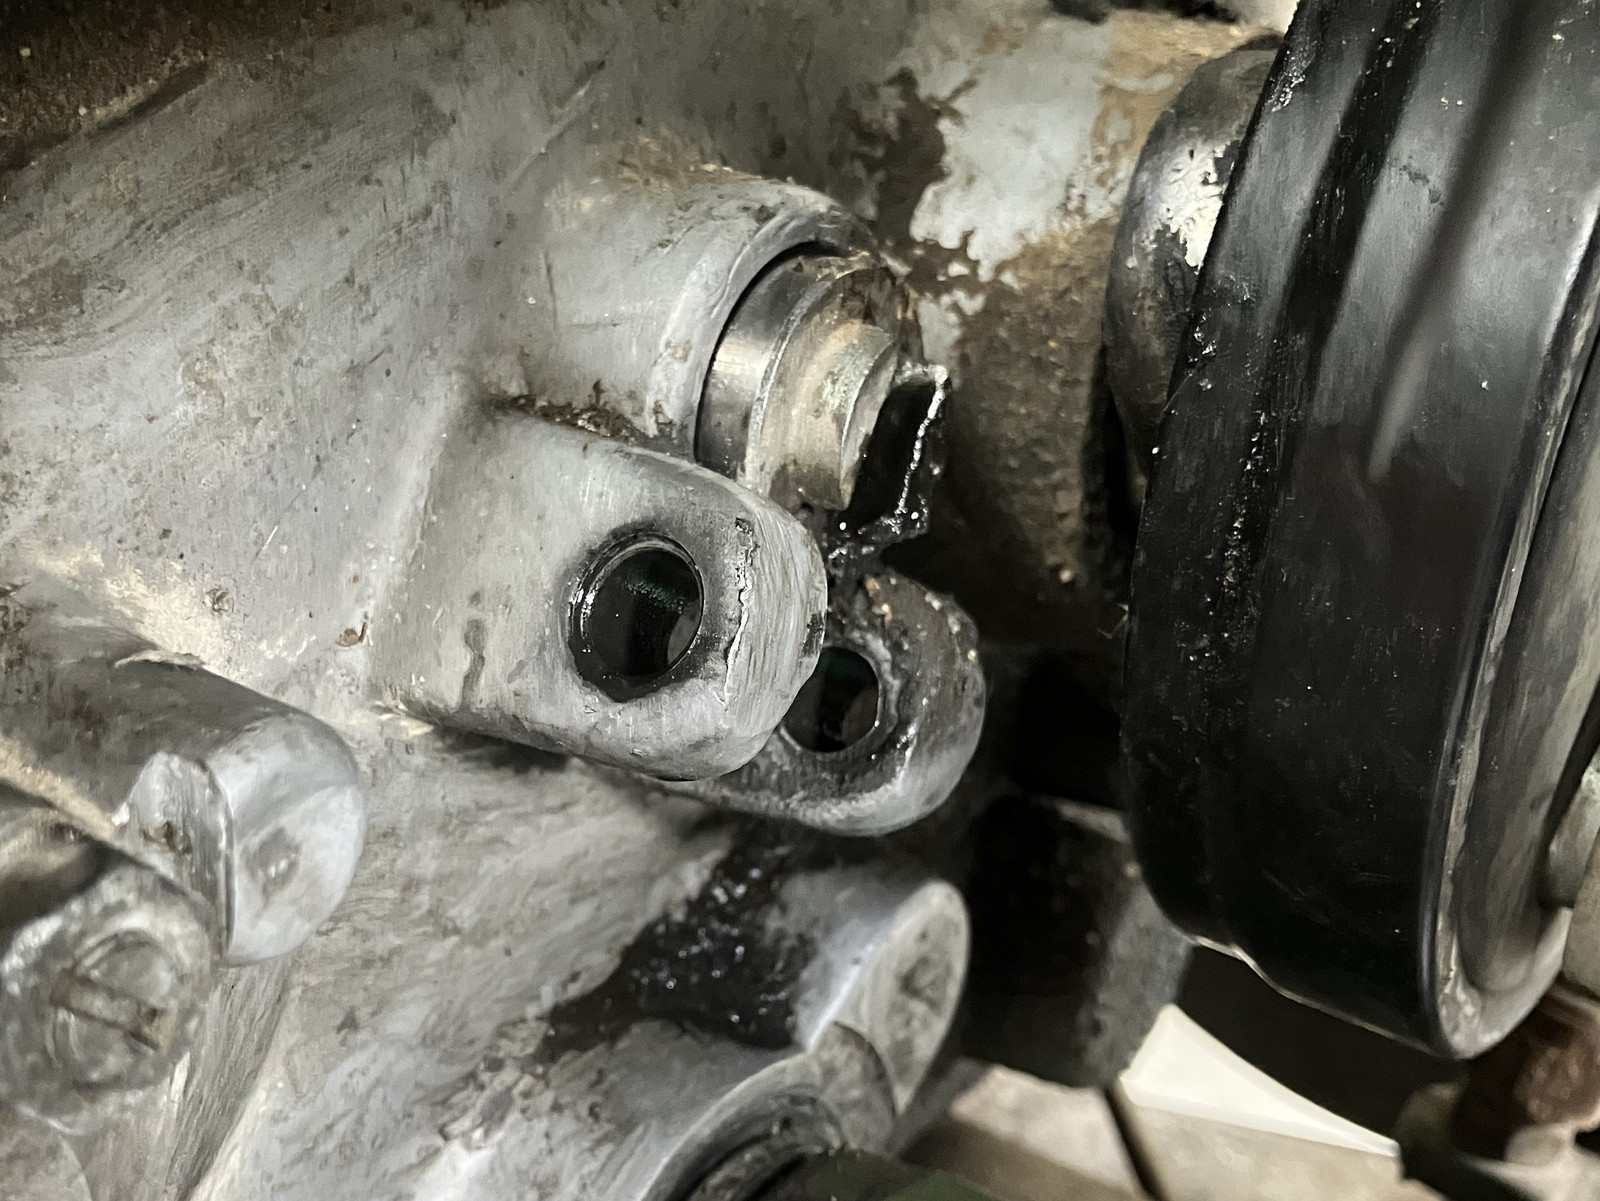
If you were to be small enough to shove your head back behind the engine, or had the engine out on a stand, you would now see the problem (potentially): Ball bearings being used as thrust bearings with flat surfaces. There’s (ideally) still a plastic retainer holding them, and mine appears to be in good shape. If you don’t see this, you’ve got a newer bearing style and are fine, just replace the O-ring and go. But if you do see this, you’ll want to find something better. But how, on earth, do you get something like this out? If the gearbox is out of the bike, push on the rod in front and you’ll push this out. But taking the gearbox off is a pain. Also, it’s not needed!
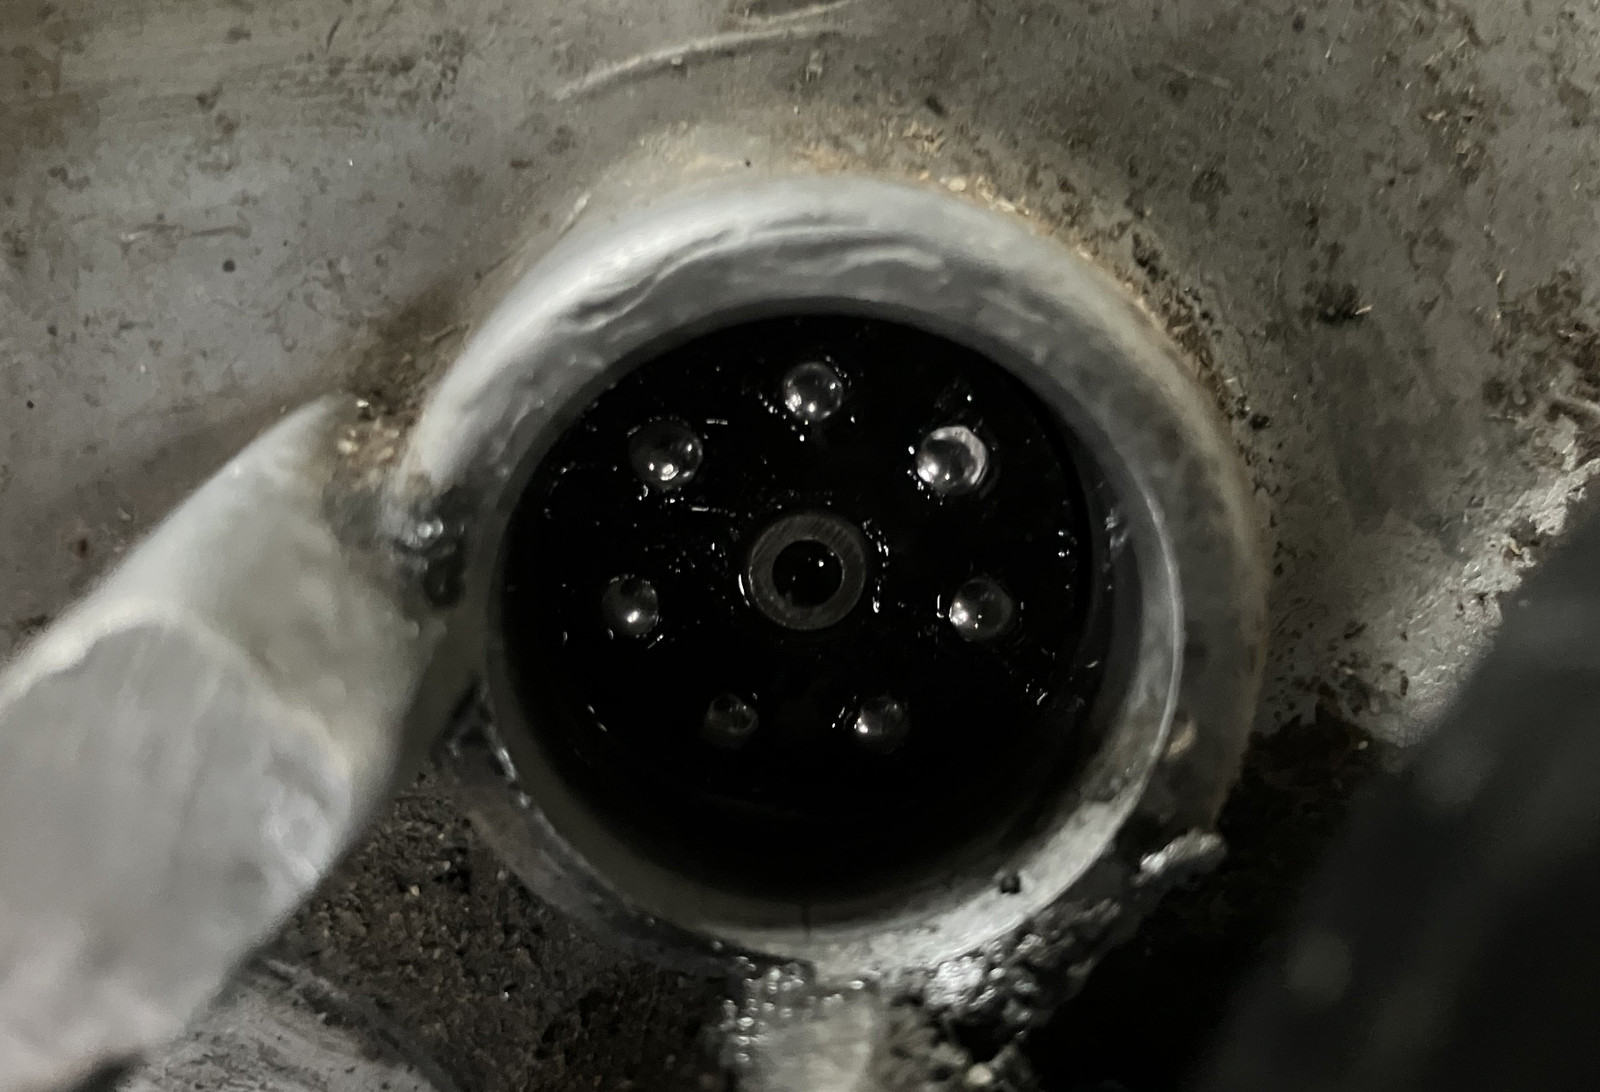
What you need is a magnet. Anything small enough to fit in should work. Apply magnet, remove parts. Simple, easy, non-damaging to anything in there.
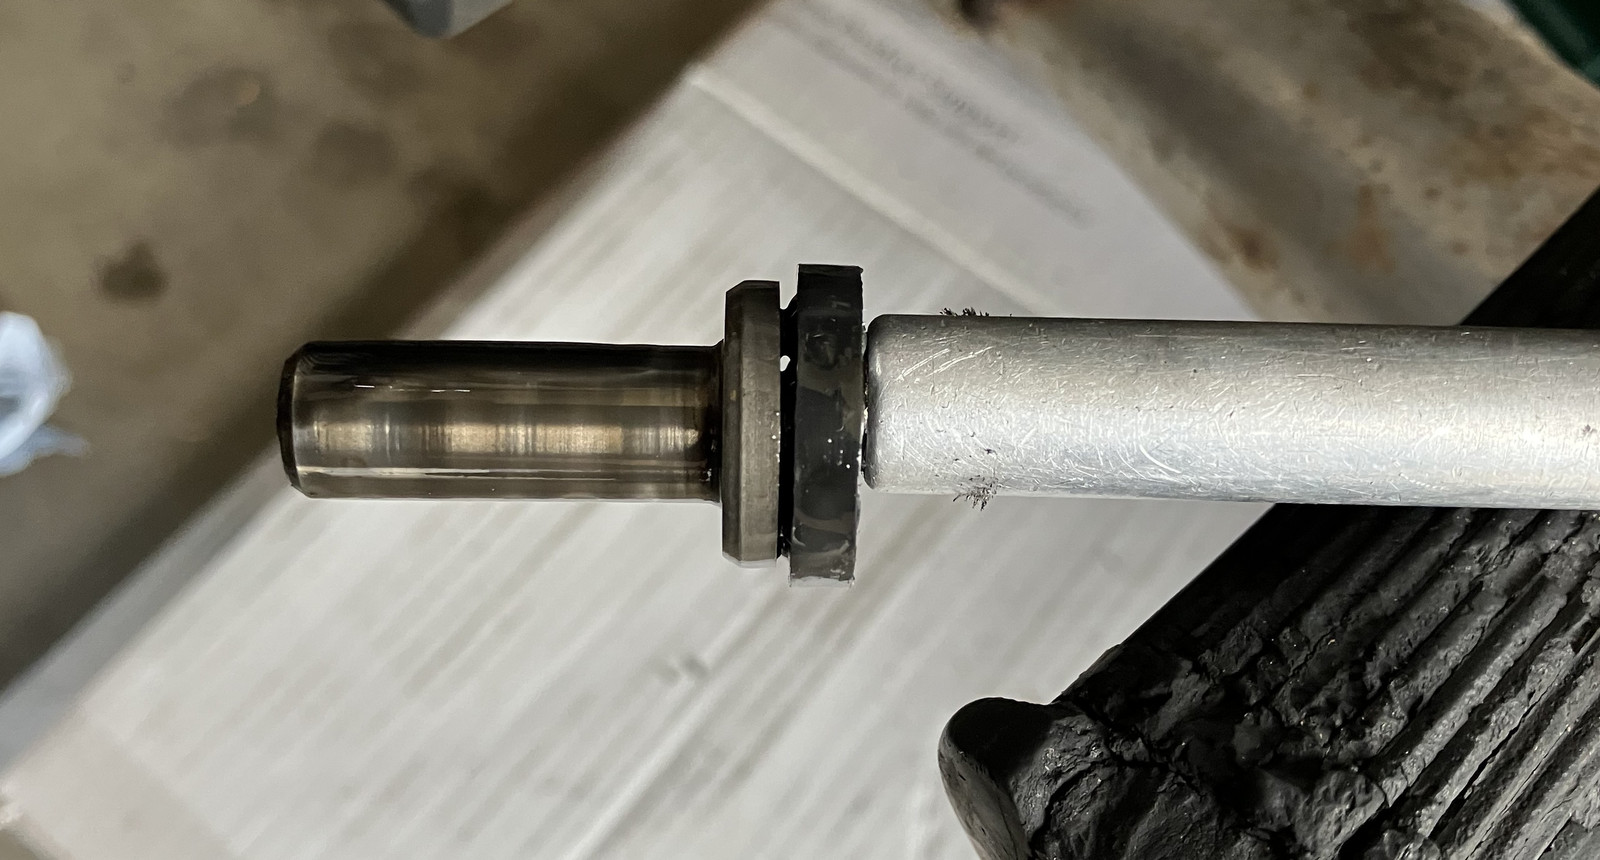
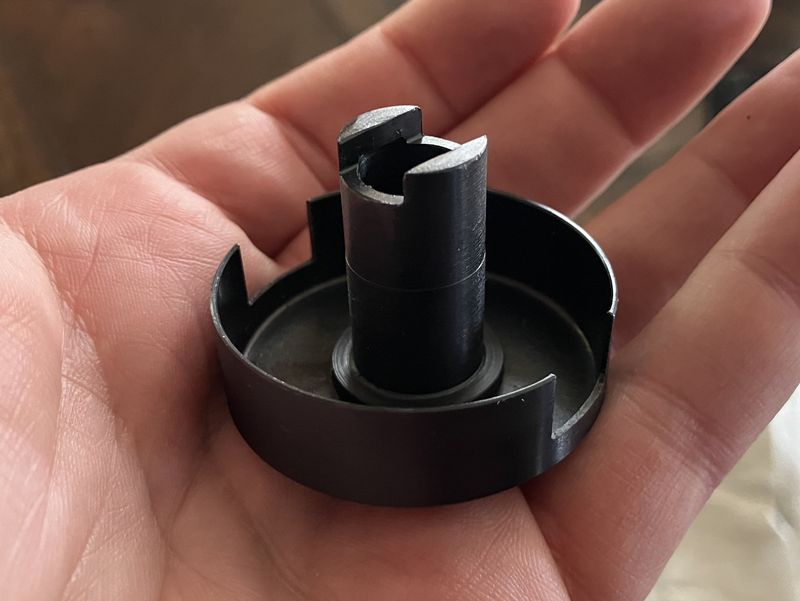
Lined up from left to right are the pusher and seal (that leaks), the ball bearing assembly, and the rotating bit further in that pushes on the rest of the rod to the clutch.
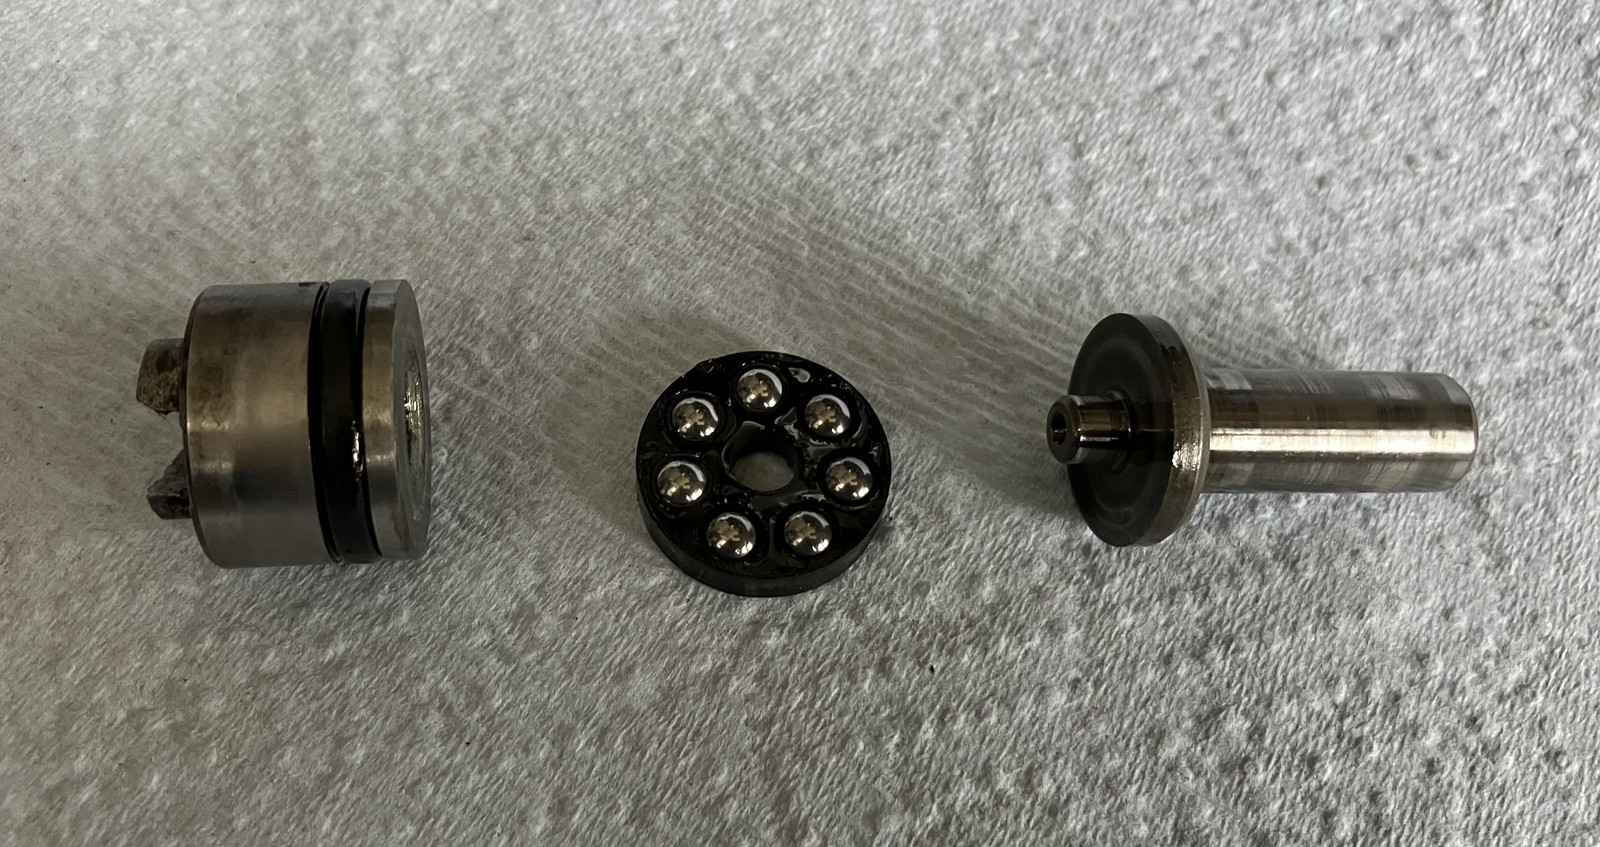
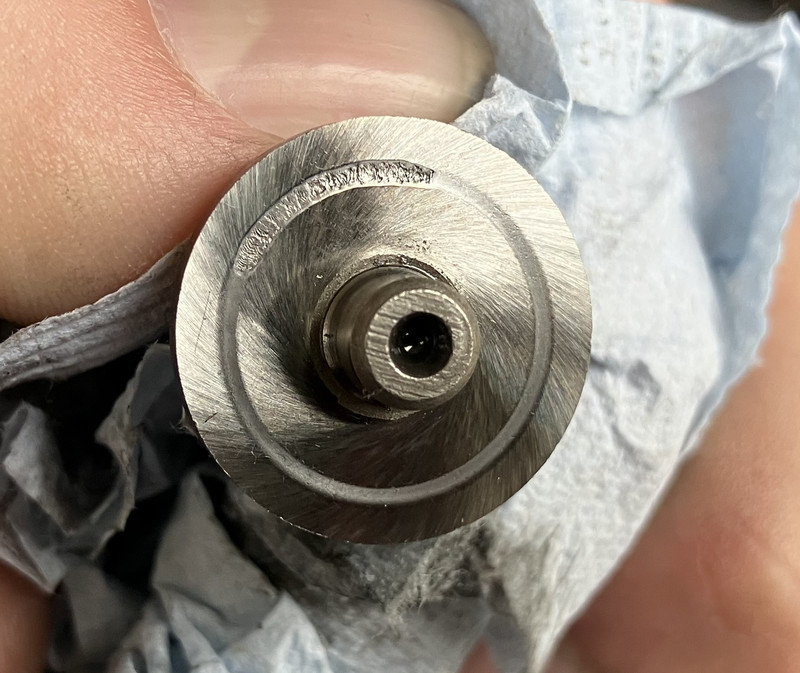
And here’s the problem. Ball bearings are NOT thrust bearings on flat surfaces! They don’t have enough contact area to spread the load out, so at best you end up with a thin worn ring on the two sides. At worst, well… I was expecting some grooving, I was not expecting this level of damage to the metal surface in only 35k km, most of which has been rural backroads. Also, it could be far worse. The bearings were still working fine, but this is obviously starting to “trench” - and it’s not what things are supposed to be. Given time, it would have continued the damage until the whole ring looked like this. The good news is that this is not pushing metal above the base yet - it seems to be purely metal lost. Why does your Ural have fuzz on the magnetic drain plugs? This would be one reason…

The good news is that there’s no obvious damage to the bearings or their holder. They’ve clearly been clattering along a section and unevenly loaded, but nothing seems to be terribly wrong with the existing bearings - other than being the wrong bearing for the job.
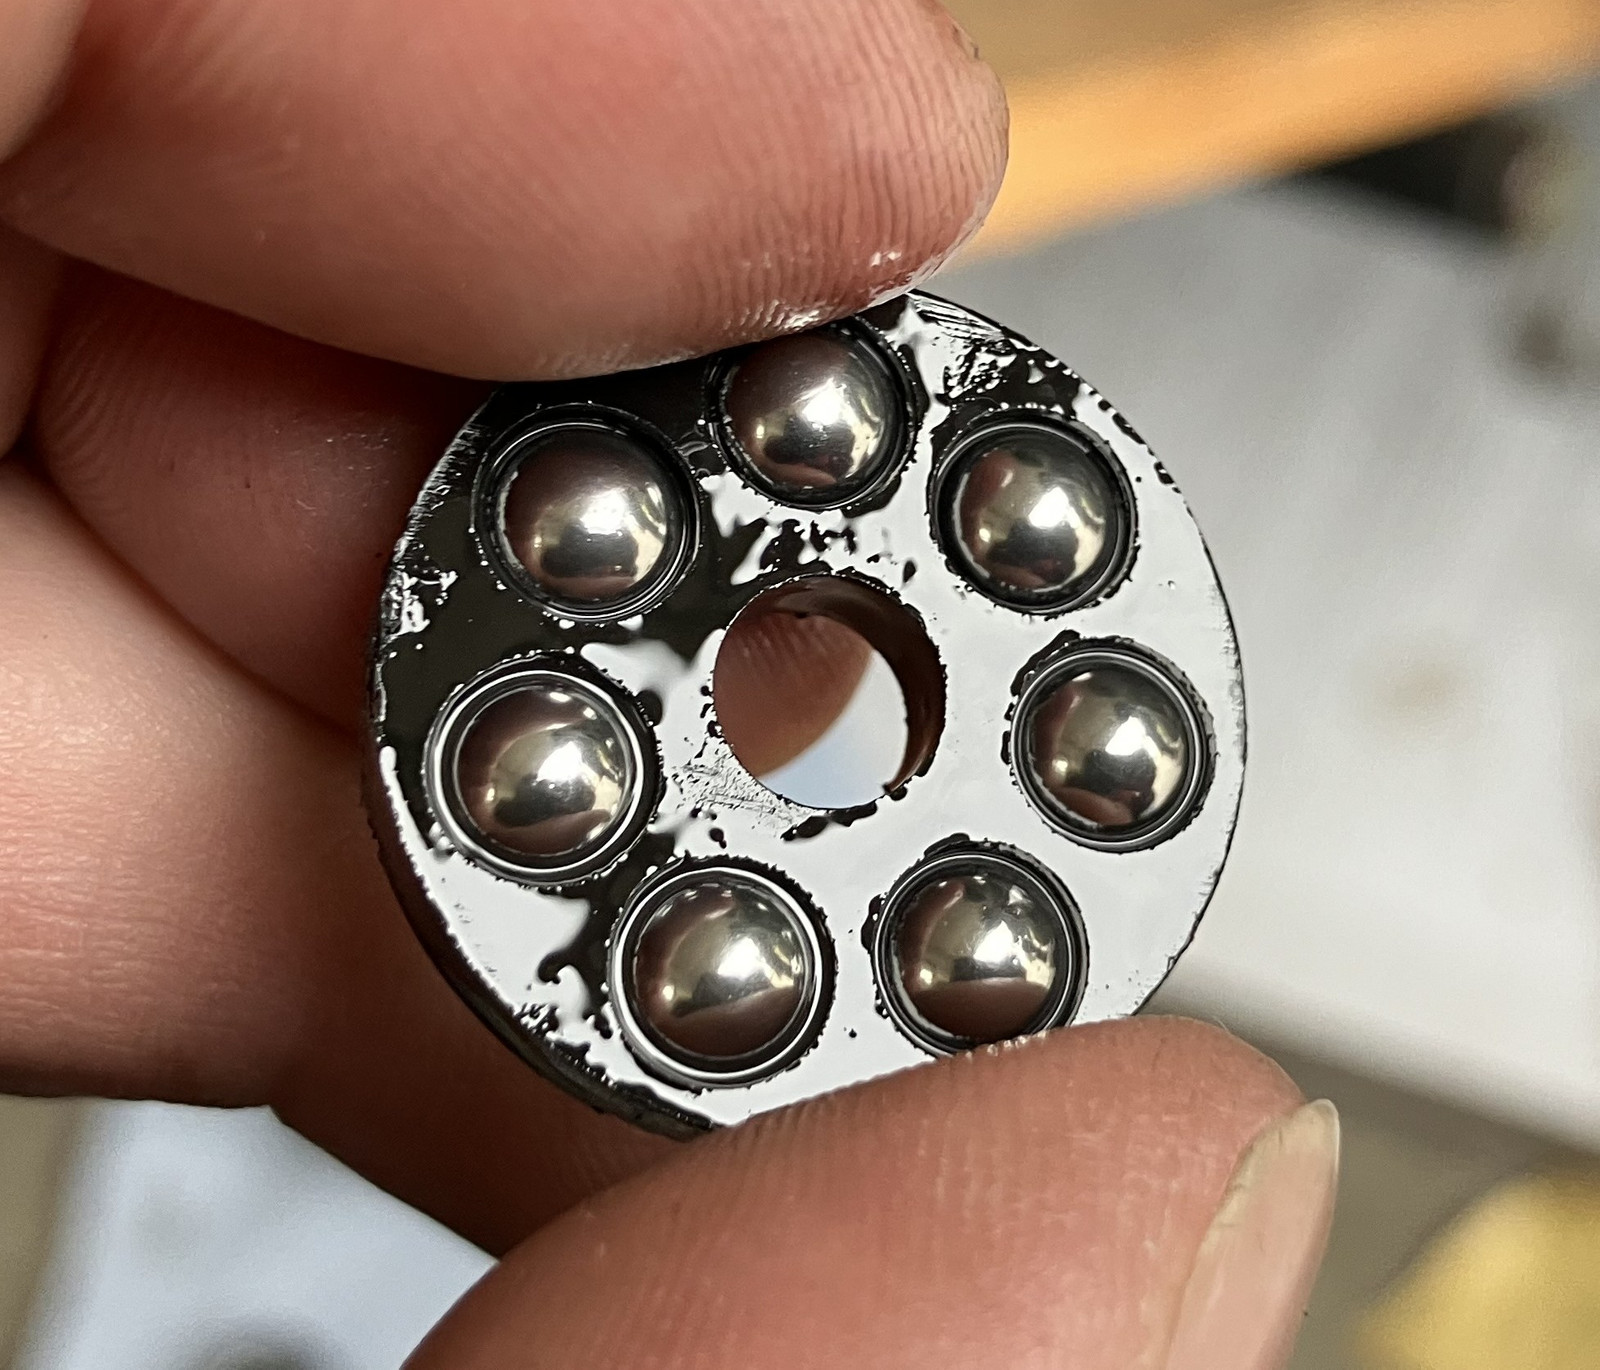
On the pusher piston, the only problem is that the wear is in a small ring. There’s no apparent damage to the metal yet. No, it doesn’t look particularly centered to me, either.
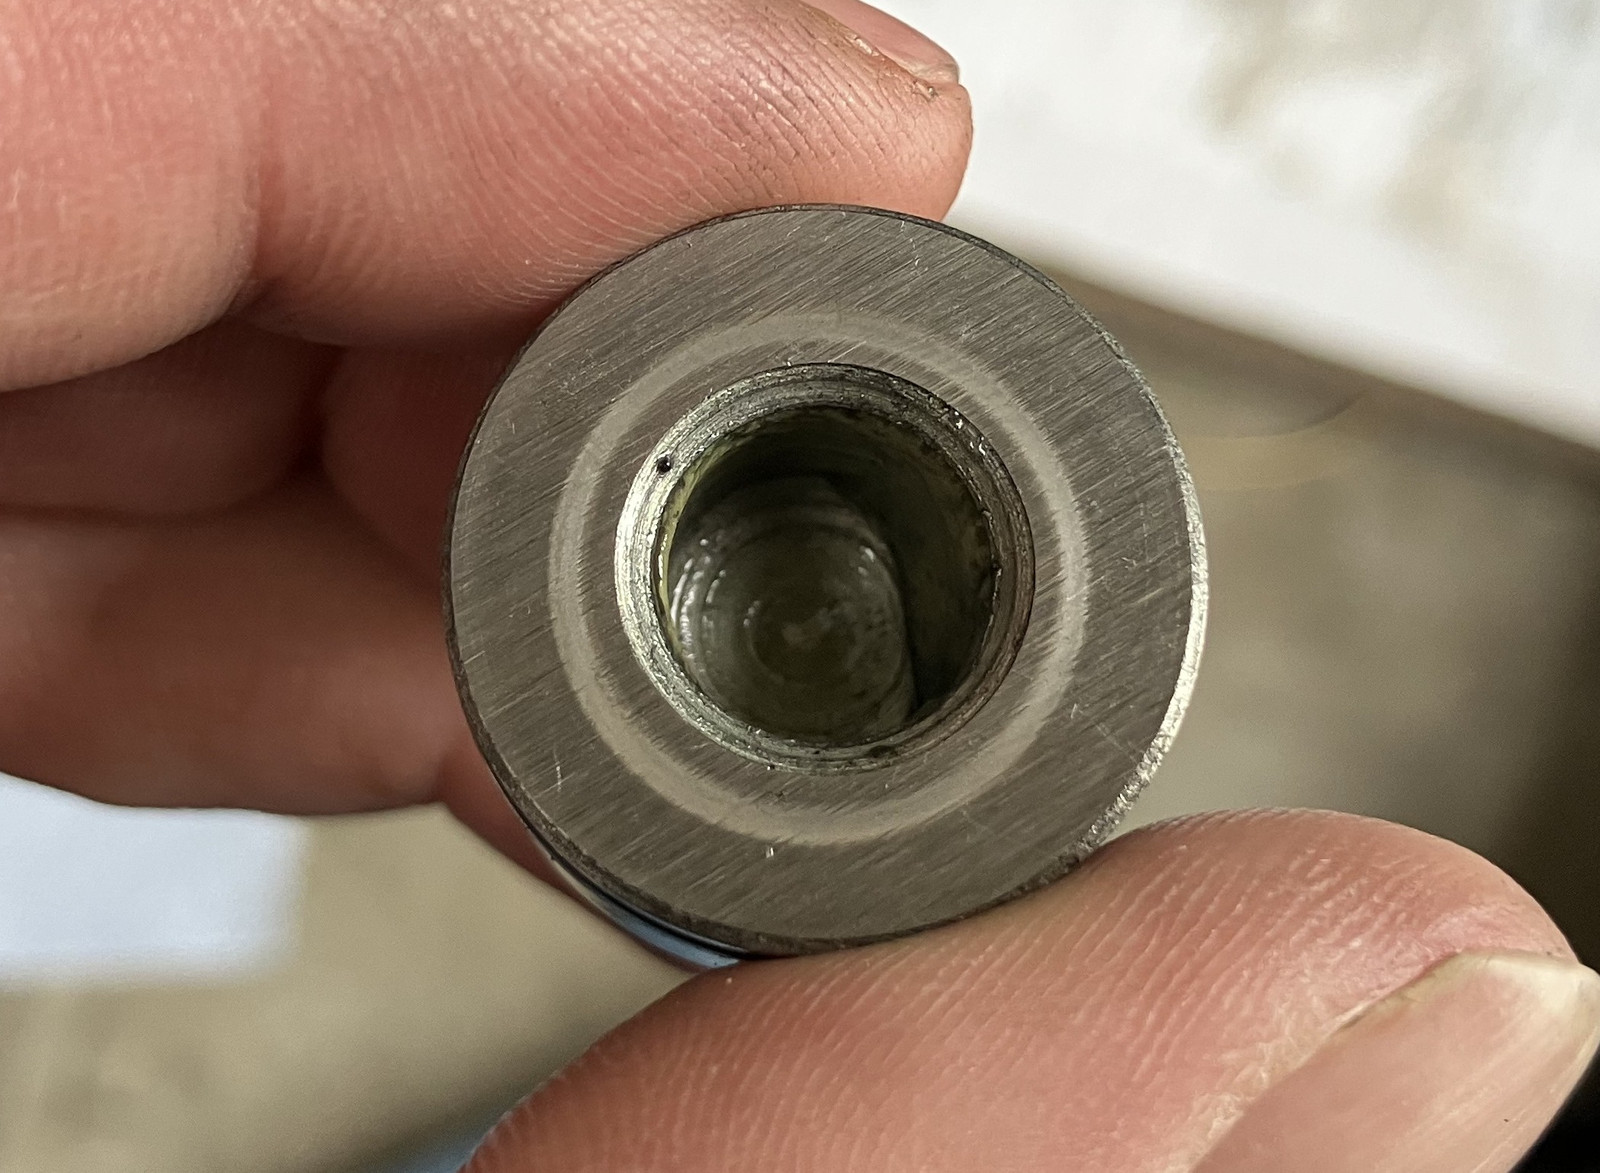
The replacement part for this, which is used in the 2006 and later Urals (or, at least, the concept in some form or another), is a proper thrust bearing. Instead of ball bearings, this uses roller bearings that run along hardened metal washers. The thrust loads are spread out over a far wider surface, and this sort of thing should last “the rest of the life of the bike.” Most other motorcycles use something similar and never have problems. Yes, the rollers are cylindrical. No, the slight bit of sliding shouldn’t matter. They’re not super high stress, and there’s no shortage of oil that gets back in there - as evidenced by the amount that has gone past these bearings and out the back to rustproof the aluminum gearbox…
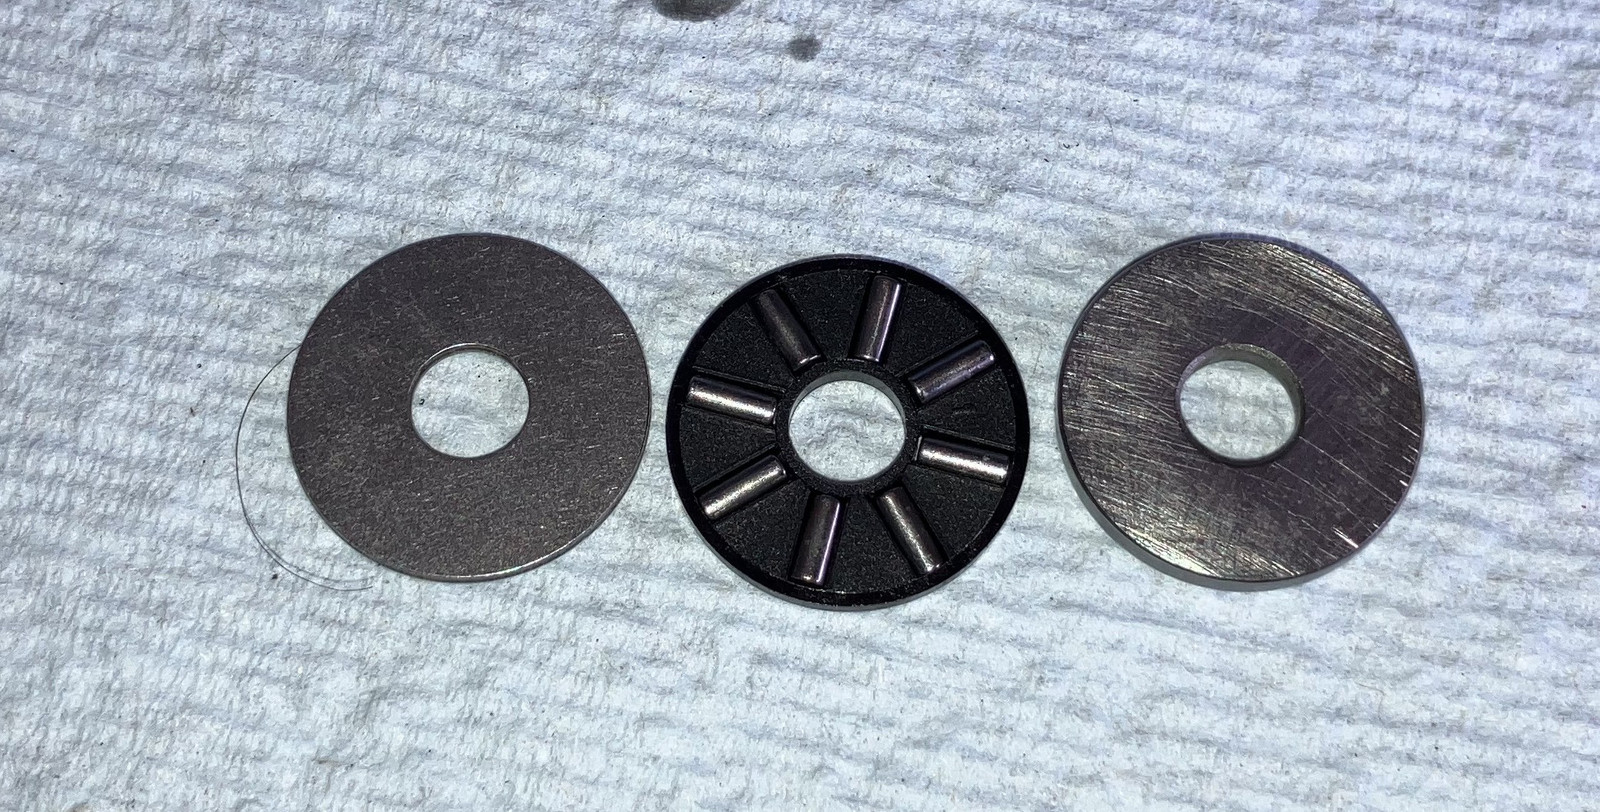
The assembly seems to stack best like this - I wasn’t sure which side the thick washer went on, but if it’s on the left, the other washer is not well aligned by the center extension and would probably wander around, wobbling in the hole. Not ideal, so do it this way.
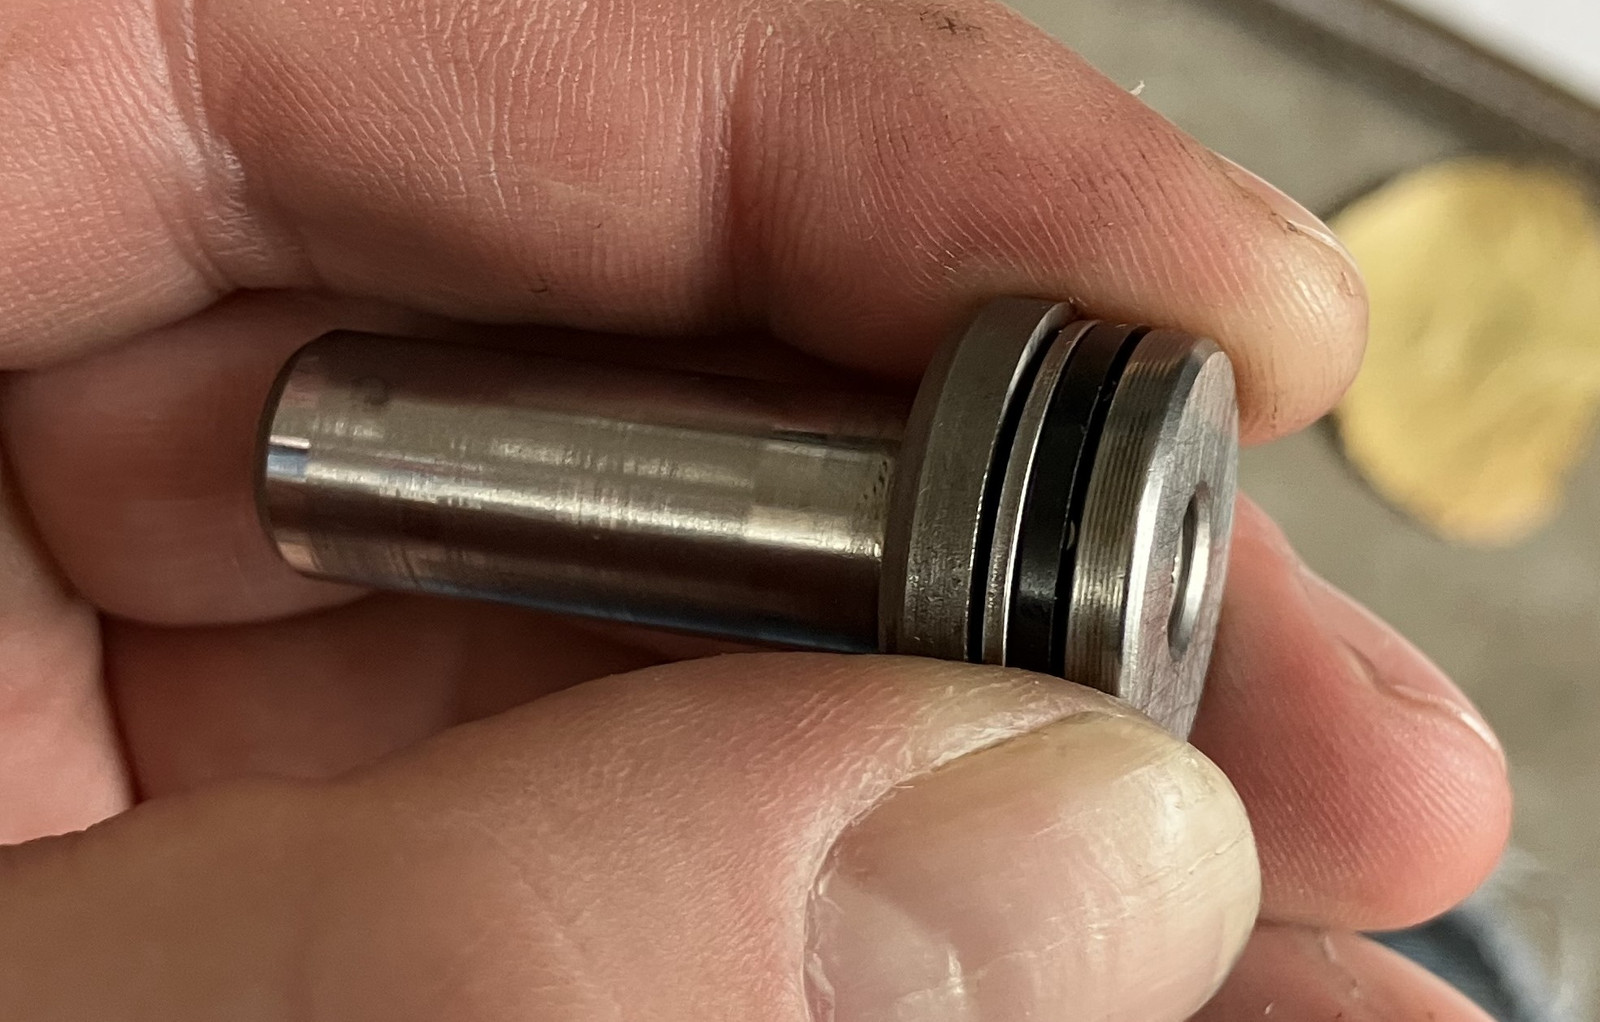
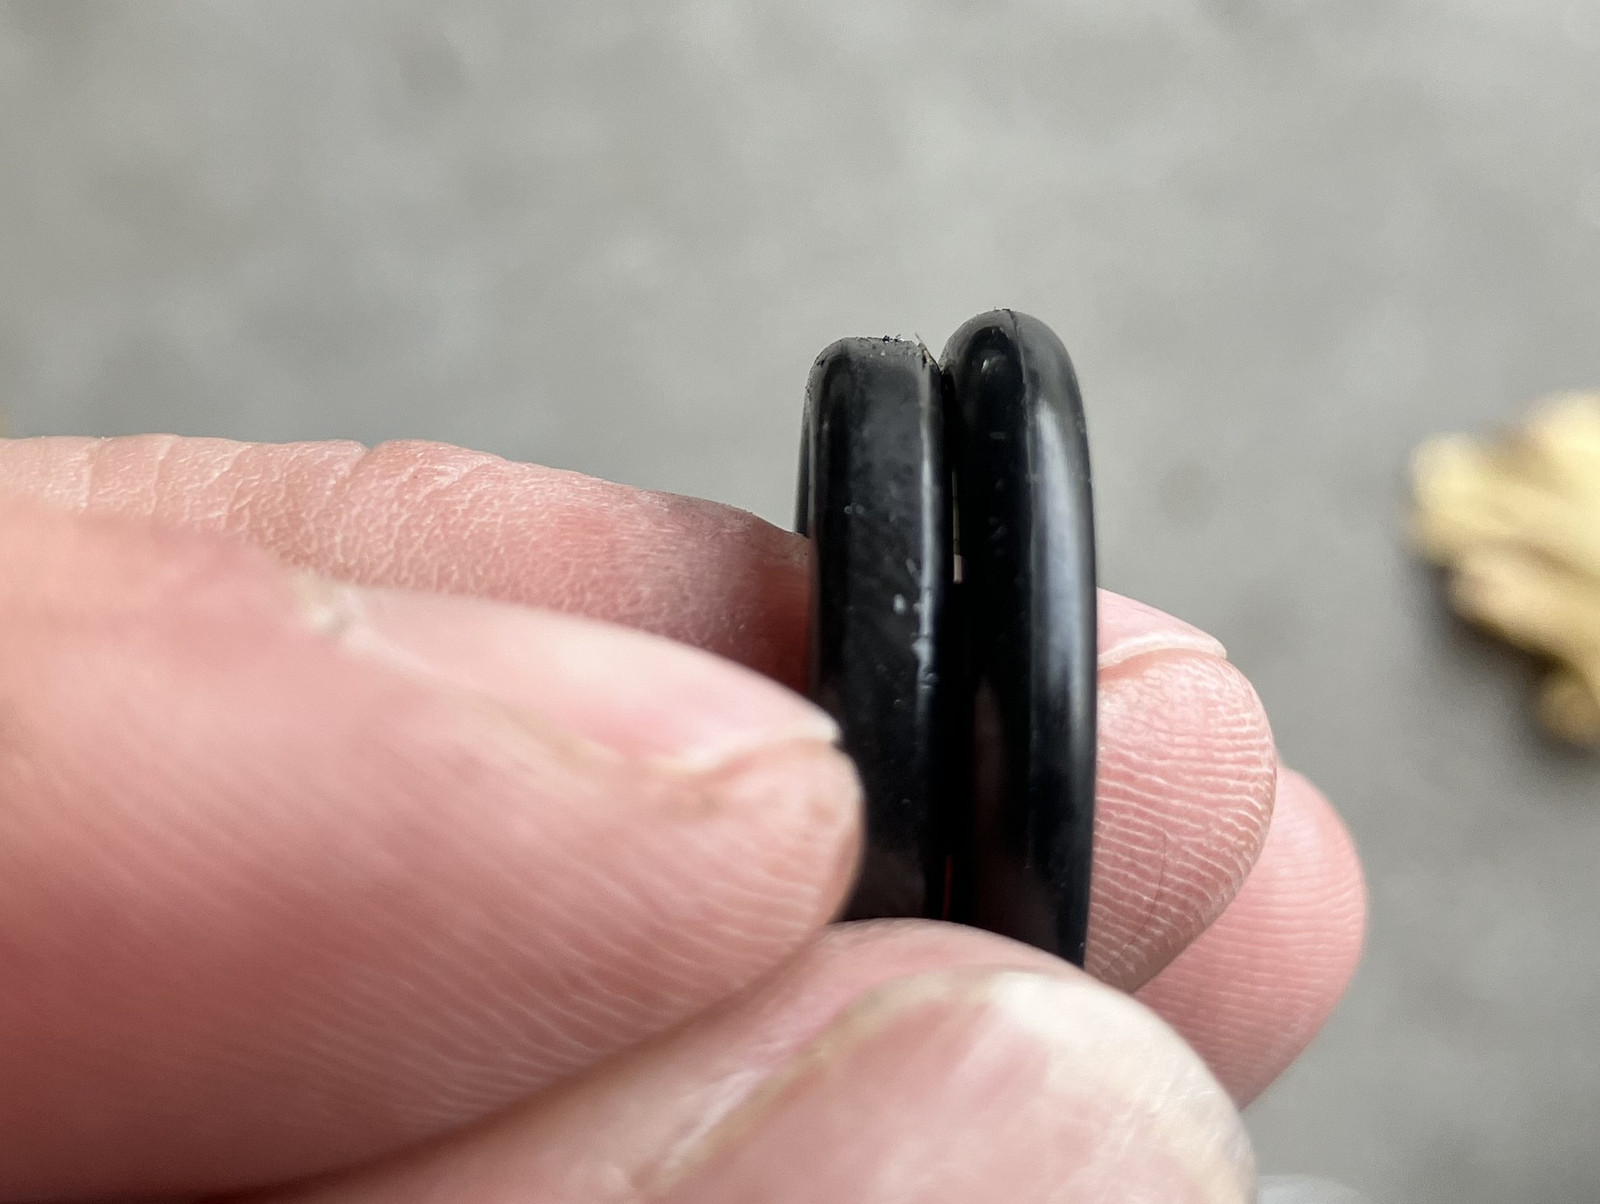
The other problem, more relevant to newer Urals, is that the o-ring will wear and leak over time. The o-ring is supposed to be rounded, not flattened off like this - but also, after 20 years and a lot of use, this happens. No big deal to replace. Pull the old one off, put a new one in, reinstall.
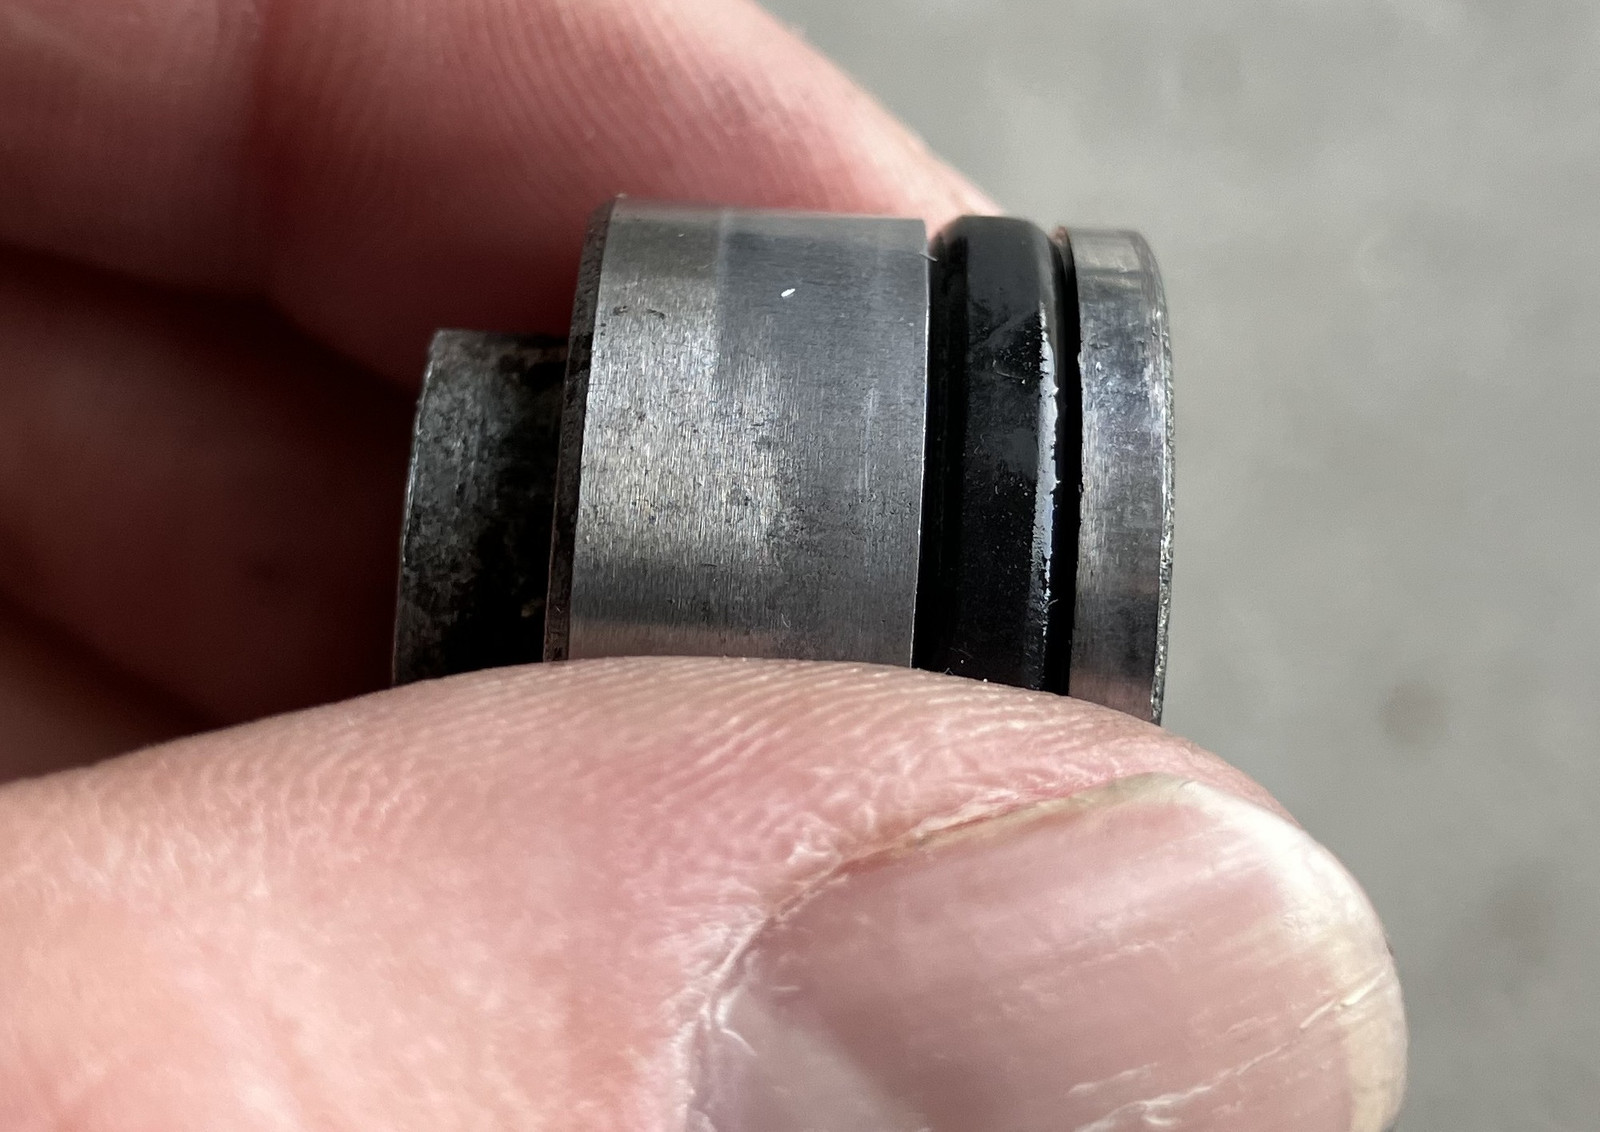
The difference in diameter and profile between the old and the rather surprised me, but this is why you have to replace it every now and then!
So, finally, reinstall everything, grease a few wear points (I put some moly grease on the pivot and at the contact point, which had been self-lubricating for some while), adjust your clutch, and go!
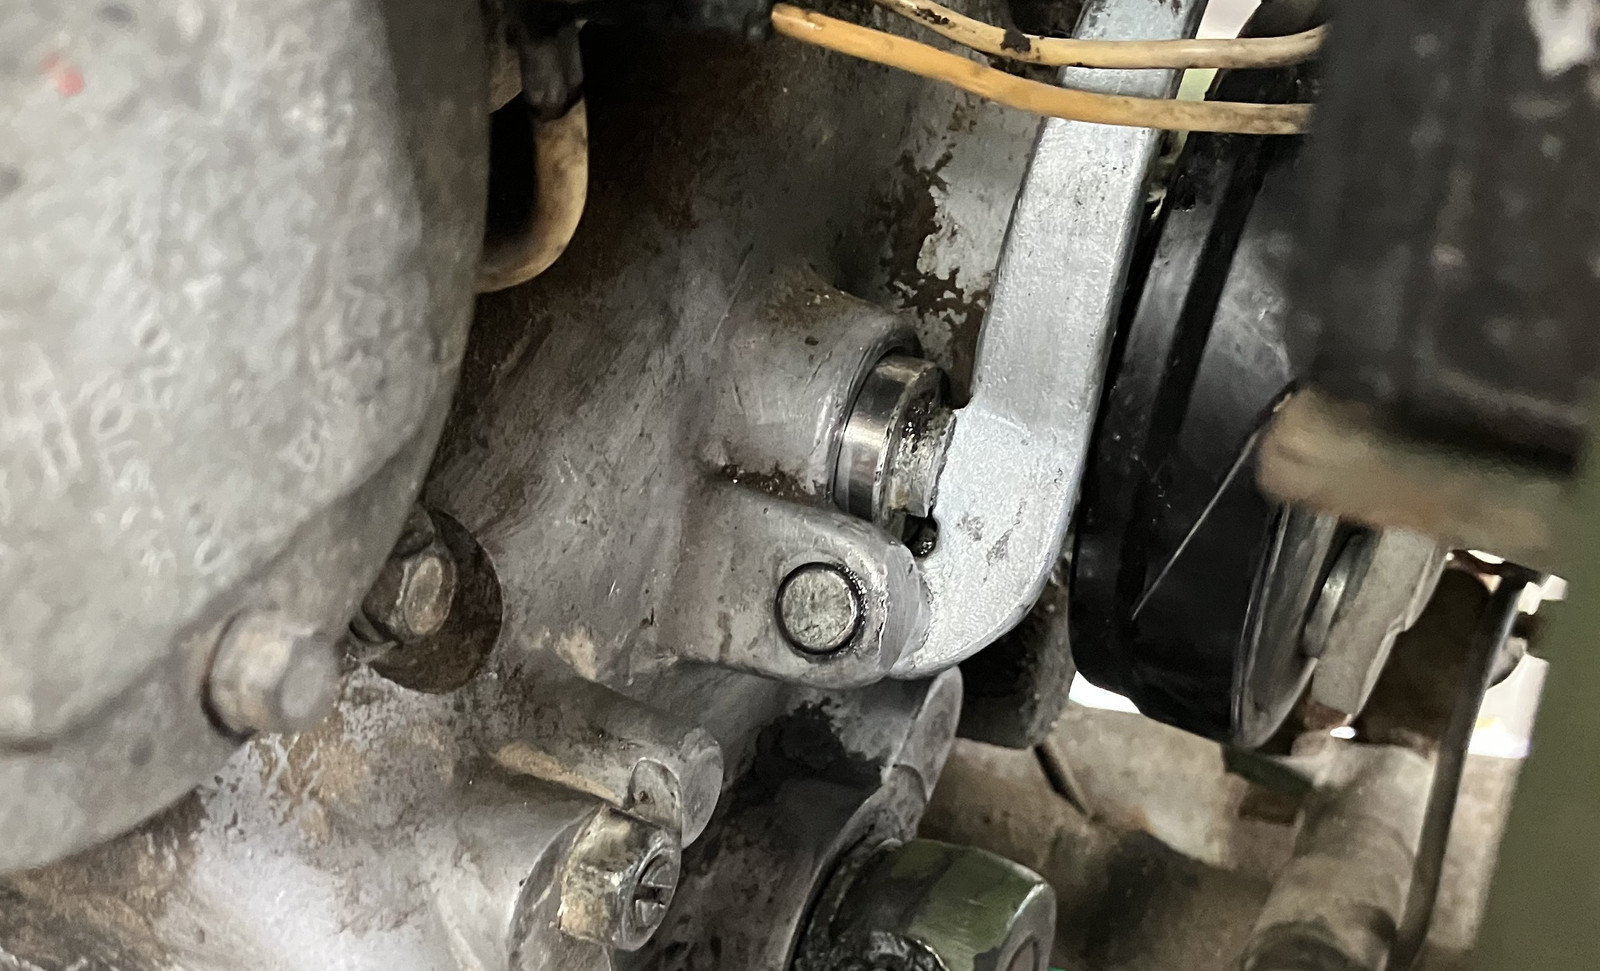
So, now, the real question: Beyond working around the damage (of a predictable nature), does it actually matter in terms of riding? And so far, I think I have to say it does! I’ve been struggling with the clutch for some while now - it has a range of various nasty behaviors that made me think it was due for a replacement. Engagement was erratic, and it wouldn’t always fully disengage at a stop - I had to keep the lever and cable adjusted really tight to get full disengagement, and even then it wasn’t always enough. I rock to neutral at stoplights if I have traffic stopped behind me, and often enough I’d get a clash going back to first, which means the clutch wasn’t fully disengaged. I’ve also been having problems where the clutch would engage intermittently as I was starting off - it would “grab” for part of the rotation, but not smoothly or evenly. So far, it seems like this new bearing is resolving the issues, even with the clutch lever adjusted looser (more slack, engagement at a more reasonable point than all the way out, etc). So I’m suspecting many of these problems really were the bearing surface making things erratic. The path being uneven, and the balls being unevenly worn, certainly would explain some of the quirks of engagement.
The Sidecar Wheel Spacer
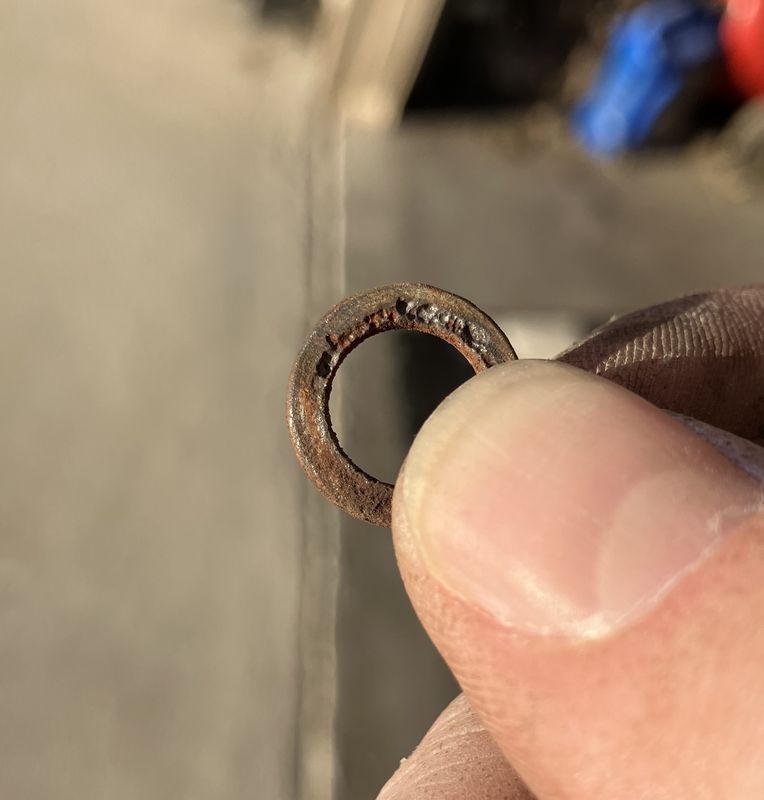
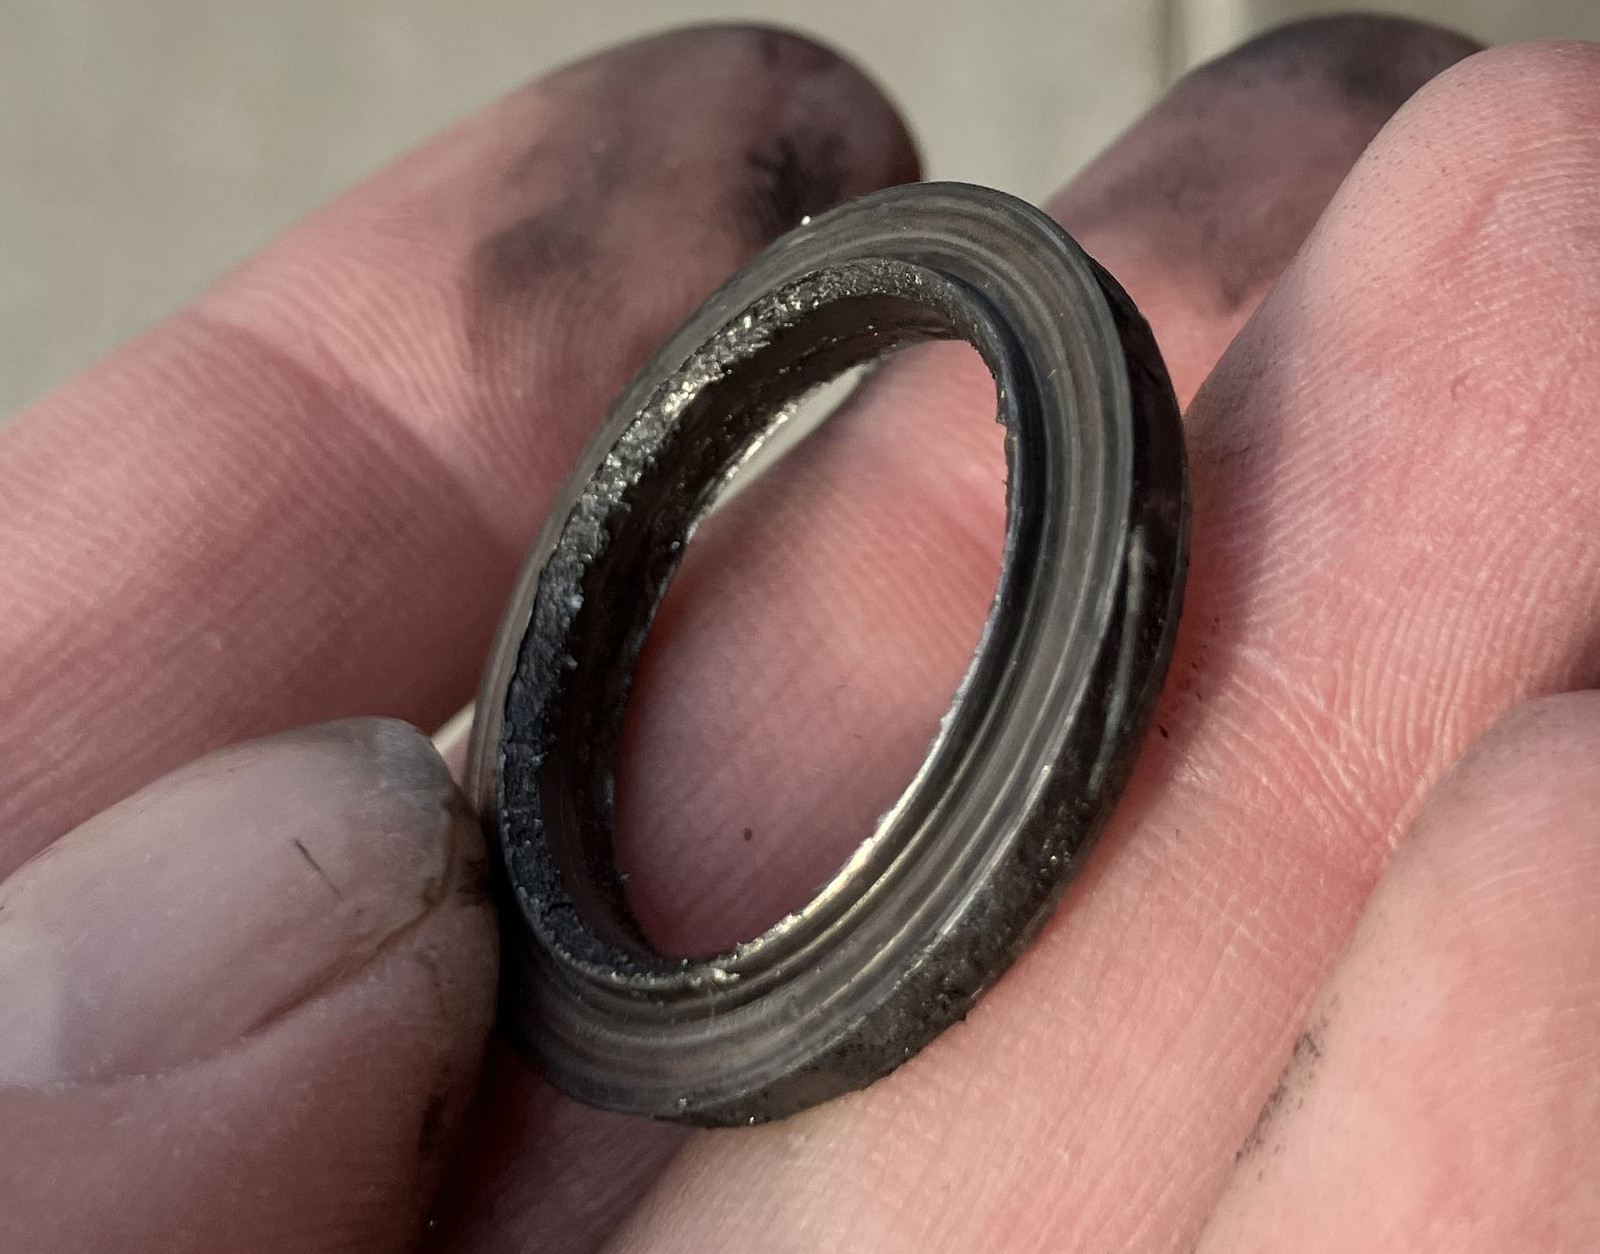
Earlier, I mentioned the sidecar wheel spacer that goes between the wheel and the hub. Especially if the sidecar wheel nut isn’t kept tight, these are prone to wear (though they may still wear with the nut tight - I’m not really sure what causes it other than “they do this”). I replaced mine, and again, I didn’t realize just how worn the old one had gotten. The new one is on the right, old one on the left, and the wear is evident.
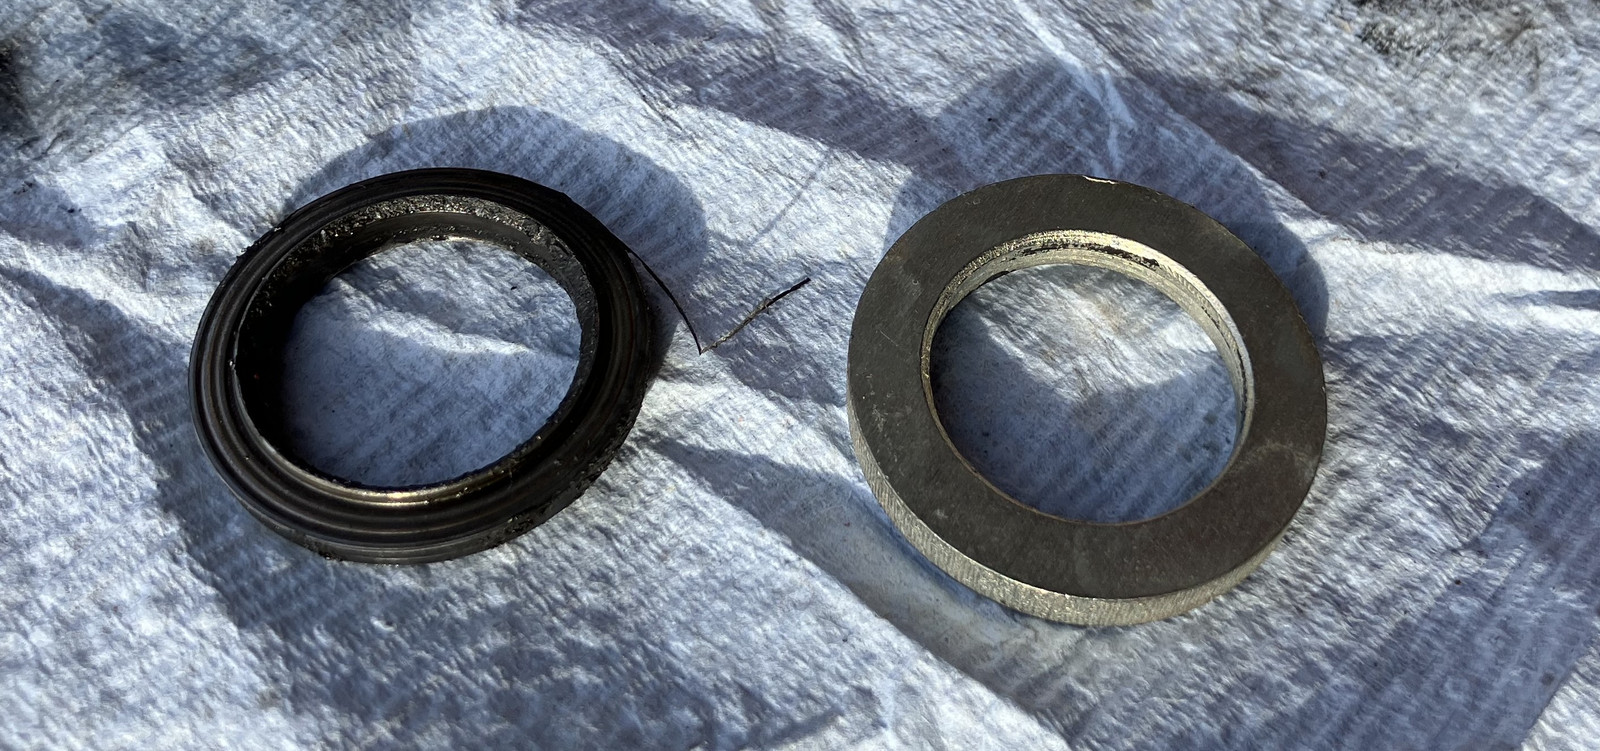
You can see the “lip” that has been worn over time. Keep a few spares, and check it every time you have the sidecar wheel off. If it looks worn, replace it, and keep an eye on your sidecar wheel nut tightness. If the dust cover spins relative to the wheel, go tighten things, and if it keeps doing it, replace the spacer.
Not All Urals…
Again, please remember, this is a 2005 Ural I’m working on. I hear rumors that the new ones aren’t nearly this bad!
But as far as a vehicle to work on, these certainly aren’t bad. “With a Ural, it’s always something simple. But it’s always something.” And next post will be yet more work on this Ural!
Comments
Comments are handled on my Discourse forum - you'll need to create an account there to post comments.If you've found this post useful, insightful, or informative, why not support me on Ko-fi? And if you'd like to be notified of new posts (I post every two weeks), you can follow my blog via email! Of course, if you like RSS, I support that too.
