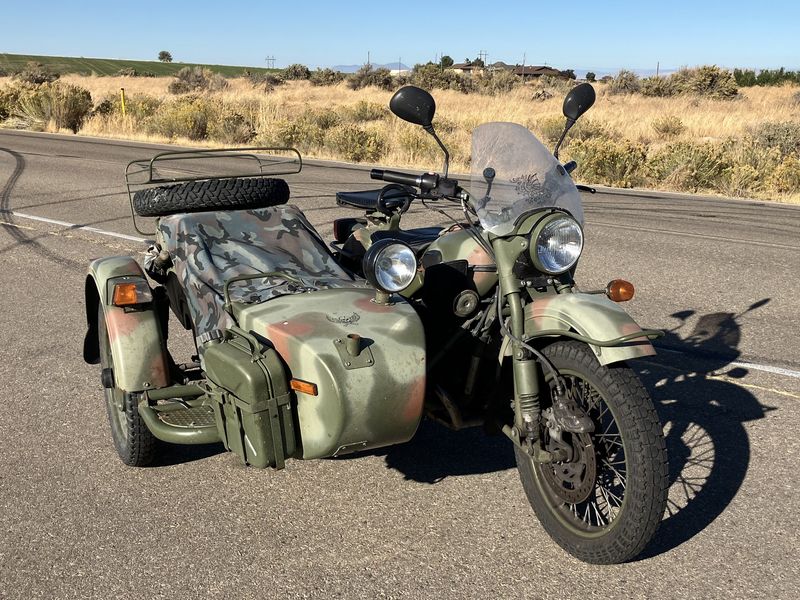
Of course, as much as I enjoy my Ural, it’s not been without work. Some of that has been regular maintenance, some has been troubleshooting, and some has been a set of upgrades I’ve made over the past year to just improve the bike. There’s a lot of things that Ural has improved over the years that my 2005 didn’t come with - but I’m slowly putting them on! First and foremost for night riding is improving lighting.
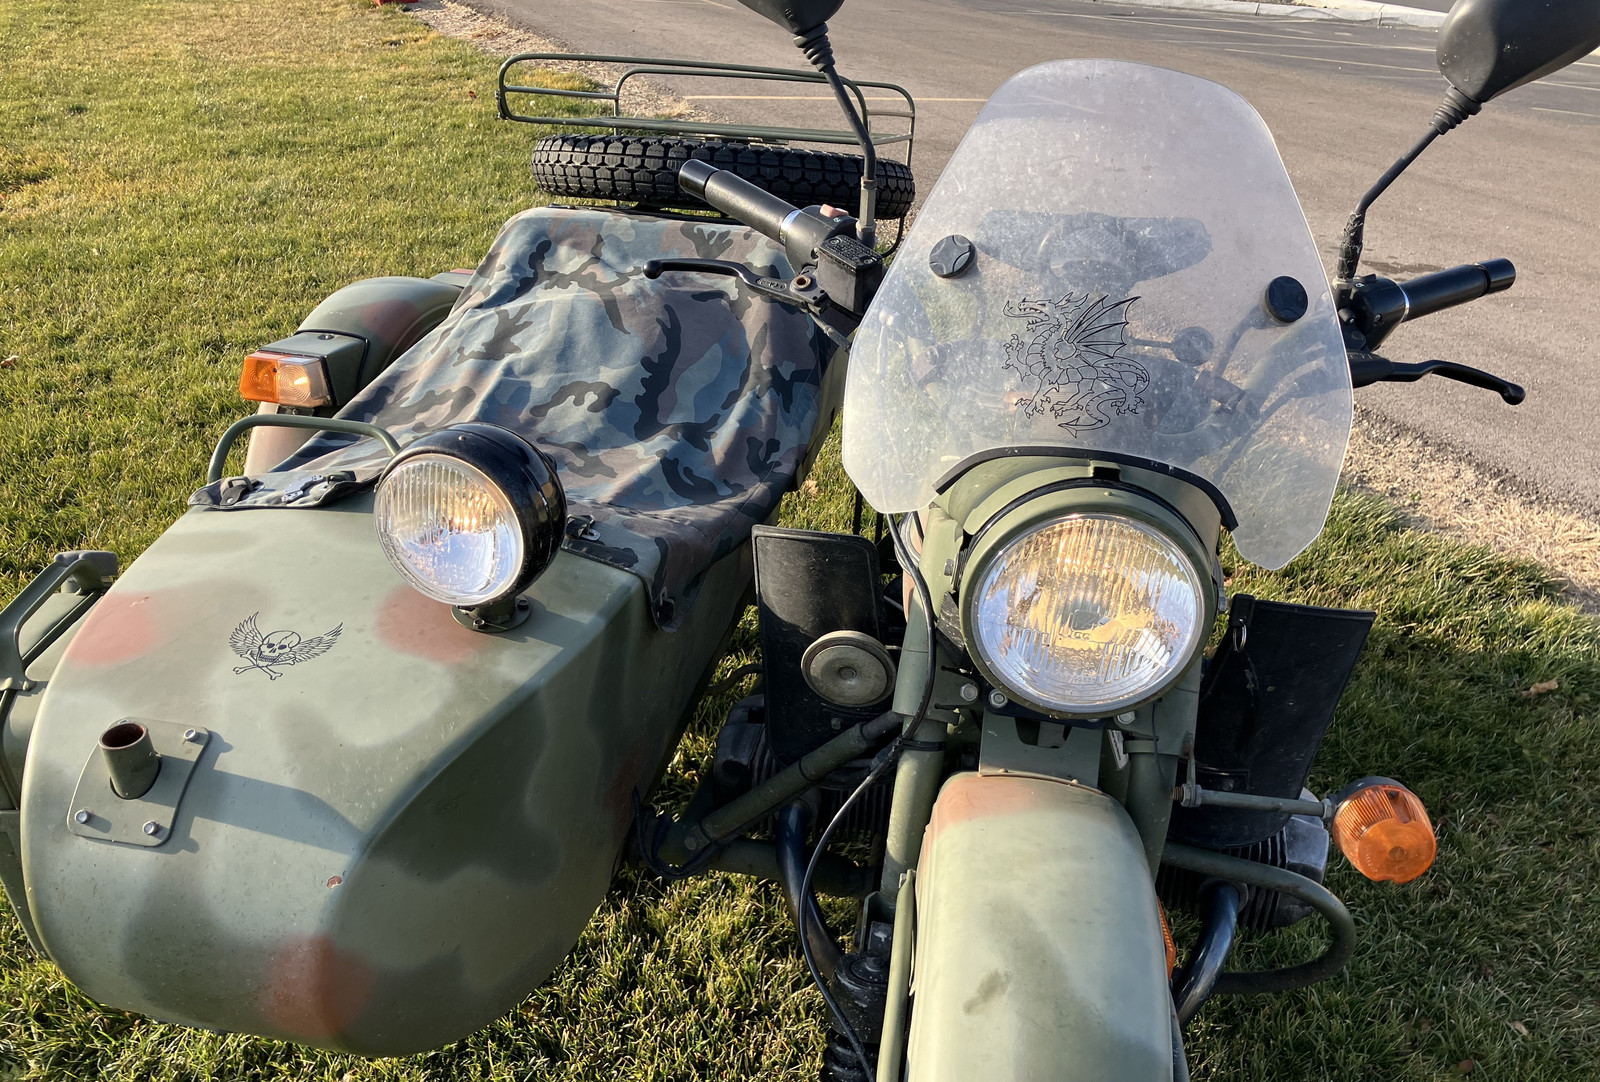
A stock 2005 Ural is not a terribly well lit bike - but if you don’t get full voltage to the headlights, it’s even worse. The good news is that I’ve fixed all of this, starting with the headlight.
An Important Note on Newer Urals
If you’re considering a Ural, please keep this in mind: I am riding a 2005 Ural that is 20 years old. This is old. It is not very far past when Ural started improving the bikes year by year. My experience in no way reflects the experience people have with newer Urals. They’re still quirky, but they’re not… this bad. Nor are they this old. If you’re interested in saving a lot of money by picking up an older Ural, this might be more relevant to your interests!
Headlight Swap: Hella H4
I wish I’d done this years ago. If you have a Ural that’s still using the sealed beam headlight, and you ride at night, go get the H4 upgrade kit. UralNE has the upgrade kit, but you can probably sort it out yourself if needed - it’s a 7” Hella reflector and the E4 lens.
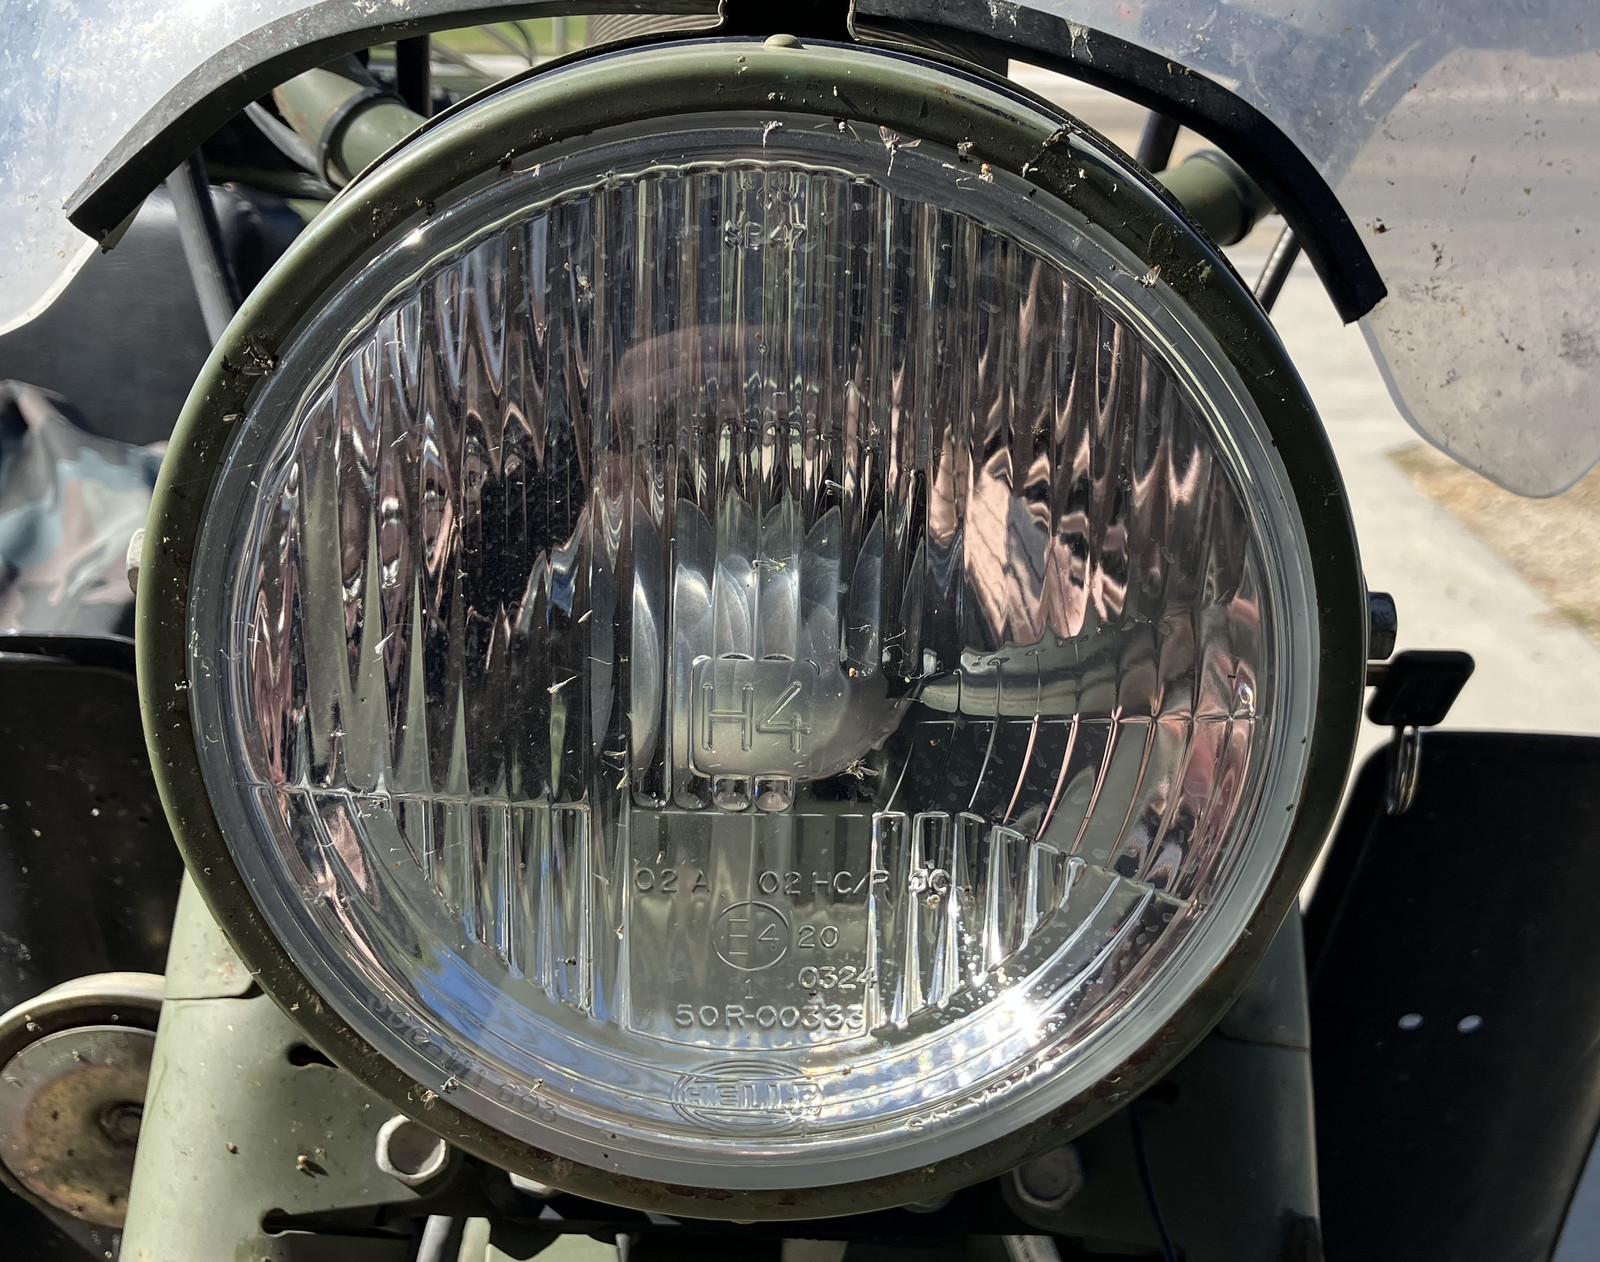
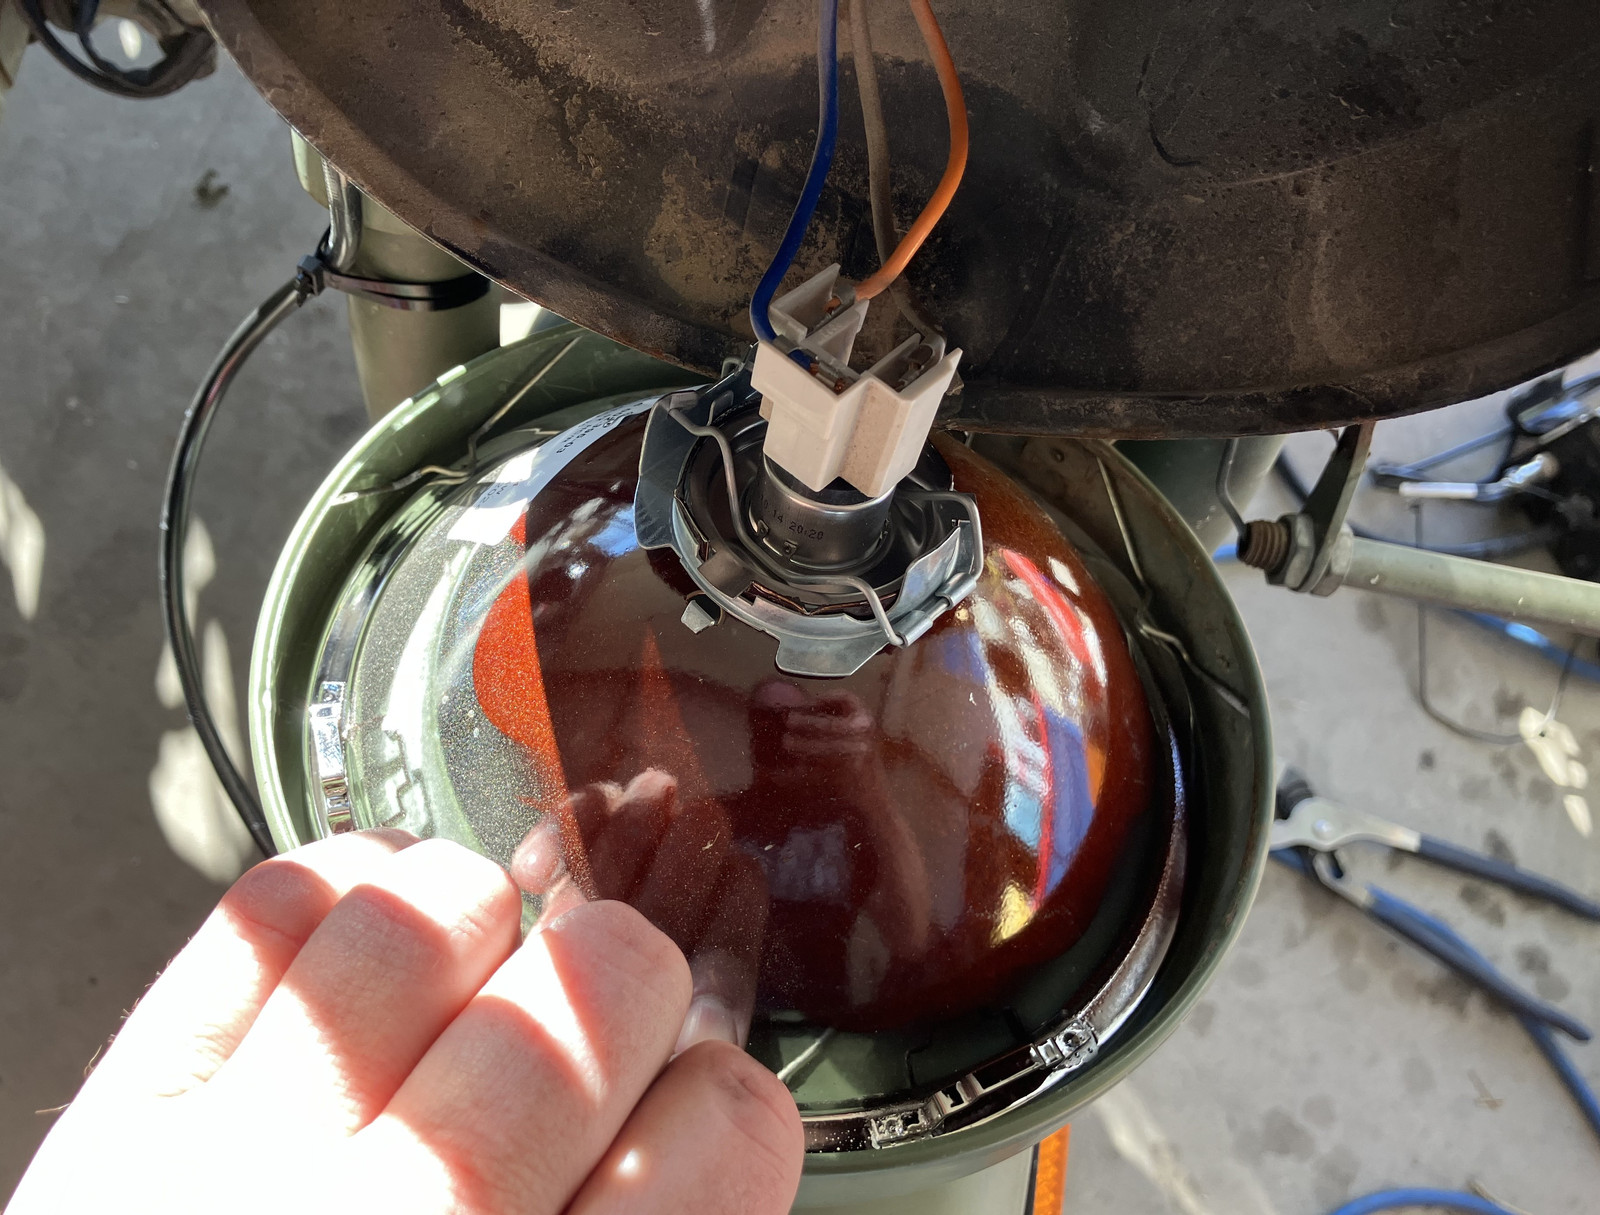
The swap is trivial. You literally just pull out the screw at the bottom of the headlight retainer ring, remove the ring (with the sealed beam in it), undo a couple metal springs, insert the new reflector, stuff the H4 bulb in, and reassemble. The provided 55/60W halogen bulb works with the stock connector - though you could, if you wanted, upgrade to a 90/100W H4 bulb… If you’re going to do that, you’ll want a ceramic connector (the plastic one will melt down at that sort of load), and wisdom seems to be that you should add a relay to bypass the ignition switch for the extra current. However, check your bike’s wiring first. Around 2002-2005, a lot of Urals ended up with a dual relay setup that bypasses the ignition switch and handlebar controls for headlight current (the ignition switch and bar controls are just switching relay current, not headlight current), and as long as those relays are in good shape, it should handle the extra current without too much trouble (but you still want a ceramic connector). You’ll also want to upgrade the inline fuse for the headlight circuit, as it’s likely to be an 8A fuse, which is really pushing it for 100W of light. But, seriously, one screw, some clips, and you’re done for the Hella H4 swap. Just do it!
As for the improved light quality, I don’t have any great before pictures, but I’ve got some after pictures. Low beams are somewhat improved, mostly in that the spread is wider, and the cutoff is sharper. I had to adjust mine a bit lower than I prefer, due to oncoming traffic blinkingly informing me that my lights were rather too bright when I had the cutoff set around the horizon.
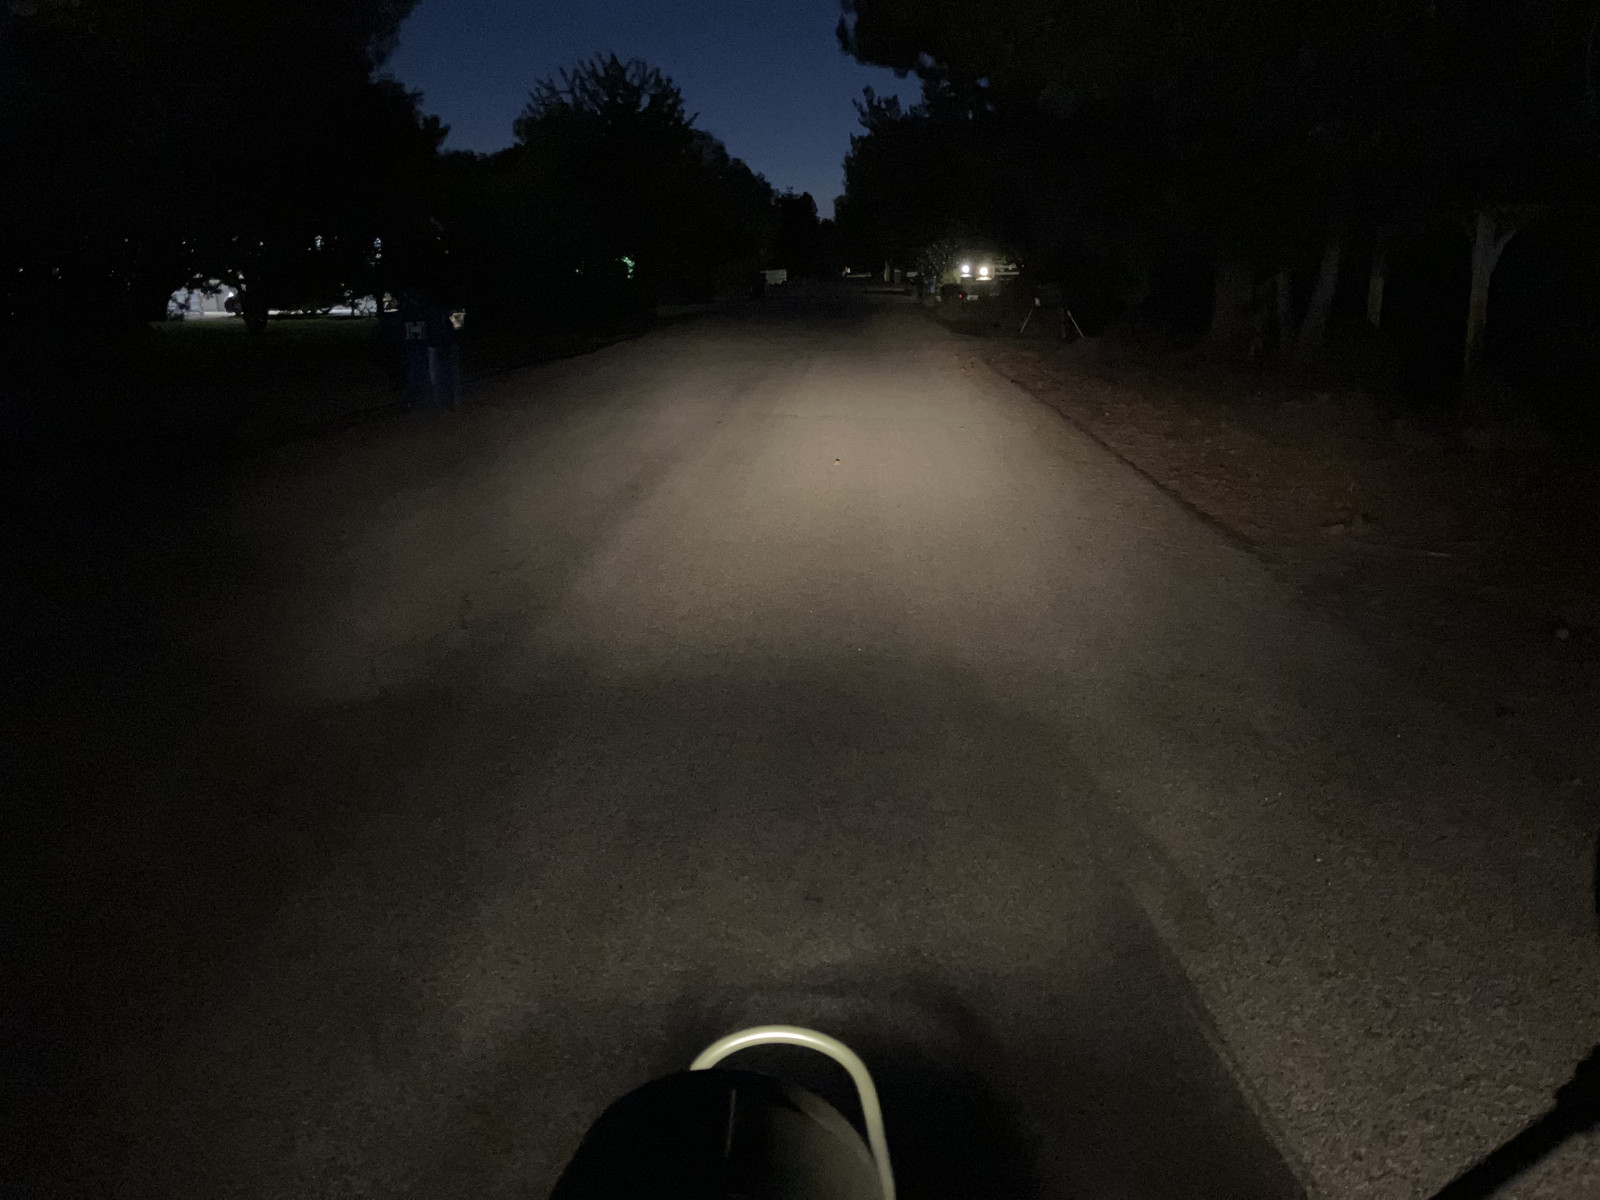
But the high beams? Oh my yes! These throw light out to the horizon! It’s hard to get good “headlight photos” - but I’m quite happy with the range on the high beams, and they’re great for daytime riding too. Seriously, you’ll be happy with the upgrade. It puts light where it needs to be, not… somewhere, like the stock sealed beam does.
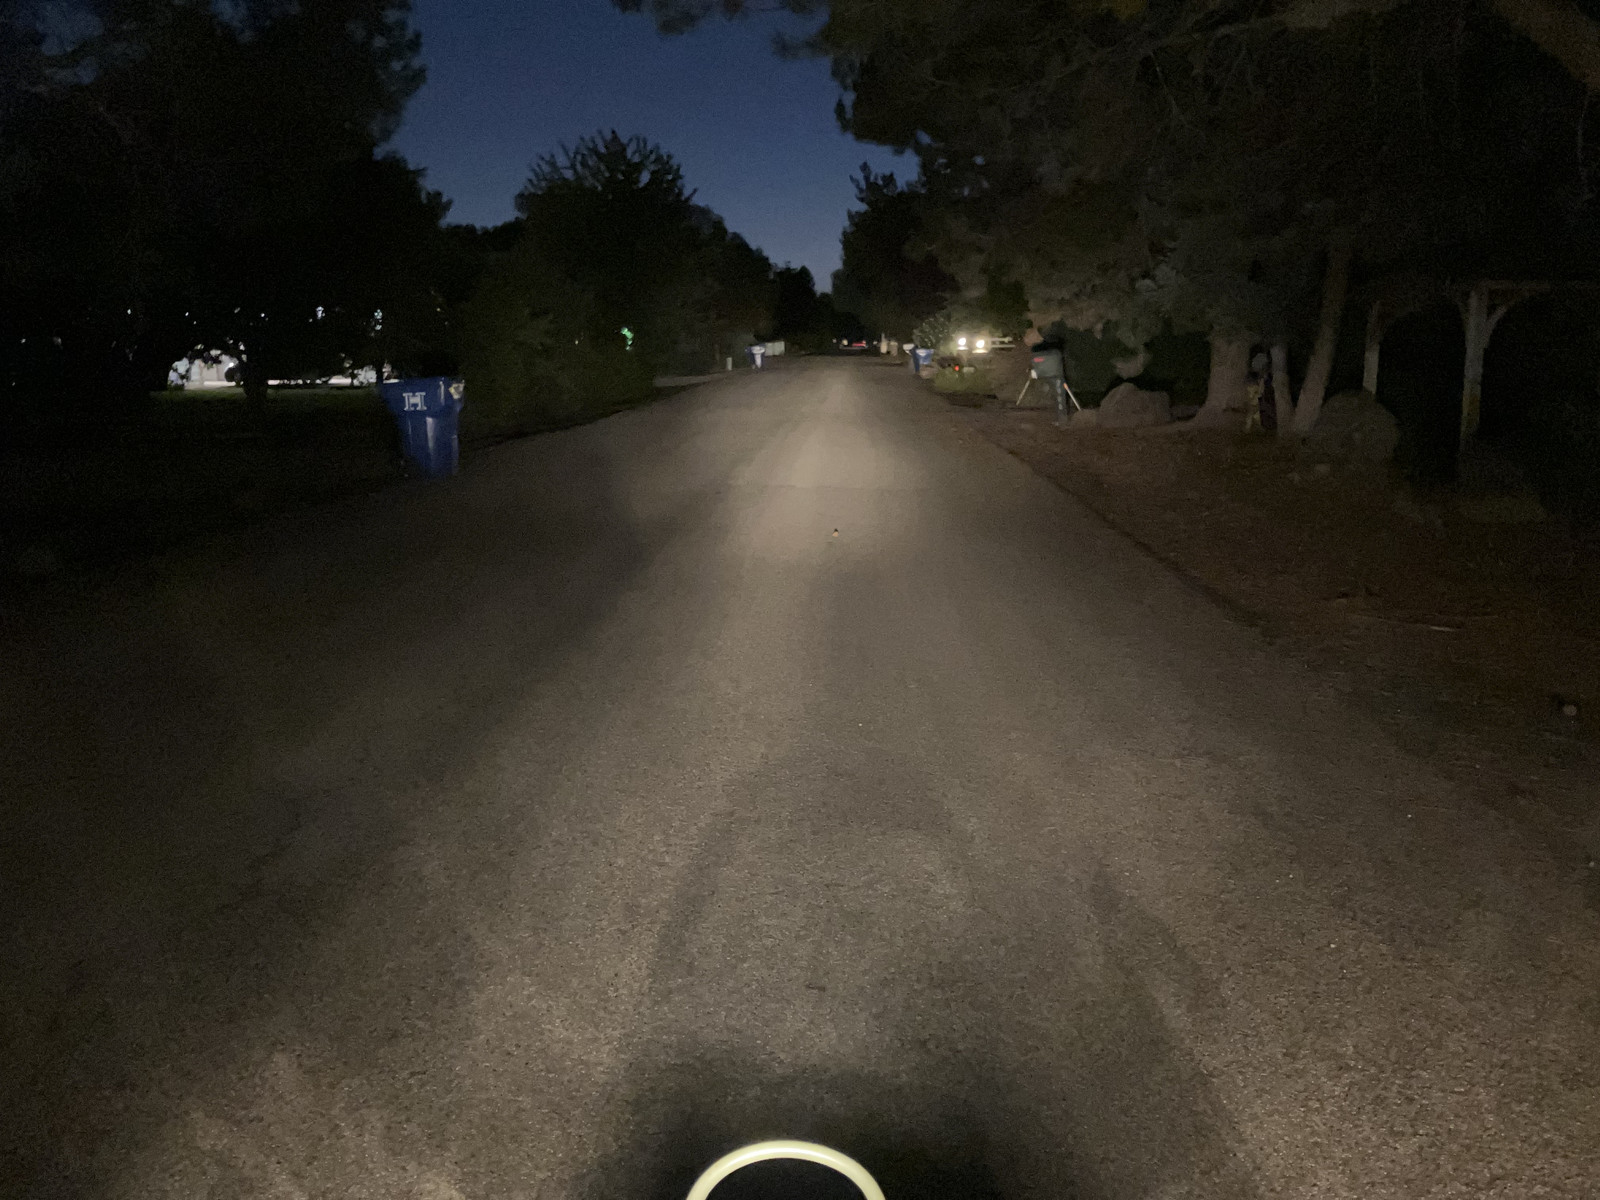
Why did I go with halogen? Simple: I hate LEDs in headlights, especially retrofit LEDs. The reflectors for H4 bulbs are designed assuming a point source of light (or nearly so), and they work well with that. The LED retrofits require a lot more LED “physical size” to get enough light out, and so they don’t focus as well. It’s no longer a point source on the centerline, it’s some line-like sources somewhat off centerline (though the newer LED retrofits are better, I still don’t care for their oddly sharp cutoffs).
There’s another reason to run halogens on a Ural, though. Winter. A halogen bulb will, generally speaking, produce enough heat to keep the ice and snow melted off. LEDs don’t do that. I ride in the ice and snow. I don’t like frozen up headlights, especially in the ice and snow.
I’ve also been running down some “flicker” issues in my headlight that persisted after the swap. I thought, for a little while, I’d solved it by cleaning a relay’s contacts and greasing things, but, sadly, the problem came back.
Well… About That Wiring…
The upgrade was great. Better light, far better beam forming… but over time, it became apparent that the headlight still wasn’t right, and reseating the relay had not fixed the flicker. This is a Russian bike, not a British bike, and the headlight had a good bit more “Lucas Electrical System” than I prefer (“The original self dimming headlight,” “The automatically selected headlight modes include dim, flicker, and off,” “Why do the British drink warm beer? Lucas refrigerators!” - and that’s only the start). It’s not a problem during the day or in built up areas, but I ride back roads at stupid-thirty AM to go swimming, and when I was the only vehicle on the road, it was hard to avoid the conclusion that my headlight was occasionally flickering. Or self-dimming for a half mile, then coming back up. If I had the high beams on, I’d see a flicker in the high beam indicator too, so it wasn’t just a road-light-absorption issue. Well, there are a few other weak spots in the system. Worth investigating.
The 2002-2005 Urals have a double-relay headlight system, and one indicator of this system is the inline fuse around the airbox. It looks something like this.
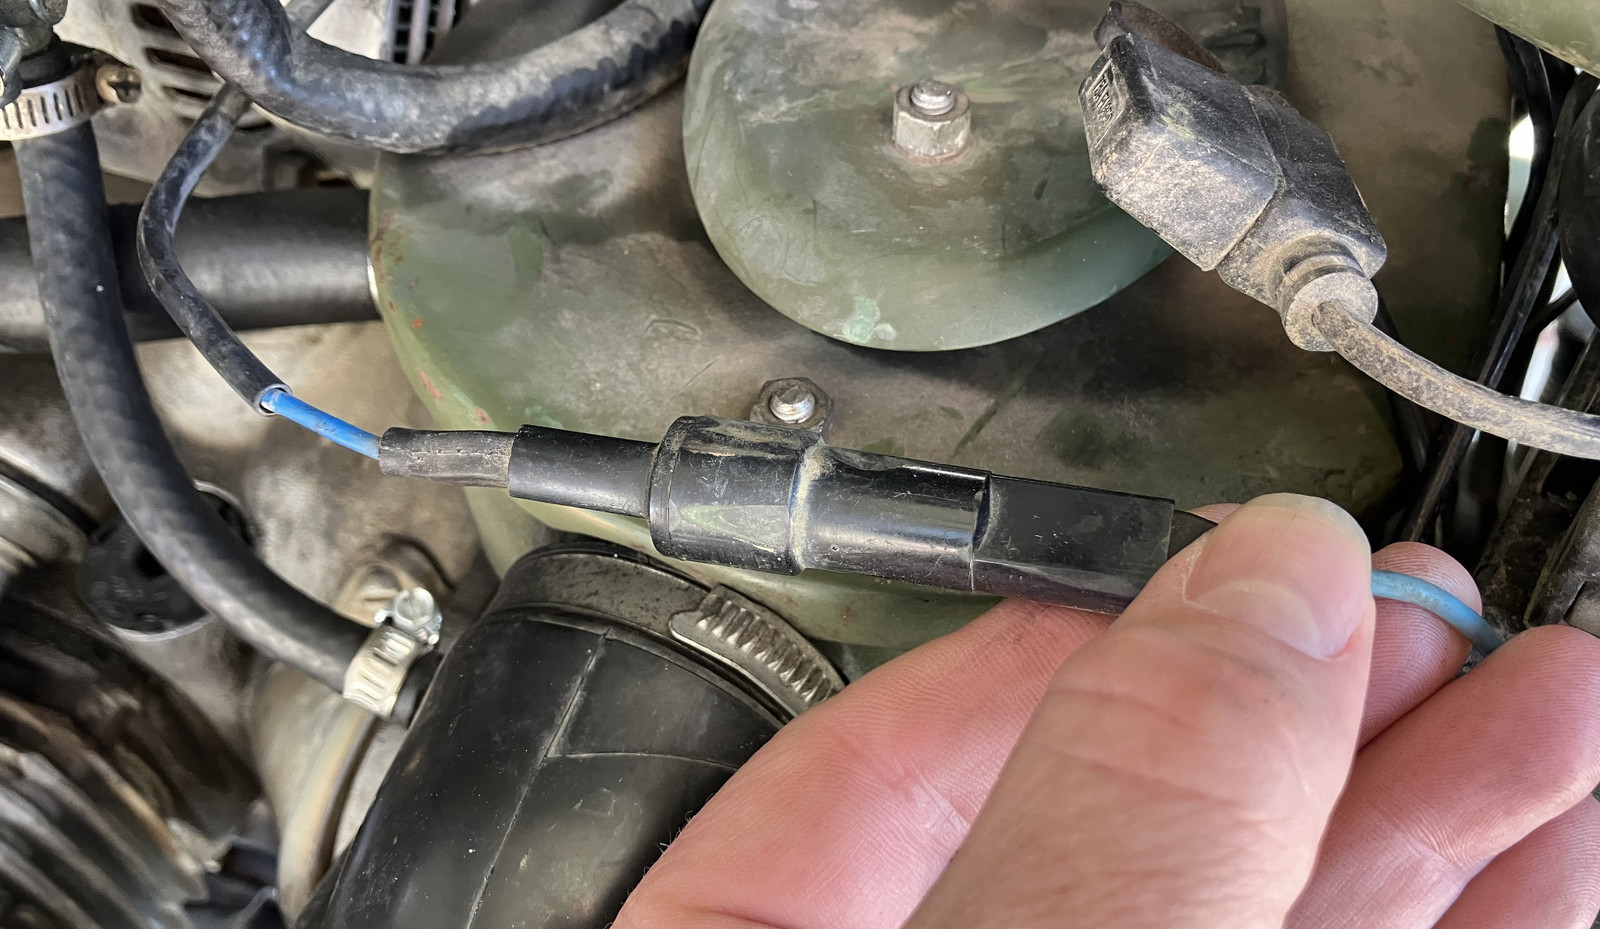
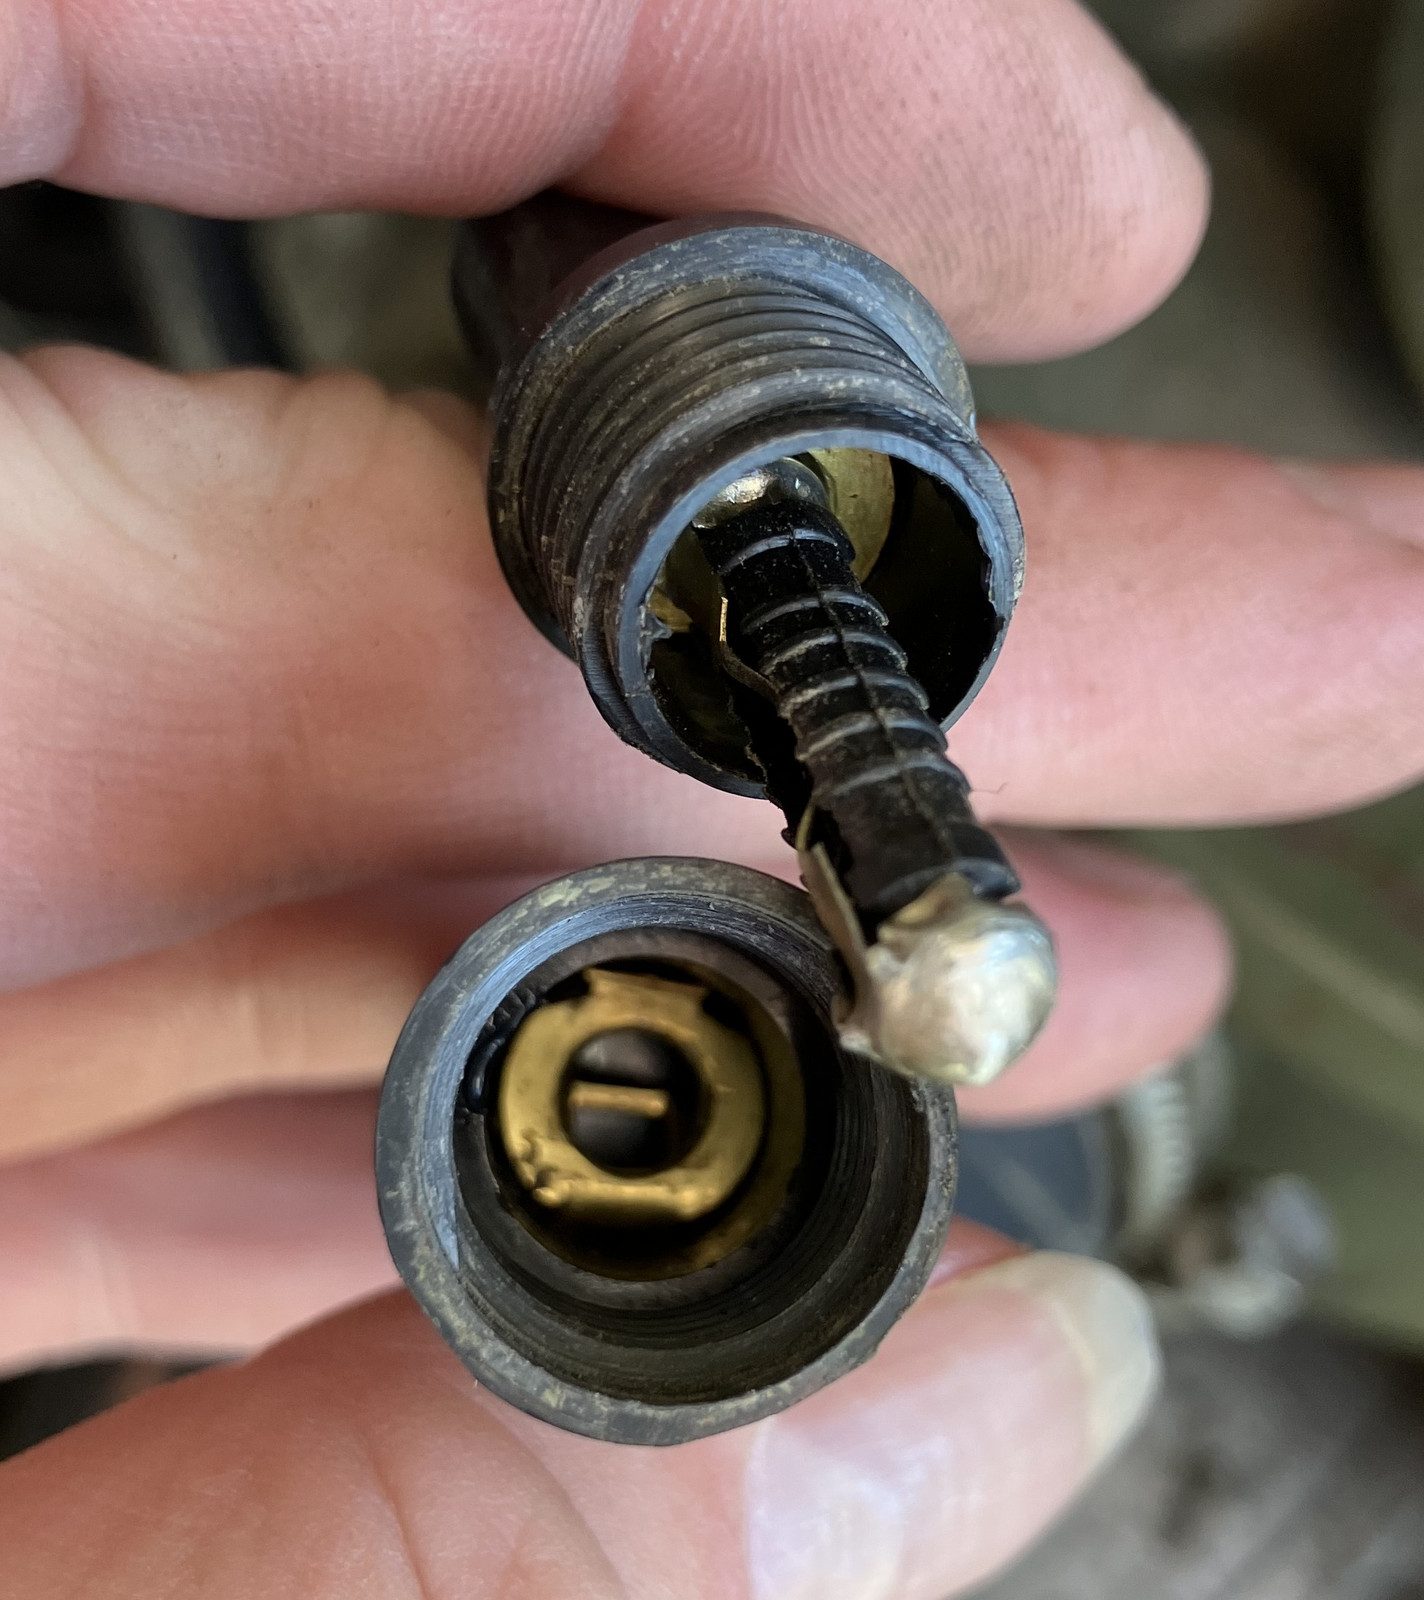
Unscrew it, the fuse pops out. This is a “European Style” fuse, or “VW Fuse,” or something like that, and they’re not great. They just sit in there with spring pressure. My light was flickering more than usual one cold morning, so when I got back, I pulled out my thermal imager with the bike idling and looked around. Sure enough, this fuse holder was running hotter than I’d expect for a good connection. Great, time to replace it!
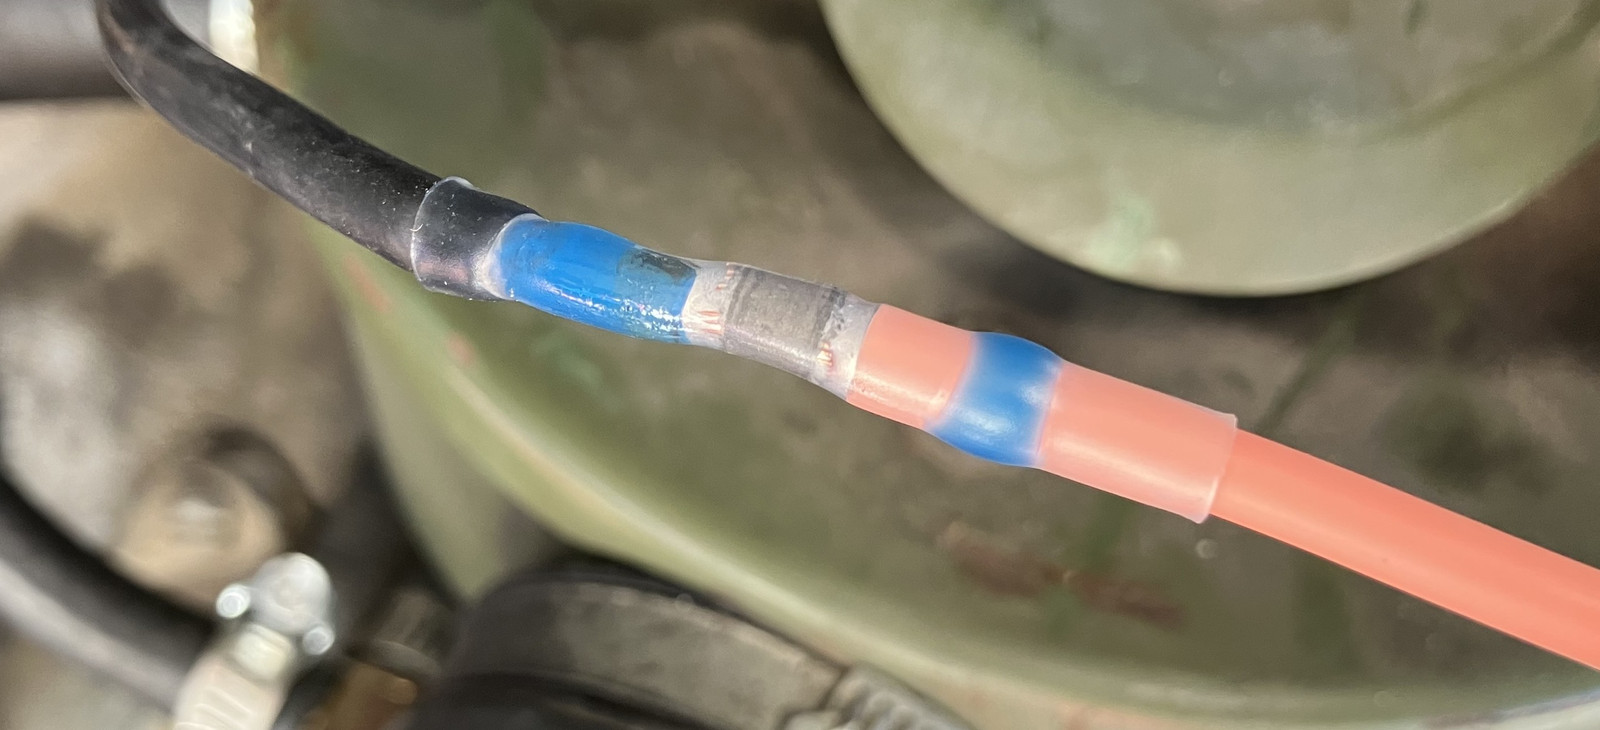
Auto parts stores have a selection of “inline fuse” things, so I picked one up, put a new ring terminal on it, and wired it in. I really like these little solder-core heat shrink joints these days, and I’ve found around 270C on a hot air rework gun does a fine job of melting the solder and shrinking the connections without melting anything or setting anything on fire. Temperature control is amazing!
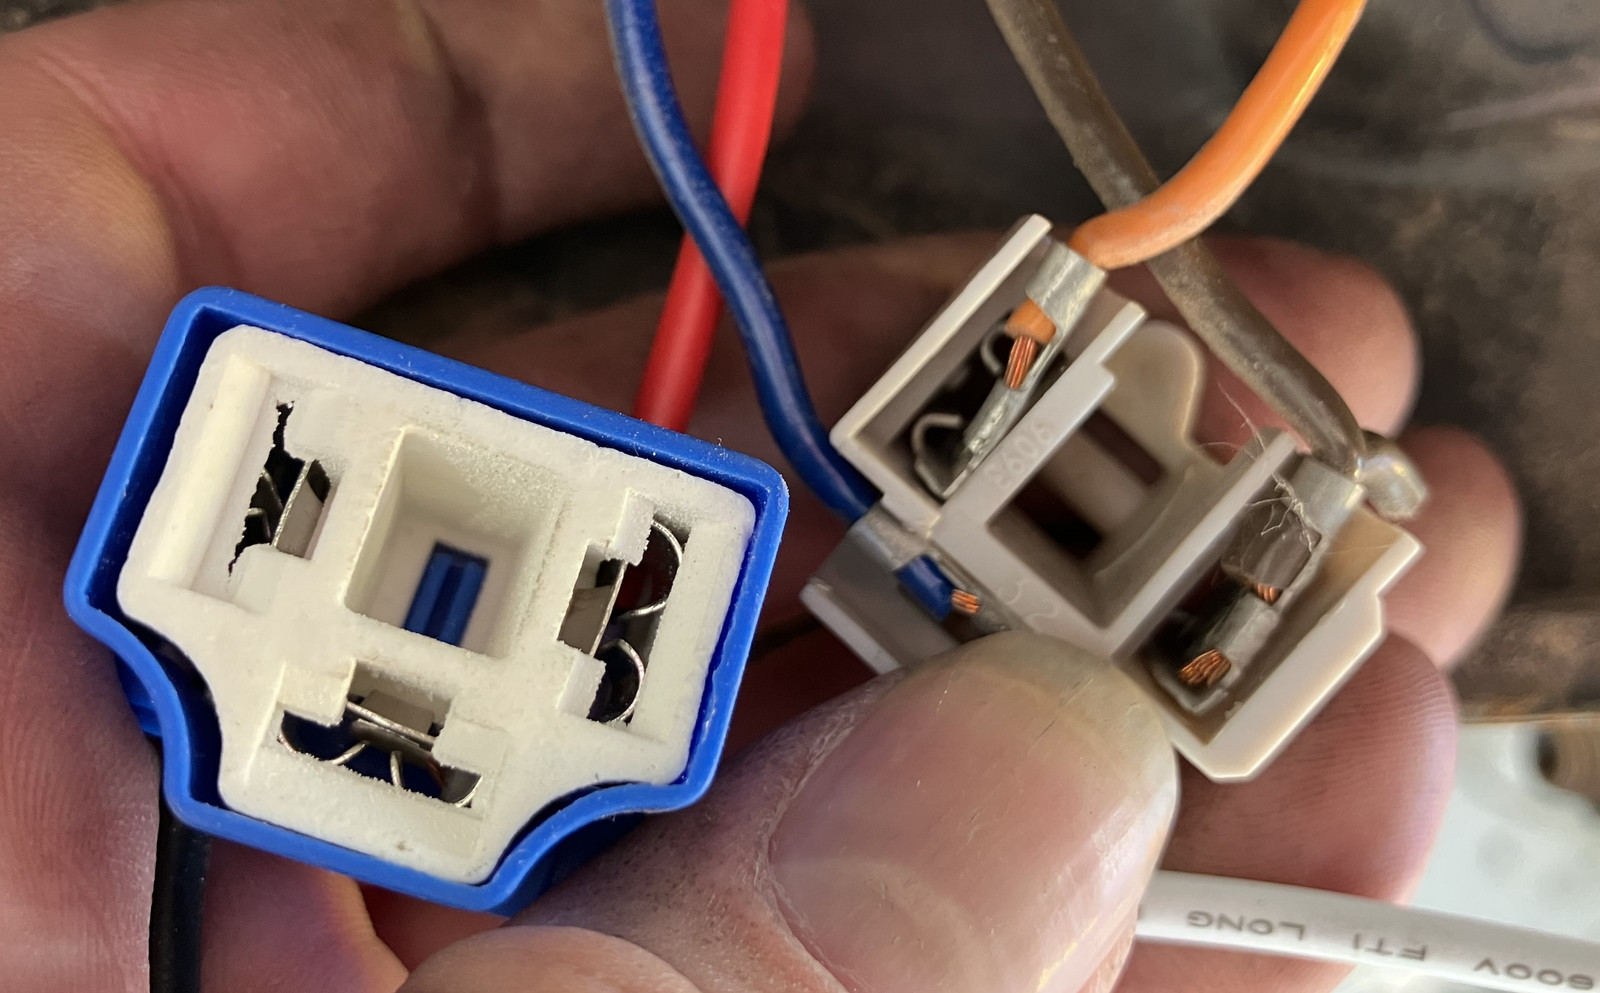
With the heat gun out by the bike, I figured it was a good time to put that ceramic connector in the headlight bucket. It’s possible that the connection up here was weak too. On the right, you can see the stock flimsy plastic connector that will melt under high current. On the left, a shiny new ceramic connector - with a plastic shroud. I’ll have to see if this has any trouble, but at least the connectors will stay in place. Again, this isn’t a hard swap, just connect same position connections to the new connector.
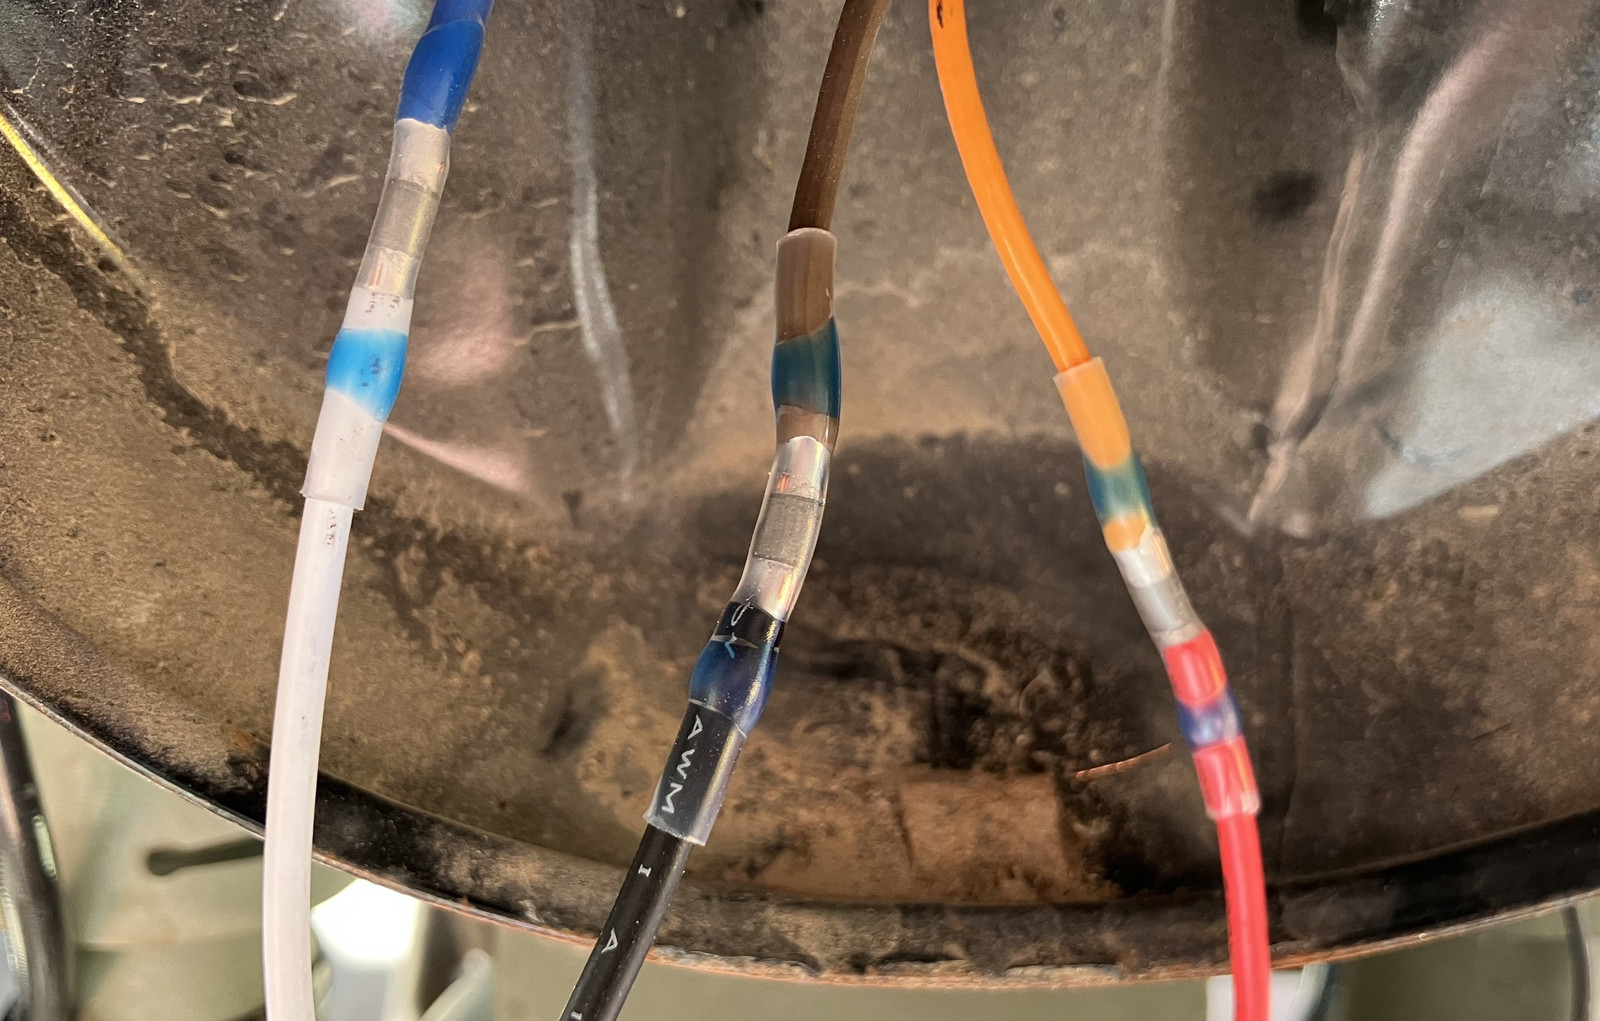
Hey, more solder connectors! On mine, blue joins to white, black joins to brown (this is ground), and red joins to orange.
That done, I plugged the headlight back in, and decided that for good measure, I’d check the voltage across the bulb. The wiring on the bike is a bit smaller gauge than I would prefer to see, but it works well enough. With the bike not running (so about 12.2V at the battery terminals - lots of lights and the engine not turning), I checked the voltage across the bulb, and found a rather disturbing 7.5 volts. That’s not okay at all! I expect some losses in the system, but I should be seeing north of 11V at the headlight on the wire gauge and relays I have. Well, there must be another bad connector somewhere.
I pulled the headlight bucket off and, as I suspected, found another connector behind there in the rat’s nest of wiring that lives in the dashboard. This must be the problem, right?
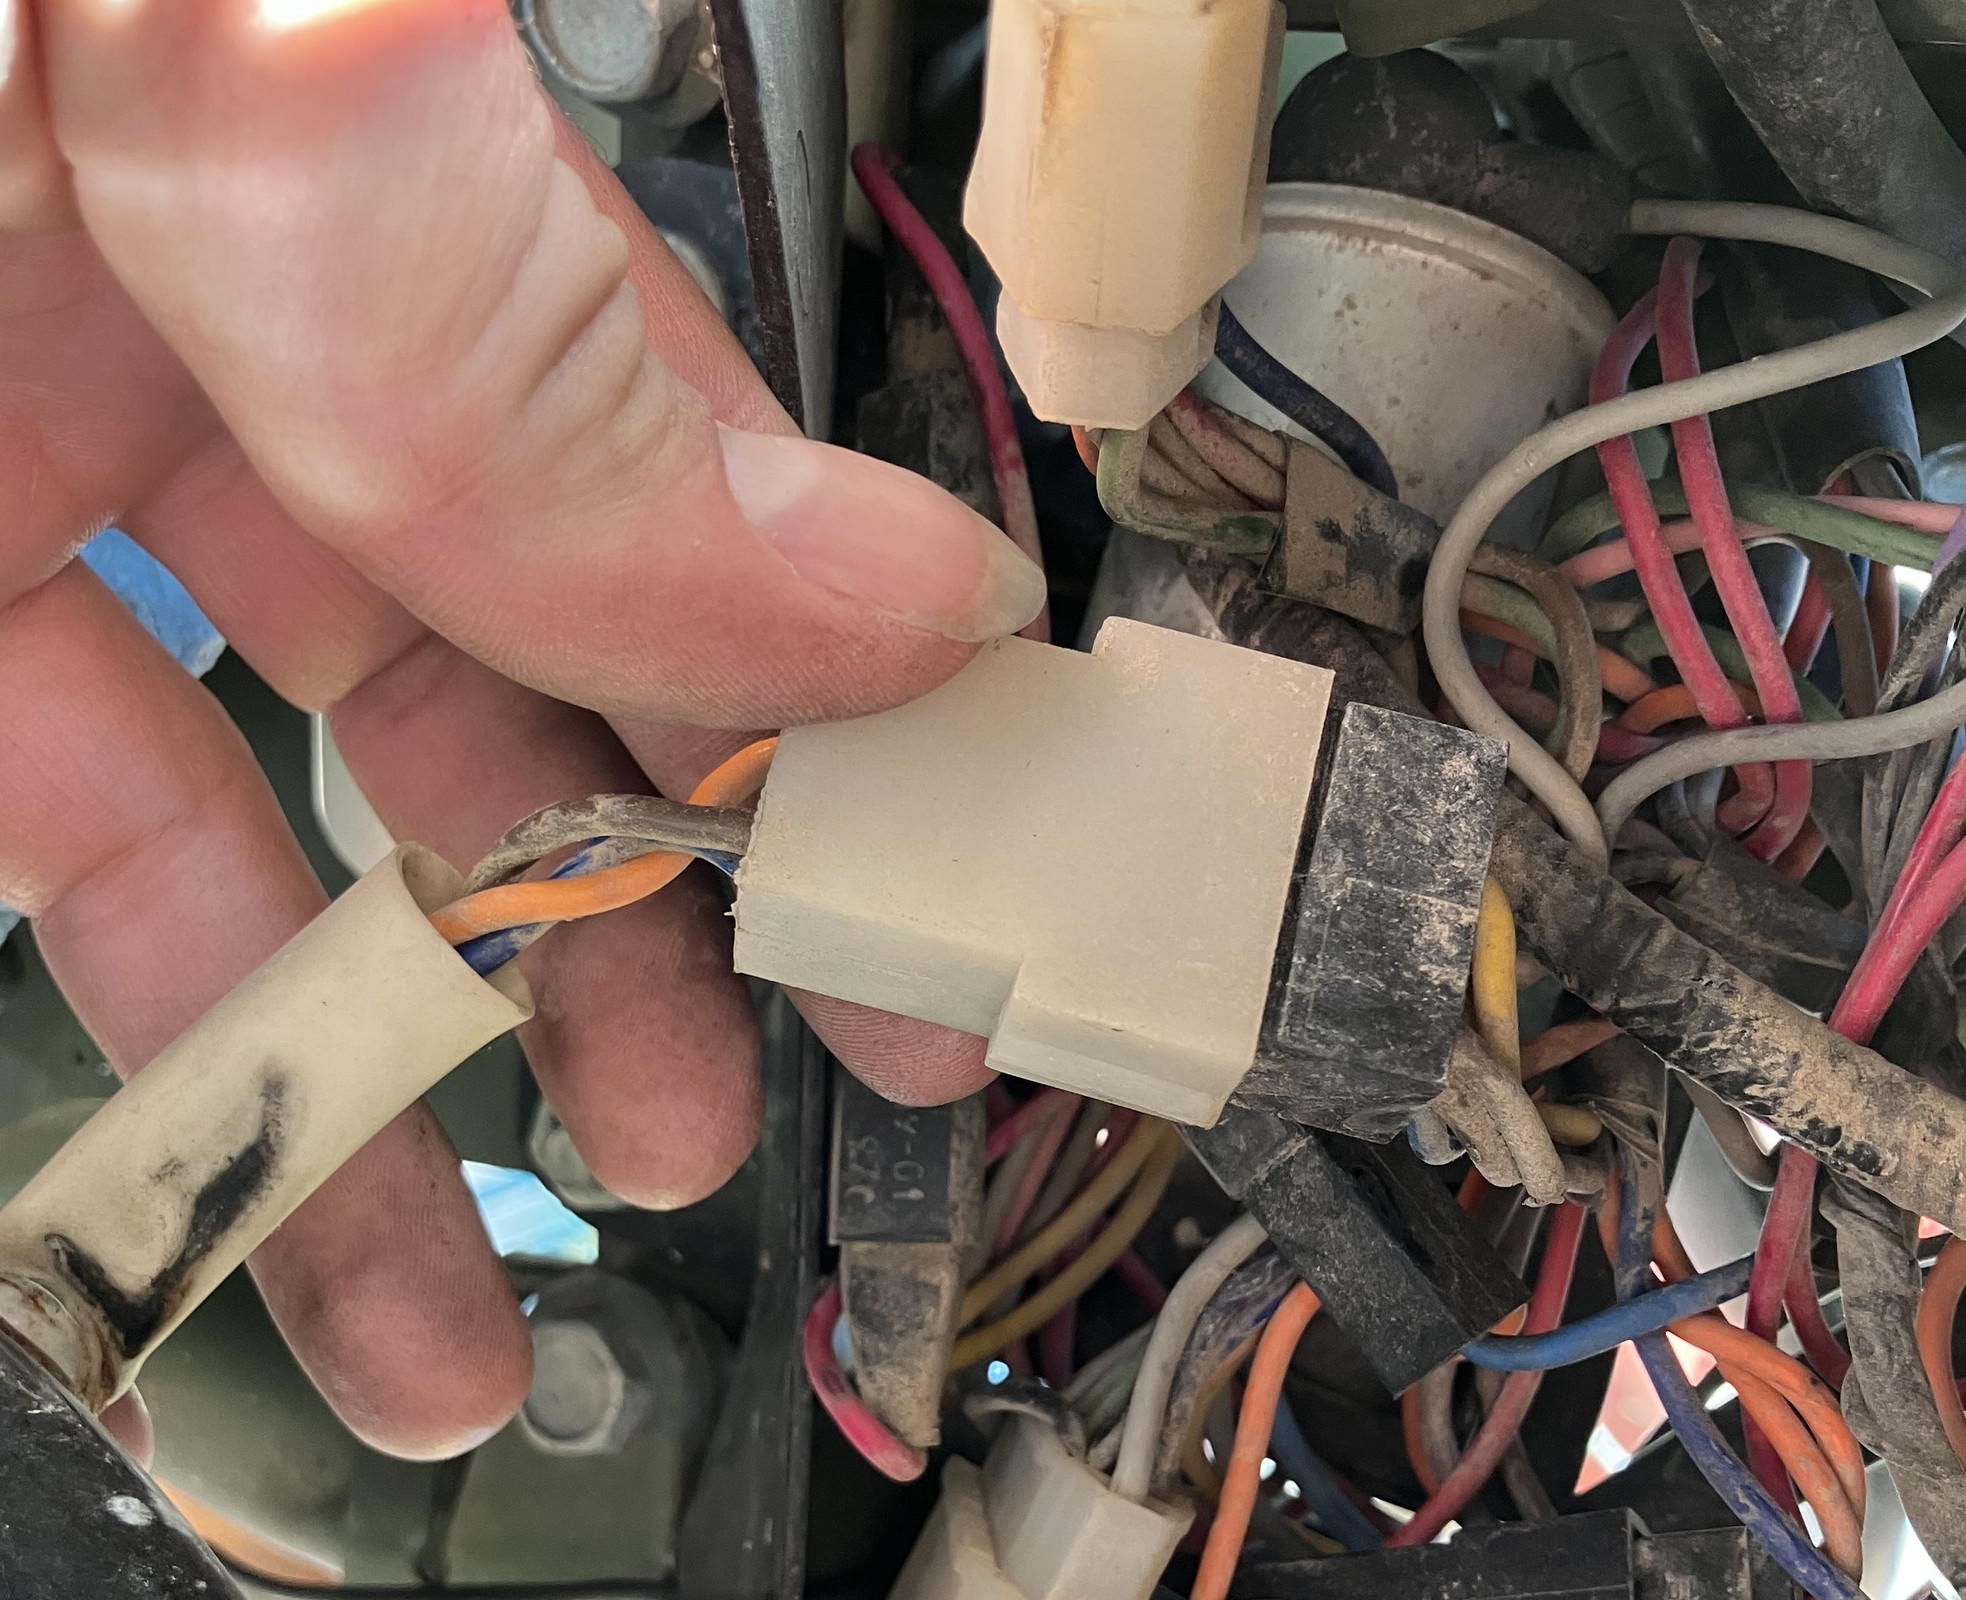
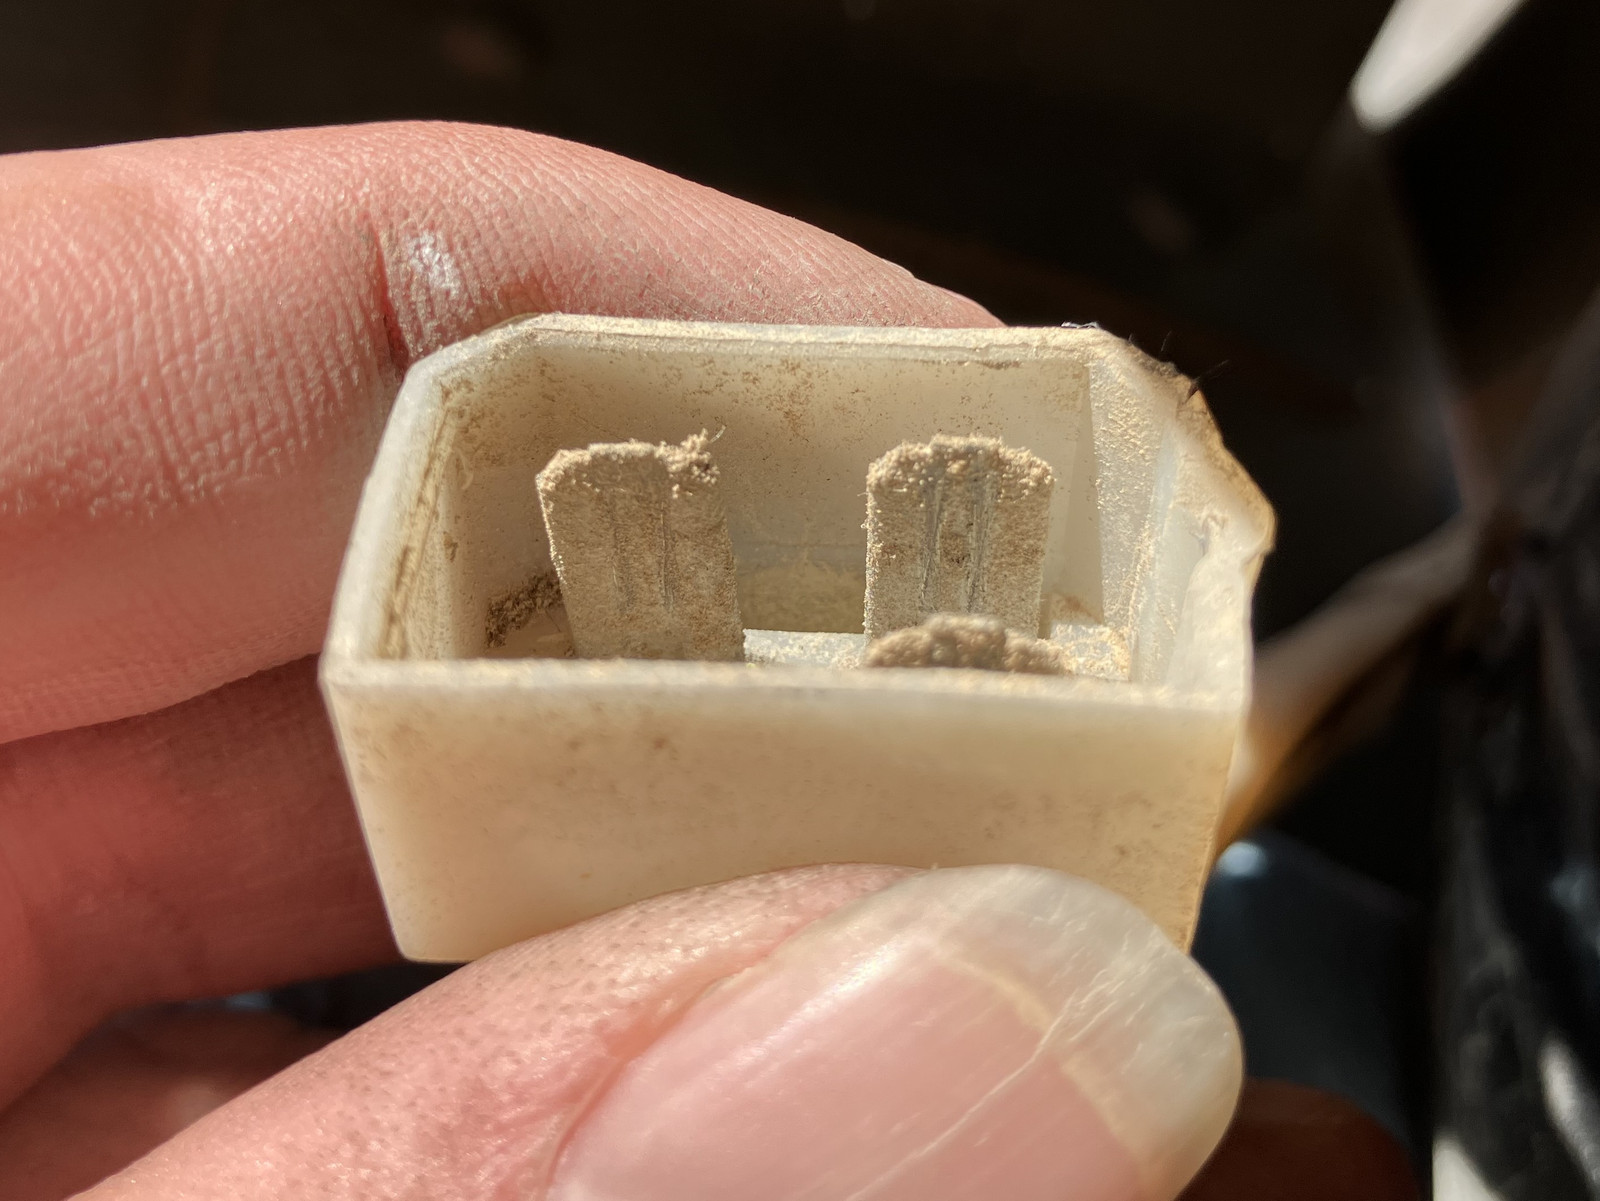
Pull it, and, gross. Dusty corrosion, some melted plastic. Well, I took my trusty voltmeter out and tested things. This was not the problem - though I cleaned it up anyway while i was in there.
This is where things got weird, and I don’t have any photos because there wasn’t much to take photos of. With no headlight load, I was still seeing 7.5V at the connector in the dash bucket - and that makes no sense at all (a high resistance connection will show normal voltage unloaded, and only drop under load). I started probing around in the wiring - maybe a relay is bad, but the immediately previous relay showed a good 11.7V or so to the engine (which happened to be the nearest ground). No problems there. I started measuring wire resistance, and was finding things in the range of 0.5 ohms - and I don’t really trust multimeters down that low. But it didn’t seem to be a problem in the wiring between the control relays and the bulb harness.
Eventually, I started poking around at the different connections. Voltage between the bulb hot and bulb ground terminals at the connector was 7.5V (unloaded), but voltage between the bulb hot and the engine case was 11.7V or so - and that, if you’ve not had the pleasure of troubleshooting automotive electrical systems, means you’ve got a bad ground somewhere.
And, indeed, measuring the resistance between the ground terminal at the headlight bulb and the engine, I had a whopping 40 ohms. That’s not the slightest bit okay! So, now, the problem is just figuring out where on the bike the faulty ground connection is. The dashboard is grounded through the wiring harness, but fortunately the wiring harness isn’t exactly complex, and there’s really nothing in the way of “fairings” or “any covers at all on anything” on this bike. It still took me close to half an hour to go from “I have a bad ground!” to “Where the heck the ground connection problem is.” If you’re troubleshooting bad grounds on a Ural, I’ll help you: It’s on top of the engine, on the right side (sidecar side).
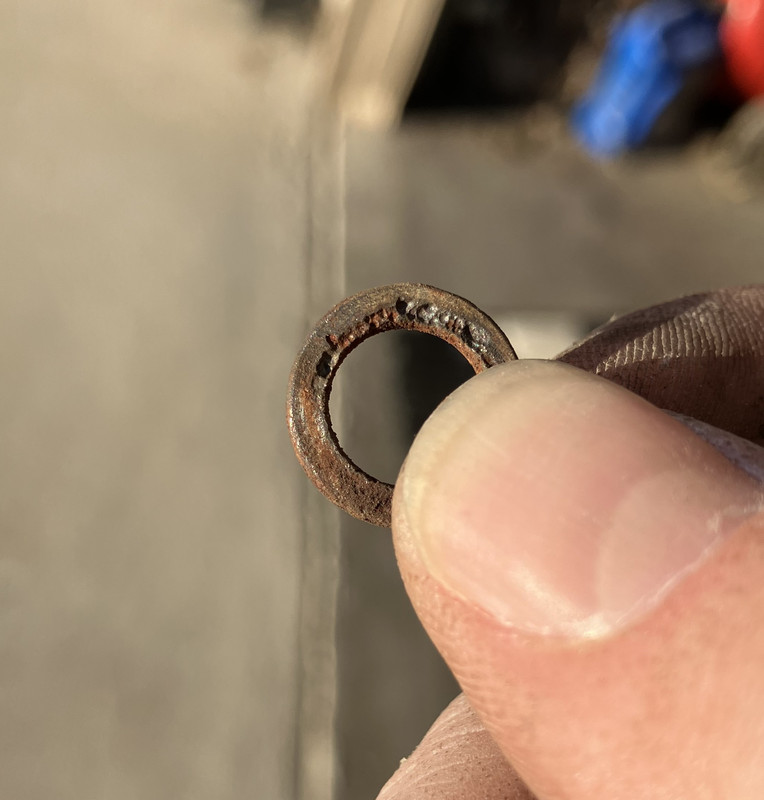
Mine… didn’t look very good, once I found it. Measuring resistance to one of the ring terminals gave the expected low resistance, but going to the engine case gave me the high resistance, so here’s the problem! Simple enough, pull it off, and… wow, it’s very loose. Not something you want in a ground.
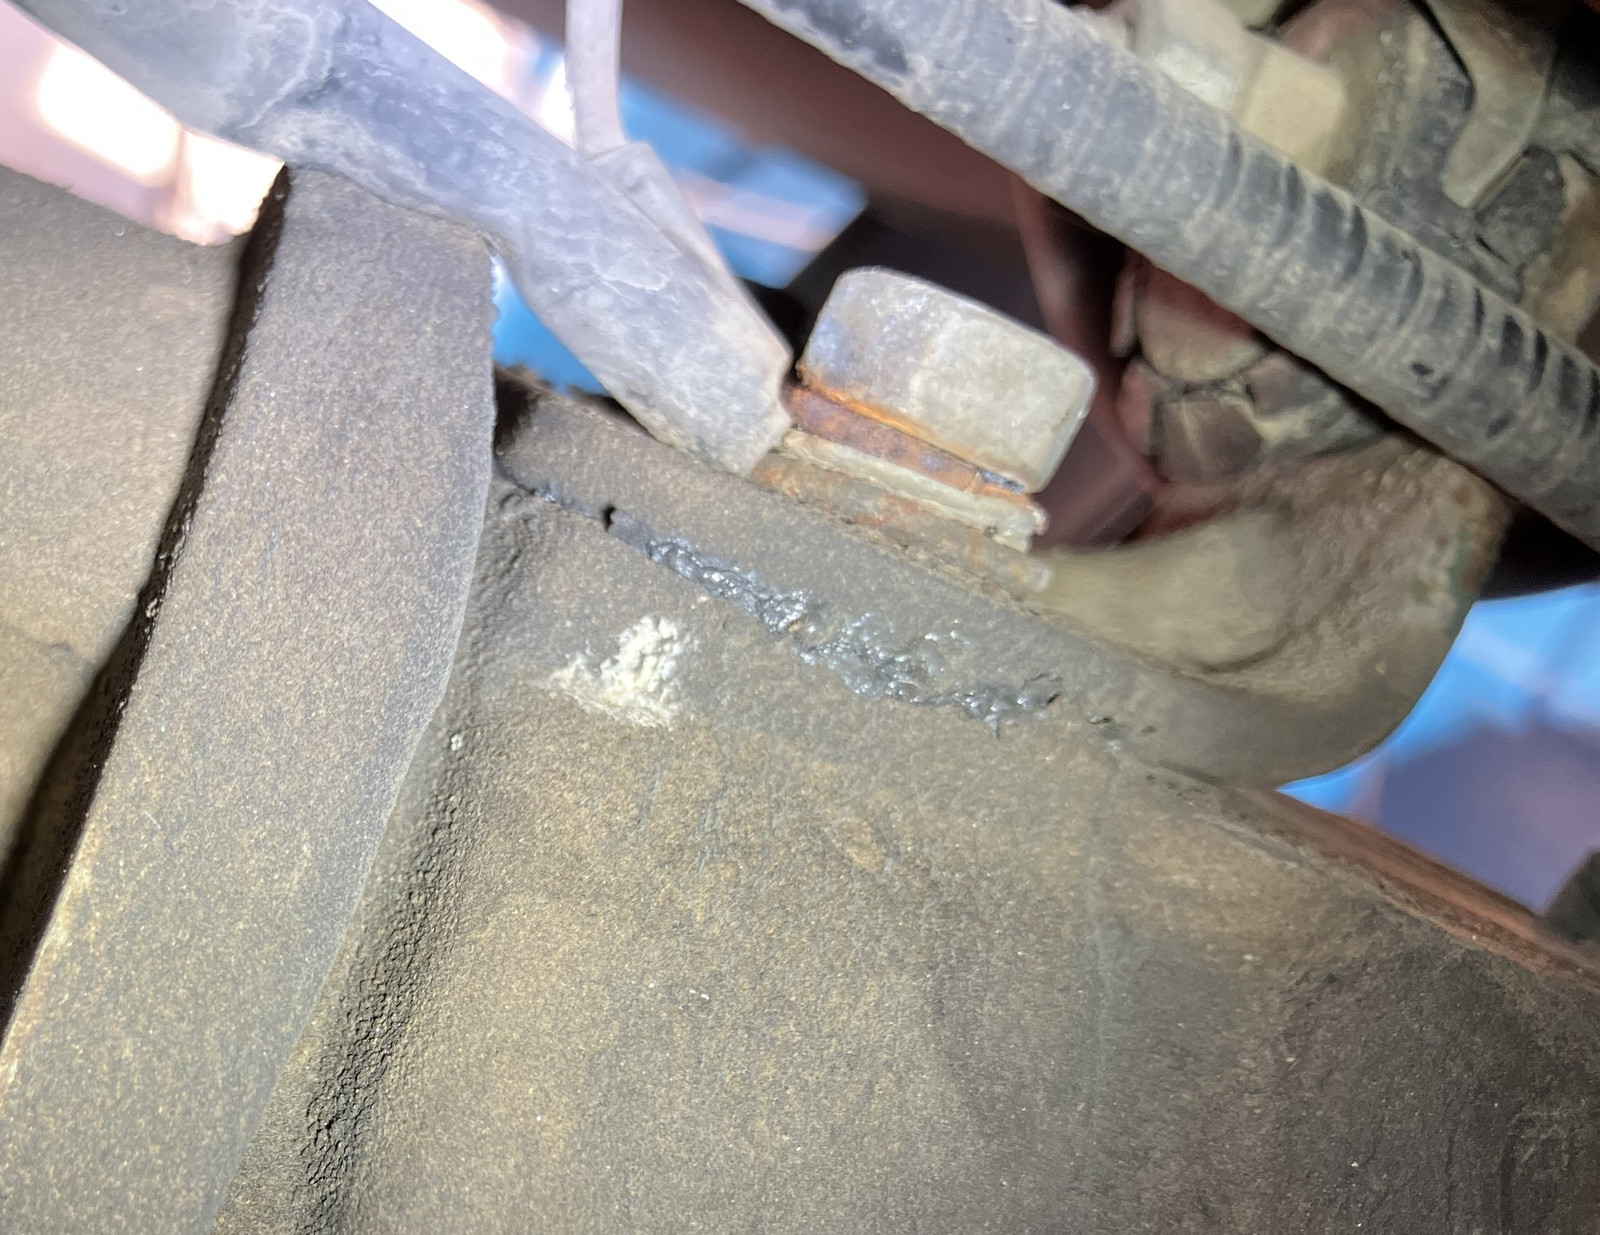
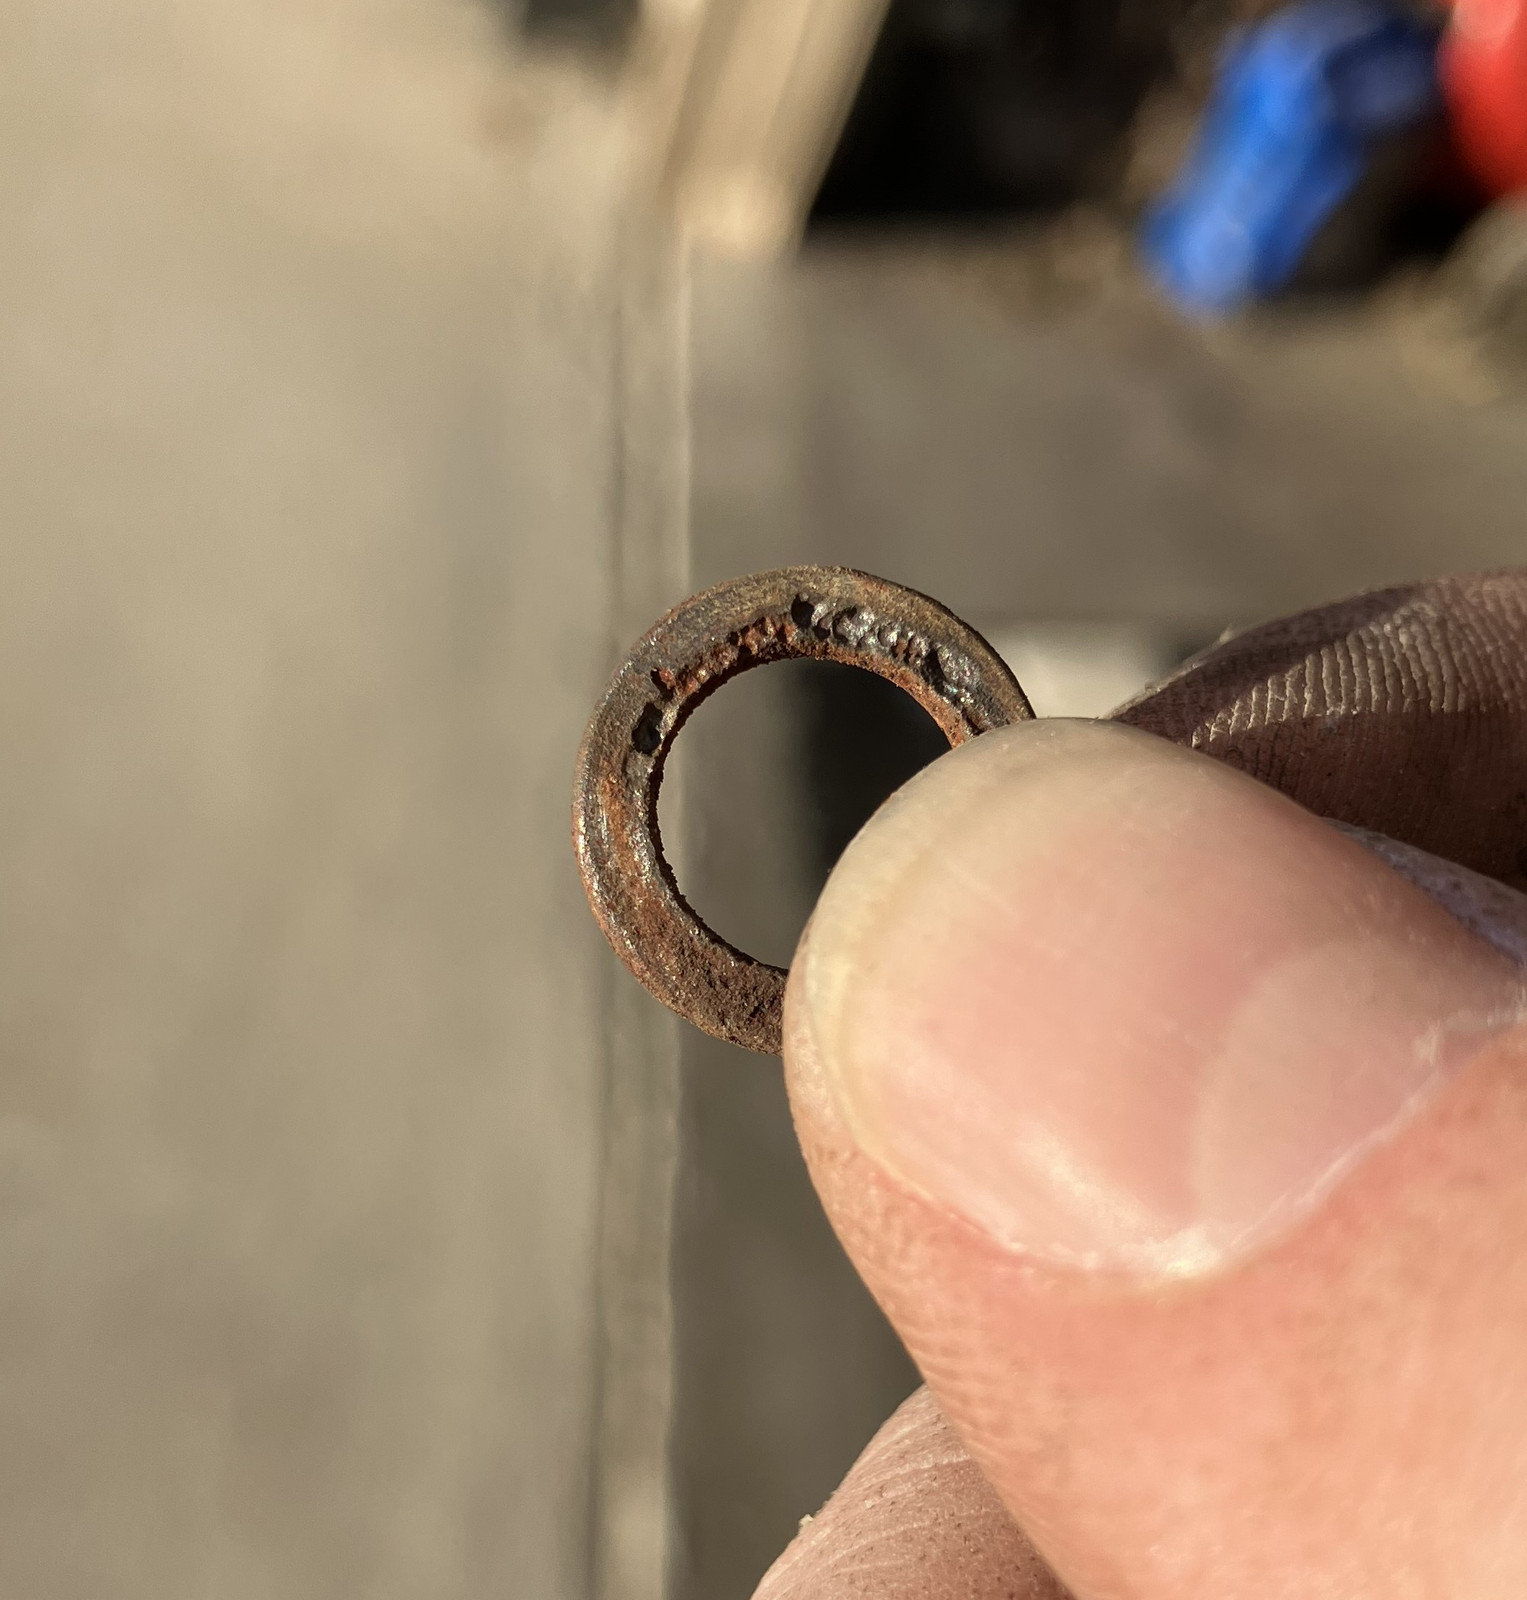
This is a washer in that stack. That pitting is from arcing. This connection has been arcing for a very long time in order to get that depth of damage. The whole pile of stuff is rusted, so I spent a while with some sandpaper and a file, cleaning everything up. I can’t find my CorrosionX right now, so I’ve got another can on order, and that’s a good idea to do for something like this too.
Anyway, the end result of tracing down, cleaning, and fixing the ground connection is that I now have a solid 11.5V across the headlight terminals, with the bulb installed and running! The bulb is very noticeably whiter in color (it was a yellowish-white before, now it’s a proper halogen white, which is still nowhere near “blinding 5000K LED white”), and the most noticeable difference is that putting my hand in front of the bulb feels a lot more heat! The entire lighting system is substantially brighter now, which is welcome as we come into winter!
Of course, having had the entire headlight assembly apart, it needs to be re-aimed. As it turns out, I prefer headlights aimed rather higher on a motorcycle than other motorists seem to prefer (even though they’re in a jacked up truck with daylight LEDs that blind me back). My headlight aiming system is rather simple. I go out to a dark parking lot at night and adjust the light to something I think is reasonable, with the cutoff slightly below the horizon. Then, every third time a car flashes me about my low beams, I reach up and tweak the assembly down slightly (I deliberately leave things loose enough that I can adjust it by hand, but so it won’t self-adjust). Eventually, I end up with something that is lower than I prefer, and isn’t blinding other motorists, and I tighten it down. I’m not sure this is the best approach to headlight aiming, but it seems to work well enough…
So, About That 90/100W H4…
After a week or two of enjoying the light output, having far more confidence in my electrical wiring, I decided to try the 90/100W H4. Oh My, Yes! I have modern lighting on the Ural now! The low beam is bright enough that I can still see (mostly…) the side of the road when a lifted truck with a daylighter white LED setup comes towards me, and the high beam… oh, the high beam. It blasts forth a photon tunnel through the night. I can see reflective signs glowing a mile away. I can see closer signs reflecting during daytime on a cloudy day. It is so, so far beyond what I had before, and I will say it is absolutely worth whatever upgrades you need to run this sort of system on your Ural!
But What if I Add More? Spotlight Upgrades
Light on a motorcycle is like a Spuddie. Enough just isn’t enough! With the headlight finally sorted out, I began considering the sidecar spotlight. I just don’t use it at all - a tight pencil beam of light doesn’t solve any problems I have in riding. However, there are kits to swap it around from a tight pencil beam to something rather more well formed for road lighting. Another H4 Hella assembly showed up in the mail, and I set about swapping some things around over there.
I have no complaints about the build quality of Hella lights. They’re not cheap, but they’re popular for very good reasons. You get a solid glass lens (it won’t fade and yellow with age, though it does tend to collect bugs), with a stout metal reflector. The whole thing holds up well and you can put an awful lot of light into one without having any thermal issues. I have a lot of respect for the people who design lenses like this.
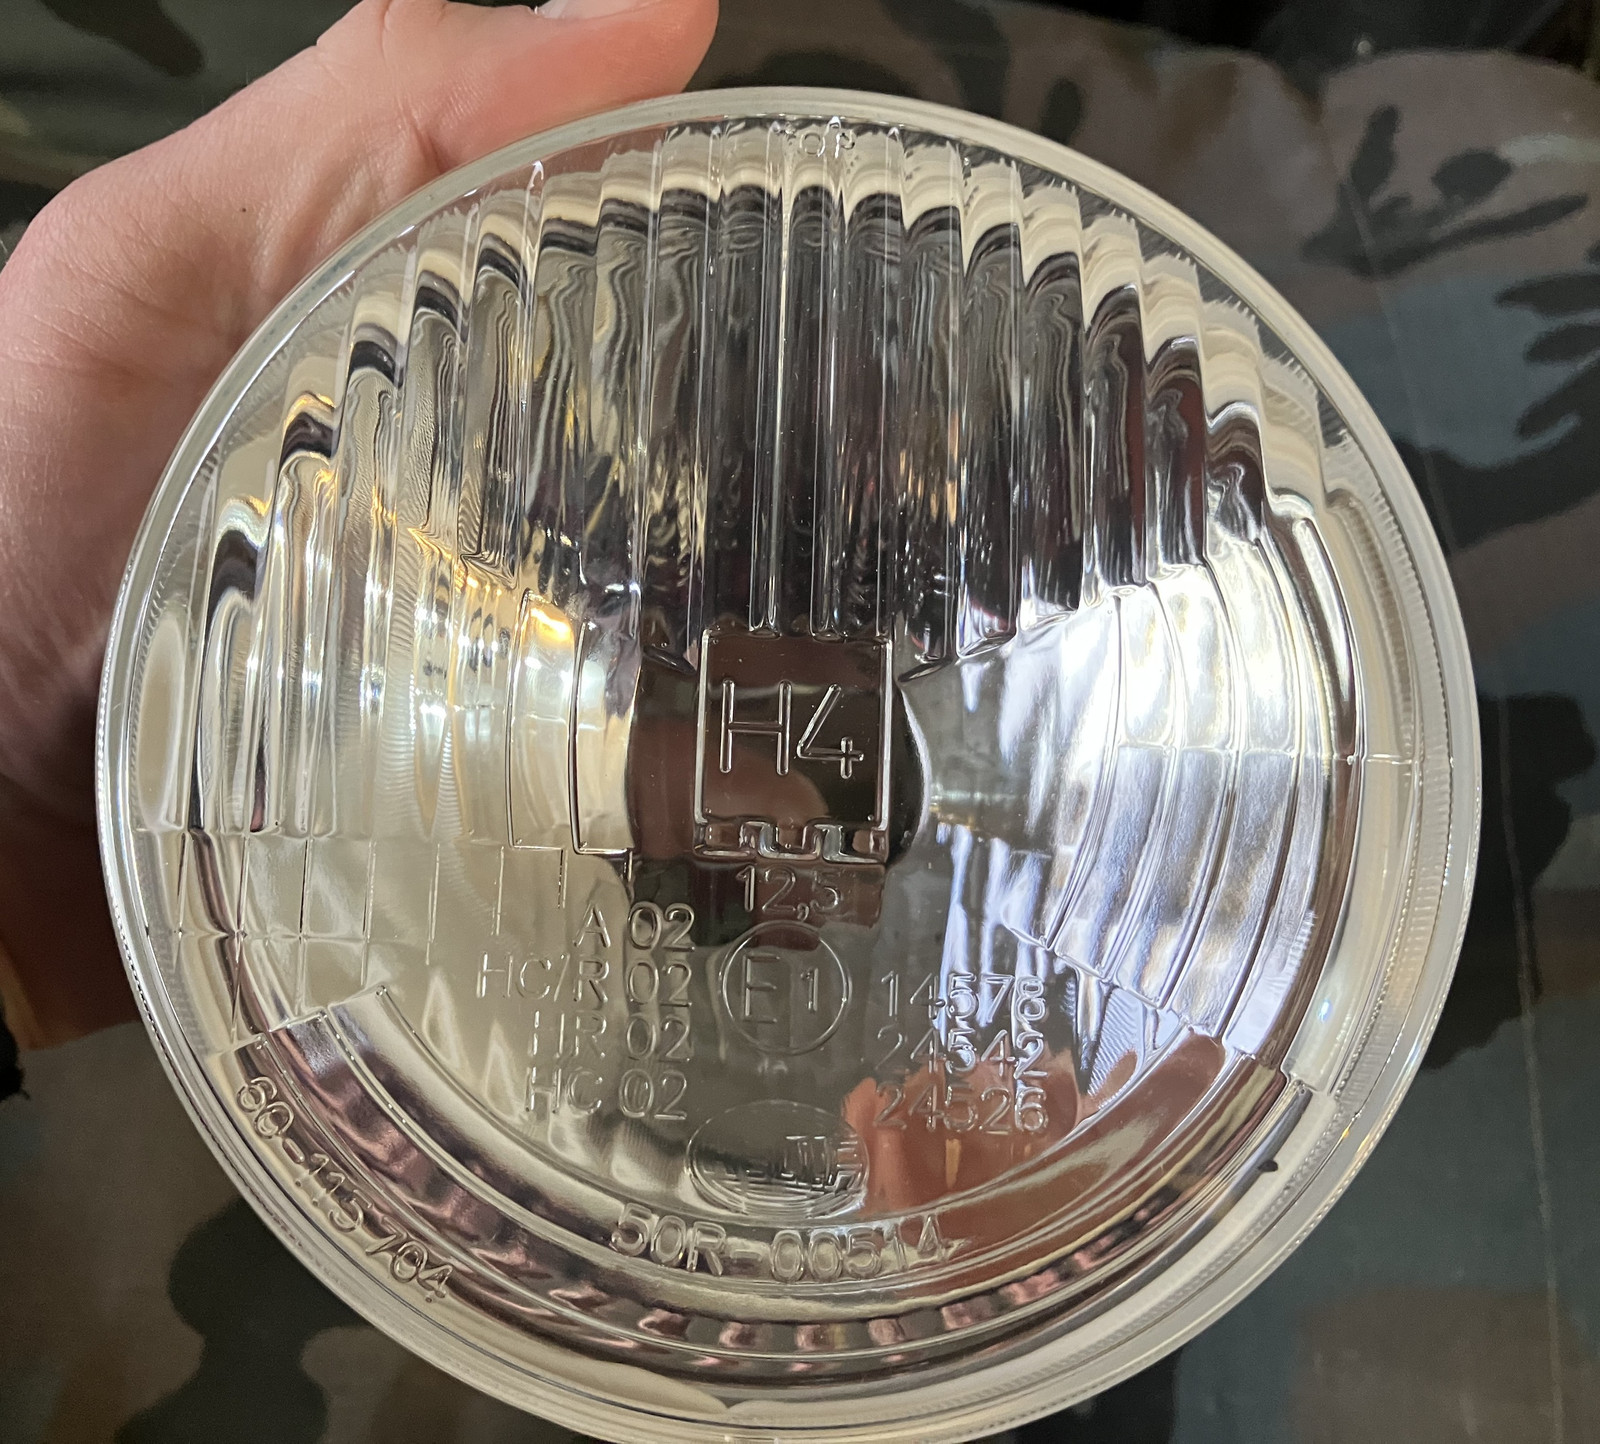
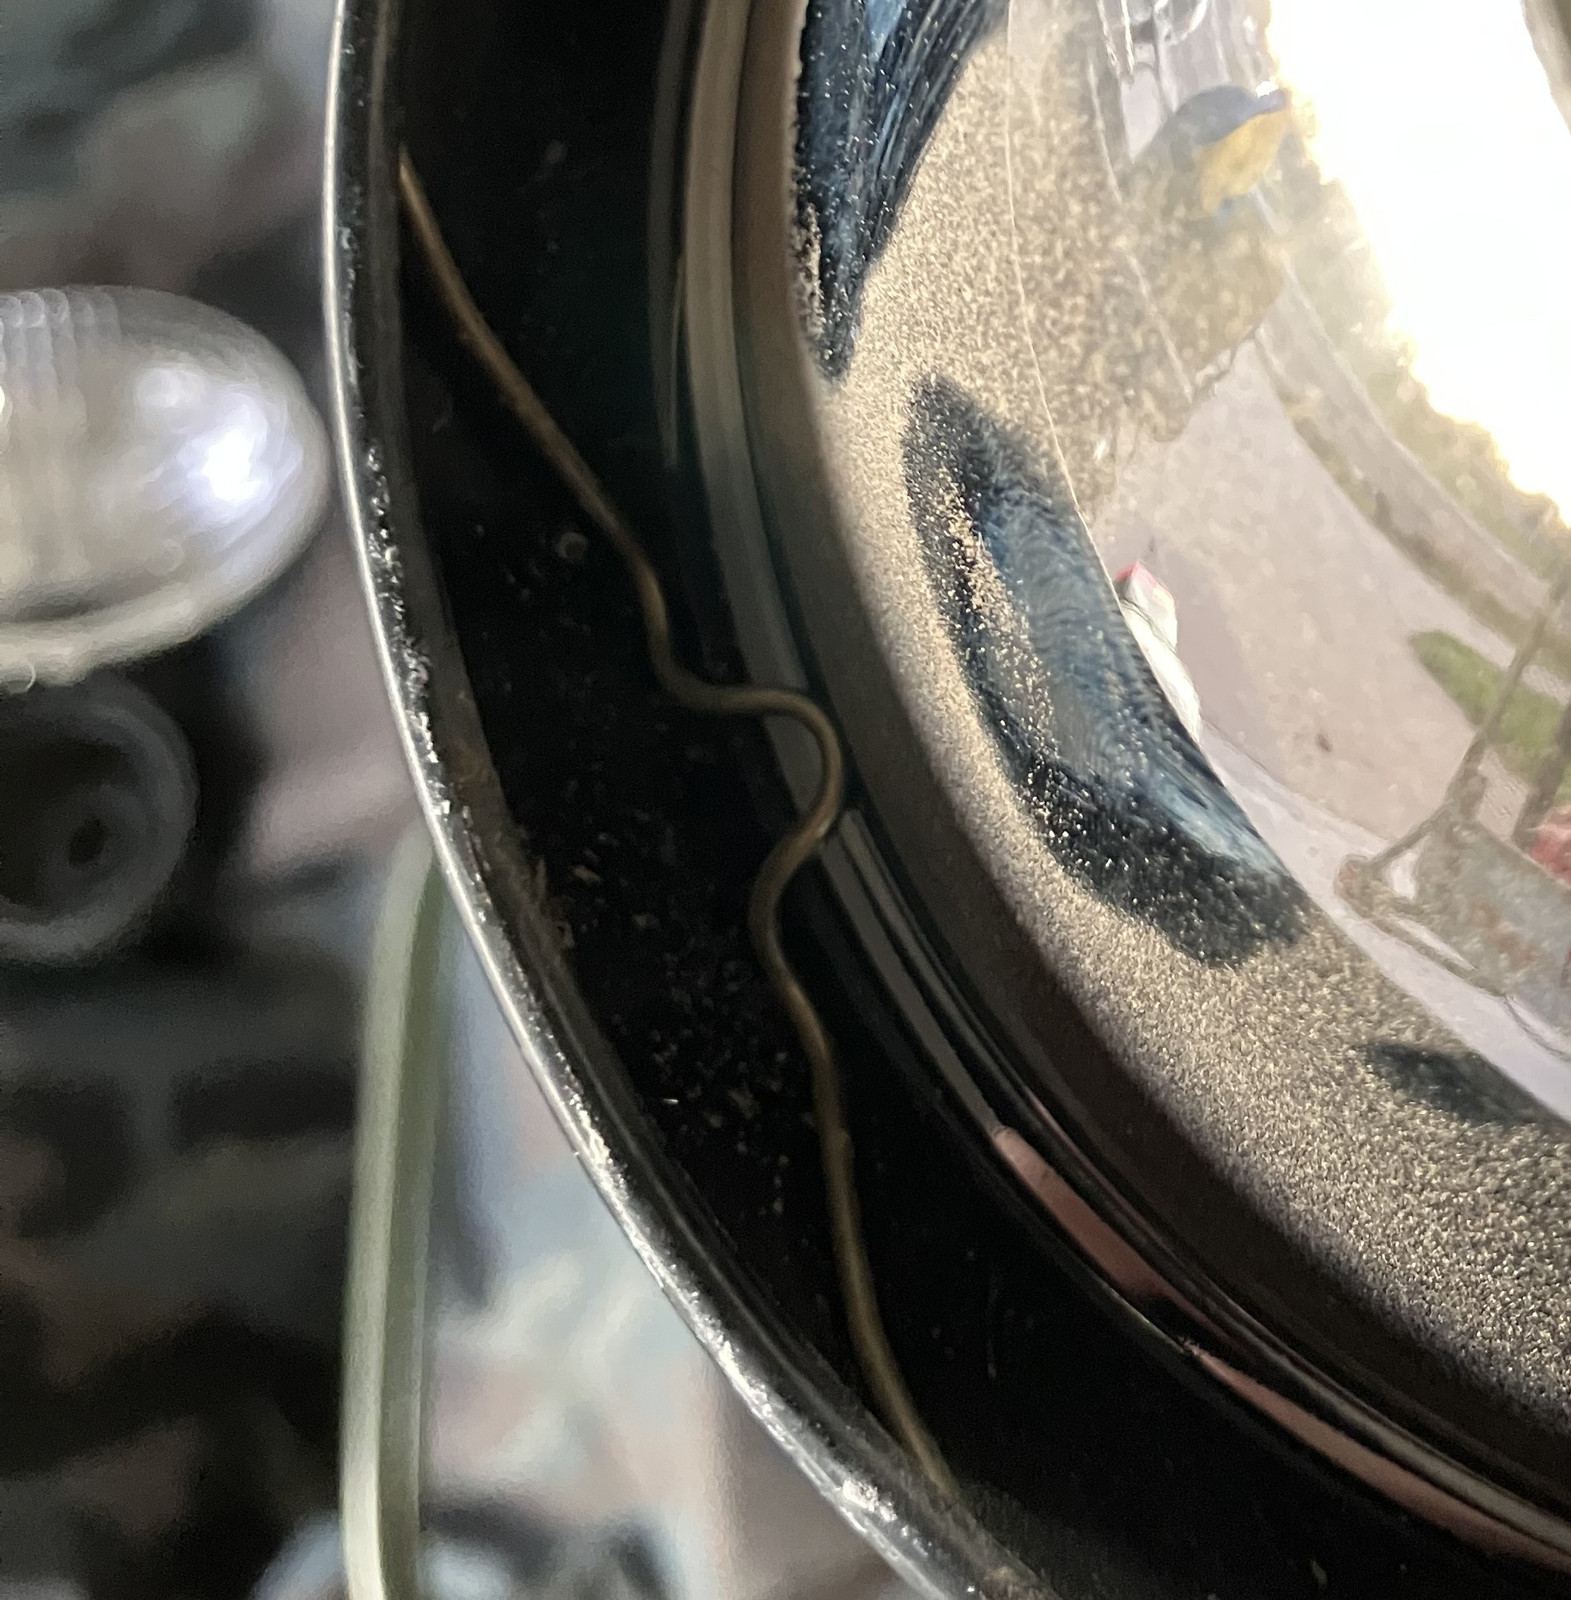
The sidecar light is held in with the same spring clips as the motorcycle headlight. Pop them out, swap the reflector, and put things back together. It is worth noting here that the lens can rotate in the various holders - so if things don’t seem to be properly aligned rotationally, just rotate the lens as needed. A parking lot in the middle of nowhere without much lighting is great to really dial in your headlight alignment.
At least on my bike, the spotlight housing contains two wires, both black. The one going to the housing is ground, and the insulated one is hot. Neither one fits properly on a H4 headlight terminal, but that’s fine, because I’ve got more planned. I want to be able to toggle high and low beams in the H4 bulb! Is this useful? I have no idea. But it’s easy enough to do and seems like the sort of thing I should do if I’m going to be putting a high/low beam bulb in my sidecar light.
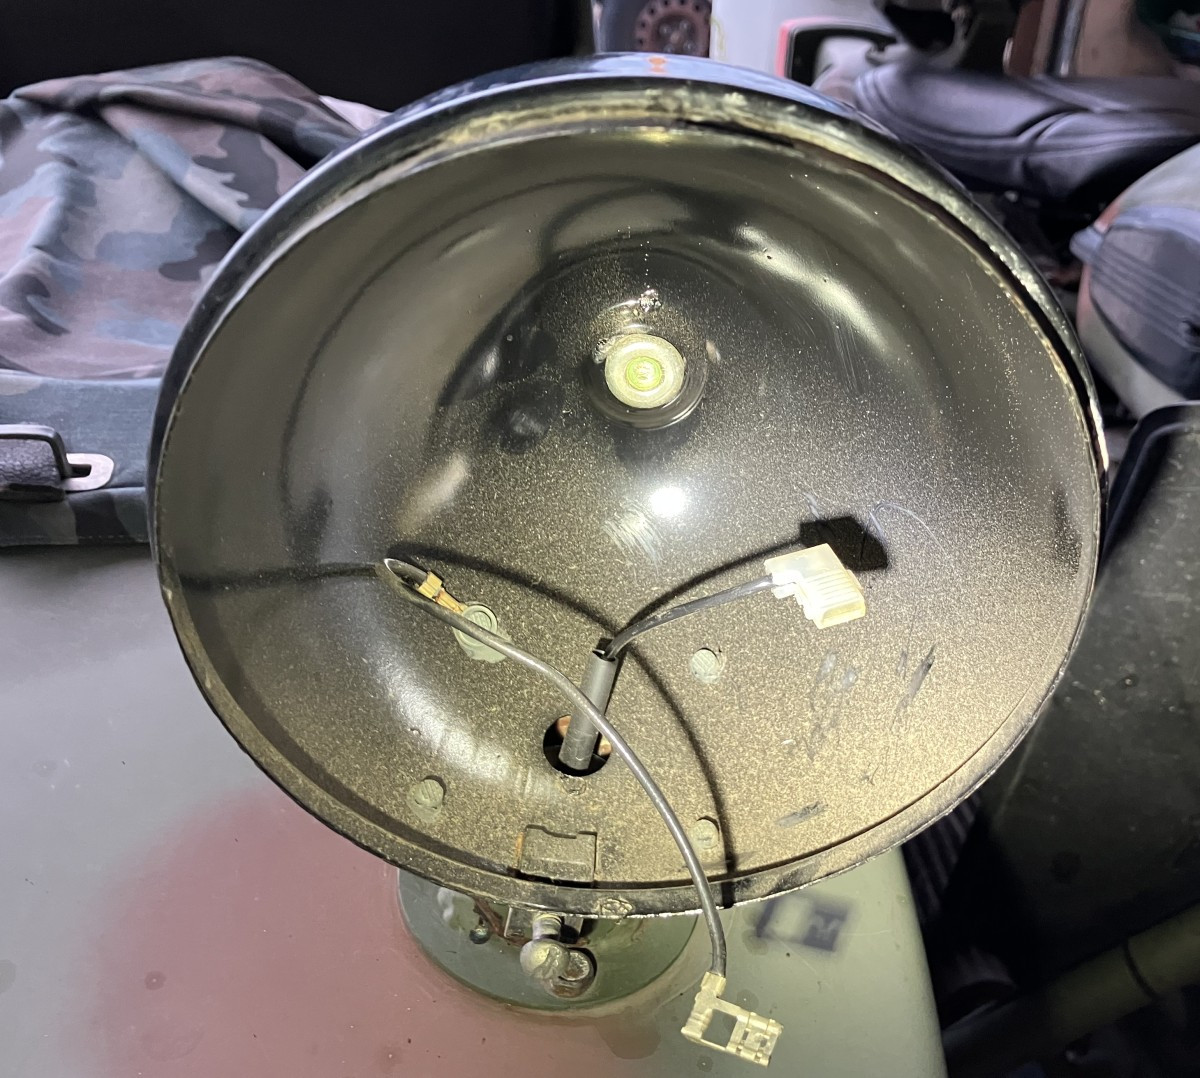
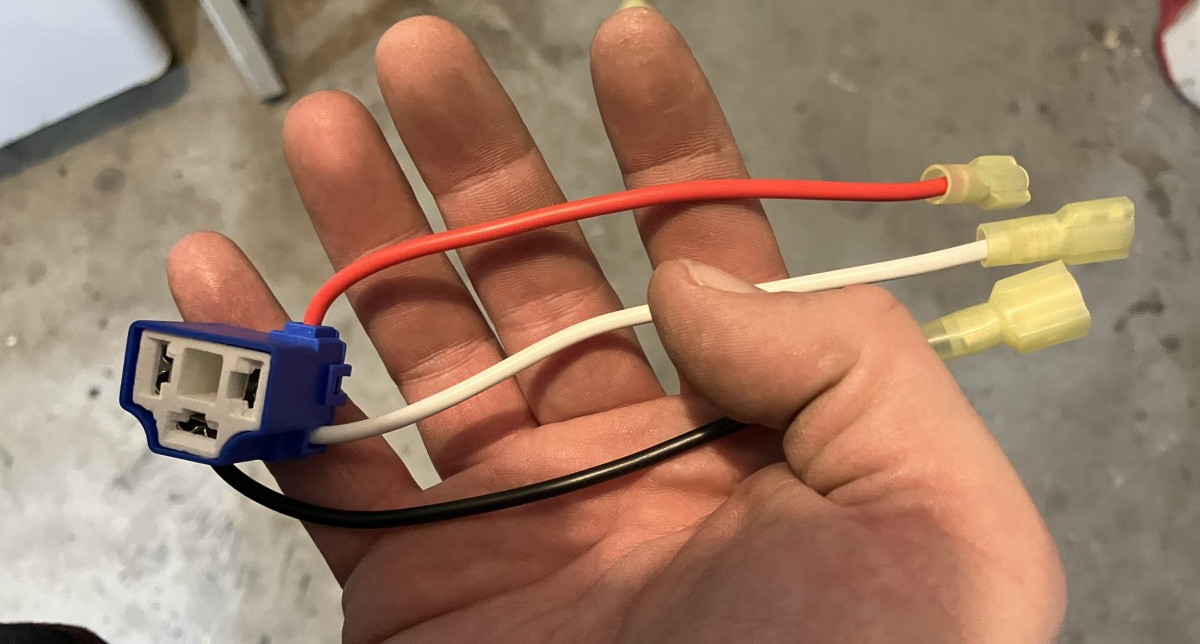
I found a reasonably capable single pole double throw switch and set about adapting the system. A few spade terminals found their way onto my second H4 connector, which will handle far more heat than I plan to run through this spotlight.
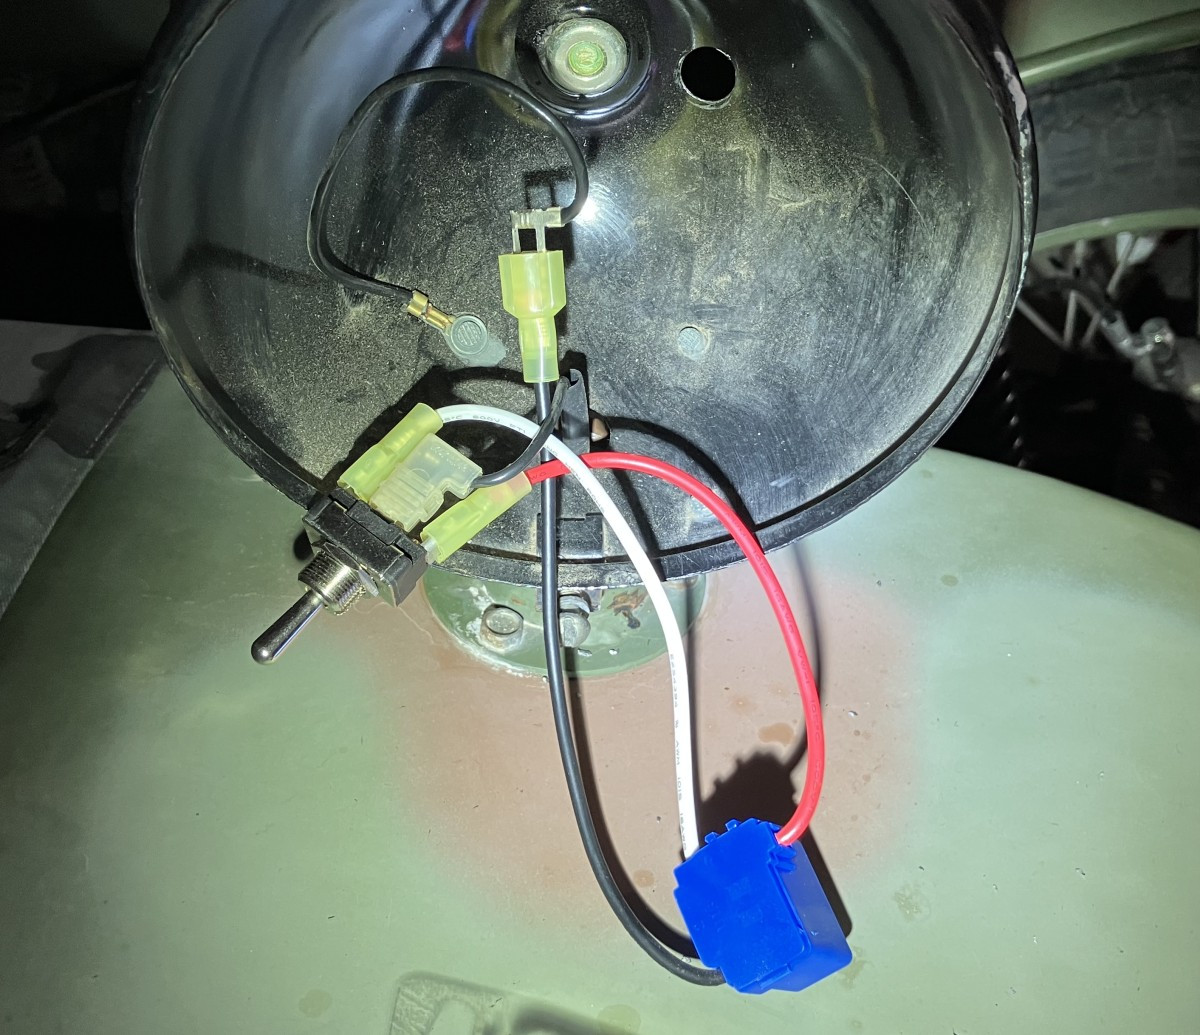
I added a 1/2” hole to the back of the spotlight housing for my toggle switch and wired things up. Hot comes into the switch, and the high beam/low beam wires come out into the connector - which then grounds to the existing ground (and I’m fairly certain this grounds through the friction fit between the spotlight and the mount for it - or maybe through the spring - in any case, something sketchy).
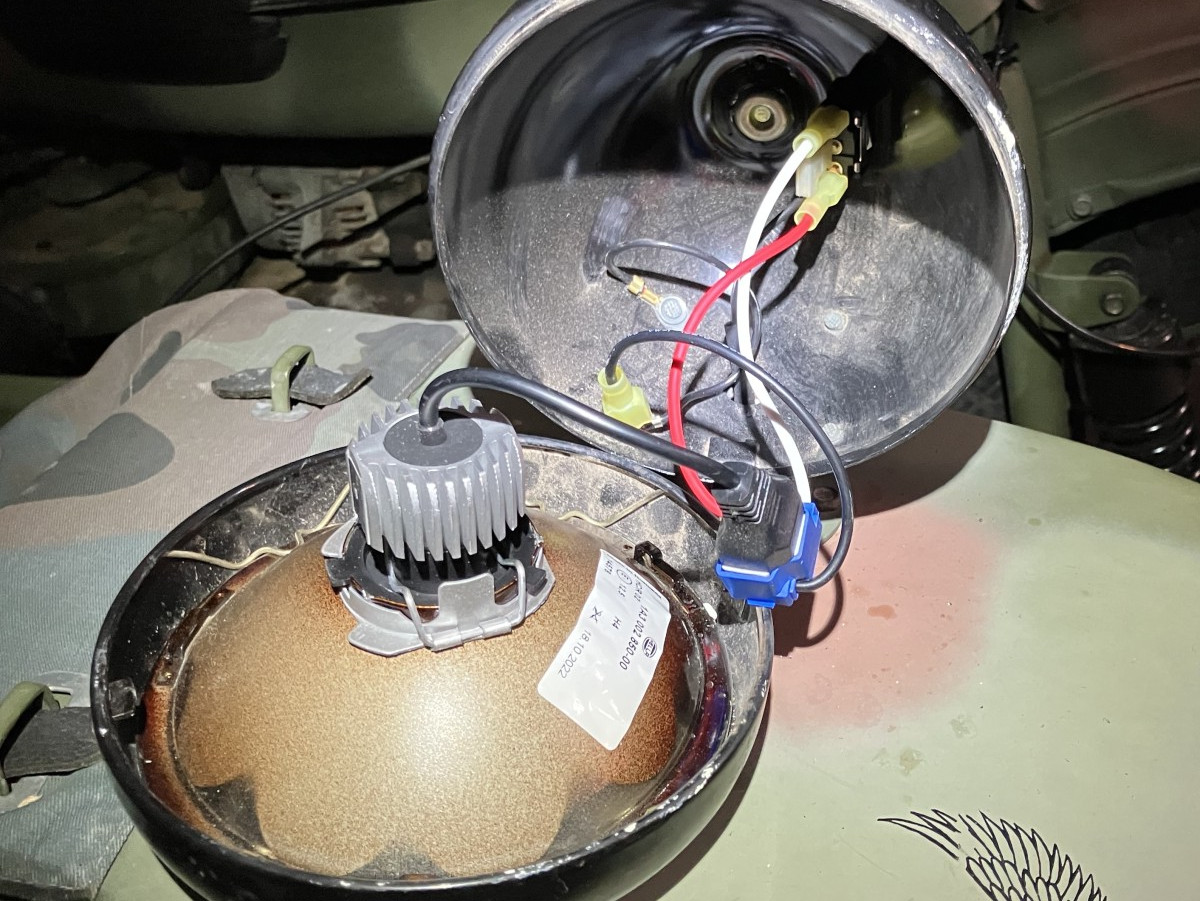
I started out using an LED over here, largely because the 100W headlight and heated gear is starting to tax the electrical system in the winter. As it turns out, I prefer the halogen light in here, so within a week I replaced it with a 60/55W halogen that meshes far better with my headlight in terms of lighting the road.
With everything back together, it works! Yes, this is a terrible way to take headlight photos, and I am out of the main beam as well - otherwise it would just be a blurry spot in a blown out image.
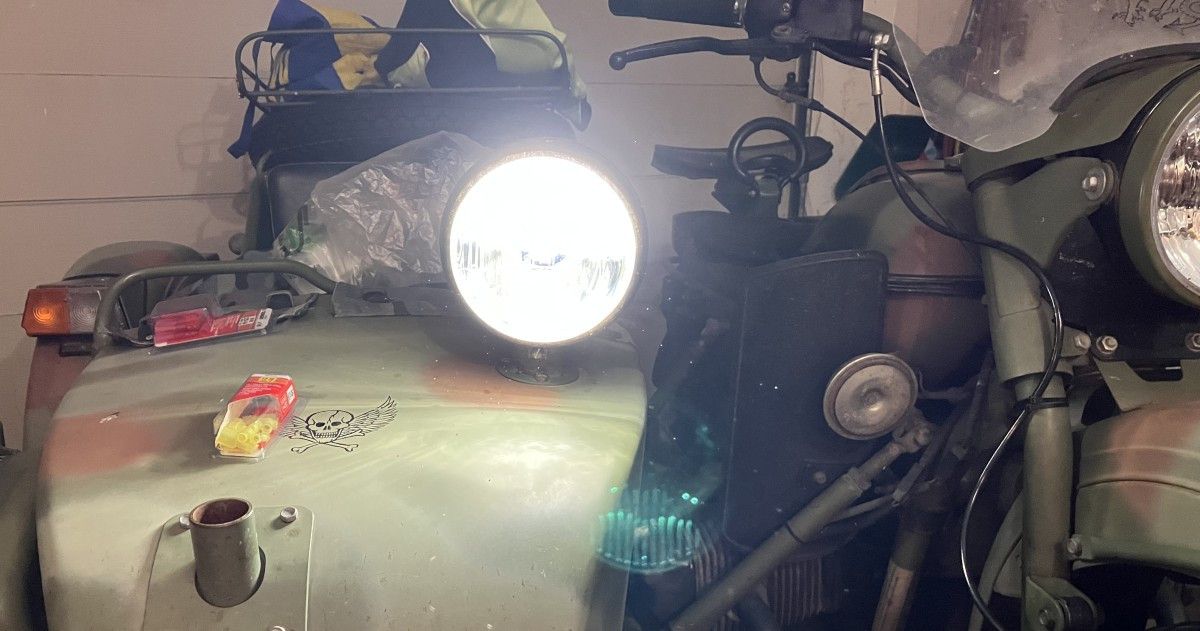
One toggle switch added. Yes, I know it says “No” - as in “No Touchy.” I still have the main spotlight control switch in the sidecar that turns the whole assembly on and off, but I now have control up here as well to switch things around as needed. It does require taking my hand off the throttle, but I can leave it on low and be fine.
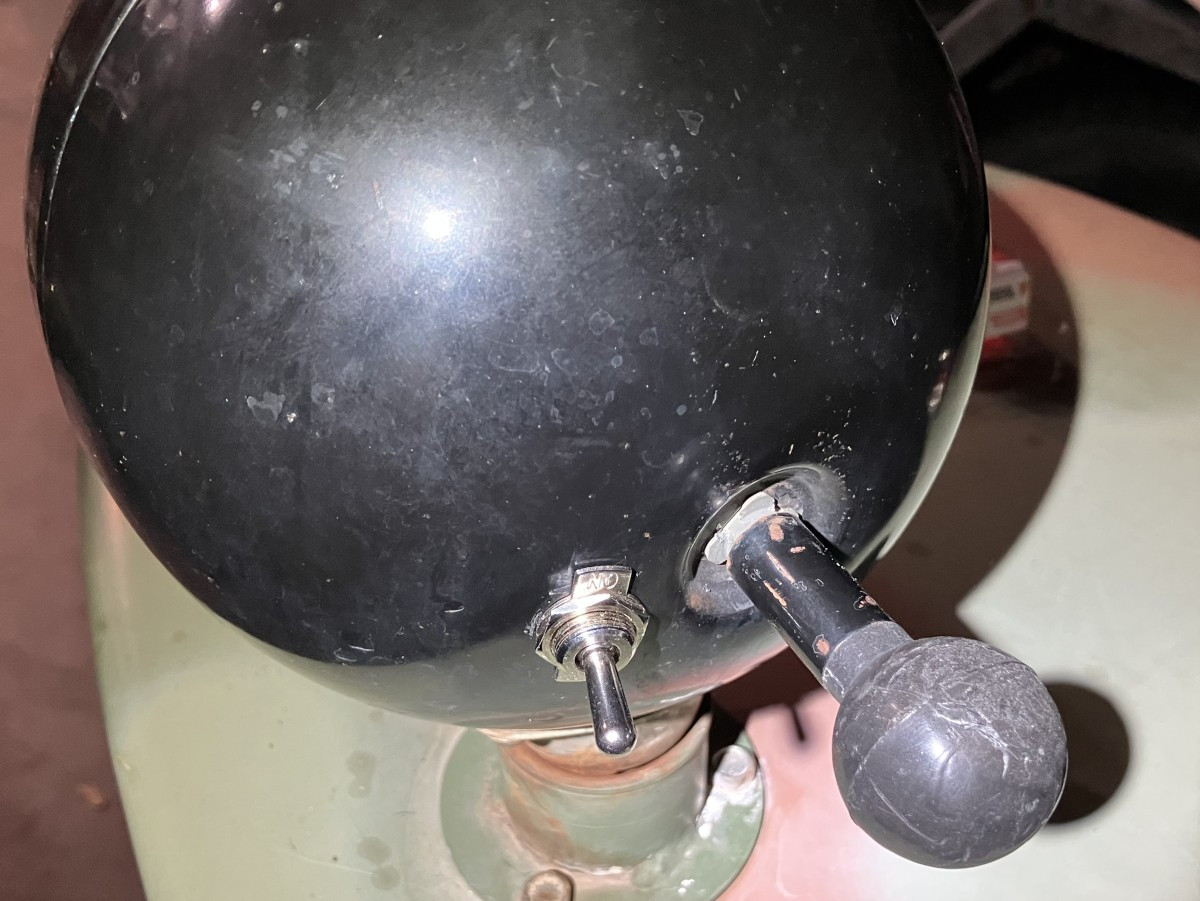
If your sidecar spotlight is loose and won’t stay put, there’s an adjustment nut down under the mount in the sidecar. Tighten it and the spotlight will wiggle around less. If you’re using it as a headlight, you probably want it fairly tight so it doesn’t shake around and blind traffic.
How is it? It’s more light, for sure! I have it aimed vertically aligned with the motorcycle headlight, but off to the right a bit more - which is helpful as a ditch light (“Aimed a bit into the fields to see any critters in the ditches along the road”), and I find it helpful when riding in the heavy rain too - I can see the edge-of-road lines better, even if they’re not reflecting because they’re wet. I don’t always use it, but it’s nice to have in darker conditions.
The 5000K LED didn’t last, though. I do not like the “bright white” sort of headlights at night, either on other cars, or on my own vehicle. They close your eyes down too much compared to a more yellow light and hurt your night vision badly. But if you have a sidecar spotlight and don’t use it, swap it out for something more useful!
Anyway, with the grounds fixed, and the upgraded sidecar light, my night illumination is vastly improved!
The End Result of Lighting Upgrades
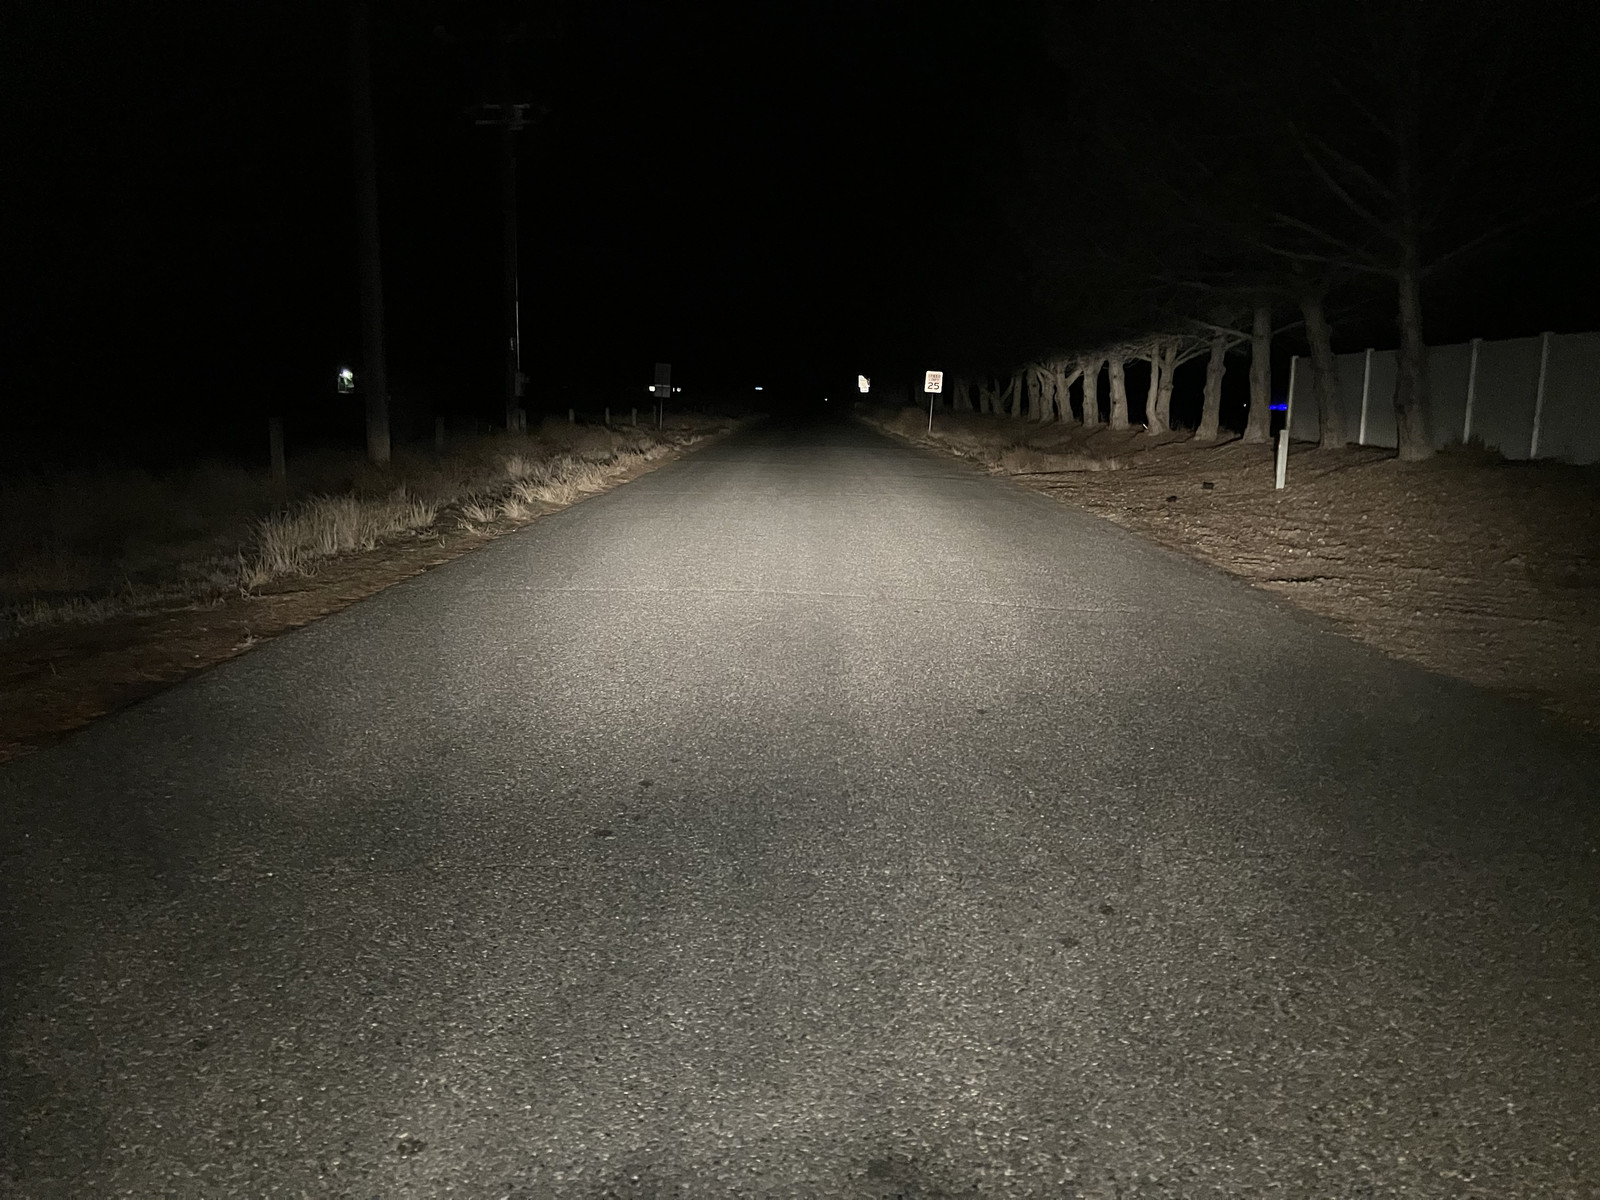
There are few things harder in life than trying to photograph the result of headlight upgrades. “Blinding shot of them glaring at the camera” doesn’t convey much, and it’s remarkably hard to get a camera to do something sane with light at night. However, I am attempting to do so. These photos reasonably reflect the beam pattern you see at night.
Here is what things look like on an empty road with both lights on low beam (from the center of the road). The beam pattern is clear, not blinding other cars out in the distance, and does a good job flooding the intermediate road with light without flooding in too closely. You can see how the beam on the right is lifted slightly at the edges to help bring out sign reflections in the distance - yet this doesn’t seem to bother other drivers. I have the sidecar beam offset somewhat to the right, and you can see how it’s lighting the trees a bit out - this is deliberate, as it helps me look for animals that may be hanging out in the ditch on the side of the road.
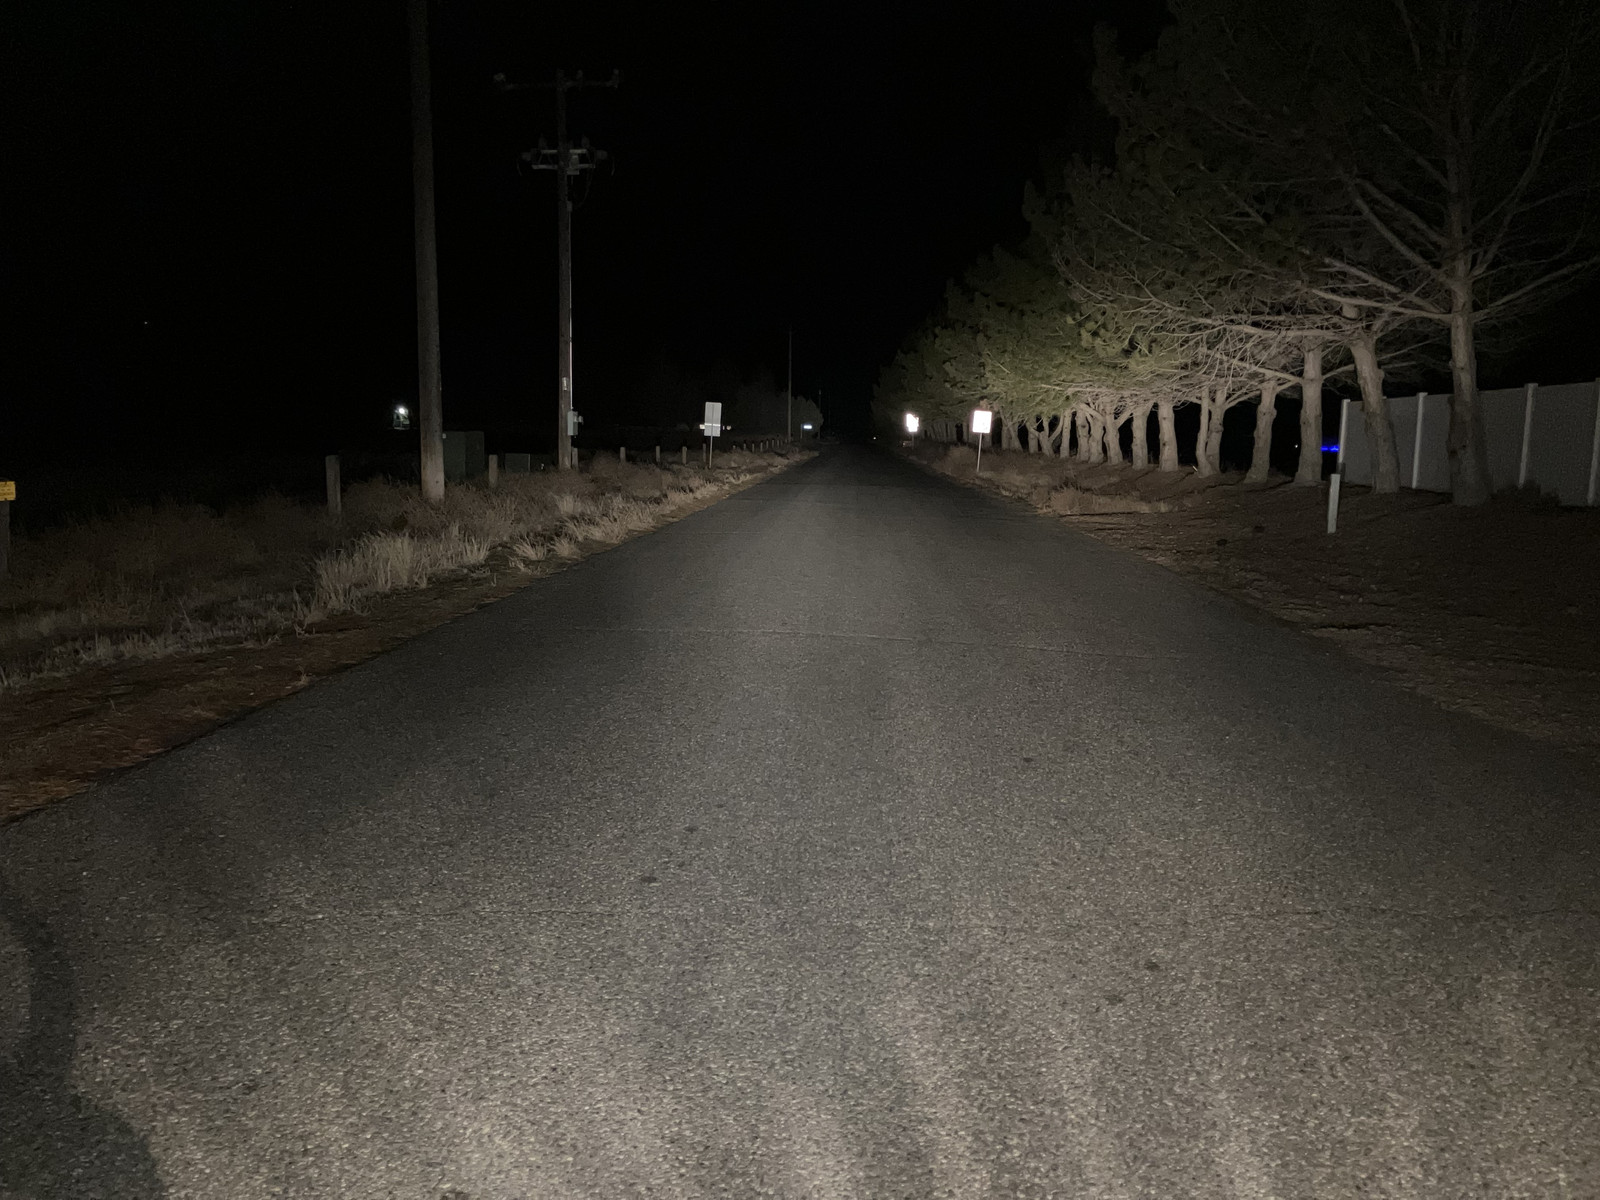
With both high beams on, meanwhile, nearly 200W of halogen bulb photons go blasting forth into the night. It looks dimmer in the photo, but I assure you, that’s just a camera artifact. The major difference is in the beam pattern - things are lit up above the horizon. Notice how the lower limbs of the trees are lit on the right, the street signs are now not simply “lit up” but “reflecting brightly,” and you can now see clearly towards the left side of the road in what, above, is simply darkness. It really is quite nice!
So, again. If you already have the Hella H4 setup on your Ural, don’t worry about anything. If you don’t? Do the upgrades. Night riding is so much nicer (and safer) with proper lights.
Rear Brake Light Switch Replacement
My rear brake switch has been “not working” for some while now, and I’ve decided I should get around to fixing that. It’s just the right way to have things set up, and having had the occasional fight with my front brake light switch (the microswitch is mounted on a couple small screws, adjust as needed), having a working rear one seemed wise. It’s down on the right side of the bike, so you’re working leaned over the bike, or from the sidecar, take your pick. Wires pull off the top.
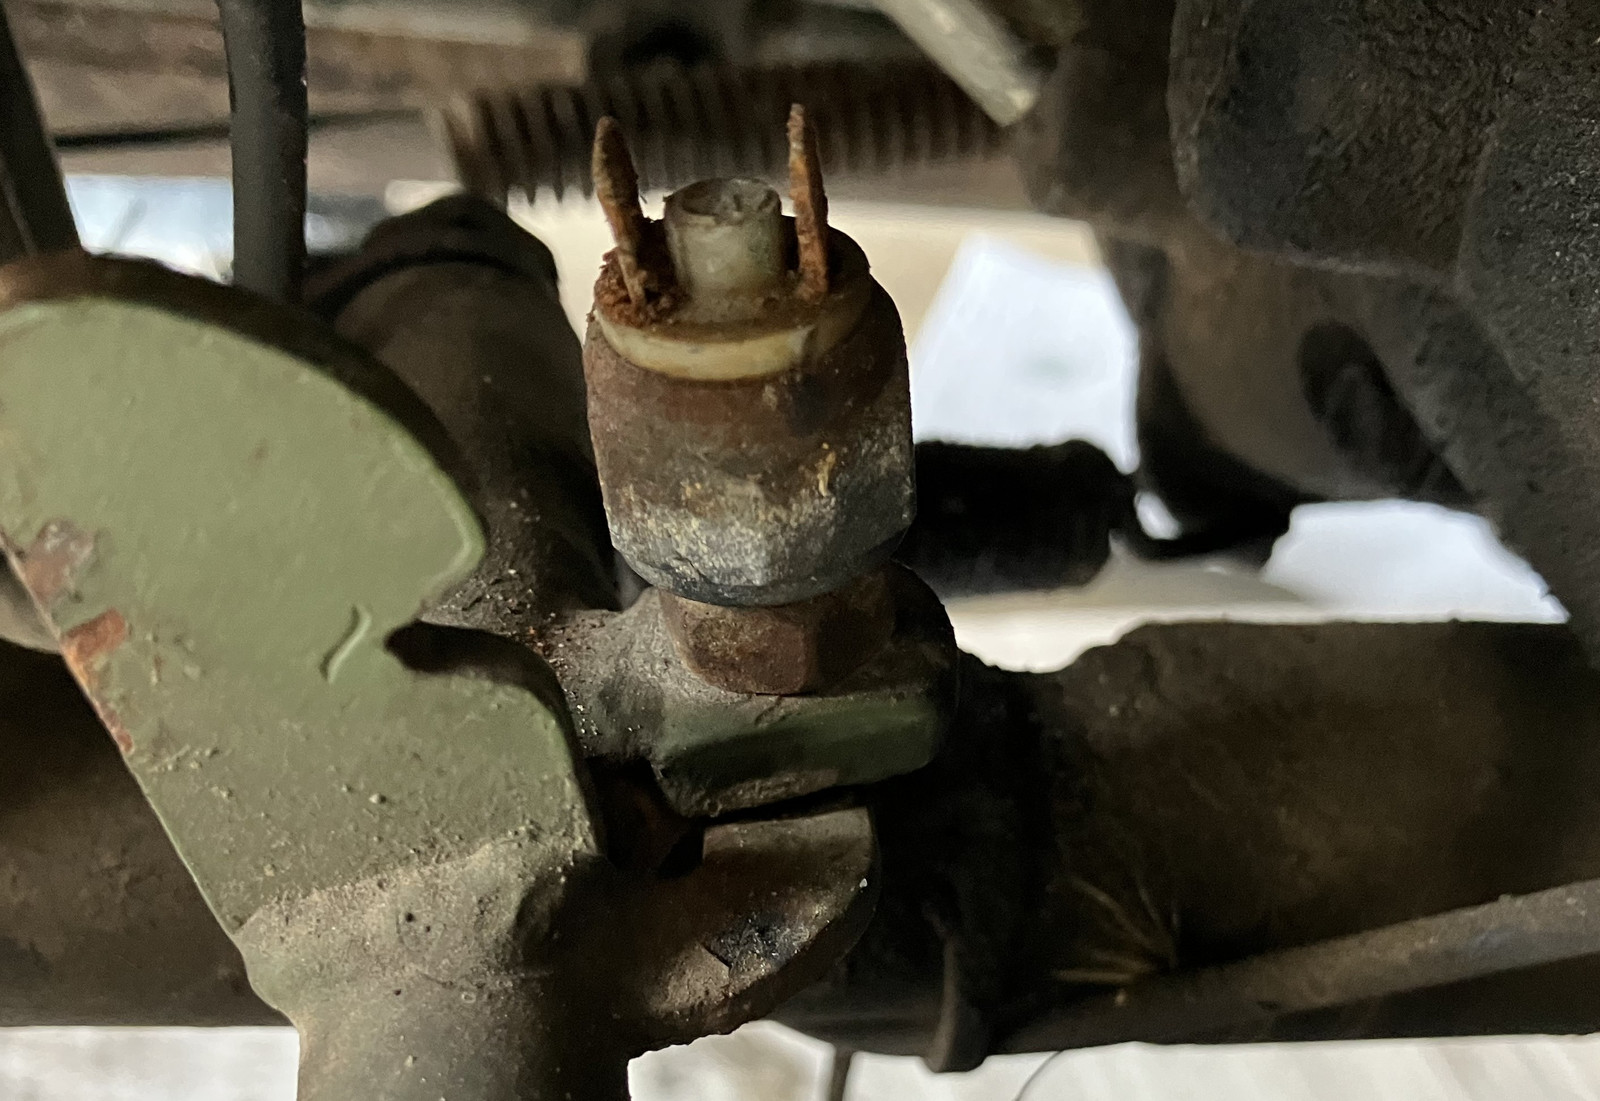
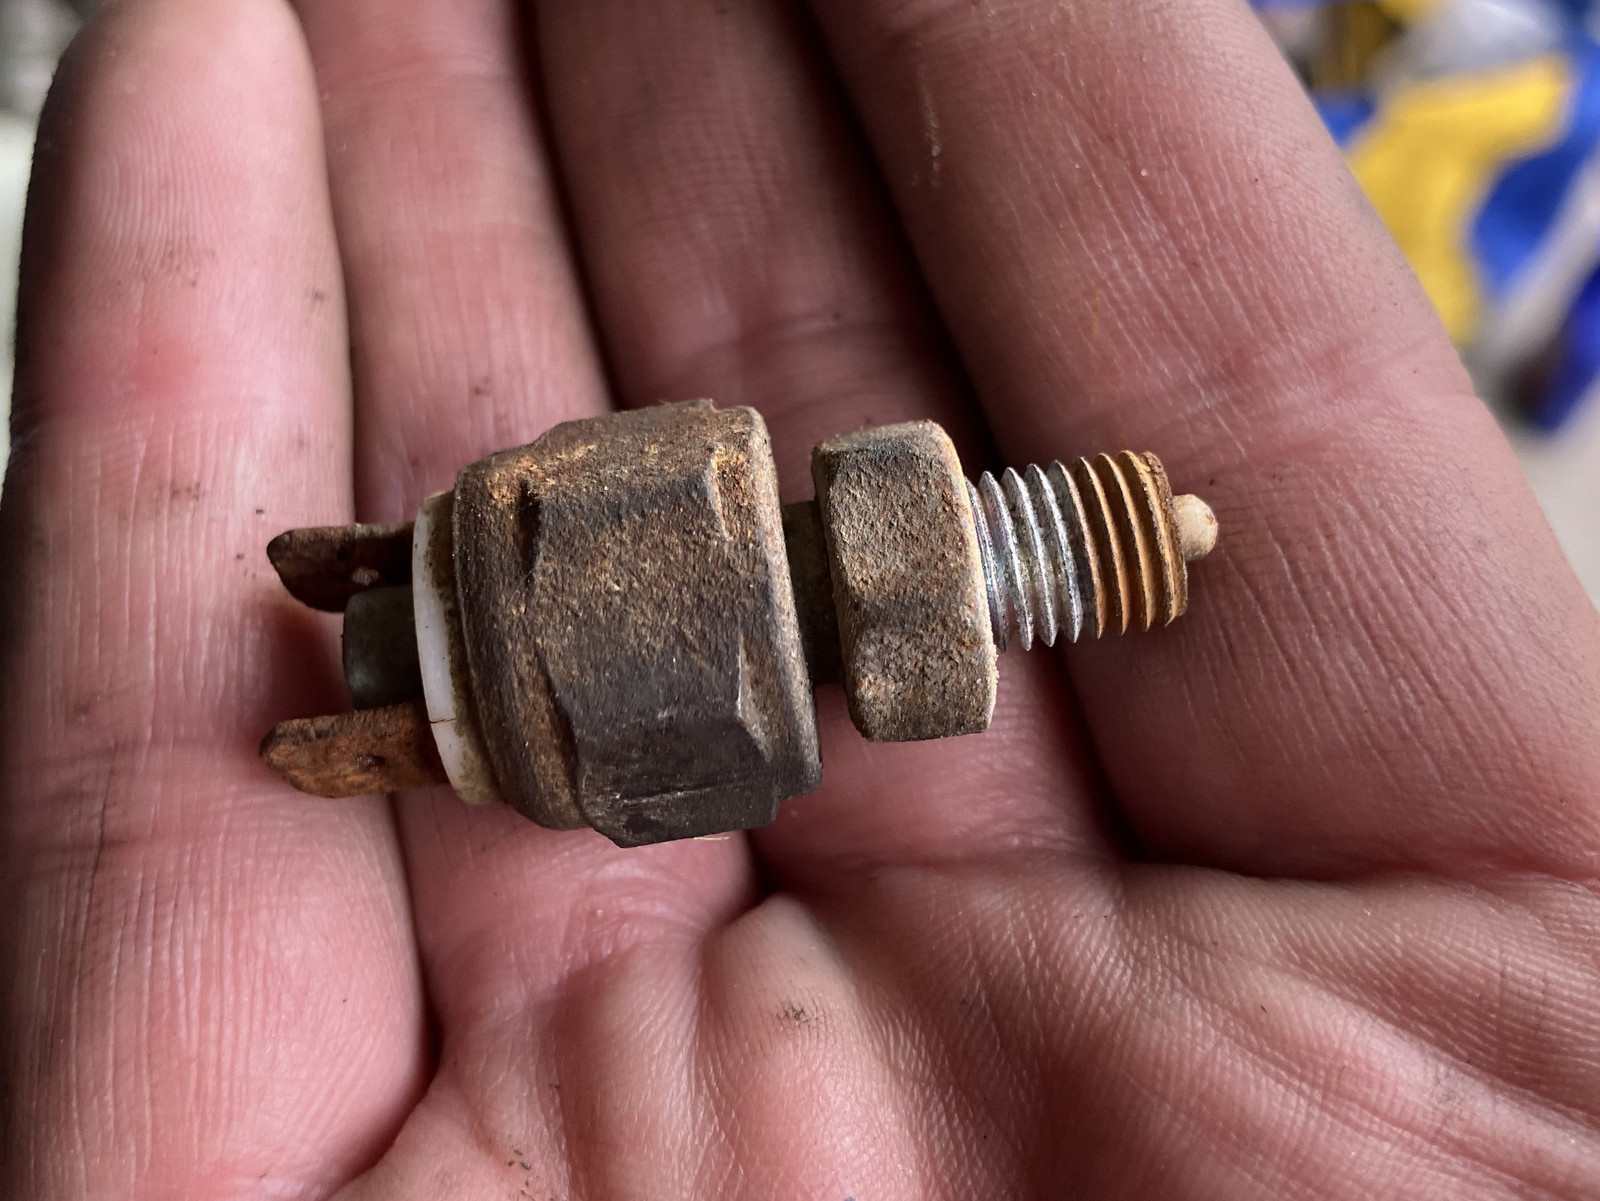
The design is simple enough. There’s a plunger that closes a circuit when extended, and opens the circuit when pressed in. The problem with my old switch is obvious enough - the plunger is firmly jammed in the “open circuit” position. I spent a while and some penetrating lube trying to free it up with no success, and as the plunger is plastic, you can’t apply much force to it trying to break things free either.
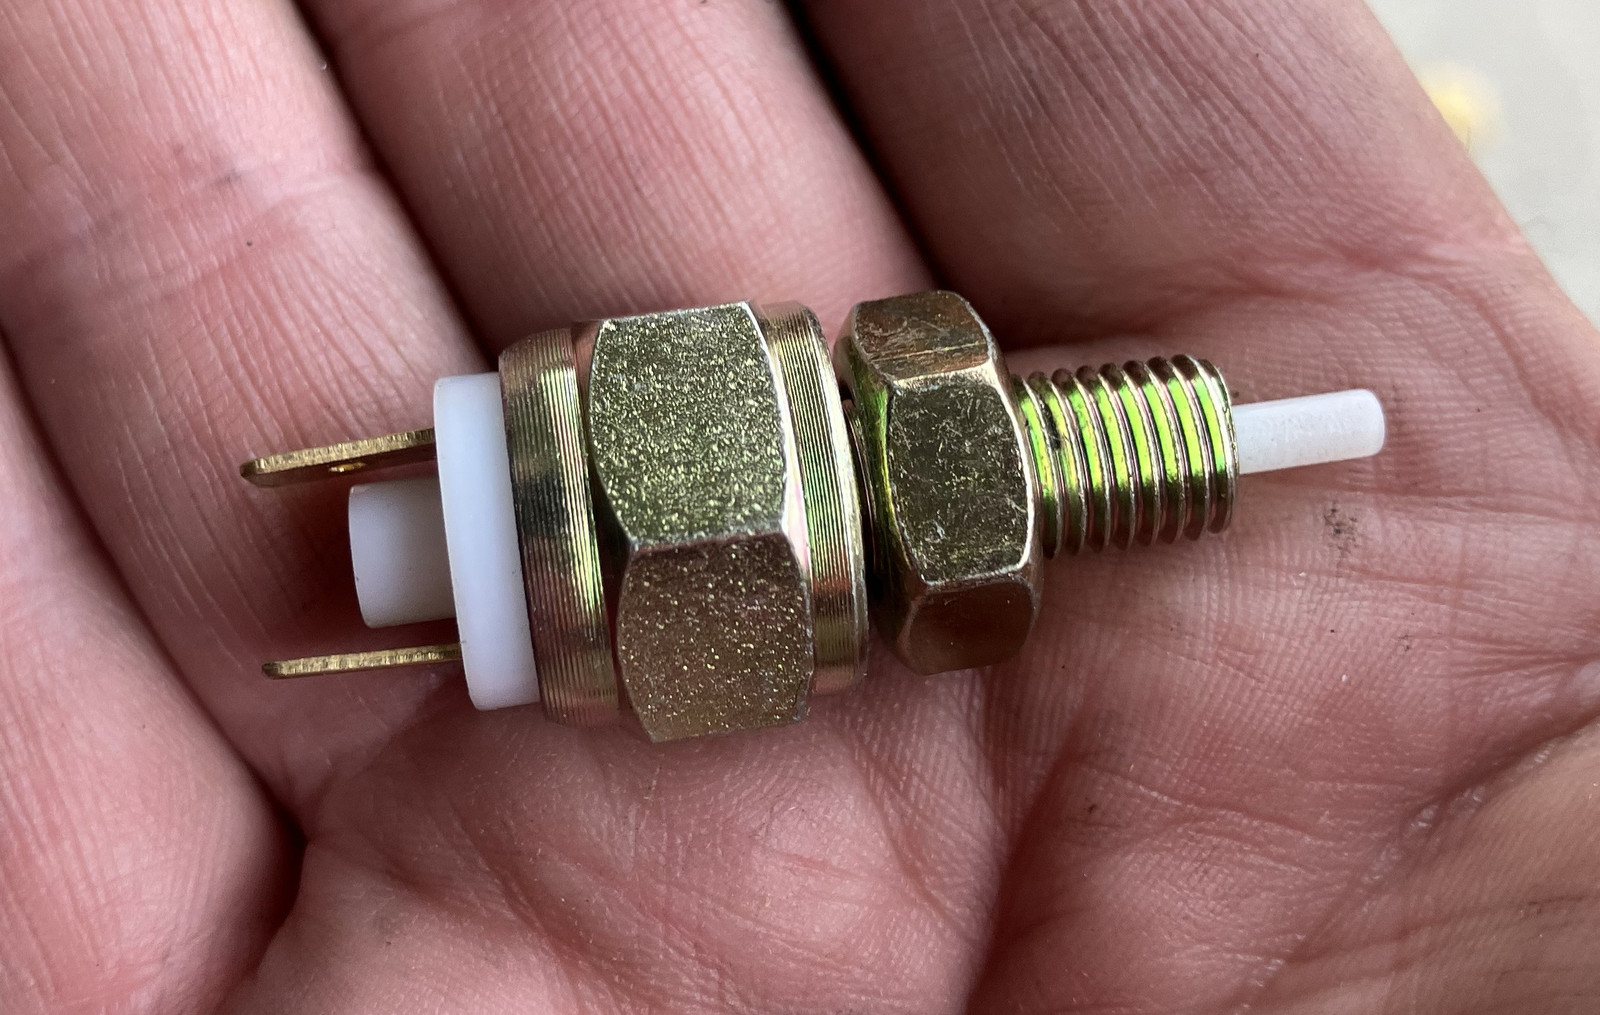
The shiny new one, though… ooooh! aaaaaah! Seriously, these things are getting hard to find…
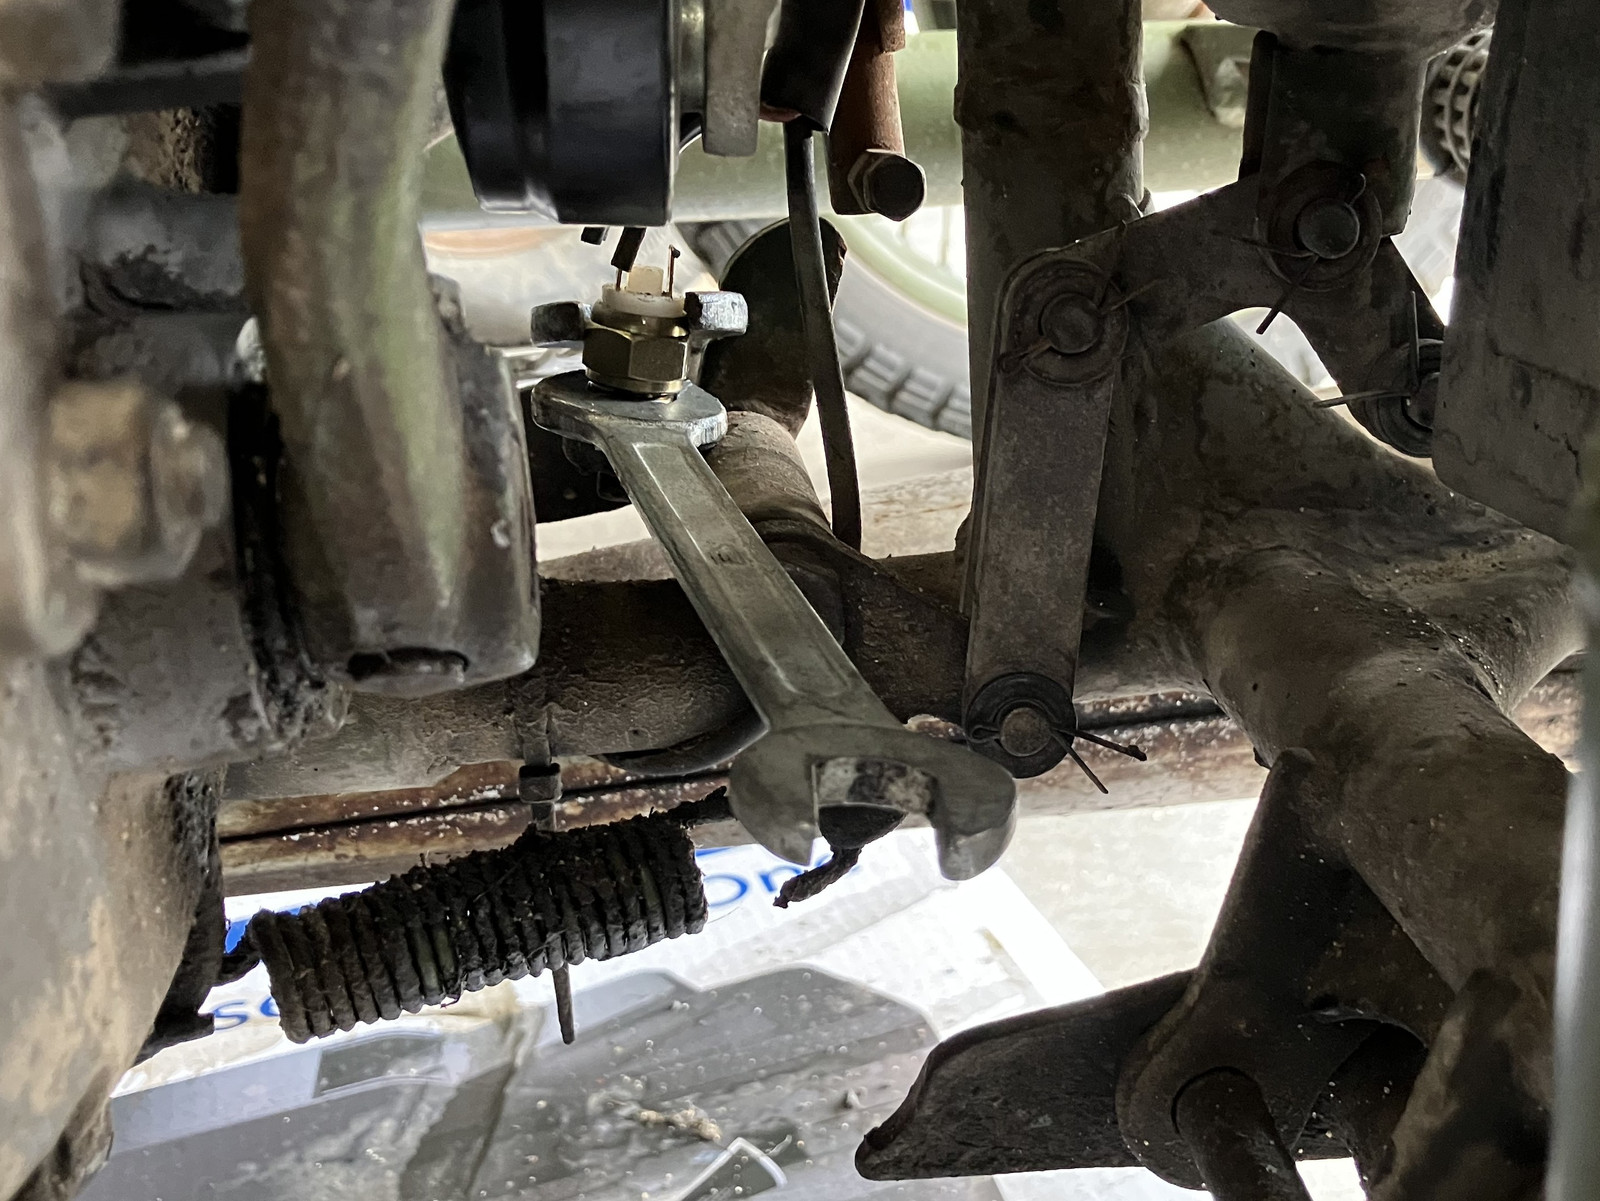
Install it as you removed the old one. But if you need to clamp the jam nut down, it’s easier to come at it from the left and work through the chassis than it is to get the 14mm wrench on it from the right side. Lots of stuff is in the way over there.
Turn Signal Experiments: CorrosionX
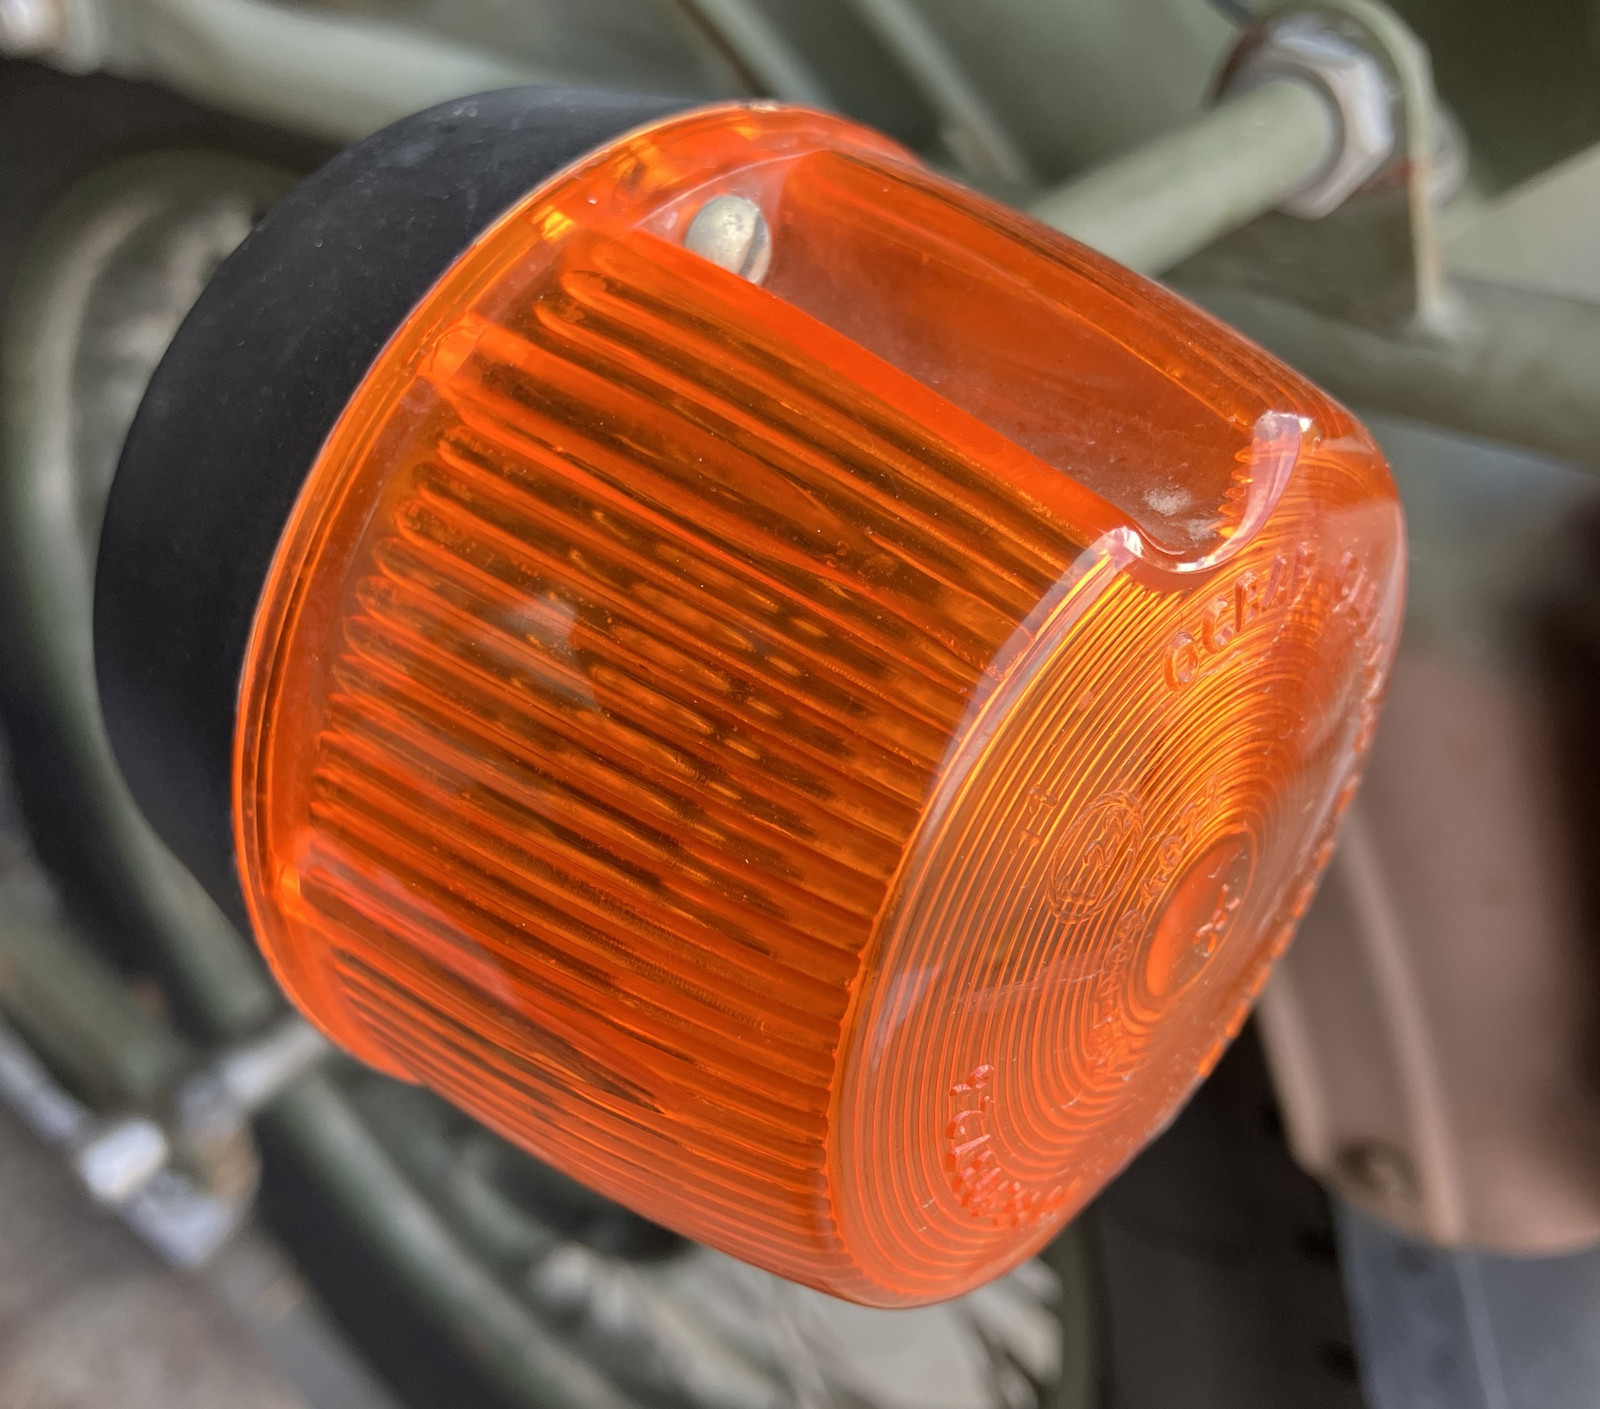
I’ve also gone about trying something different with my left side turn signals. They’ve been “annoyingly erratic” for some while now, and require the occasional bit of percussive maintenance to make work - but I also don’t have to really smack them hard, so it seems like a minor corrosion issue. I’ve been using dielectric grease in them, but I’ve decided to try something different and see how it works: CorrosionX.
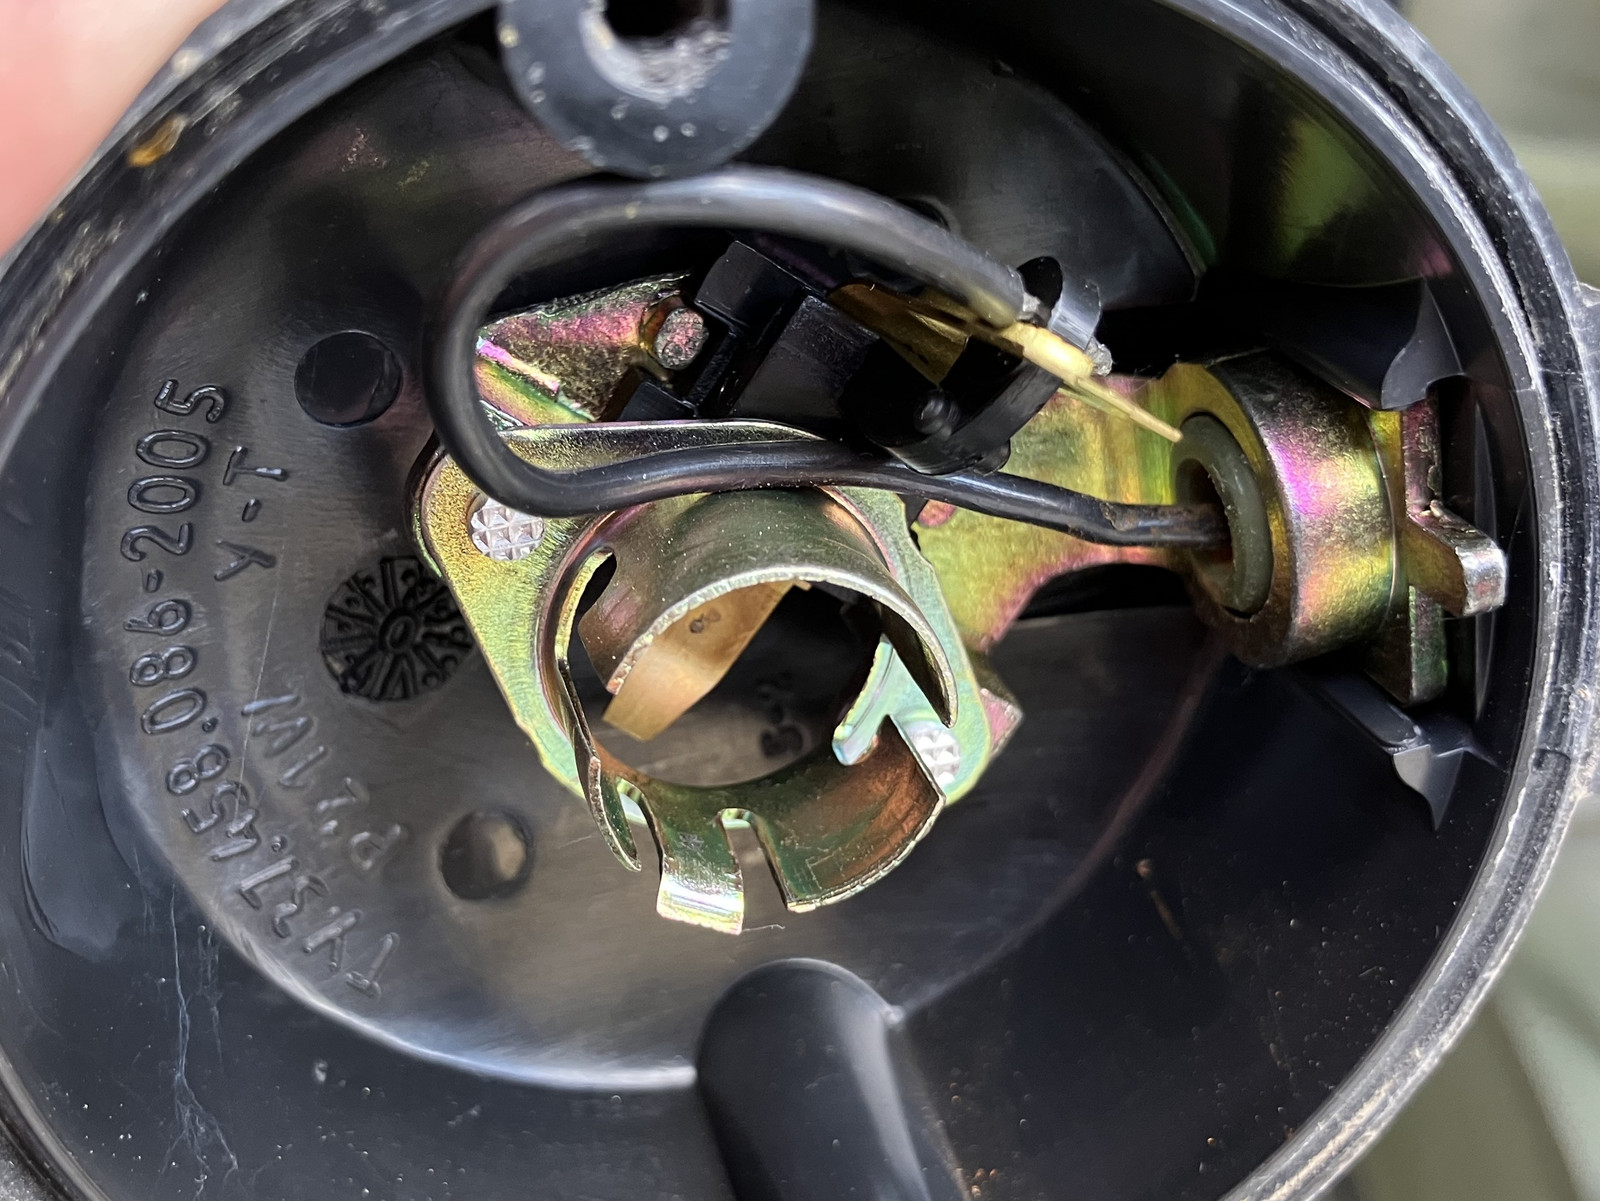
Inside is oddly simple, and almost annoyingly so. The whole thing is grounded to the chassis, and a wire comes in. This wire is held in a spring clip (top right), and that’s connected to the base of the bulb (copper strip at the base of the housing). Making these both “more springy” seems to help a lot (bend them out to increase contact pressure as appropriate), but I’ve now replaced my grease with a layer of CorrosionX to see if it holds up better. Several months into the experiment, I’ve not had to tap the housing to get my turn signals working once, so I think it’s a better option than the grease. CorrosionX is some cool stuff…
Notes On Heated Gear
Heated gear on a Ural is easy enough. Hang a connector off your battery, hook gear up! I’ve got an existing SAE pigtail coming off for a battery tender, and there’s an adapter from that to the barrel plug my heated gear uses.
The main issue is just being aware of your power draw. With my nearly 200W of lighting (90W headlight, 55W sidecar, 26W sidecar marker, plus a few dozen watts in the rear) and heated gear, the alternator will not keep up at idle. It’s wise to keep the bike on a battery tender if you’re doing this, and to be aware of your power draw. This is nothing new to me, the Buell 1125R I upgraded the high beams in had the same problem. If it’s too much of an issue, I can always drop to a 100/55W bulb in the headlights, but so far I’ve not had any actual issues. If you have an older alternator, you might be careful, but my system should be around 500W worth of alternator, and it works!
Check Your Grounds!
I think the main point of this post is, “Check your grounds.” They are such a common problem, and lead to so many weird behaviors. You don’t need to go nuts with a 4/0 grounding kit. You just need to make sure your existing grounds are solid.
Next post, into the mechanical projects!
Comments
Comments are handled on my Discourse forum - you'll need to create an account there to post comments.If you've found this post useful, insightful, or informative, why not support me on Ko-fi? And if you'd like to be notified of new posts (I post every two weeks), you can follow my blog via email! Of course, if you like RSS, I support that too.
