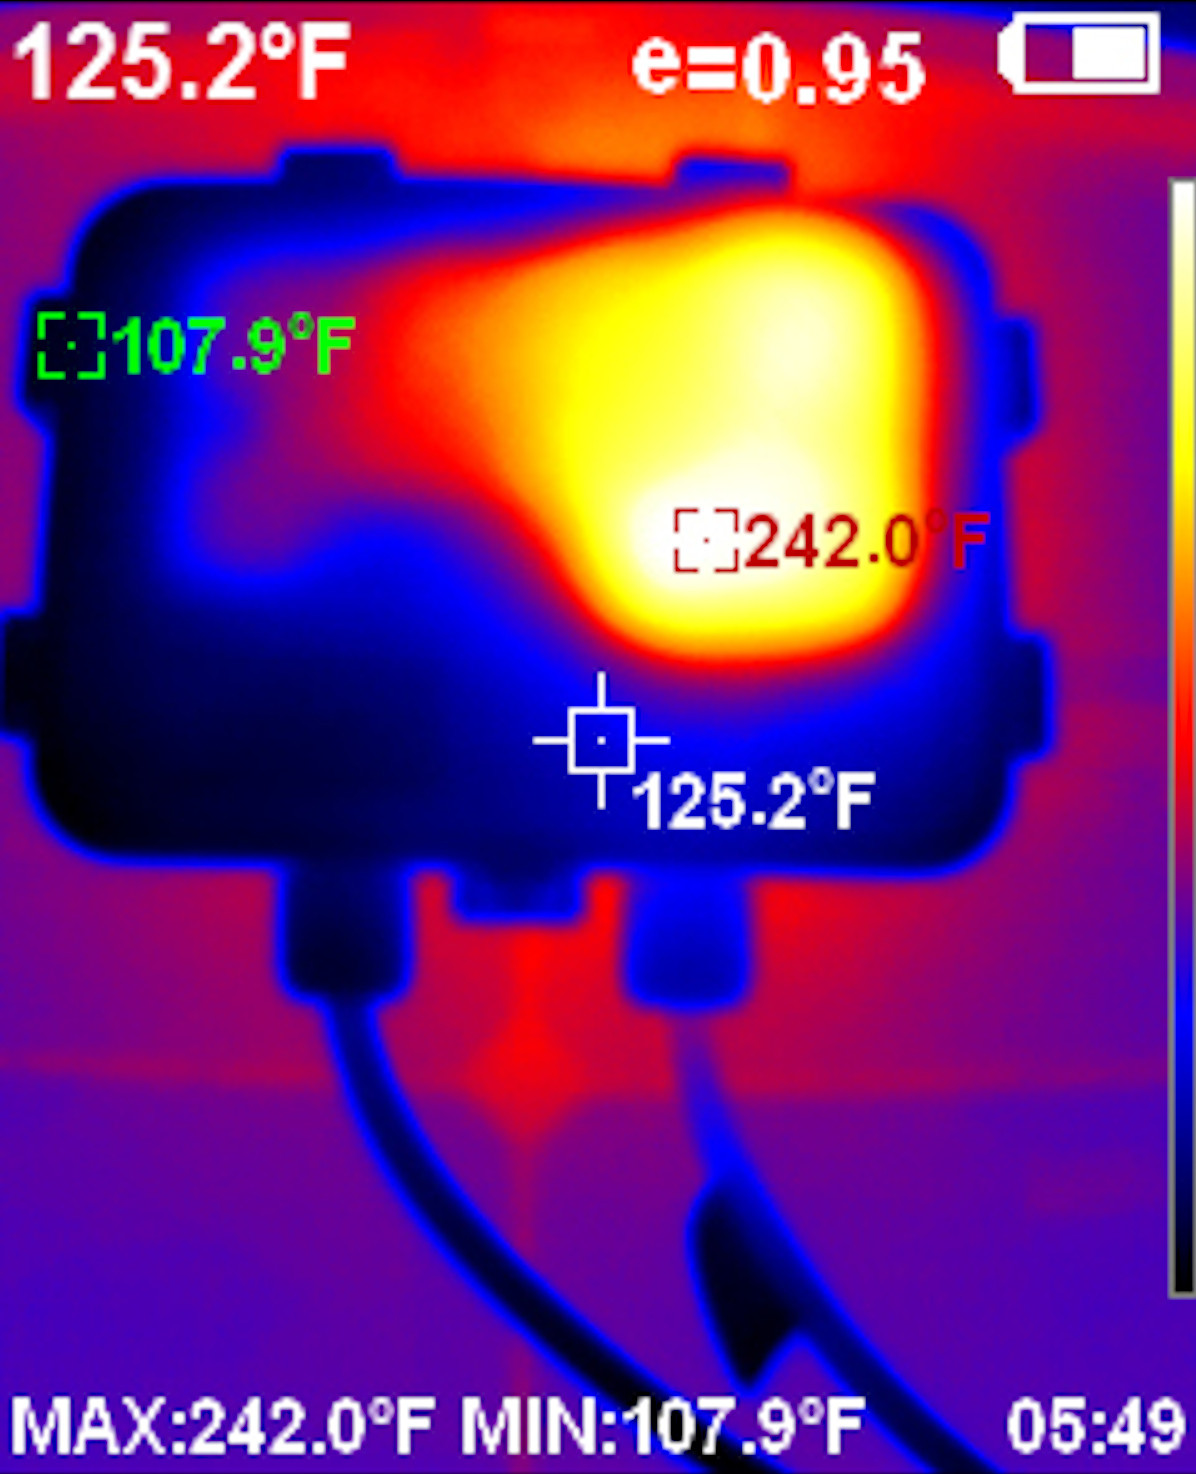
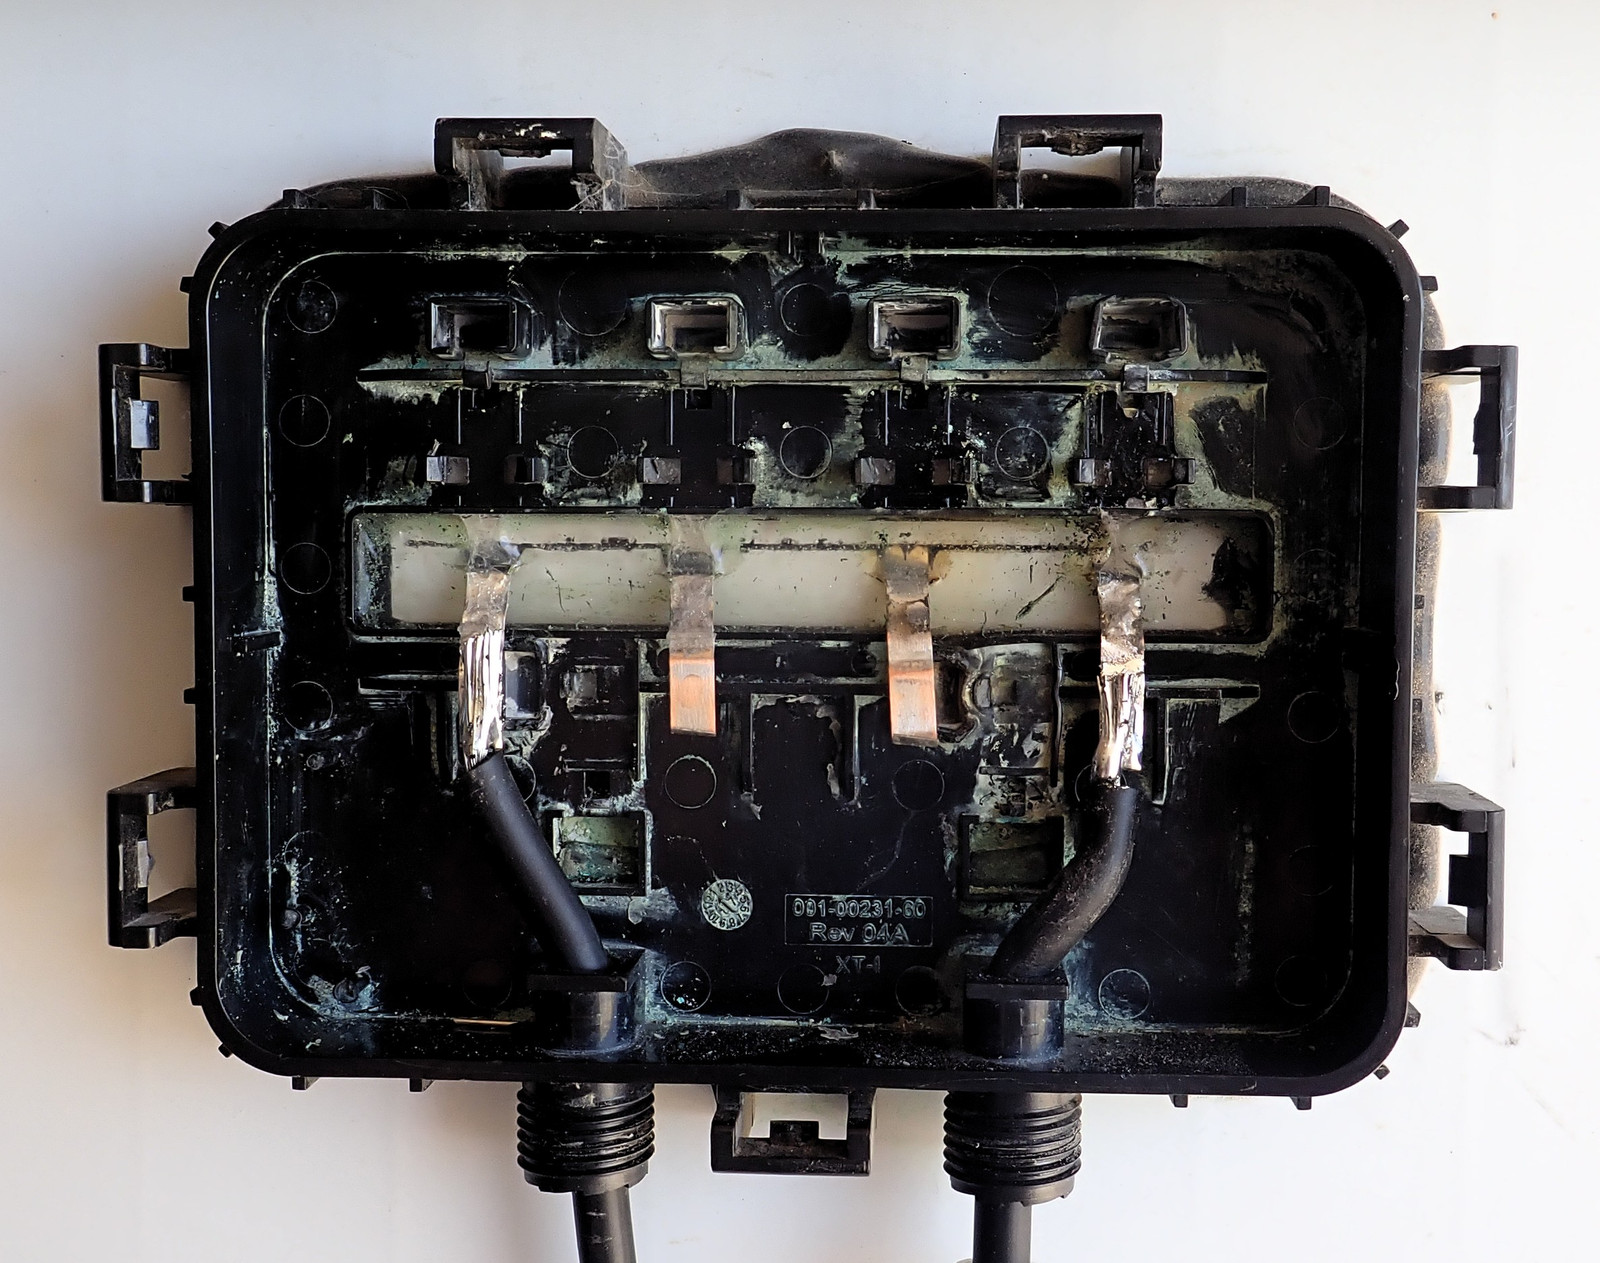
Two posts ago, I talked about hunting arc fault warnings in solar strings - and I’ve found and replaced the panel that was faulting. As near as I can tell, the fault was inside the junction box - it was running hot, and opening it up… well, it looks pretty toasted. But is this panel dead? Or is there some way to make use of the perfectly good silicon on the front of the panel despite this corrosion and thermal damage in the junction box on the back?
Since I’m writing about it, you can probably assume I’ve done something productive with this panel - and it involves a trip deep into the junction box on solar panels. Plus some soldering, which is interesting! And more thermal imaging! So, come along for the ride as I replace this damage with something a tiny bit more robust, and a whole lot more “working.”
The Standard Warnings
If you’re a “The Panel Warranty Matters” sort of solar installer, you might want to skip this post, as it involves doing very not-by-the-book things to convert a reasonably modern and non-functional solar panel into a 1980s style entirely functional solar panel. And if you’re considering doing this to your own panels, you’d better be familiar with what you’re doing and how to do it, because this isn’t really a “how-to” so much as an “I-did.” And I’ve got a ground mount array, work with high power electronics fairly regularly, and know my way around a soldering iron. Also, I can only hope this junction box design wasn’t sold for very long.
Is this work unsafe? Not if you’re careful. Is the result unsafe? Only if you think any modification of a solar panel is unsafe - and, I’ll politely suggest that the original panel design, as installed, was less safe than my modifications are. Because the stock configuration here was tripping arc fault warnings, and this junction box was certainly running alarmingly hot in thermal images.
Don’t “do it live.” I reworked my panels in a shipping container, facing the wall, and they weren’t even making rated open circuit voltage while I worked on them. This is not the sort of repair you should attempt with the panels in the sun.
Solar Junction Boxes
Just about every solar panel you find on the market for residential or commercial use (60 or 72 cell) will have a junction box somewhere on the back - top and center on my panel. This box contains the bypass diodes for each third of the panel (to help deal with partial shading), and it’s where the main panel wires connect. It’s a weatherproof box that interfaces “strings of solar cells on the front” to “the wiring on the back,” and they’re generally boring. Unless they fail and you decide to go about fixing them (either replacing a failed diode, or reworking the whole concept).
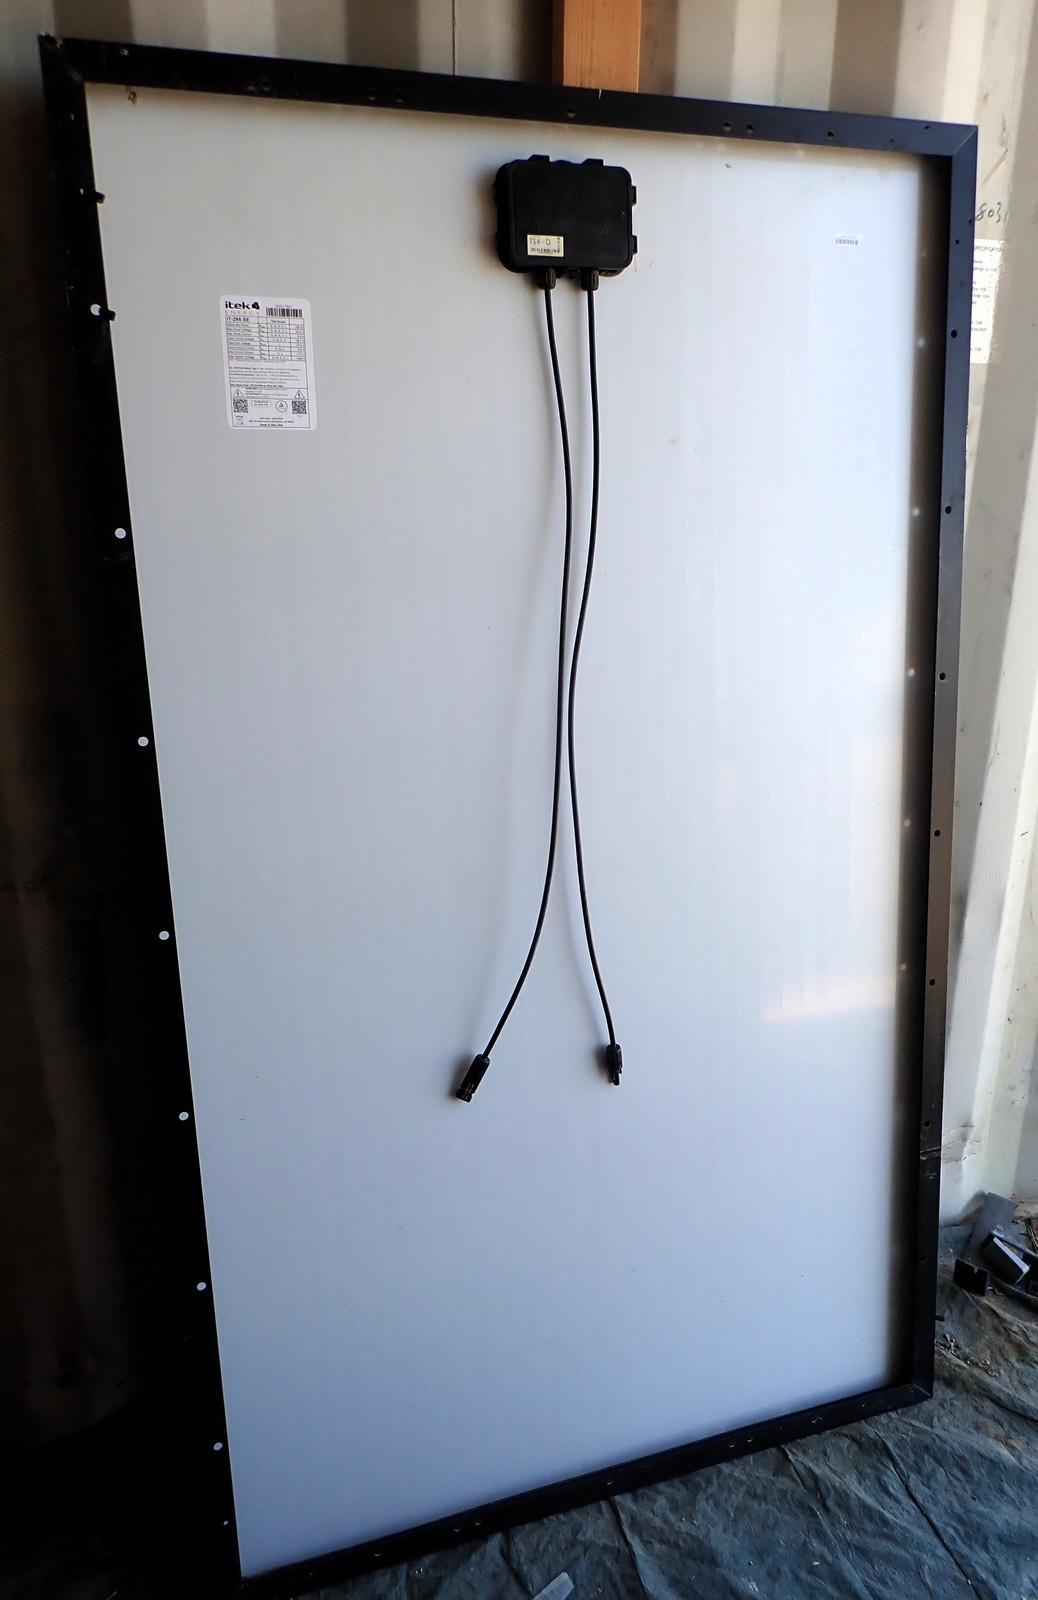
Hopefully, you’ll never need to worry about yours. And, hopefully, you’ve got a style of junction box that’s soldered together or something and won’t fail in the same way as this spring clip based Tigo style. Seriously, the Tigo junction box concept is cool. But the implementation just doesn’t seem to work.
The Tigo PV 2.0 Junction Boxes
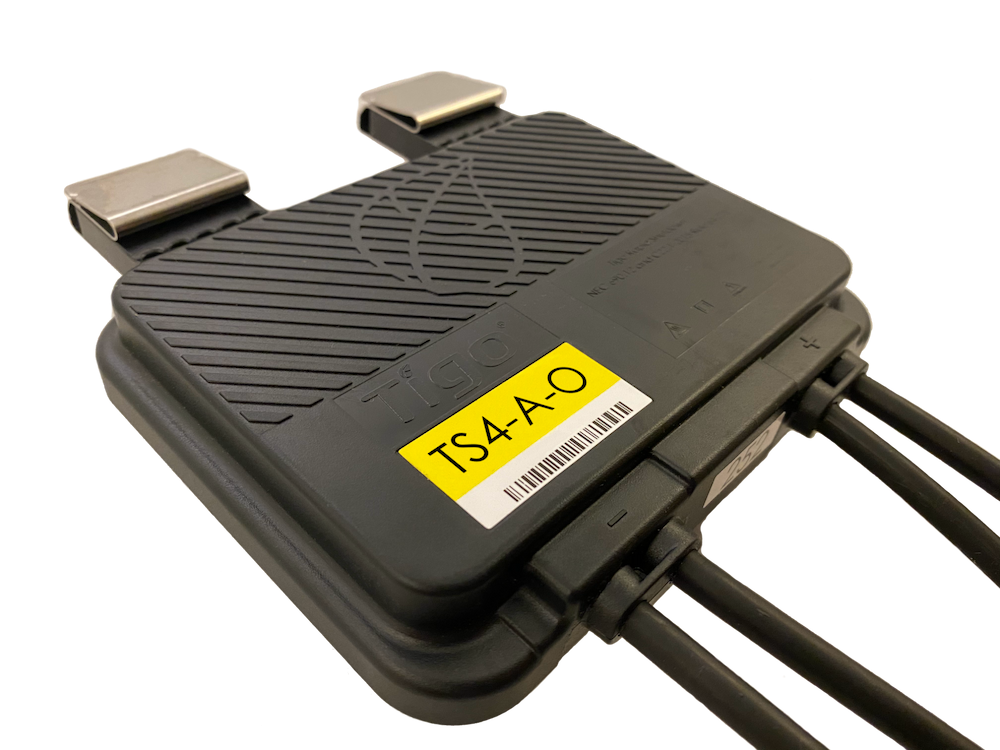
When I got my panels back in 2019, they came with the Tigo PV 2.0 junction boxes - which are a neat concept that supports swapping the back plate for additional functionality. You can get the basic diode junction box (as I have here), panel monitoring versions, rapid shutdown versions (for NEC 2017 compliance), and optimizers that will allow you to use a string inverter with partial panel shading more efficiently. They support communication for monitoring and configuration, and generally do useful stuff for a panel. And, if you want, you can retrofit an existing (supported) panel with the new backplate - just snap the old one off, snap the new one on, and you’re good!
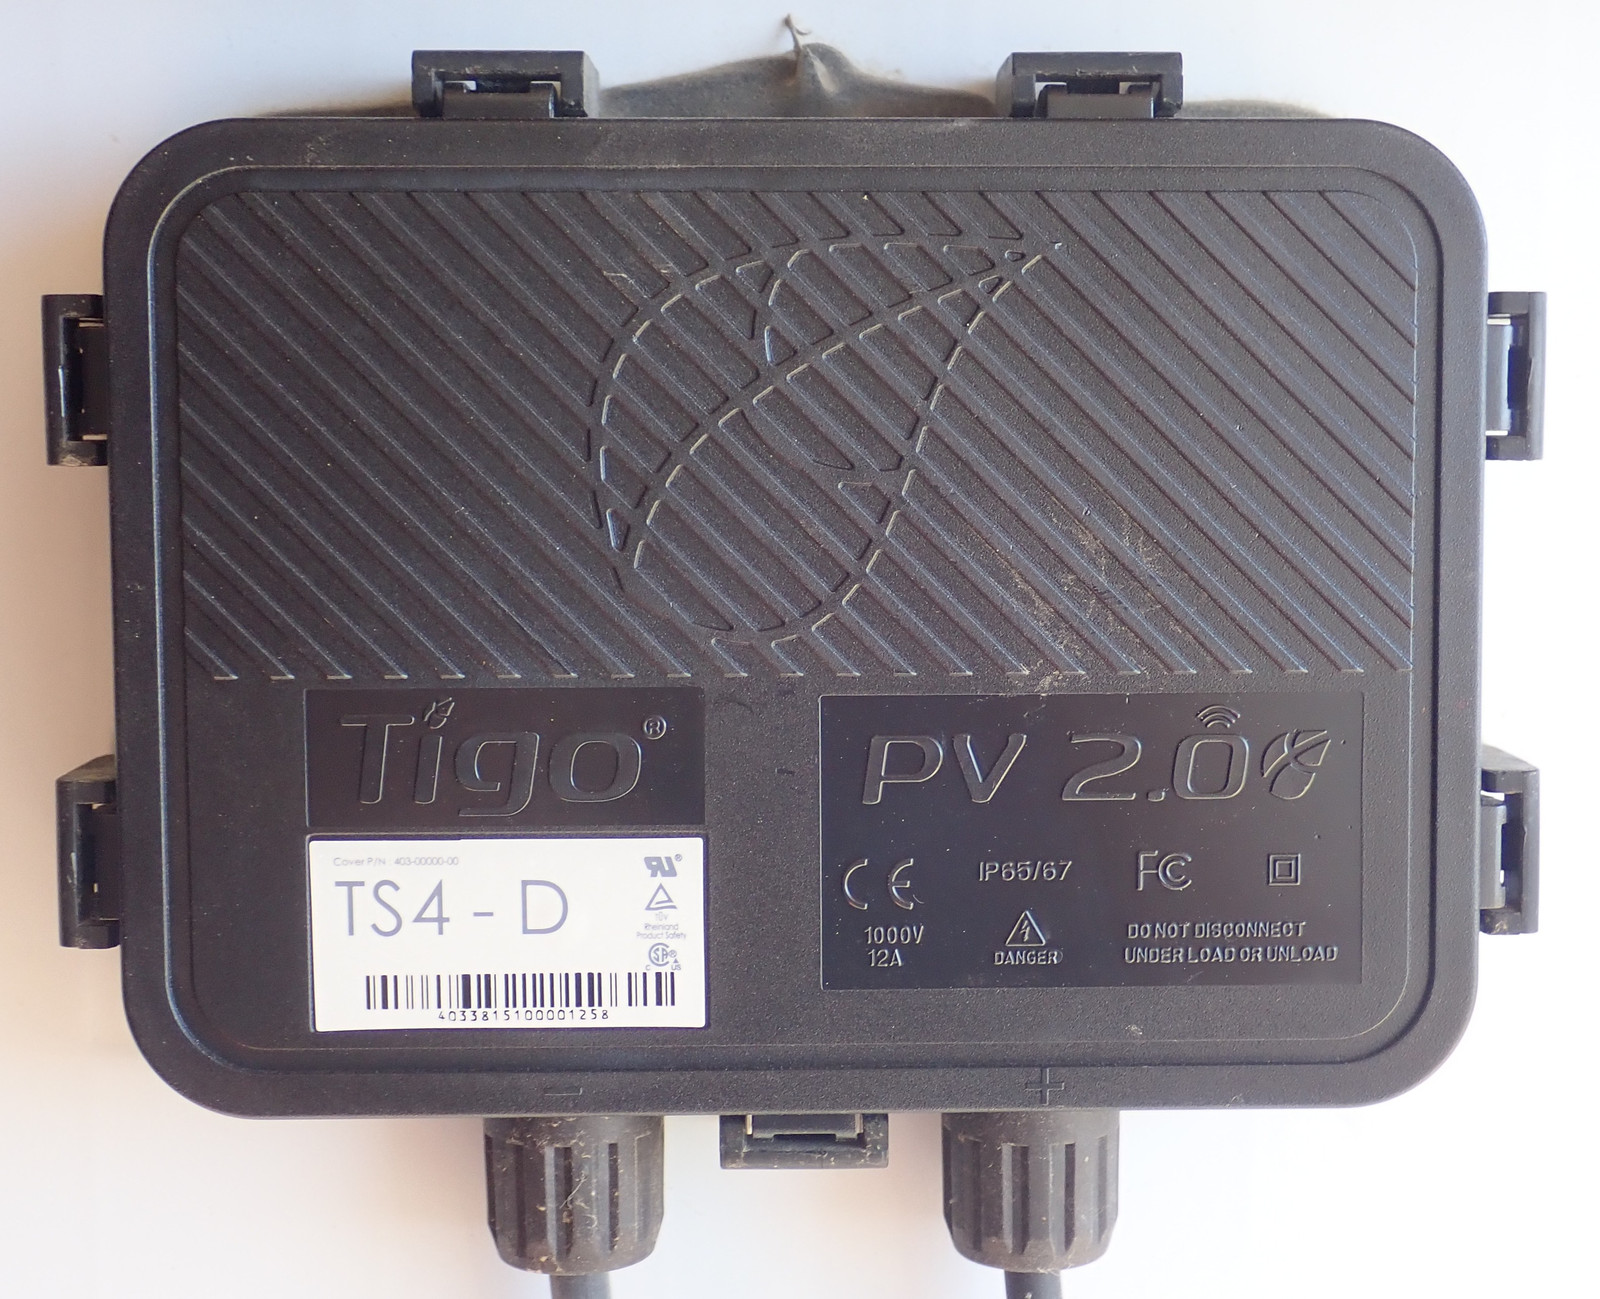
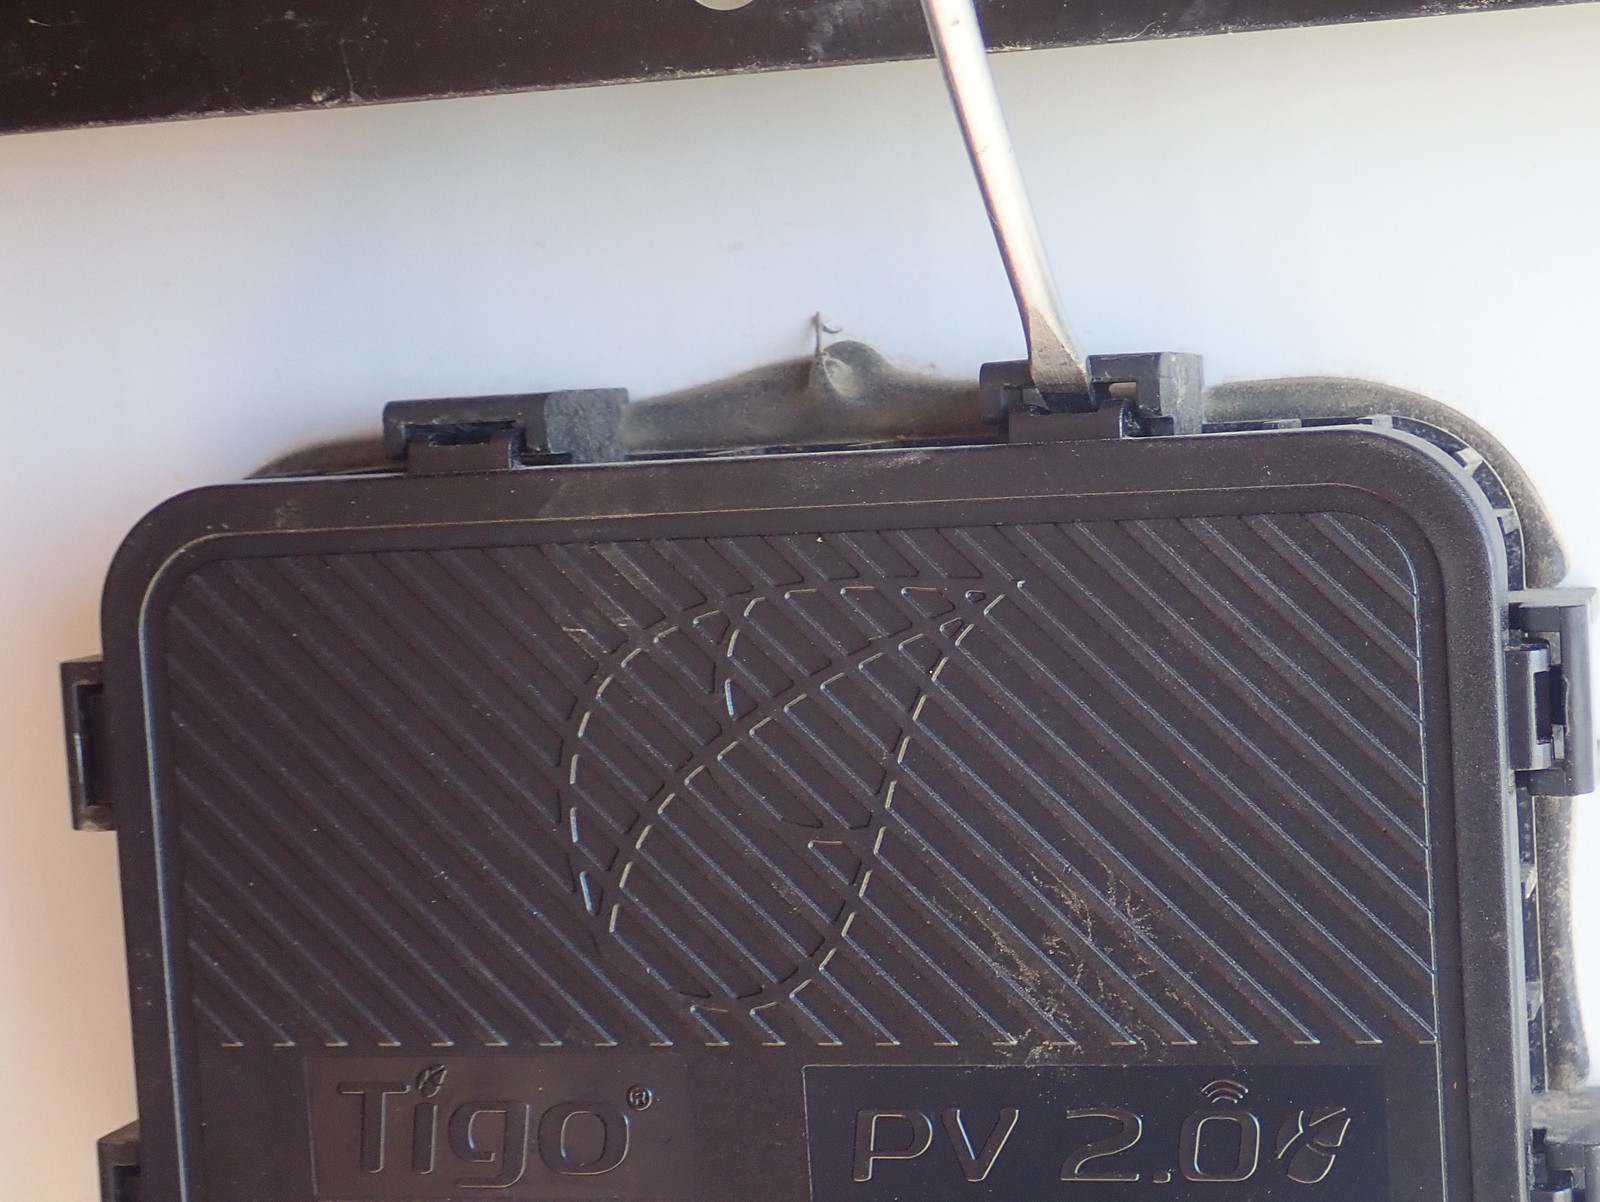
Opening the junction boxes is… actually, somewhat tricky, and I’m not at all certain this is the right way. This tends to snap off the little triangular clips on the inside - but I’ve not found a better way. I’m not sure if this is the correct way and the clips are just brittle after a few years, or if there’s some better technique. If you know, please, let me know! Try to push the spring clip out, and then pry the backplate clip slightly to free it.
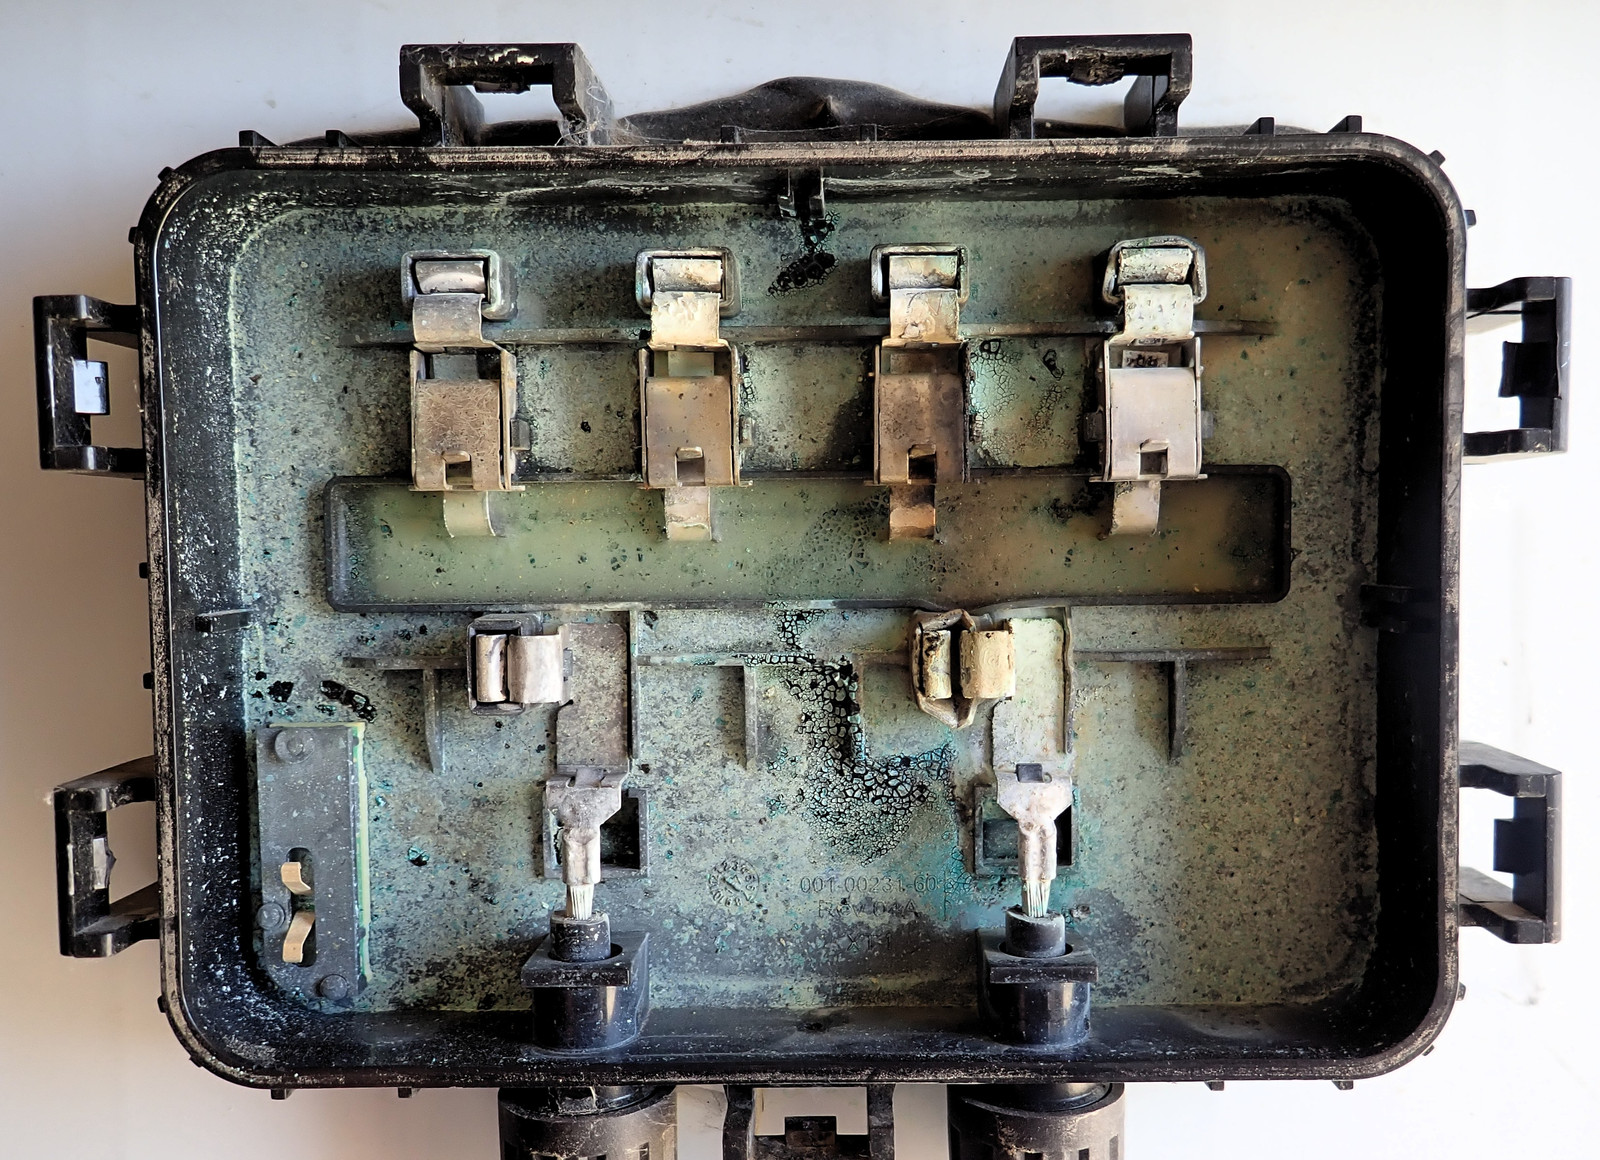
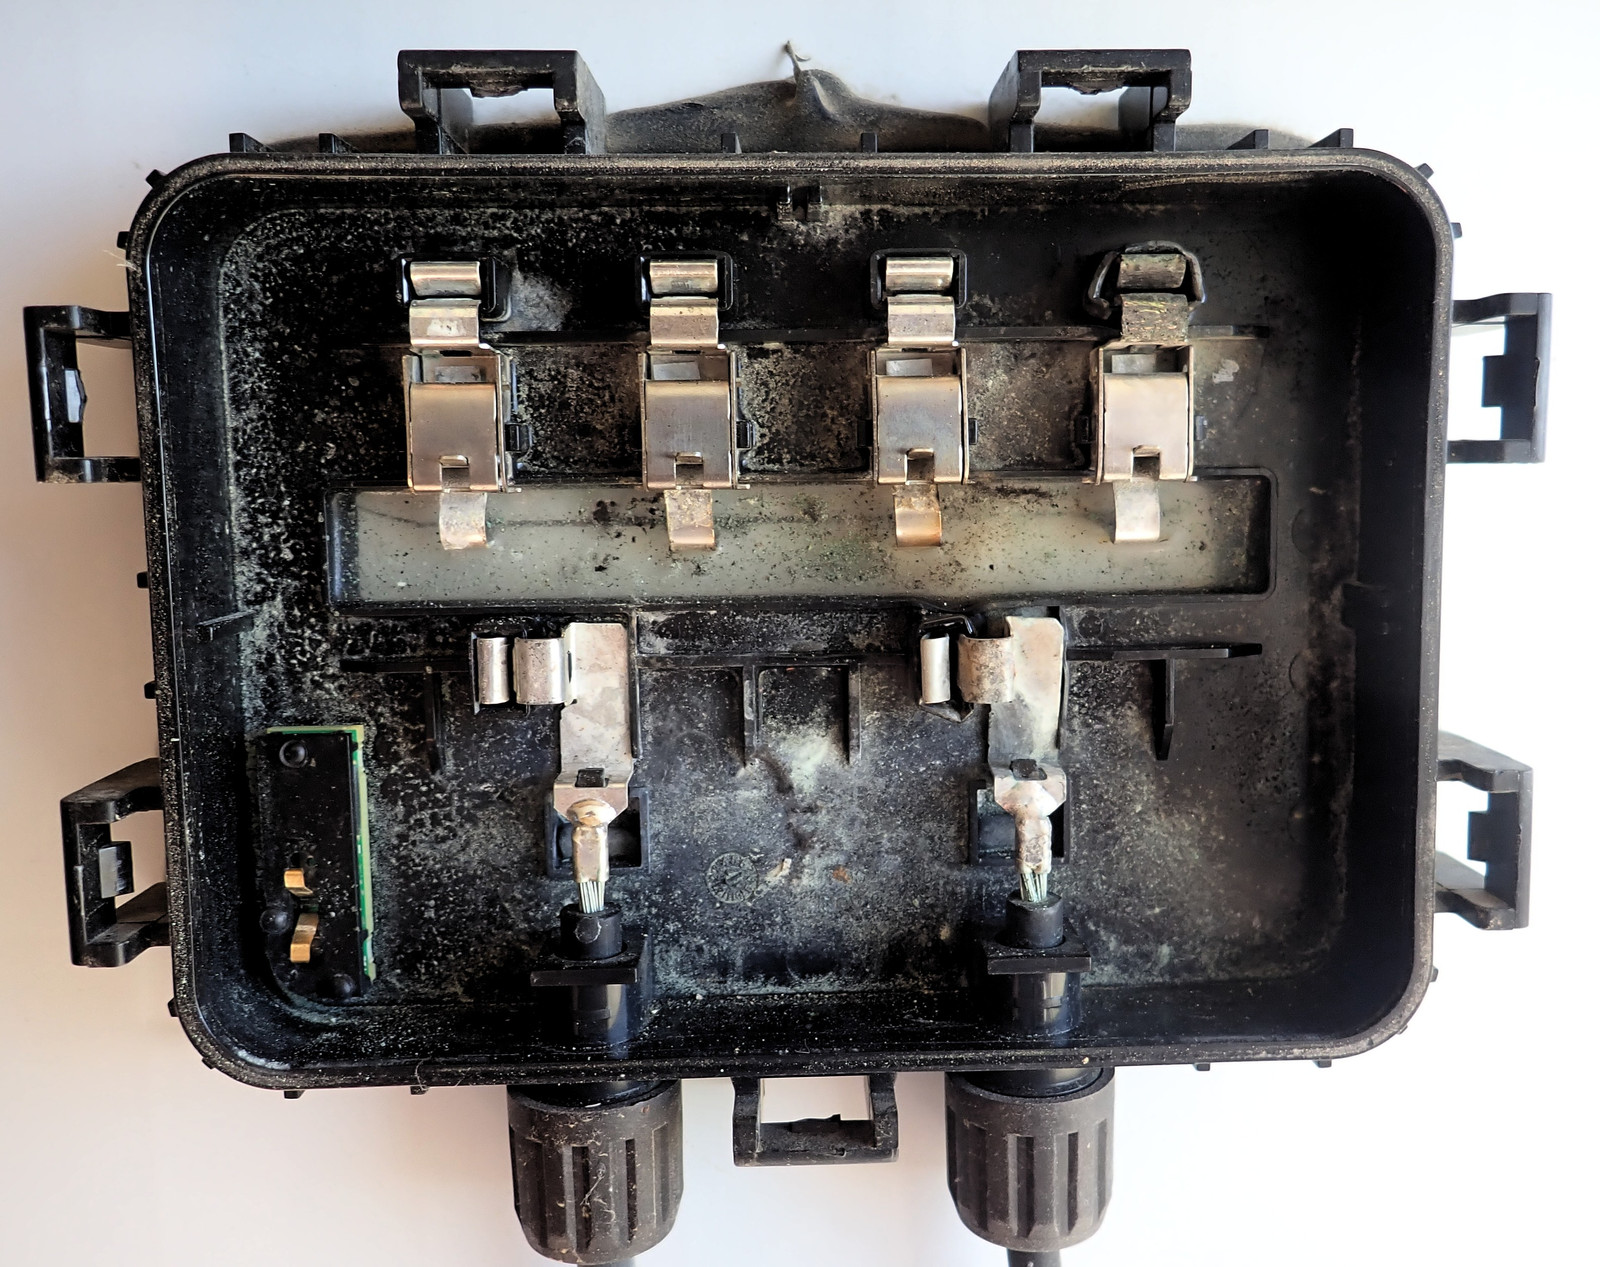
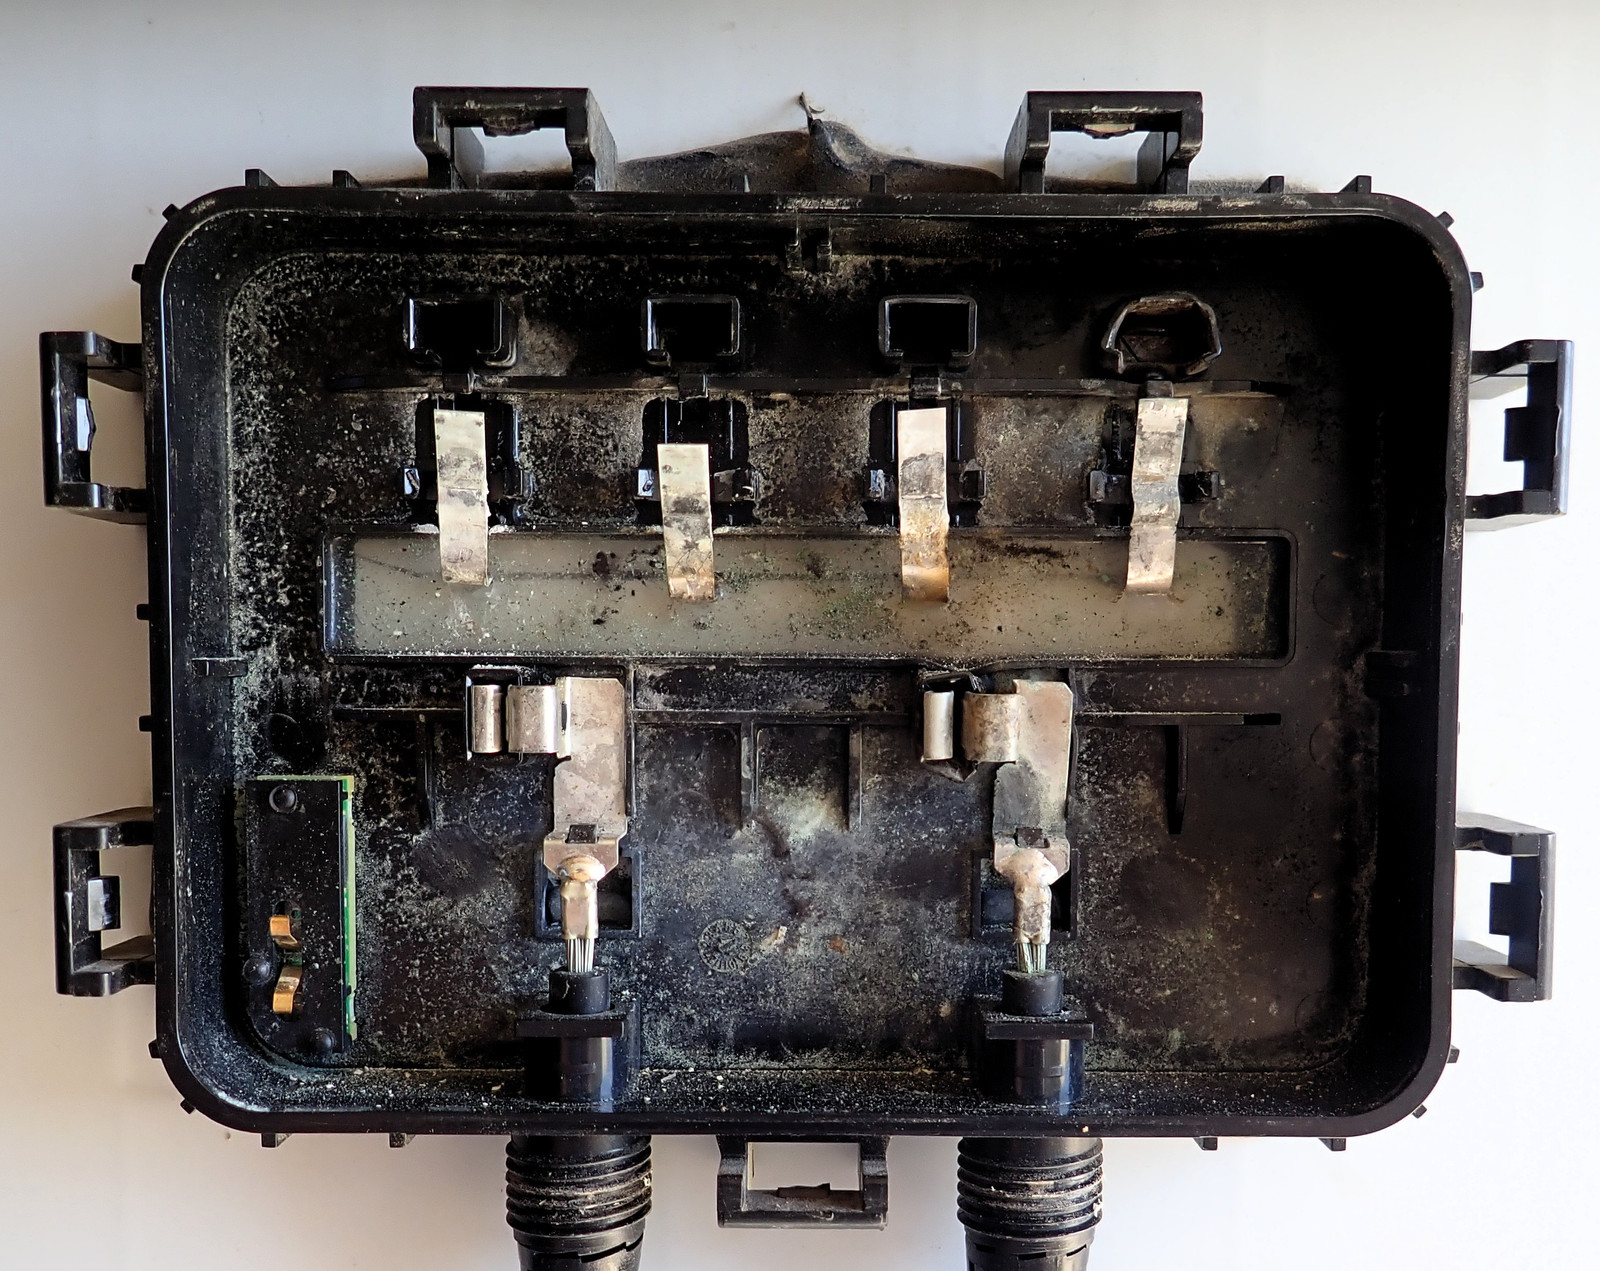
Inside, the panel-side guts look something like this (ideally a bit less “melted and fried” looking). Along the top, spring connectors give access to each of the three panel strings. In the center, ribbons come out into these little snap/spring connectors. And at the bottom, the main PV -/+ wires come in and have their own clips for sending power out to the rest of the array.
If you look closely, though, you’ll notice that some of these clips aren’t like the others. The right hand main clip and surrounding plastic show some signs of thermal distress, and the top right panel connector isn’t looking amazing either. Both of them have clearly gotten hot enough to distort the plastic around them - which, I assure you, isn’t in the design for these modules. Clipping the back on and off, pretty cool. Frying the spring connectors, the opposite of cool - hot.
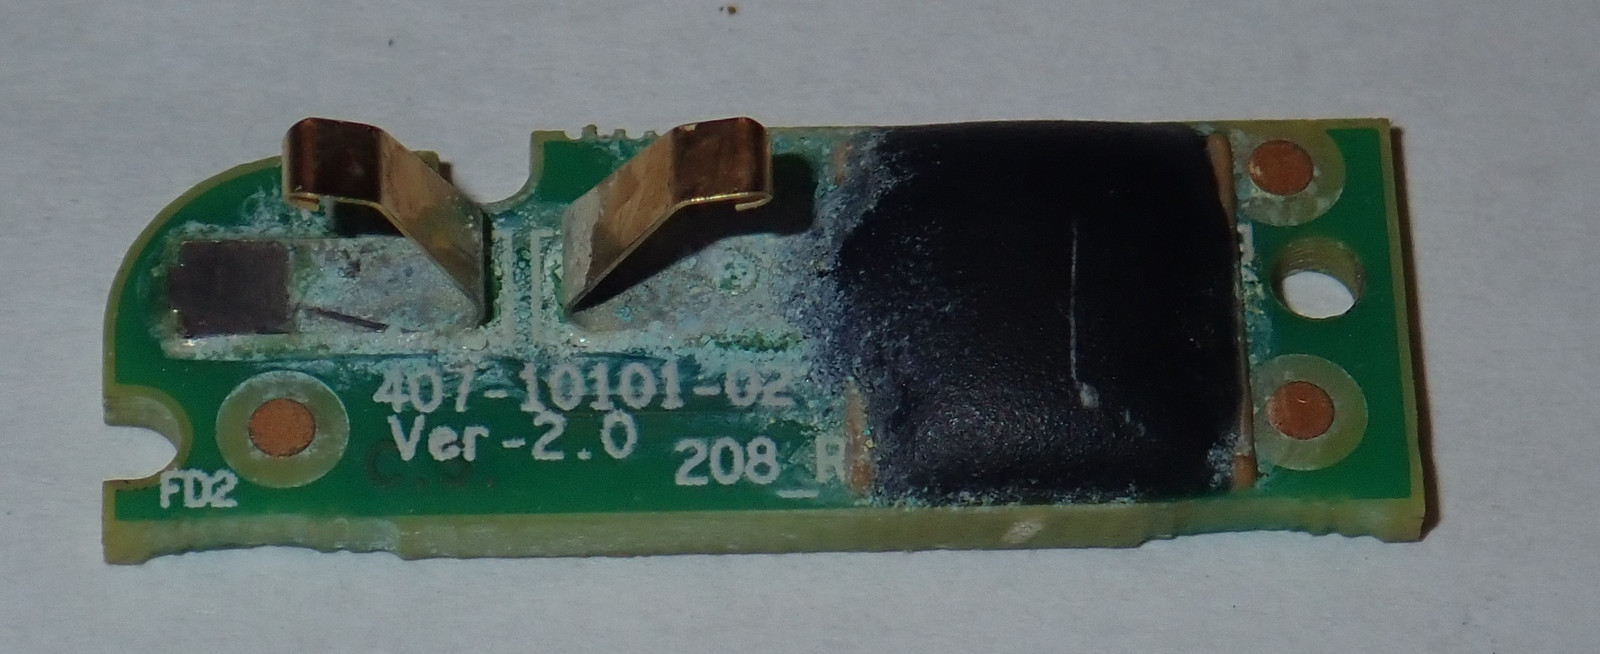
In the lower left, there’s some sort of little communications gizmo. I popped it out, because I don’t care about it - I’m not going to be putting anything fancy in here that might need to talk to it. What’s it do? No idea.
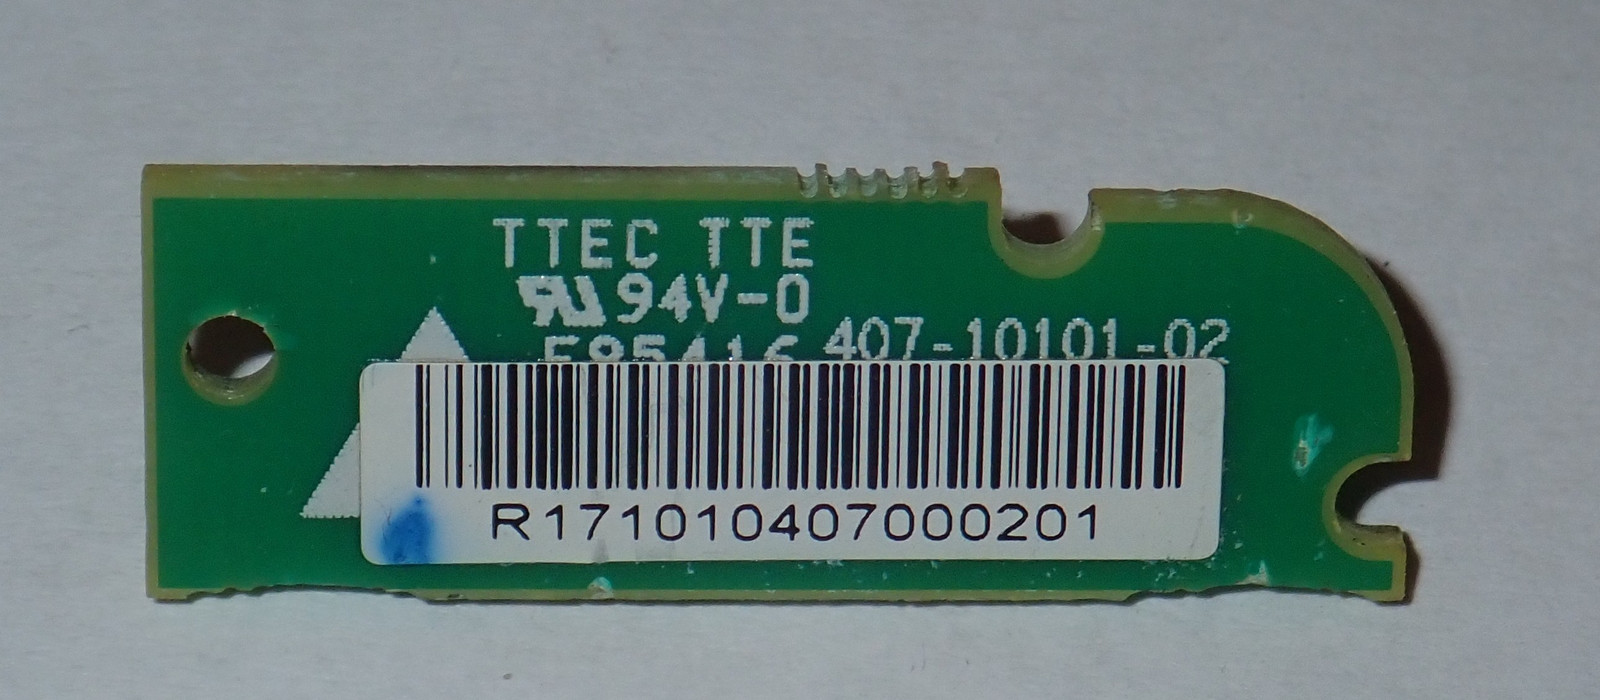
I was hoping that the bar code on the back might match the panel serial number, but I can’t find any relation between the two. I assume this is some sort of panel data store that includes the serial number, nameplate power, and various operating parameters - but I’ve not tried to read anything off it. If you want it, let me know, but I doubt it’s anything terribly interesting.
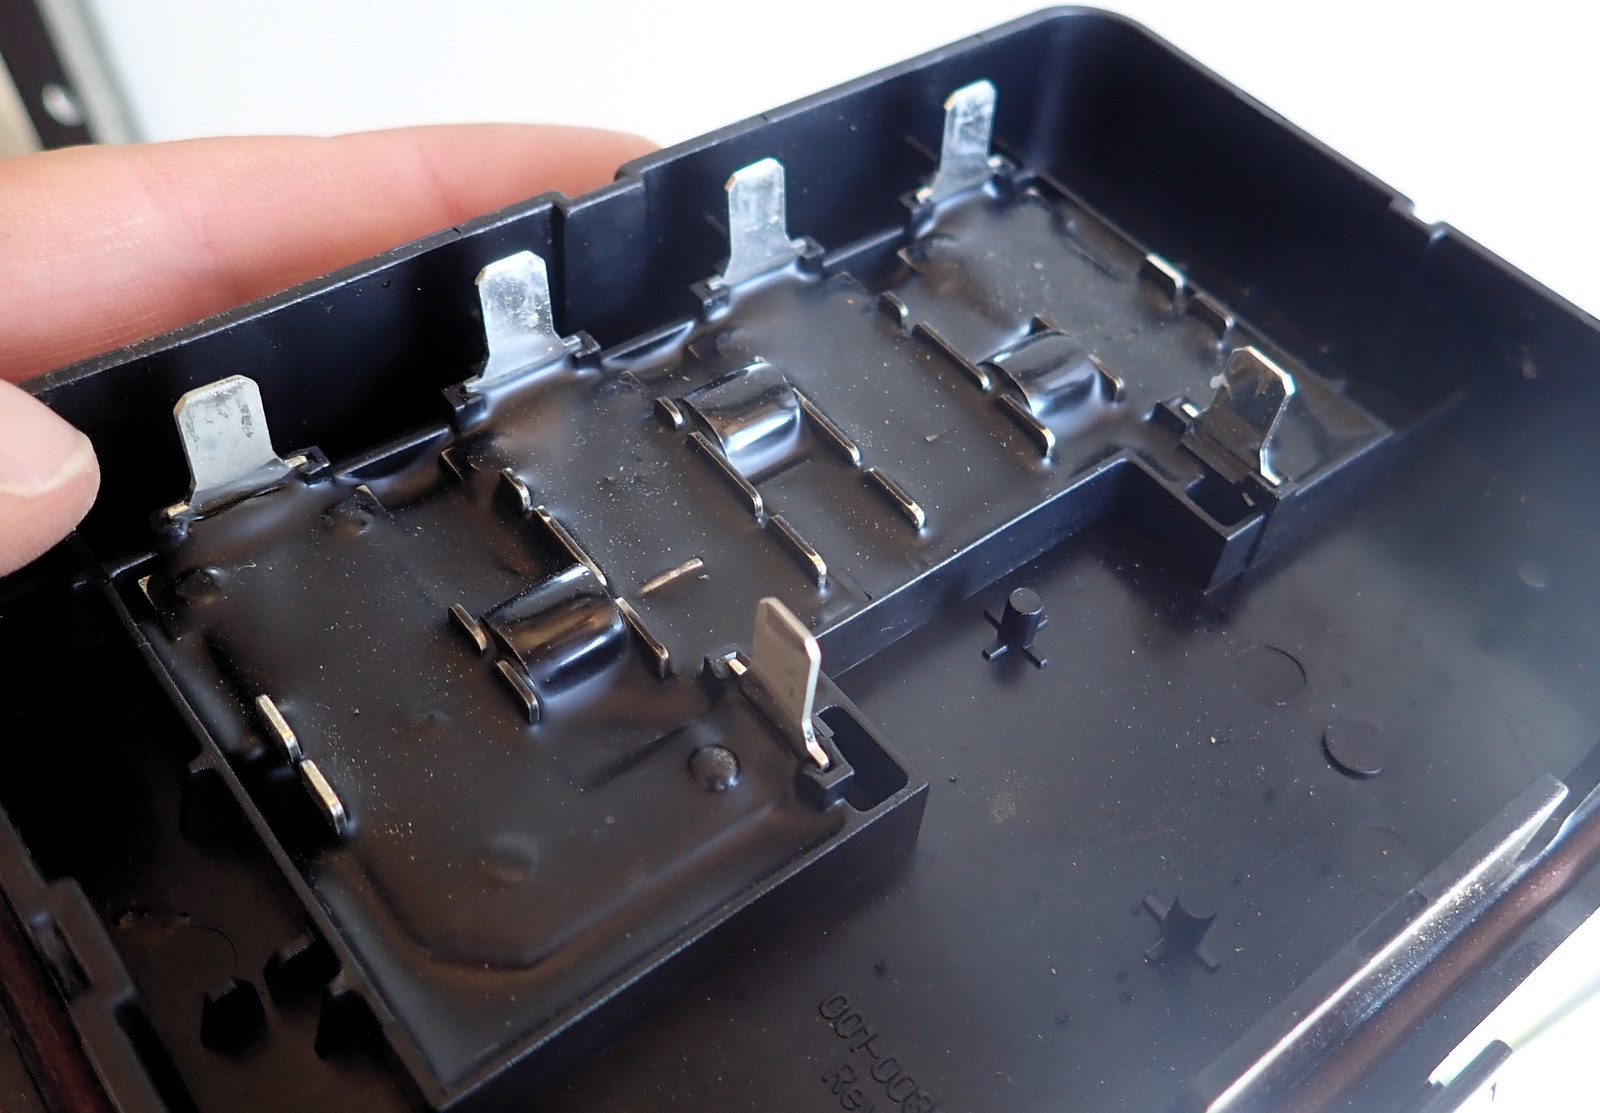
The backplate that clips in contains the assorted electronics that do something. Here, my backplate modules are simple bypass diode versions, so they’re just a set of conductors from the panel +/- to the output wire +/- terminals, with some diodes in the middle to handle bypass. Nothing fancy, and they’re easy enough to obtain. When I started this project, I assumed I just had a set of bad bypass diodes, so I picked up a pile of them on eBay, but as far as I can tell, I’m not actually dealing with any failed bypass diodes. Just fried springs.
Further Teardown
My other panel is in worse shape. This one was responsible for the actual arc fault warnings as opposed to just running a bit hot. And I’ve got a few more that will get some rework in the weeks to come. But, continuing down the path of “Get the fried stuff out,” the good news is that all this stuff comes out easily, and the junction box is quite easy to convert into something saner!

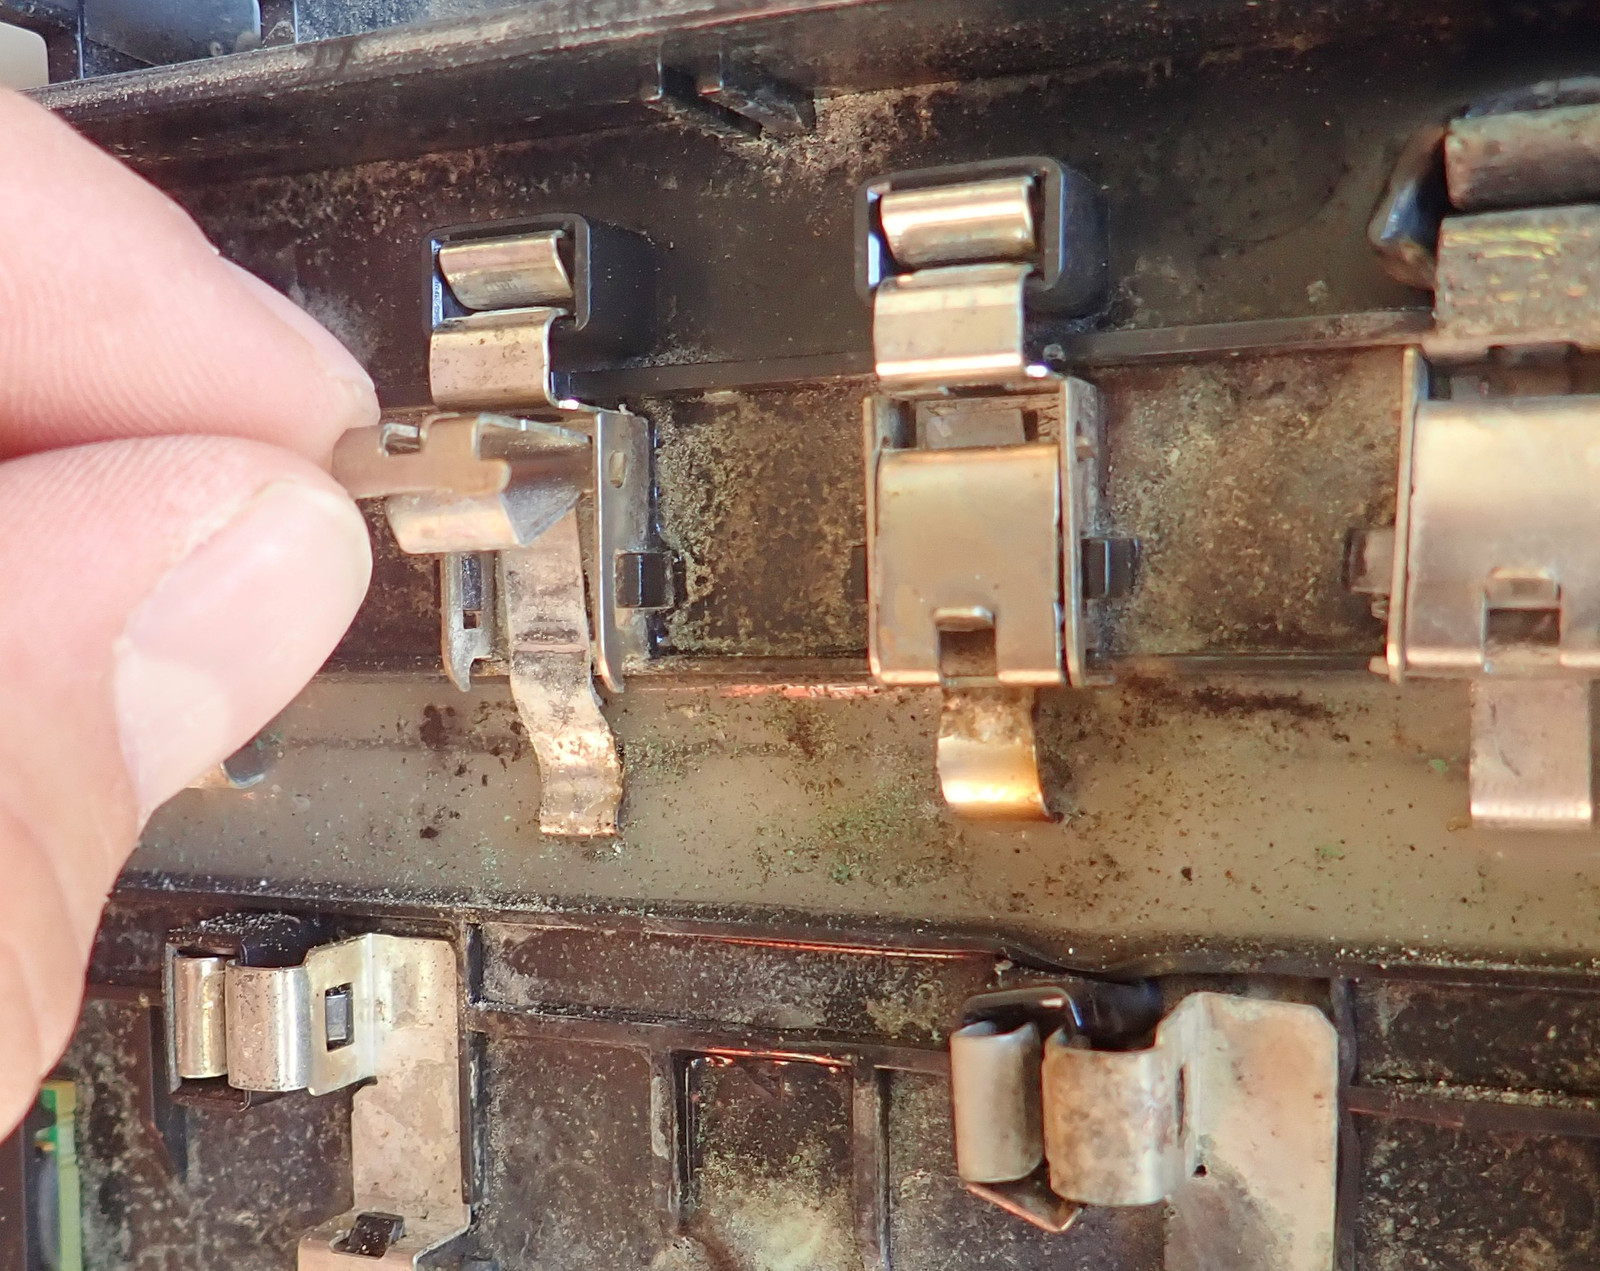
The clips along the top are actually just pop up spring clips. You can see how the extensions on the cover clip under the hooks on the base - this applies a lot of pressure to the ribbon and presses it into the metal chassis of this connector, which continues up to the spring clip for the back plate.
There are a lot of press/spring fit connections in each one of these boxes. Ribbon to spring clip, spring clip to back plate, and back plate to main wires - which, at least, are crimped in place.
These clips are easy enough to open and remove. Get a small flat head screwdriver or similar device, stick it through that opening at the bottom, and pry “up.” This will bend the tabs out past the hooks, and should free the ribbon from the spring. To the right and left of the clip gizmo, there are some little black plastic tabs that hold it down. I found that rocking it left and right with a screwdriver through the movable bit works well enough to free them. There might be a bit of sealant/adhesive, but these all came out without any trouble. Just be careful with the ribbons - they’re not particularly fragile, but if you rip one off, that’s an awful lot harder to fix.
The main PV +/- leads are held in with a standard MC4 cable gland, but you’re not going to be able to get a MC4 tool around them - there’s not clearance with the panel. Just use a large set of pliers to give them half a turn, and they should come the rest of the way off by hand. Once those are clear, snip the wires and remove them. Then, the main +/- spring terminals come out - a pair of plastic latches holds them in place, if yours haven’t melted clear yet…
The ribbons are a tinned copper sort of construction - a copper core with some silver metal of some variety or another in a thin layer over the top for corrosion resistance. Not that much should be getting into a sealed junction box to corrode them…
Failure Analysis
So, what happened here? I hate to say “The standard failure of spring terminals,” but it sure looks like that. Spring terminals are great, until the first thing goes wrong. Then everything goes wronger and wronger from there, because spring terminal failure is your bog standard positive feedback loop.
It’s obvious both the appearance of the metal and the clearly melted plastic around the terminals that they got hot while running. All the hot junction boxes I’ve pulled apart so far look the same - at least the top right and positive terminal showing heat distress. Notice how the terminal on the left has a nice square plastic box around it squeezing the spring, and on the right, the box is no longer applying pressure? Lower pressure, higher resistance, more heat. Whoops.
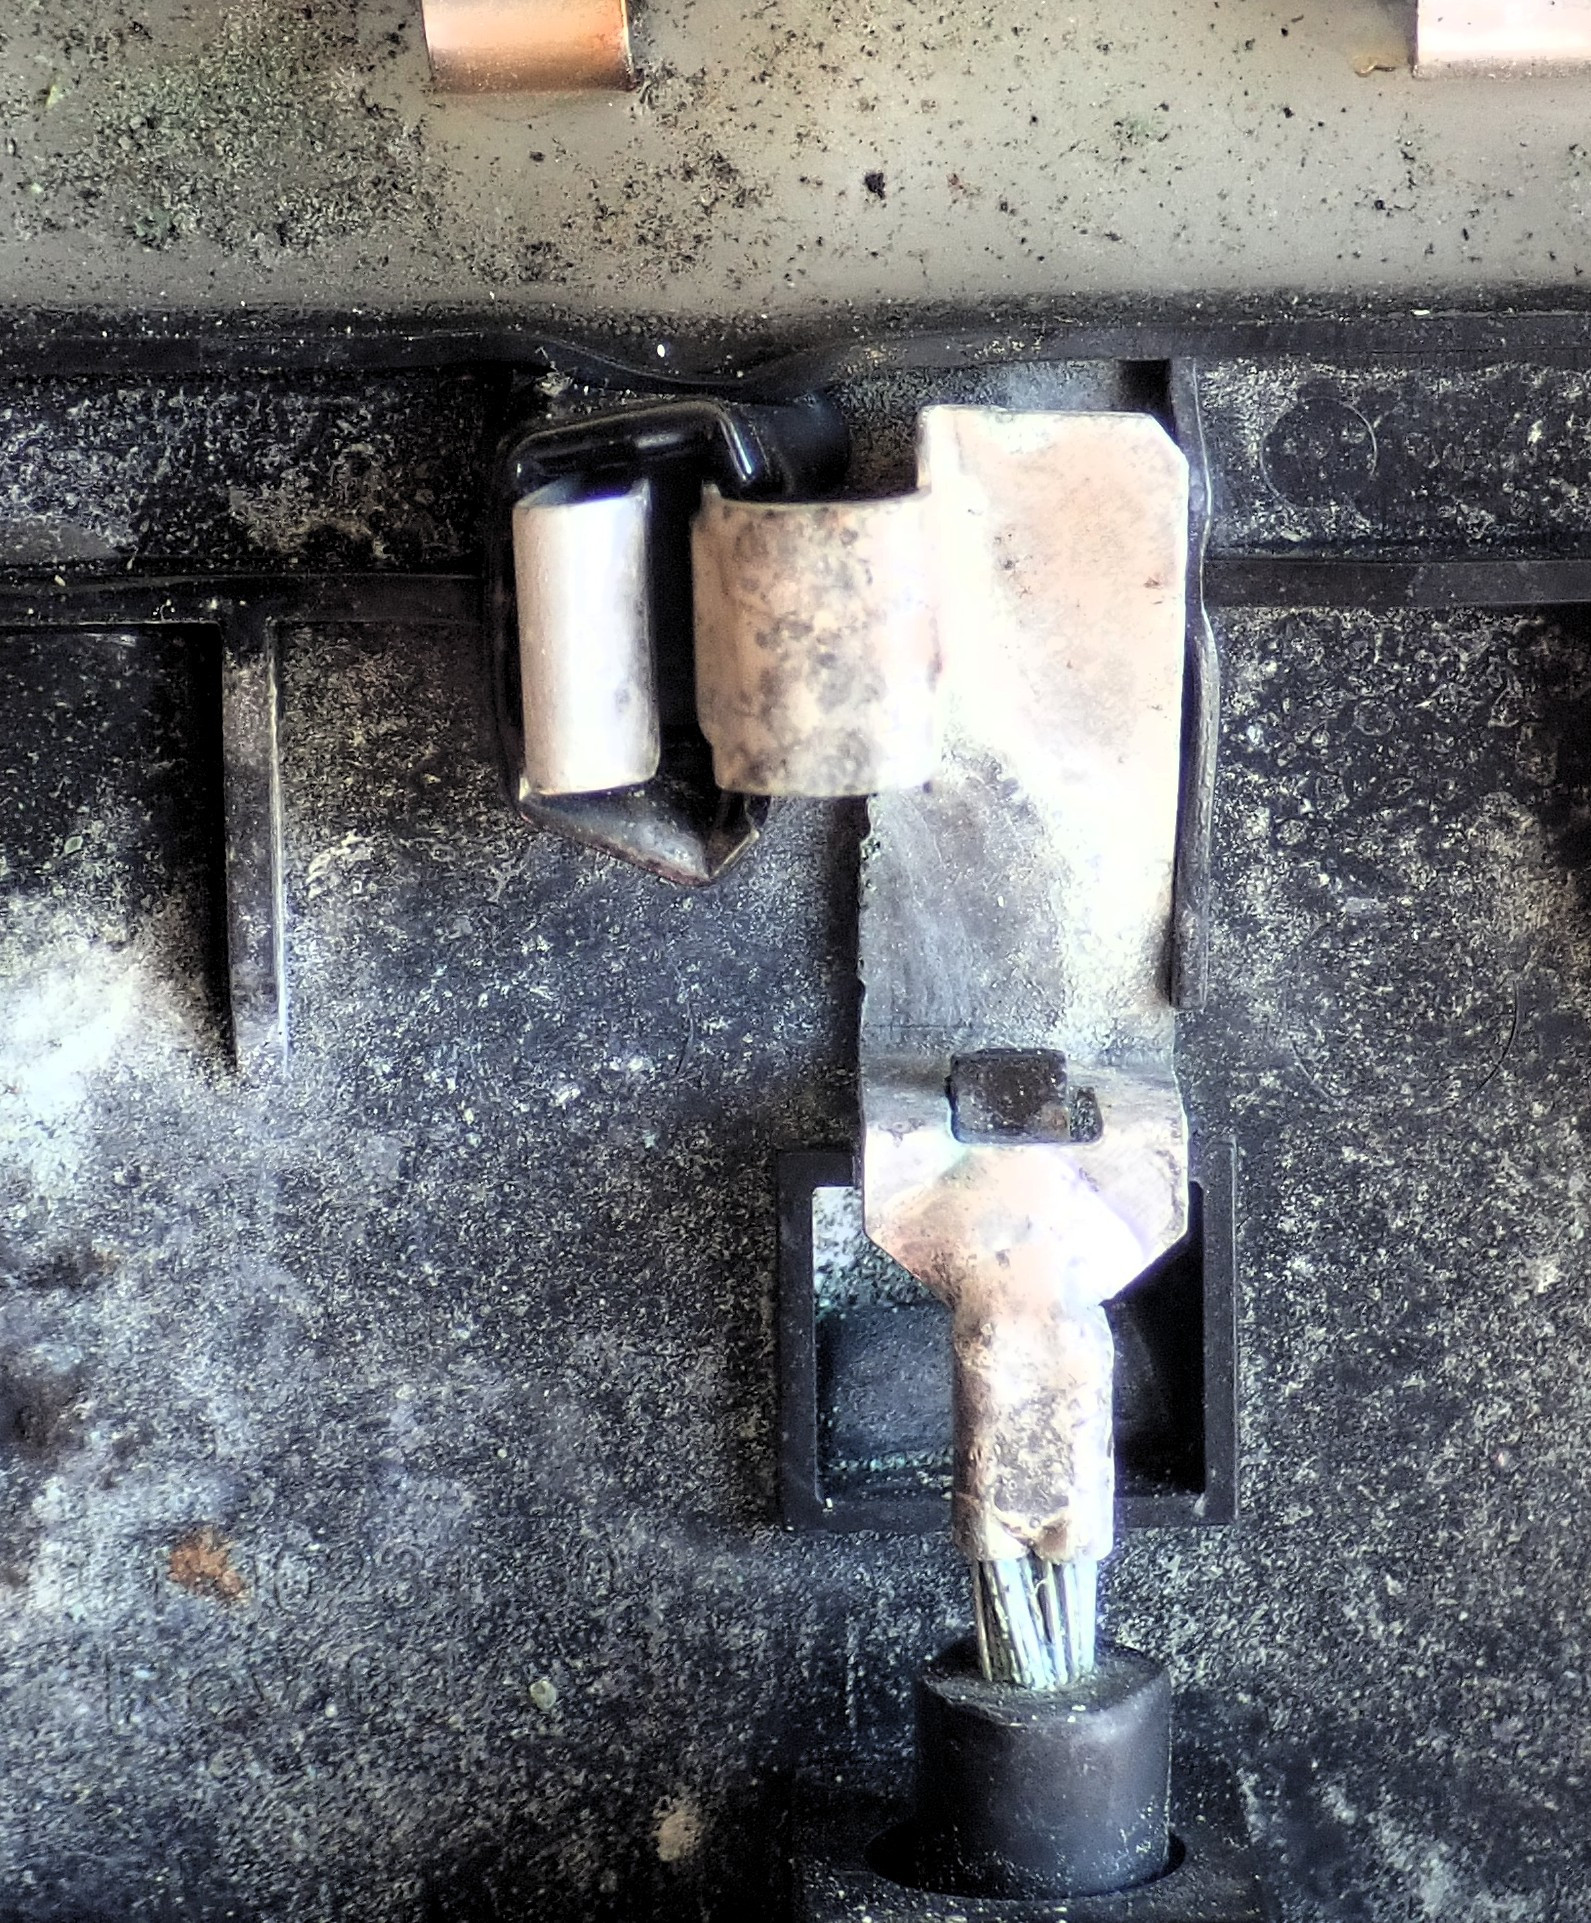
The main terminals look the same - warped plastic and heat distress. Look at the main wire coming in though - that’s also showing green corrosion products on the wire. I’m assuming that some water got in here at some point (either during storage before I got the panels or during operation from a bad seal) and started the process. I honestly don’t know how long this has been going on, not having had a thermal imager when I got the system online. This failure may have started before I even got the panels.
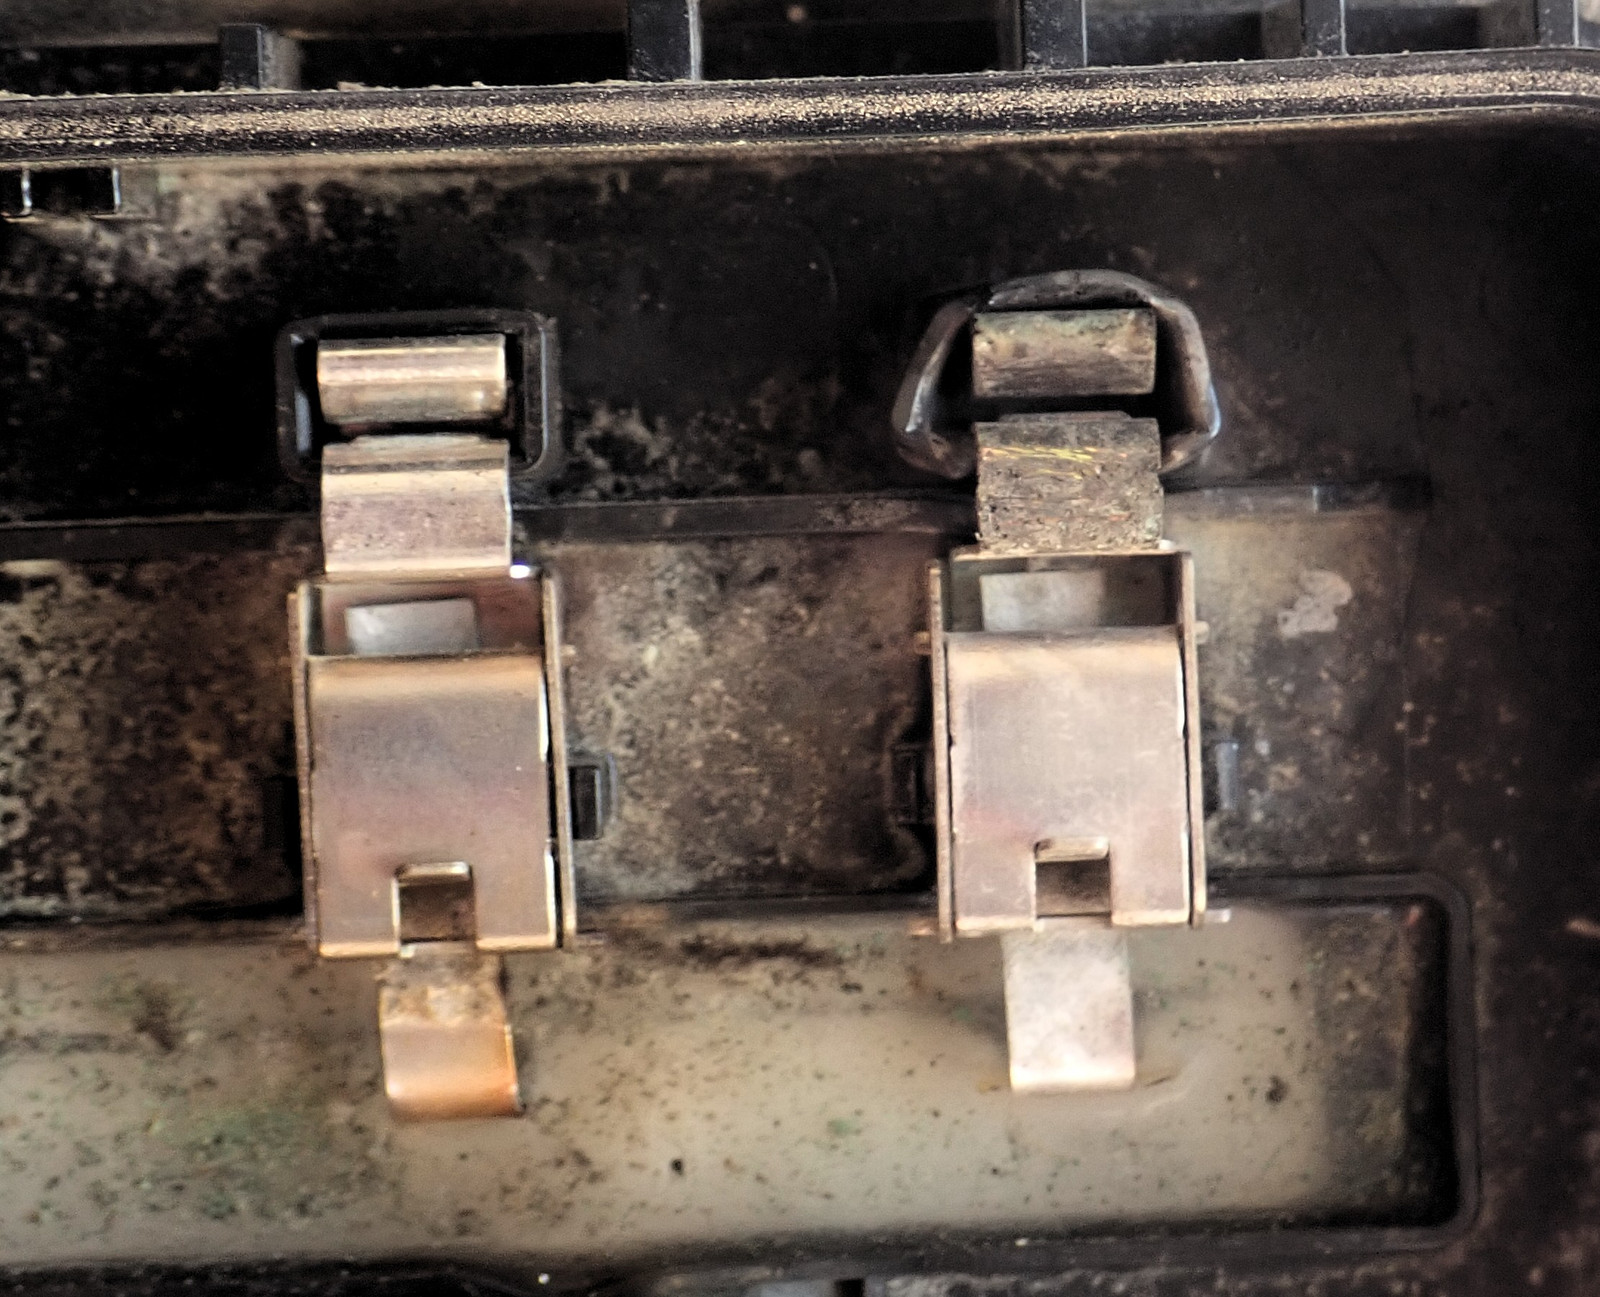
But heat is even nastier to metal springs - because enough heat will anneal the metal and make it “not springy.” On the left, look at the gap between the spring contacts. This is out of the junction box that was causing arc faults, and this is the worst of the upper contacts. On the right, one with no signs of damage (on top - the sides still look a bit rough). That larger spring gap on the left will mean a worse connection, more heat, and that whole positive feedback loop that goes until something fails enough to be noticed.
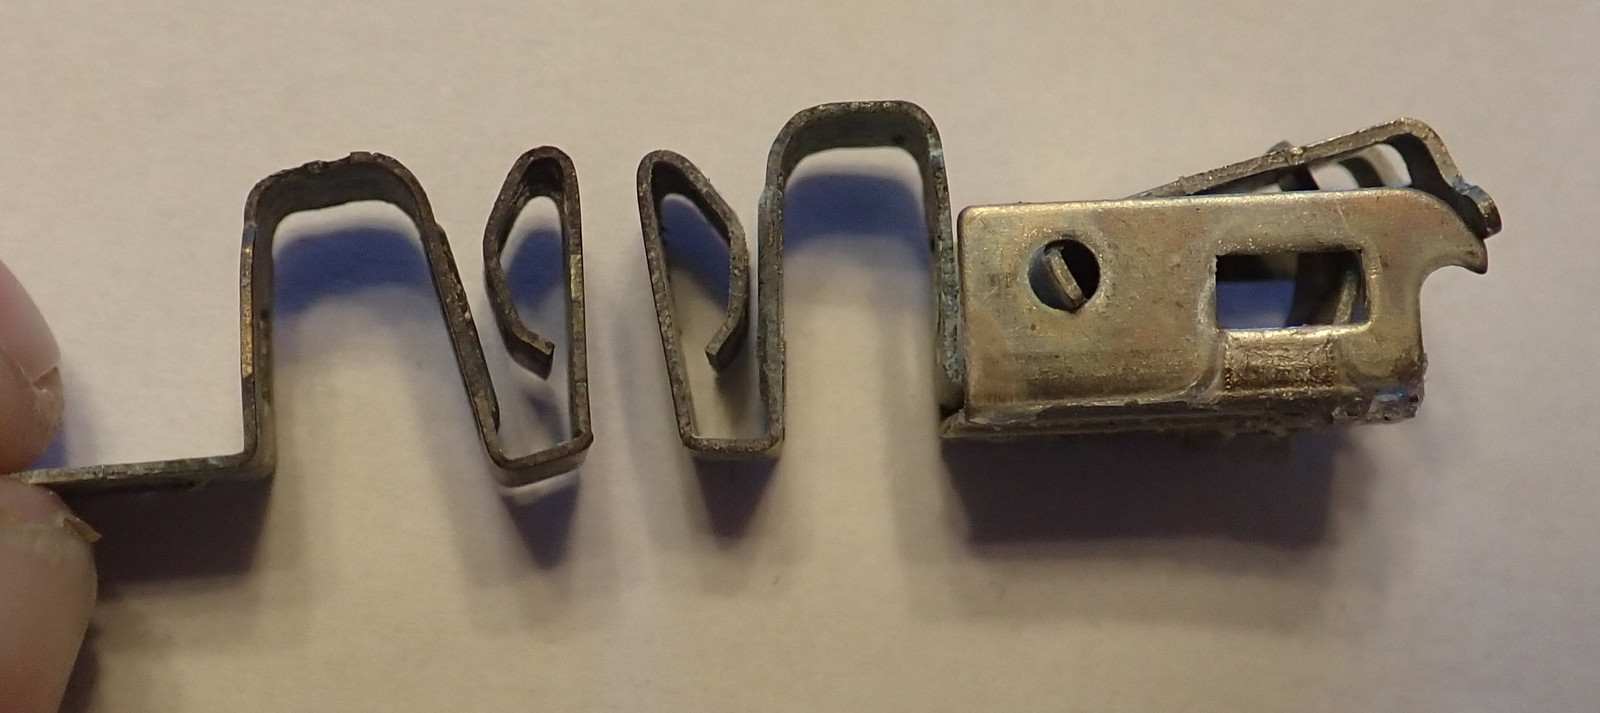
The “ribbon to spring” contact points seem to have been mostly fine. There’s some corrosion around the outside of the contact point, but the contact points were fairly clean - at least here. The ribbon side had some hard black buildup on it too.
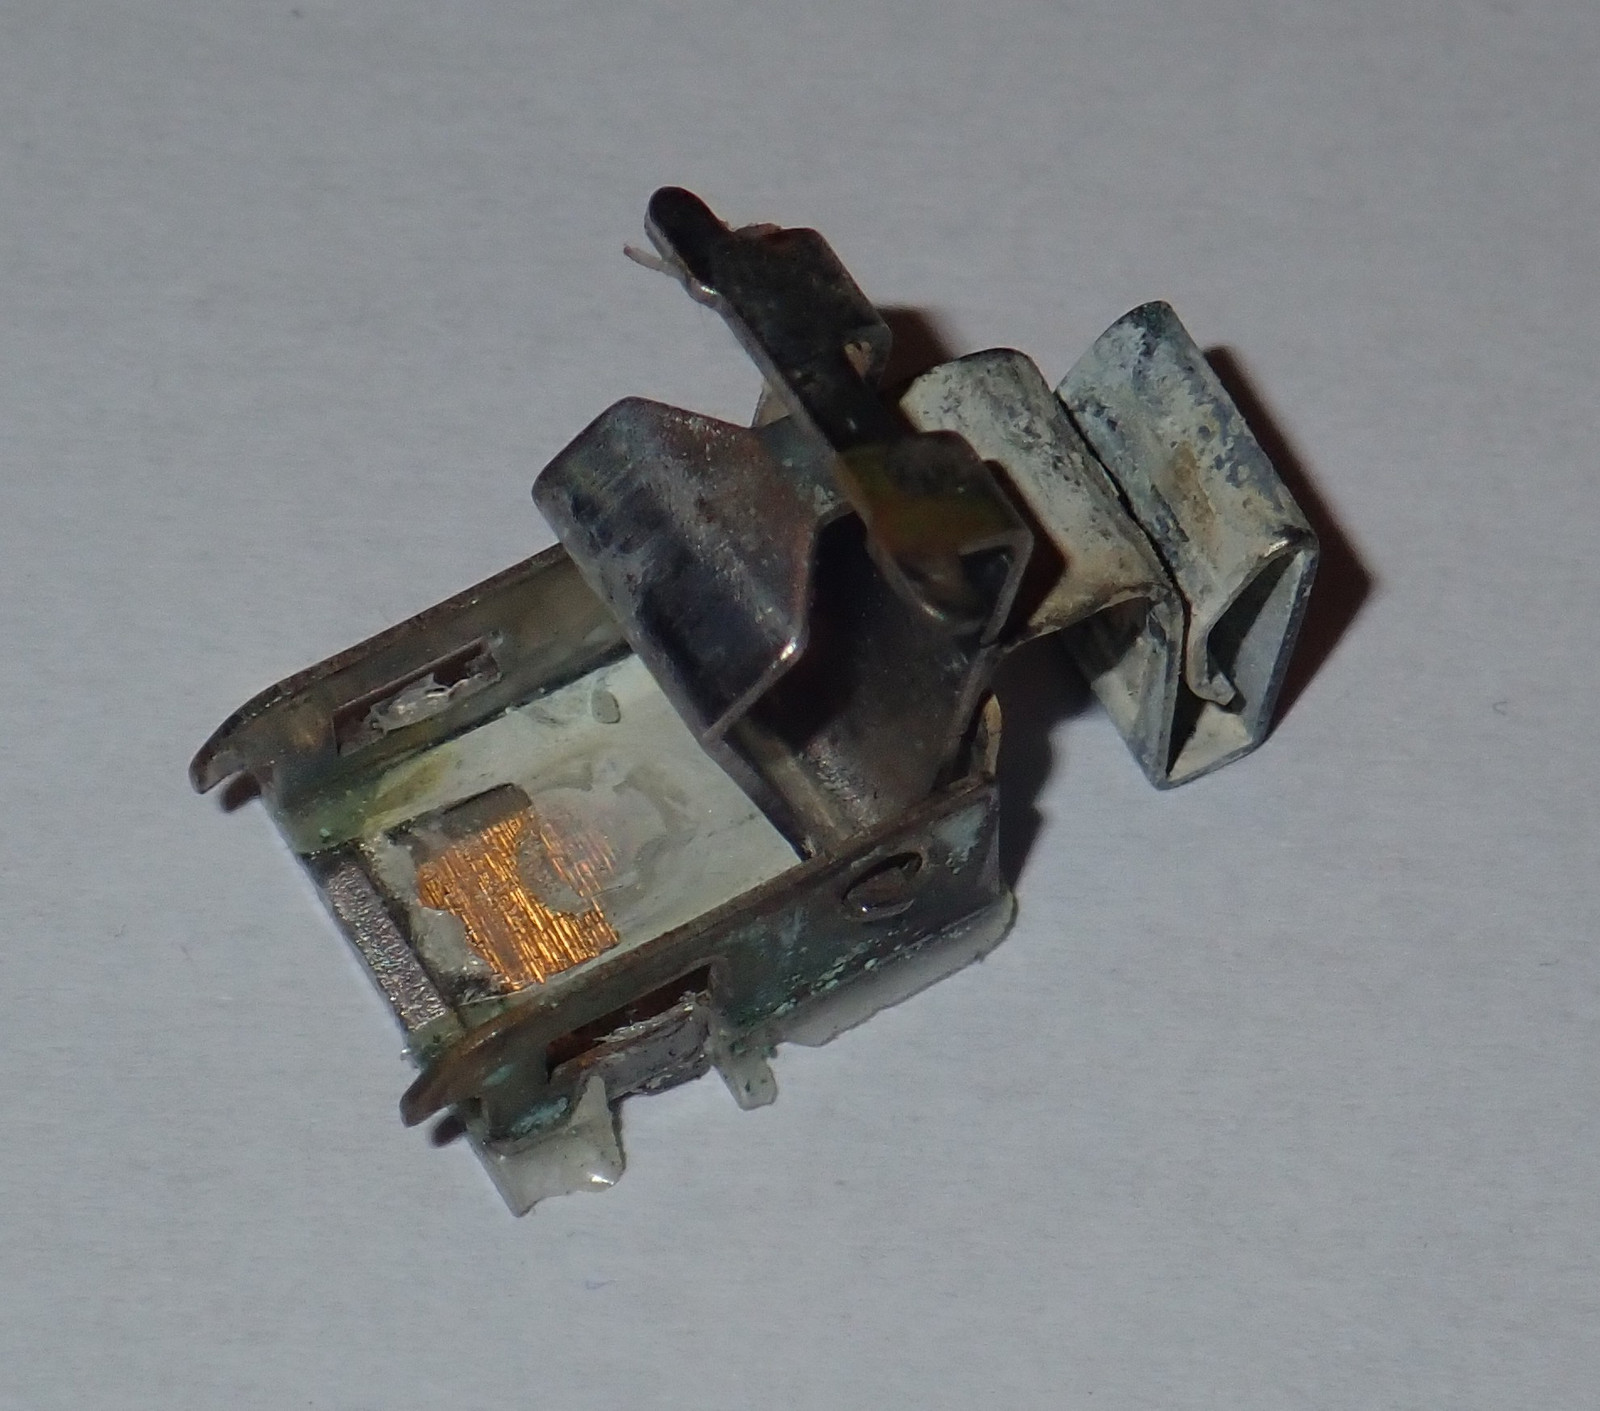
But even the “good condition” springs out of these junction boxes were showing some corrosion buildup. I don’t know how much of this is from moisture, how much is from the general heat of the box over time, and how much is material blasted off another connection while it was faulting - but they’re just not in good shape. And this is after less than two years of operation!
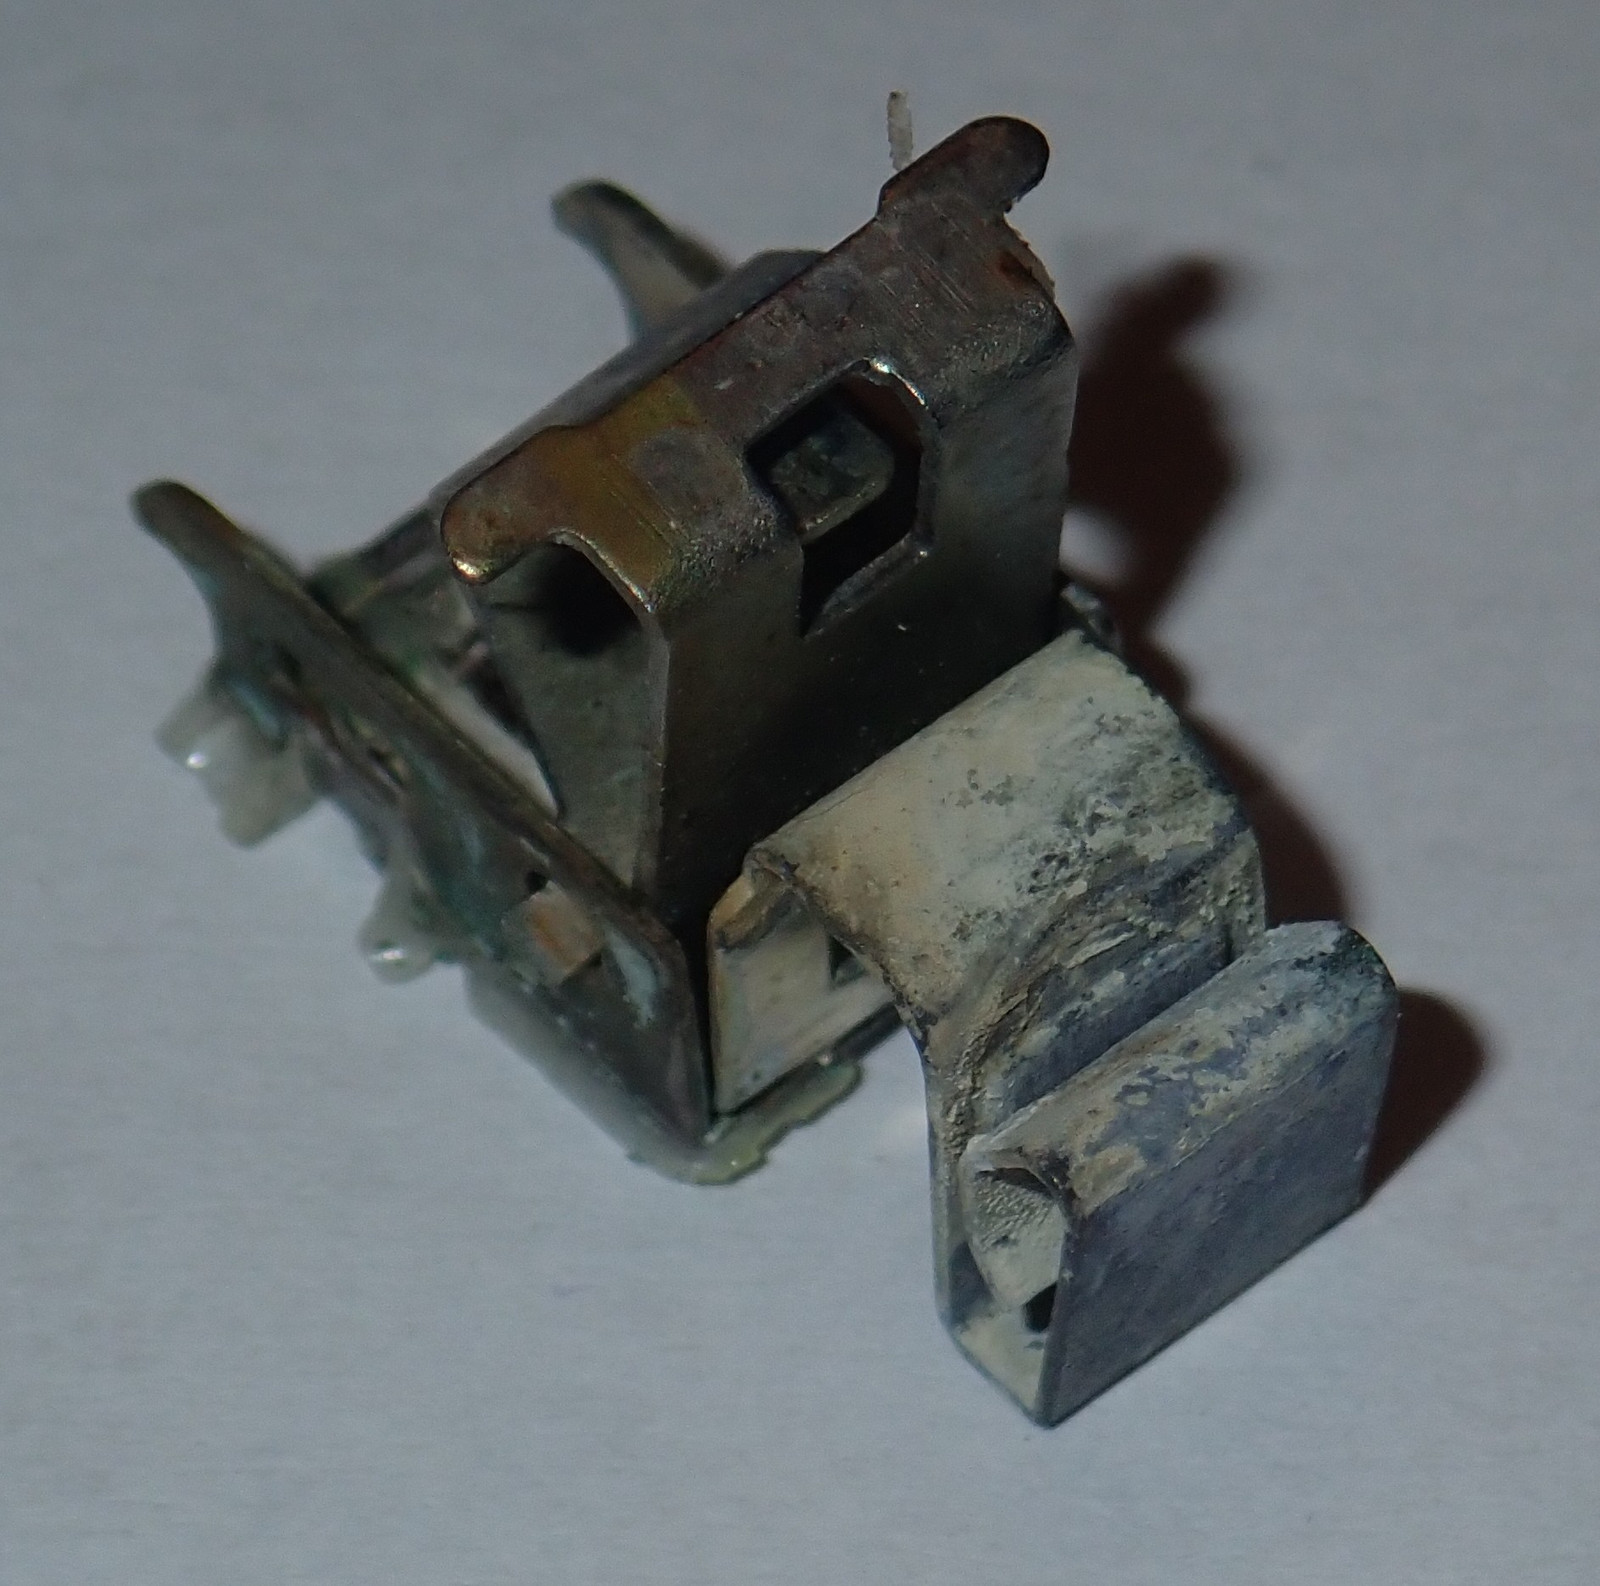
The “really hot connection spring” is just toasted. I scraped some of the crud off, and it’s copper under there, but this is not the sort of contact that makes a good connection anymore - and, sure enough, this was the box that was triggering the arc faults.
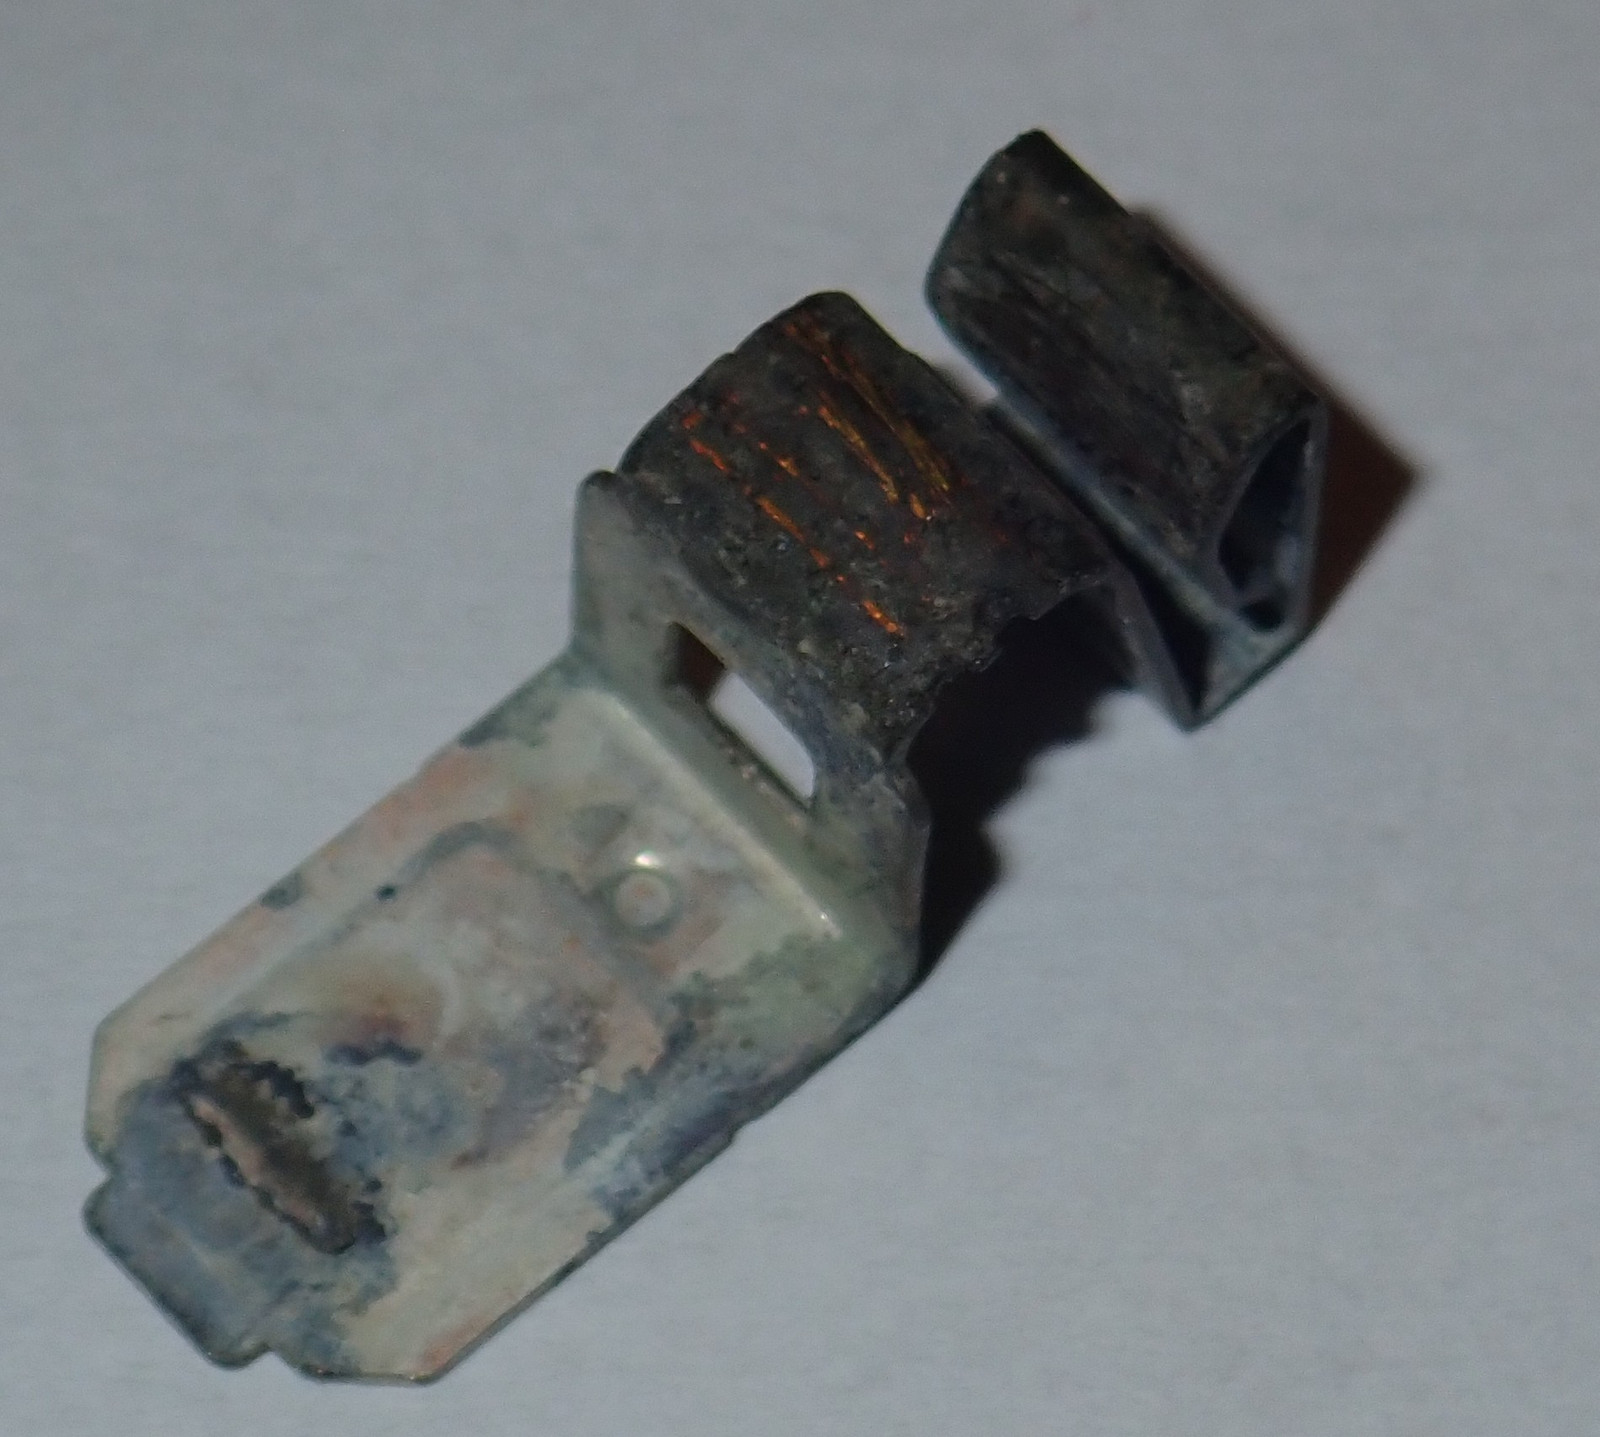
Again, spring connections just do this. They build up some corrosion or lose a bit of spring tension, the resistance increases slightly, which increases the connection temperature - and that raised temperature both increases the rate of corrosion and does things like melt the plastic that’s adding force for the connection. Then, over time, it gets hot enough to cause the metal to be less-springy, and you’ve entirely lost. If you’re lucky, it will fail open circuit, or you’ll get arc fault warnings. If not, it’ll generate enough heat to damage something, and your clue that something has gone wrong will be a melted junction box or worse.
I can’t help but think that Tigo worked this out in a hurry, because none of their current products are the junction box style products - they’re all standalone modules connected via MC4.
Anyway, at this point, most people would be warrantying the panel and go on with life. But ITEK isn’t in business any more, the solar cells on the front are still totally fine, and so I fixed the problem my way - by going back to an older style junction box, built within the shell of the failed one.
Building a New Junction Box
The thing is, I don’t care about being able to slot a new back plate in. I’m not going to. I have arrays that are well placed for illumination, and that only barely use the bypass diodes anyway. They’re in use briefly during the morning and evening when the arrays shade each other, but during the bulk of their power production, it’s just the cells running hard. I could skip the bypass diodes, but that’s the sort of thing that’s really hard on the shaded cells when current is being forced through them, so I wasn’t willing to skip them entirely.
But I’m sure skipping the spring bits. I have four ribbons coming off the silicon strings, and need to connect two main power leads, and a couple diodes. This is a job for a butane soldering iron, of which I happen to have a very nice one.
The first step is to cut the main wires back an inch or so to get rid of any corroded sections - there’s plenty of wire left, so no need to run new wires unless you want to. Cut, strip, tin.
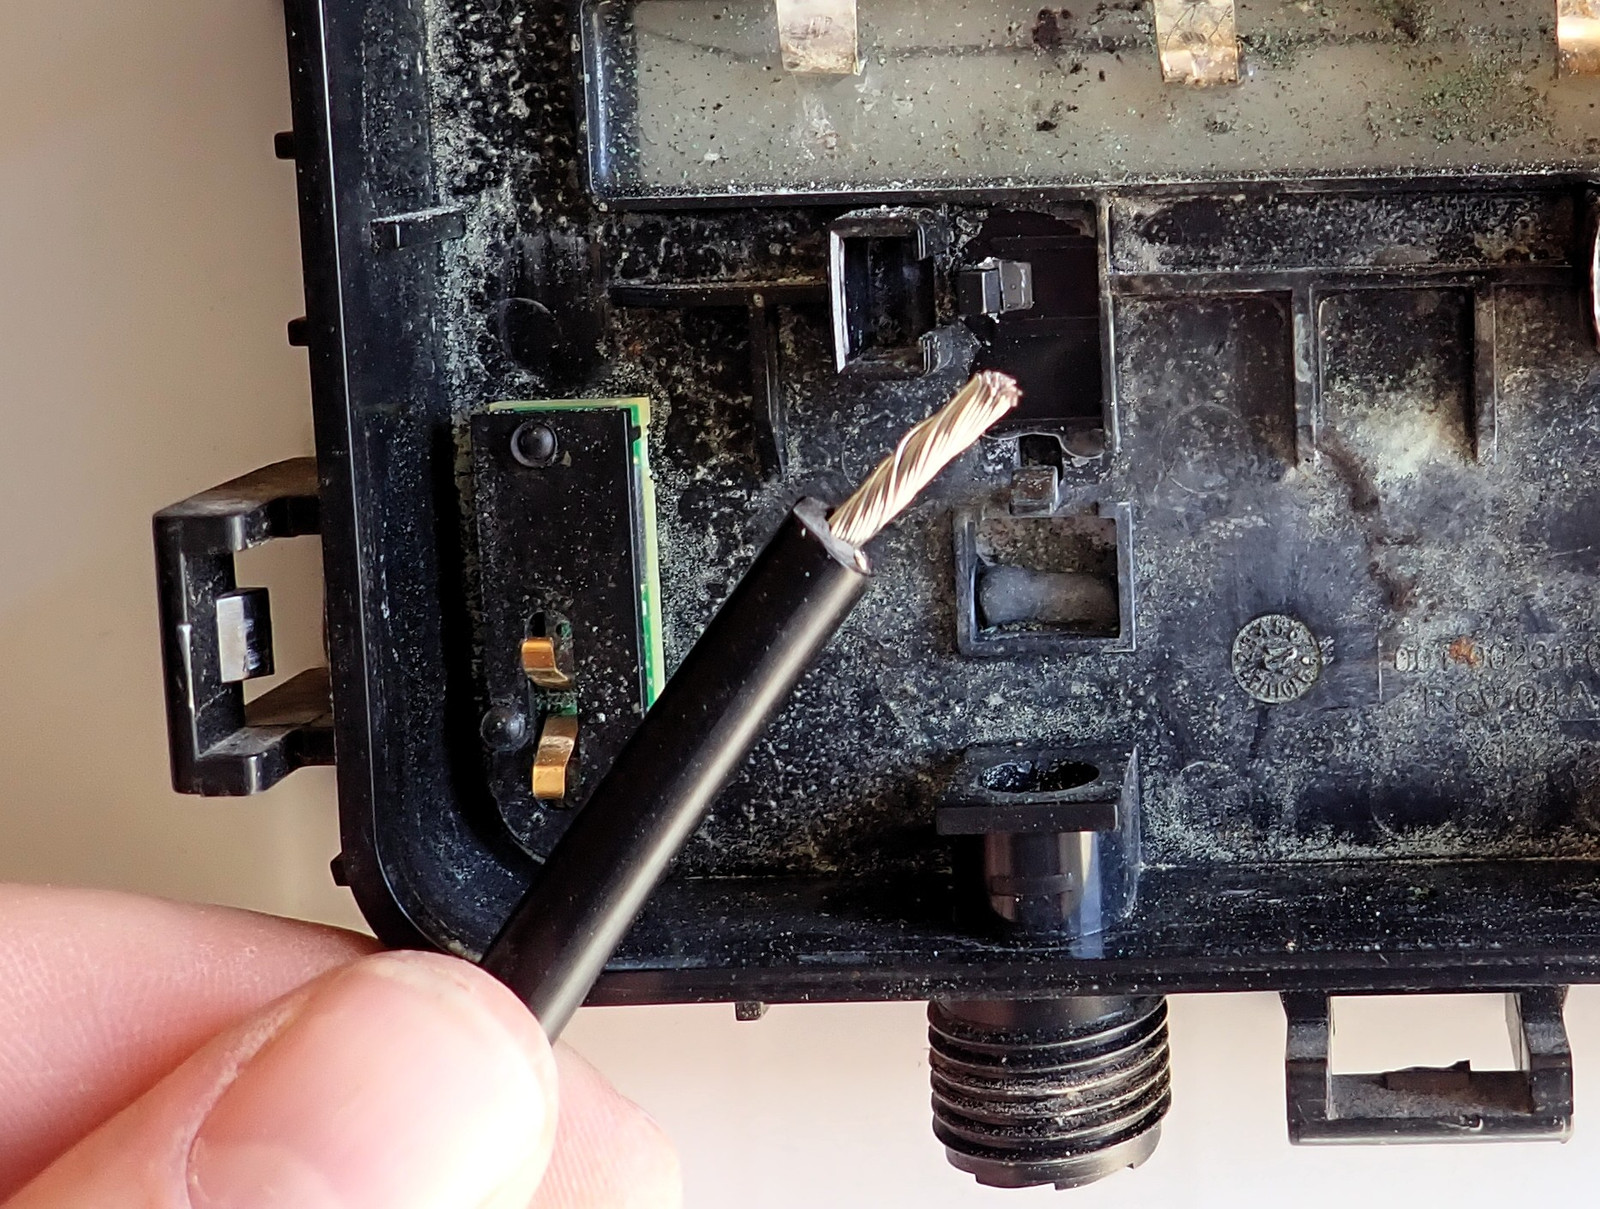
Bypass diodes go in between each of the ribbons, and the lined end (the cathode) goes to the right (to the “more positive” end of the panel). If the panel is producing, the higher voltage won’t go through the diode, but if a string is shaded, current can bypass that string through the diode - hence the name “bypass diode.”
The ribbons bend “down” - this will clear the bits in the back plate. I also cut out the various no longer needed plastic forms sticking into the box that were in the way. A pair of pliers or a set of wire cutters does a great job removing those.
Finally, I sanded the surface of the ribbons to expose the copper - I would have left them tinned, but removing the black buildup (which is fairly hard and presumably non-conductive) required getting into the copper anyway. The point is to make sure that solder sticks well.
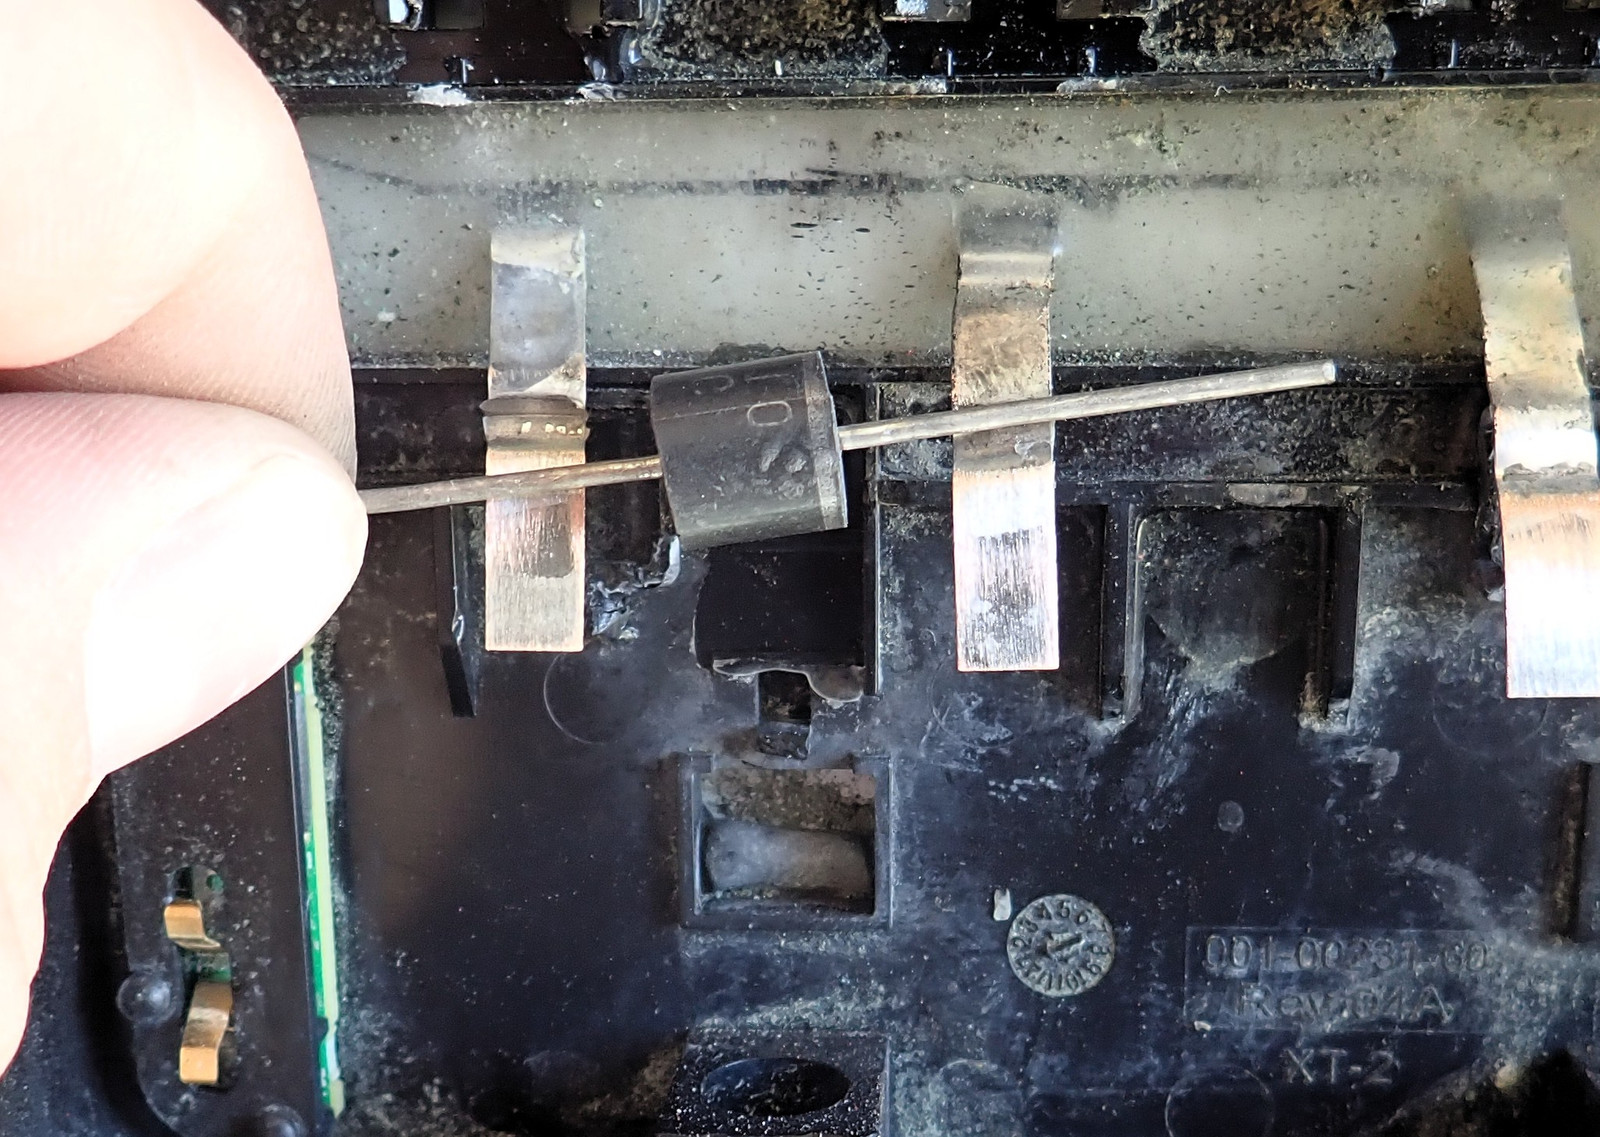
Flux the front side of the ribbons and apply solder to the ends so there’s something for the (also tinned) wire to join with. I actually flipped the ribbons horizontal after this photo to spread the solder more evenly along the bottom half inch.
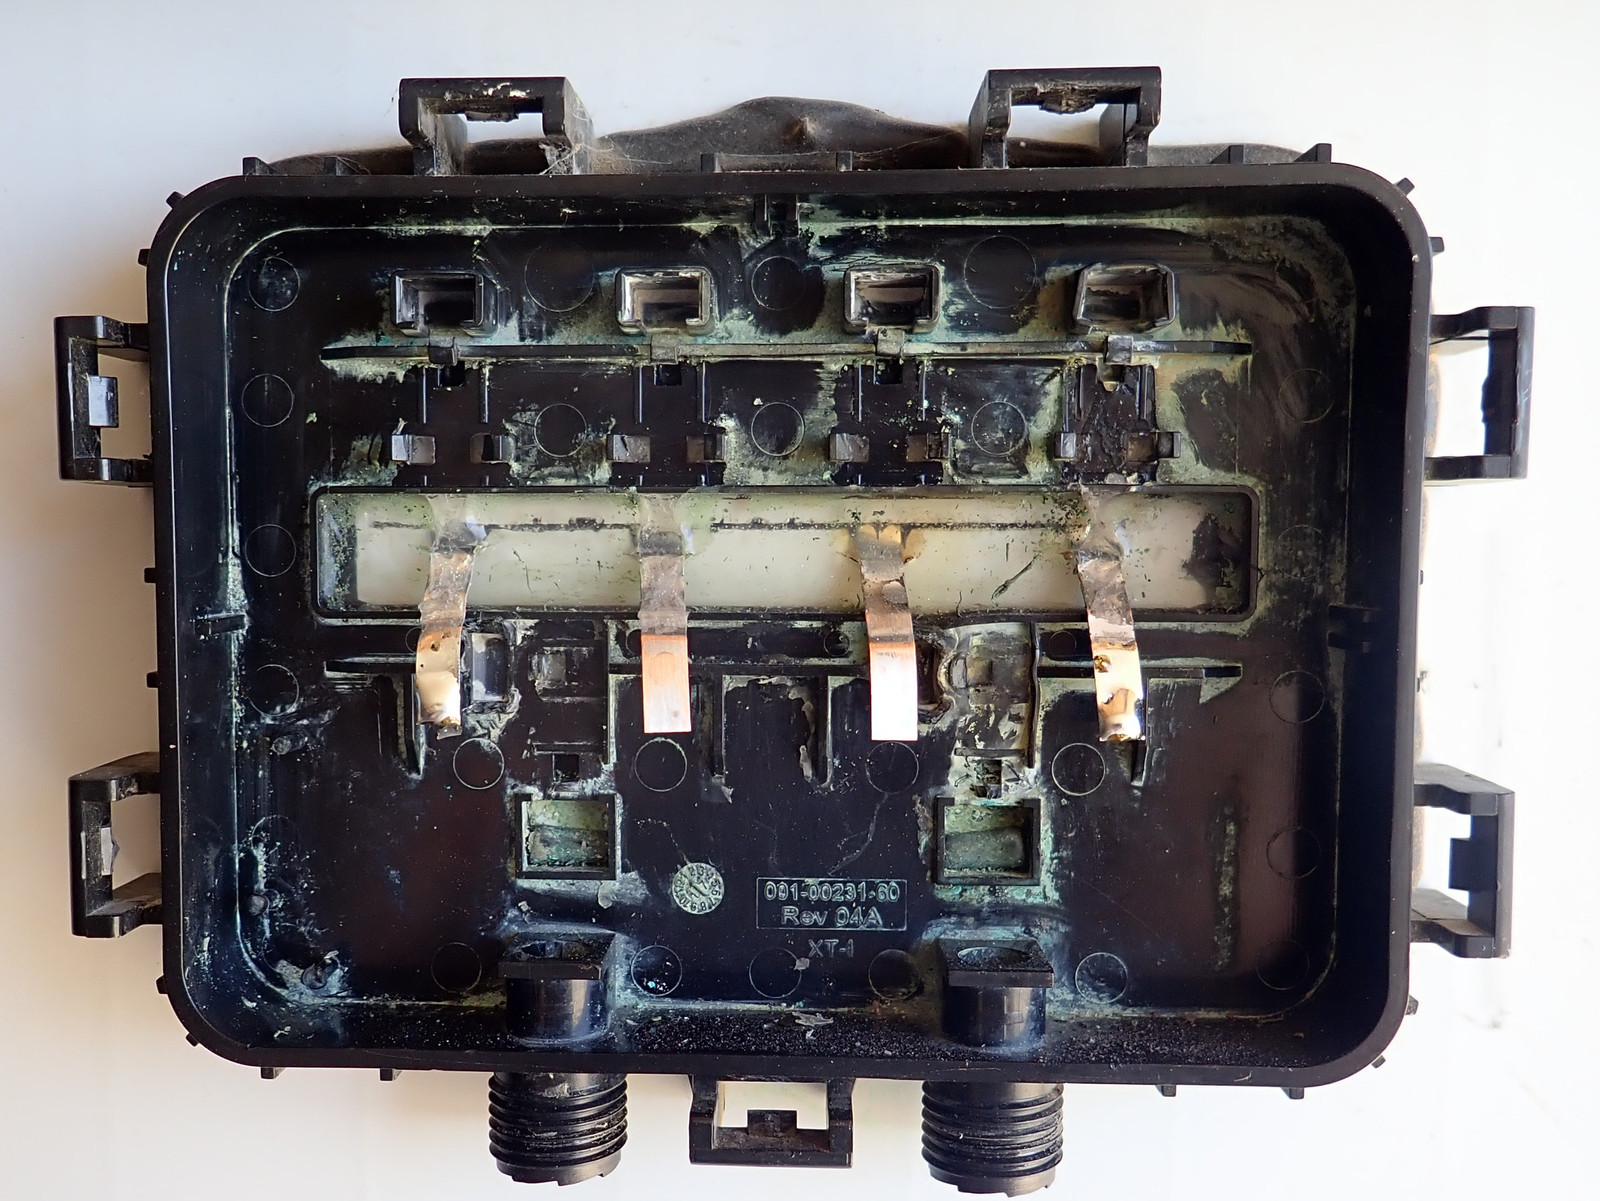
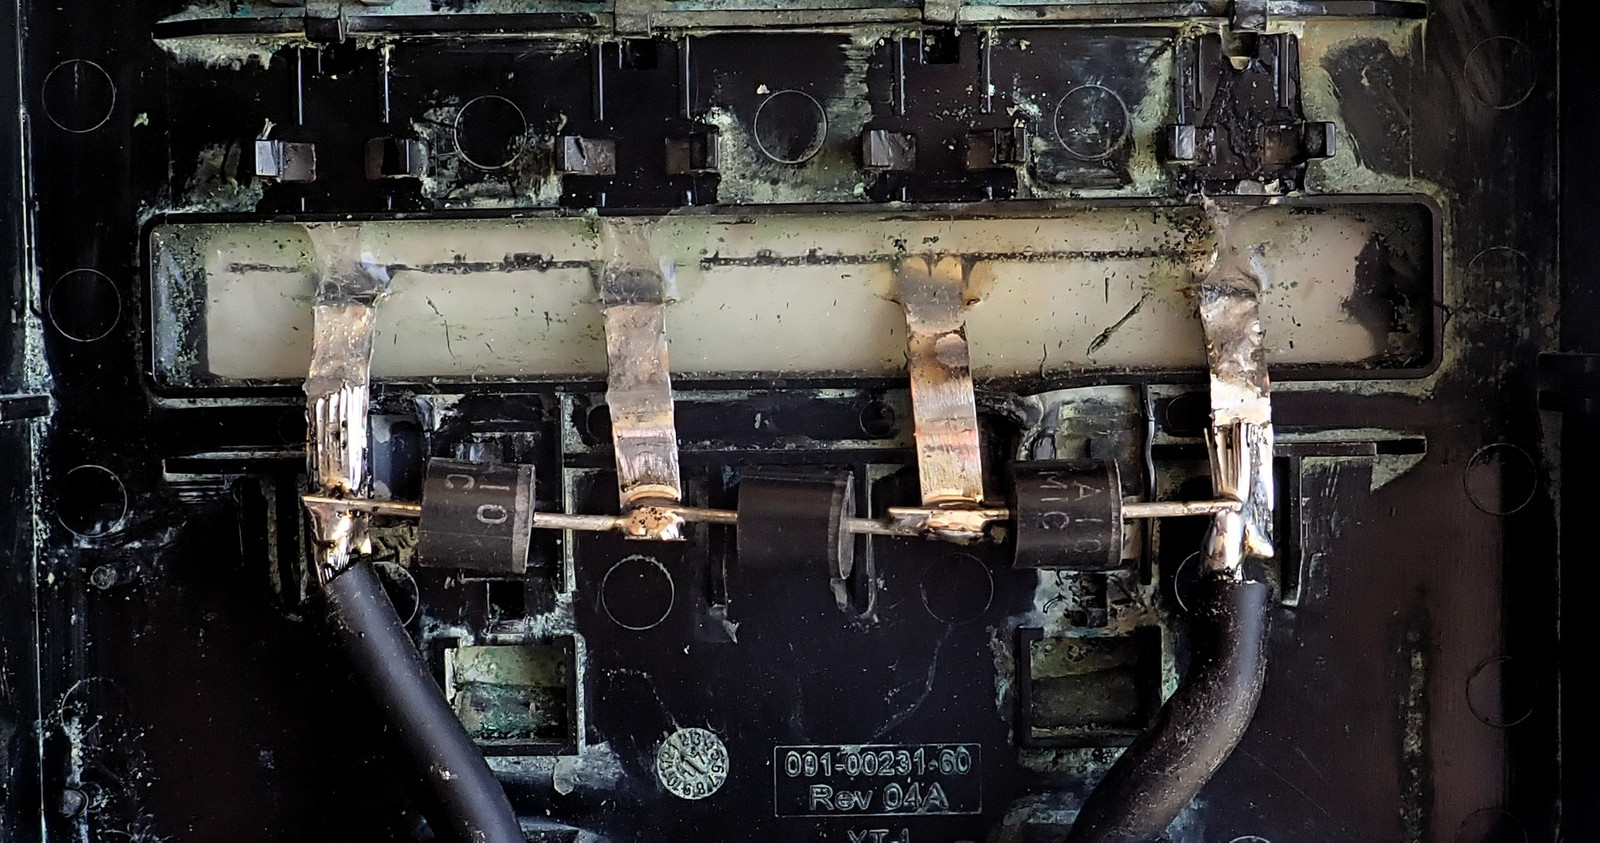
In normal, fully illuminated operation, current flows from the left-most ribbon to the right-most - and the main PV leads solder directly to those. Apply heat, solder, flux, add more solder until happy. The panel would now work - but it’s still missing those handy bypass diodes.
Trim your replacement bypass diodes to length and solder in place. I found that making a “cup” in the middle ribbons at the bottom was very helpful to hold the leads. Add solder and connect. These are power connections, so feel free to be generous with the solder. The right most connection is a well flowed connection, even though it doesn’t look like it in this photo. The diodes will get hot in bypass operation, but are well connected thermally to both the main leads and the ribbons, so shouldn’t be a problem - this is how solar panels used to be built. But I will monitor these in operation for any indication of problems.
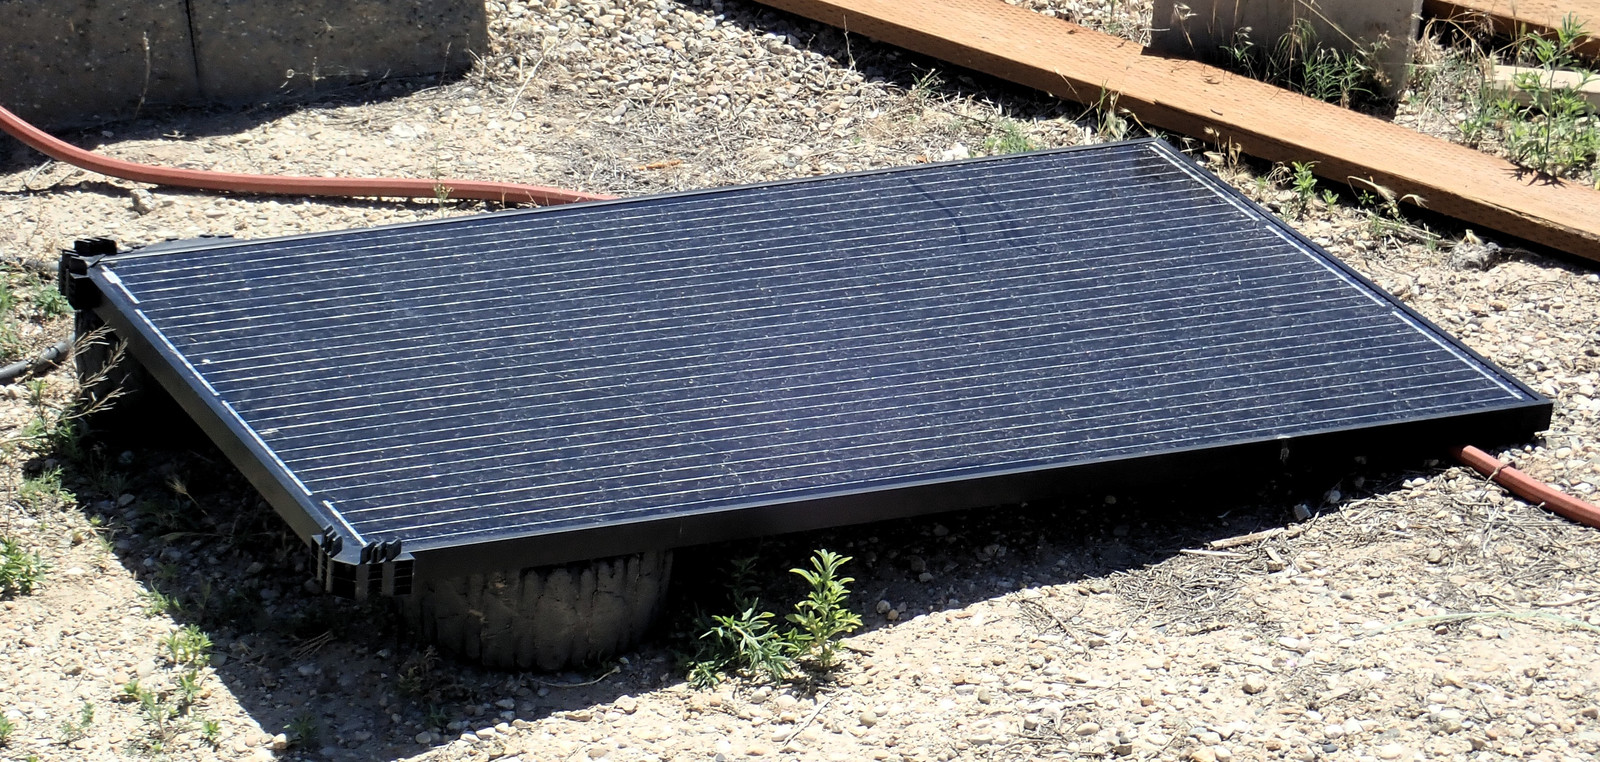
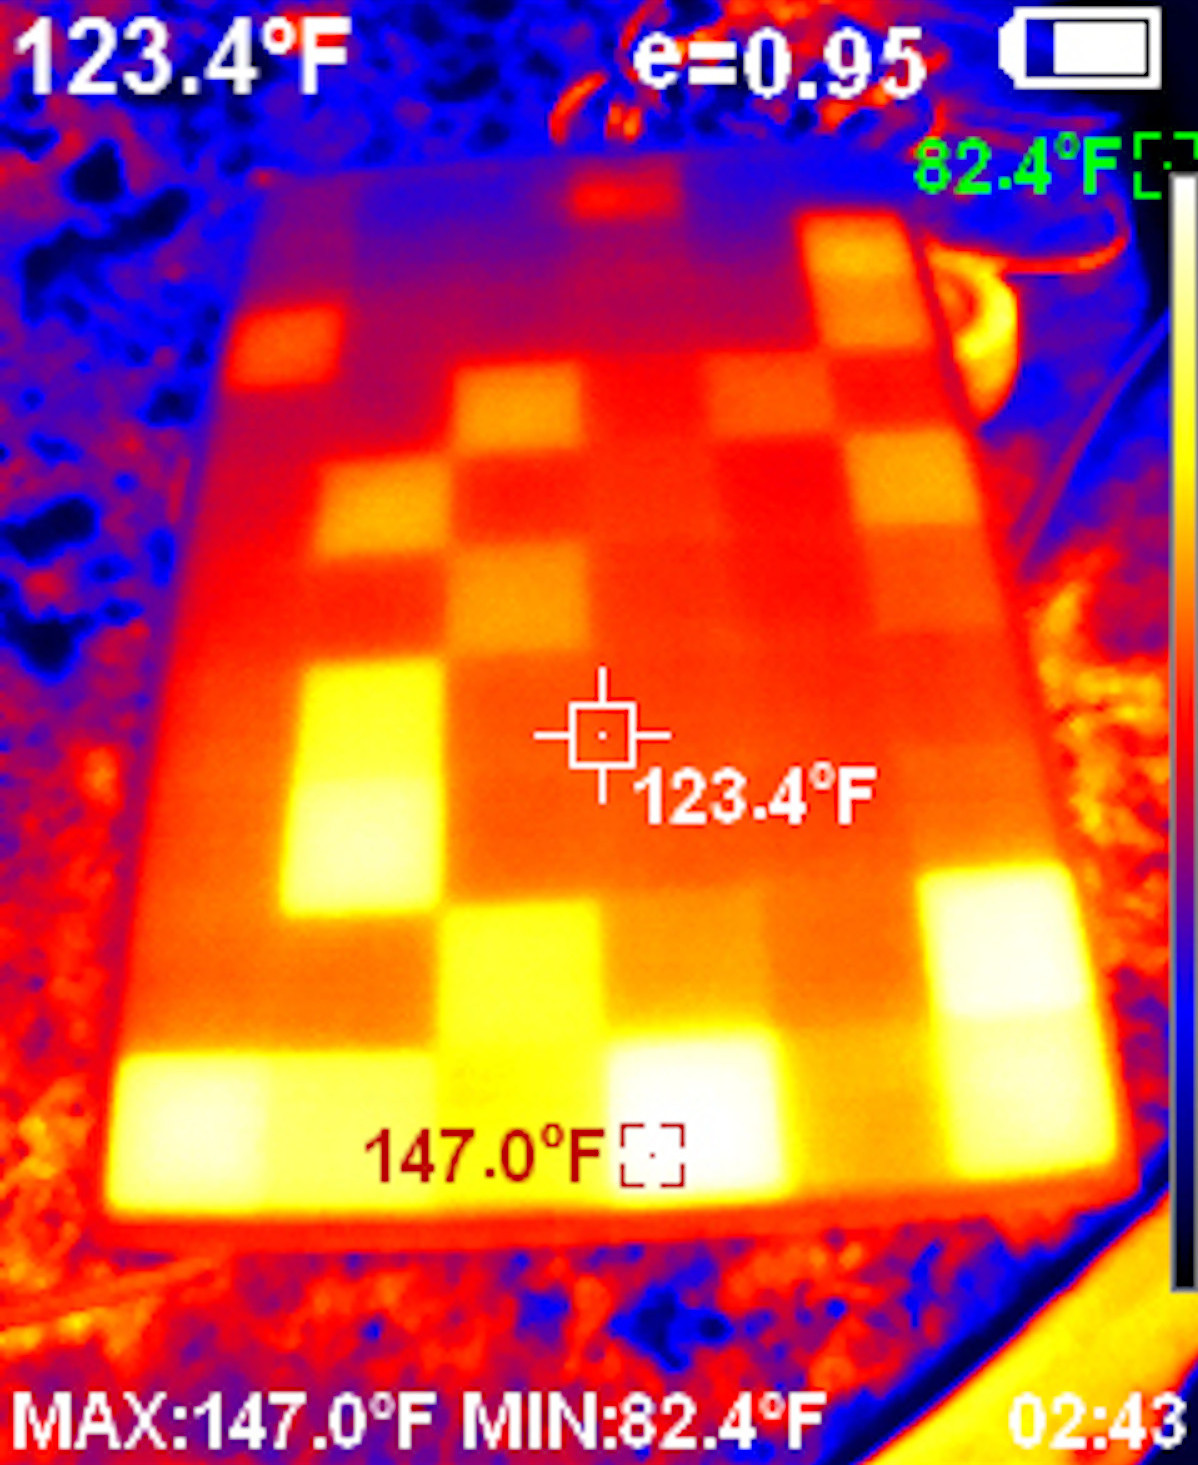
Finally, some panel abuse for testing. How do you test a new junction box to see if it’s getting hot? The easiest way is to simply short circuit the panel (connect the leads together), and set it in the sun. This will get you short circuit current (a bit north of 10A on these), and you can inspect your junction box for thermal issues!
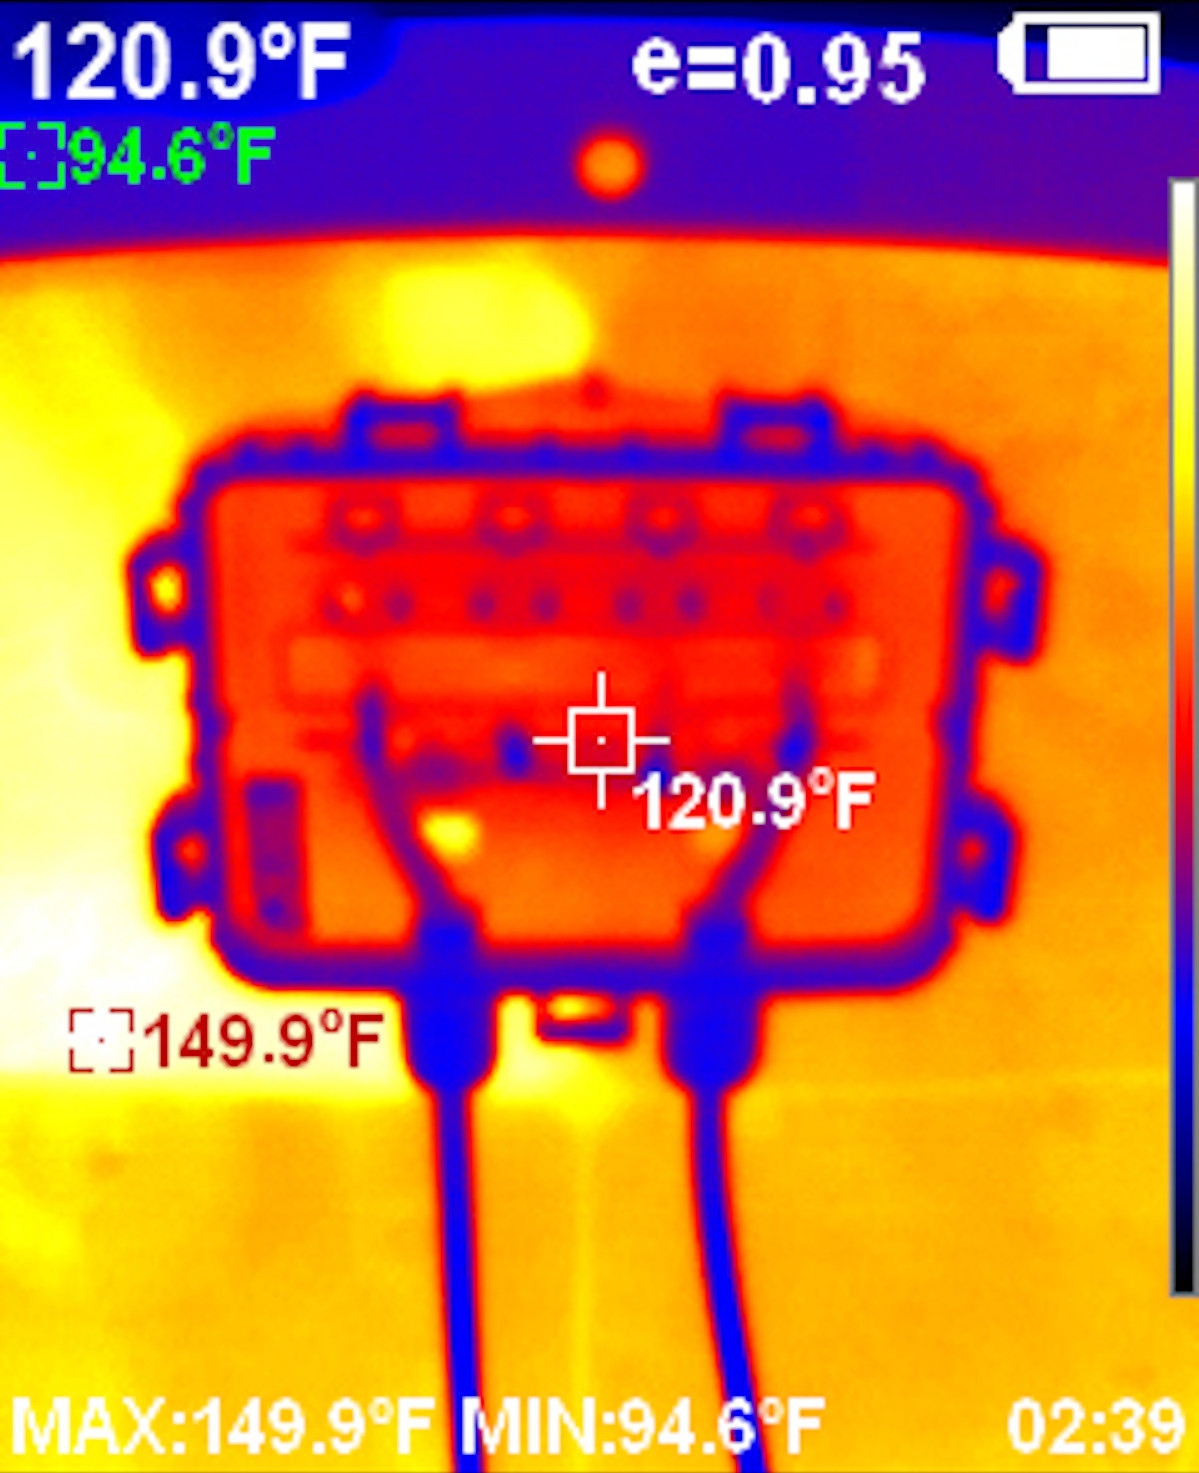
It doesn’t take long in the sun for a bad connection to show up, so a couple minutes for the panel to load the circuit should suffice. These are reasonable temperatures for the junction box, and, notably, nothing is glowing. The two yellow spots to either side of the main power leads are a clear section through to the panel backside - so they’re expected to be hotter.
Out of curiosity, I shaded a section and observed that diode heat up in a hurry. They get warm - don’t touch while running. But they can now also dump heat into the air, instead of potting. I’m not worried about them.
But don’t leave the panel shorted for very long. It’s exceedingly hard on the panel! Maximum current is flowing, and while the voltage is fairly low, nothing is zero resistance in solar, so you get a “chessboard” pattern on the panel, and some cells will get properly hot in a hurry. You don’t see this pattern during normal operation - this is an artifact of short circuited operation, and doesn’t indicate a defective panel - they “just do this.”
I took the panel back into the shipping container before disconnecting it. Voltage is probably too low to arc, but I don’t want to risk damaging connectors that aren’t rated for disconnection under load by doing that, so just take the panel somewhere darker first.
Once satisfied with that, it’s time to modify the rear junction box cover so it doesn’t interfere with the new operation. The easiest way to do this is to remove the main terminal leads - bending them off with pliers is fine. But if you’re careful, you can actually remove the entire end conductors. Those remaining tabs at the top will just hang out in empty plastic space. There’s no need to mill out the box - this leaves more than enough room for the setup I’ve created.
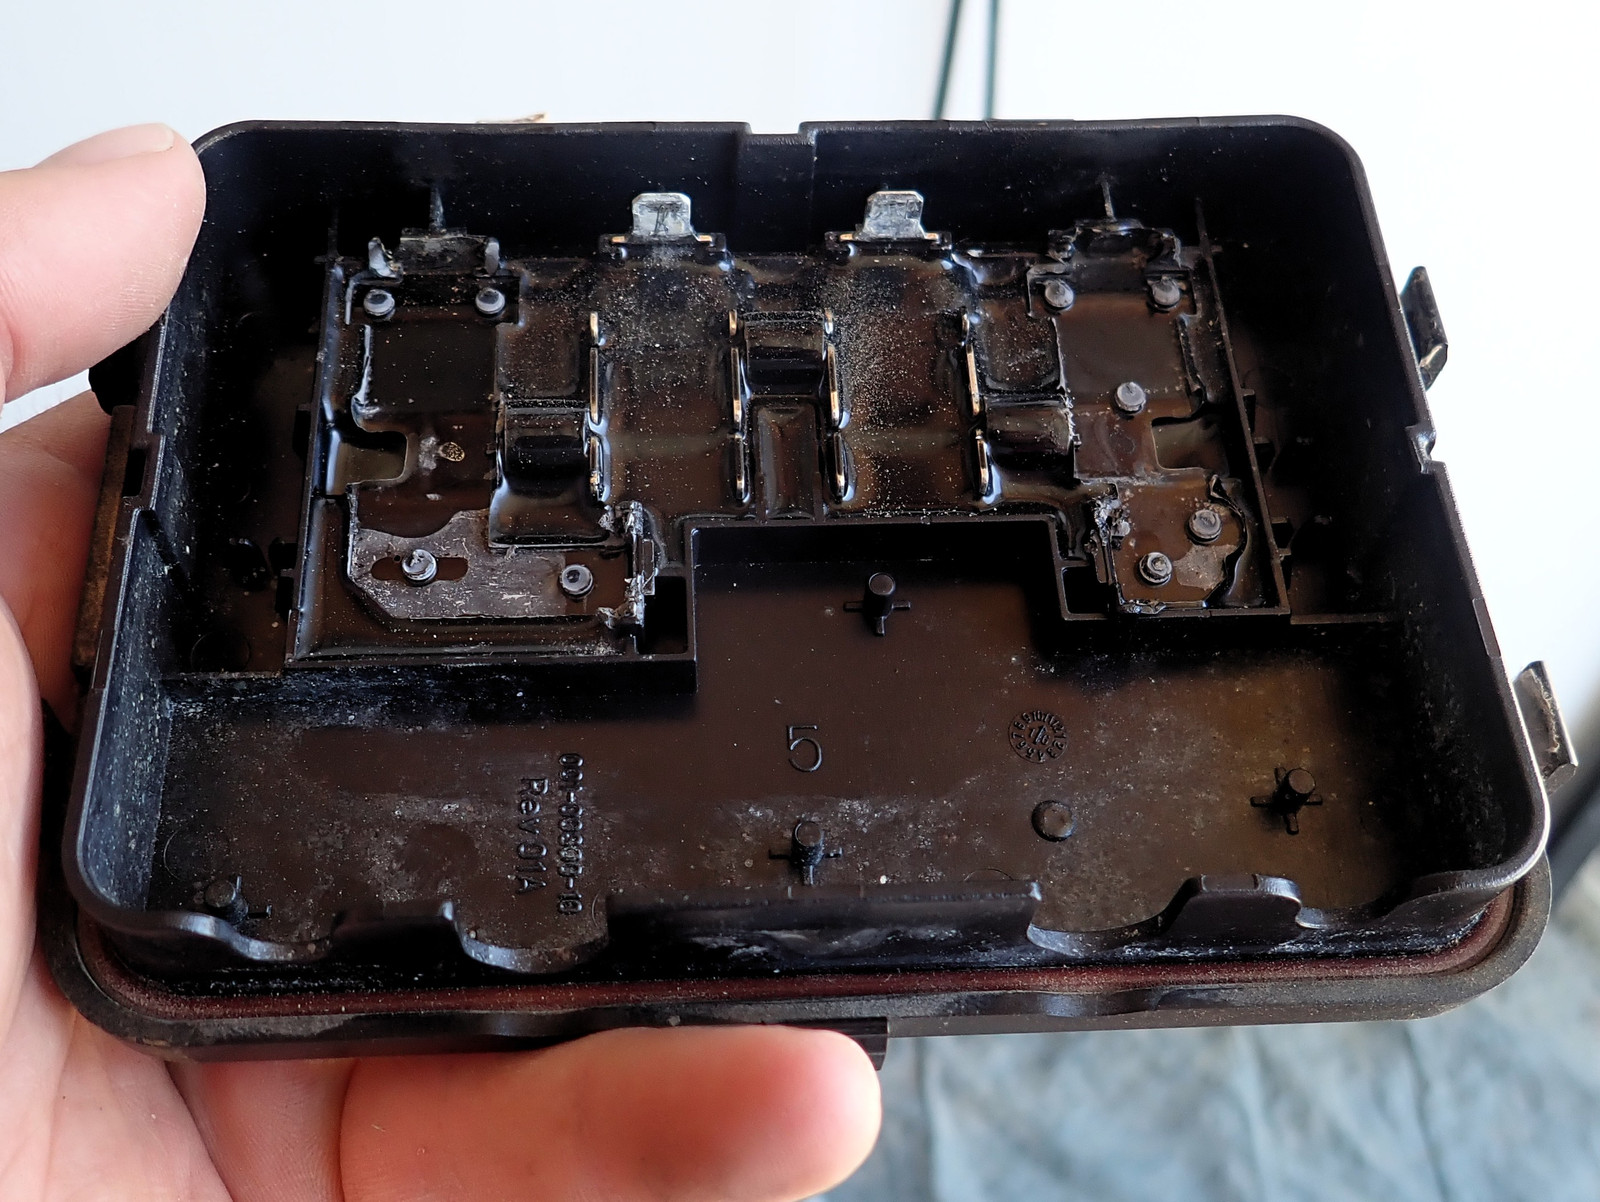
Install the junction box, and you should have a repaired, ready to go panel!
Does it Work?
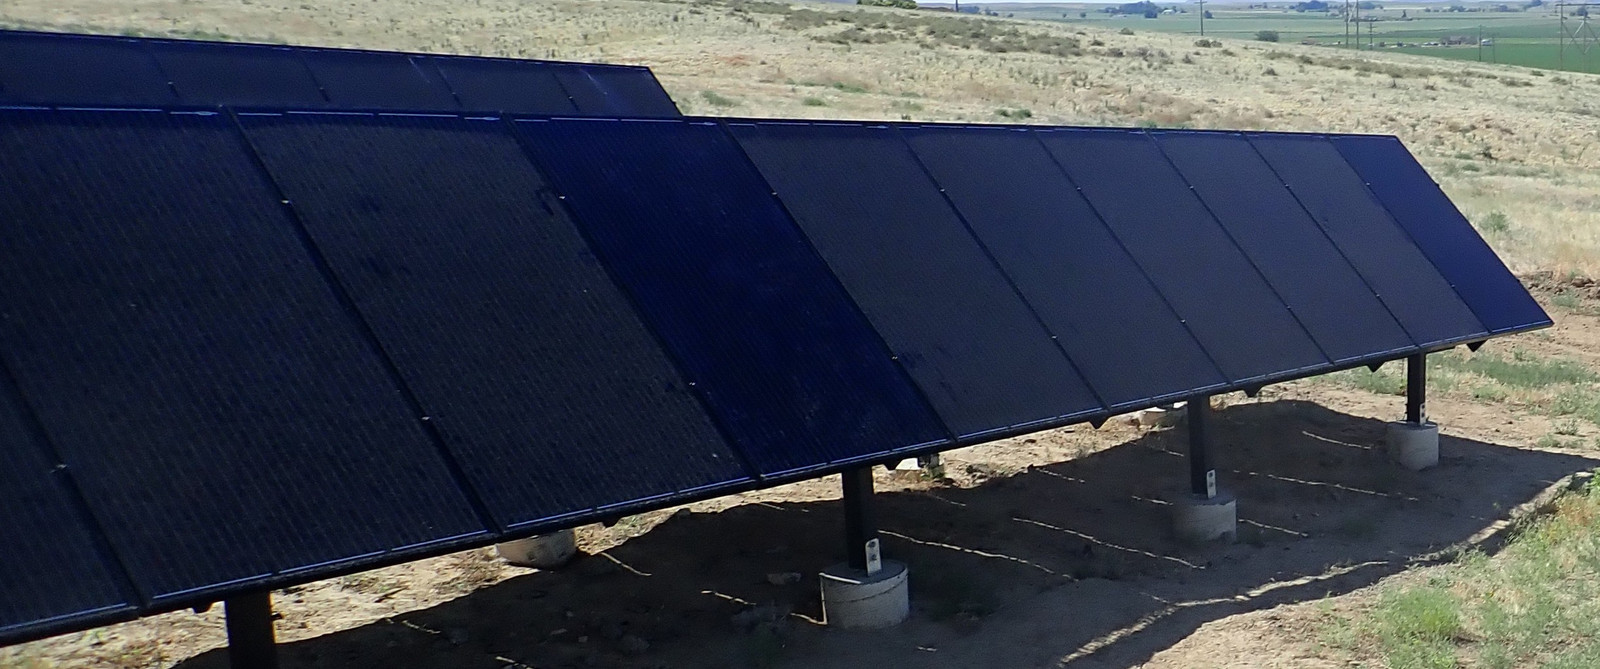
It sure seems to be! I’ve got some of the reworked panels installed in places I can easily monitor them for thermal issues, and they’re running just as cool as the other junction boxes. Even that totally nasty one.
Should You Do This?
If you’ve got some faulting Tigo 2.0 junction boxes? Absolutely. Rework them like this and you’ll be back operational in no time.
But hopefully not many of those panels shipped, and/or they didn’t have water leakage issues, and it’s just not going to be an issue.
I did this partly because I can, but mostly because the skills to do this sort of thing (figure out how to rework existing hardware that’s suffered a fault) seems likely to be useful in the future we’re rapidly heading towards, in which “just replace it with a new one!” isn’t a viable option anymore. At some point, “maintaining the existing stuff and repairing it when it breaks” is going to be useful, so I may as well start now!
If you’ve got bad junction boxes in a panel, don’t scrap the panel. Just fix your junction boxes!
Comments
Comments are handled on my Discourse forum - you'll need to create an account there to post comments.If you've found this post useful, insightful, or informative, why not support me on Ko-fi? And if you'd like to be notified of new posts (I post every two weeks), you can follow my blog via email! Of course, if you like RSS, I support that too.


