It’s been an exceedingly nice Lent off from the internet - although I’ve not really been taking it off from “computers.” I’ve been doing a bunch of the sort of weird things that I don’t normally get around to, and it’s been rather productive - if, perhaps, a tiny bit pointless. Today is the first in a series of posts about some weird little rabbit holes, and I’m starting out with this: Playing Minecraft, on AArch64 Linux, on an Raspberry Pi 4, an ODroid N2+, and a PineBook Pro!
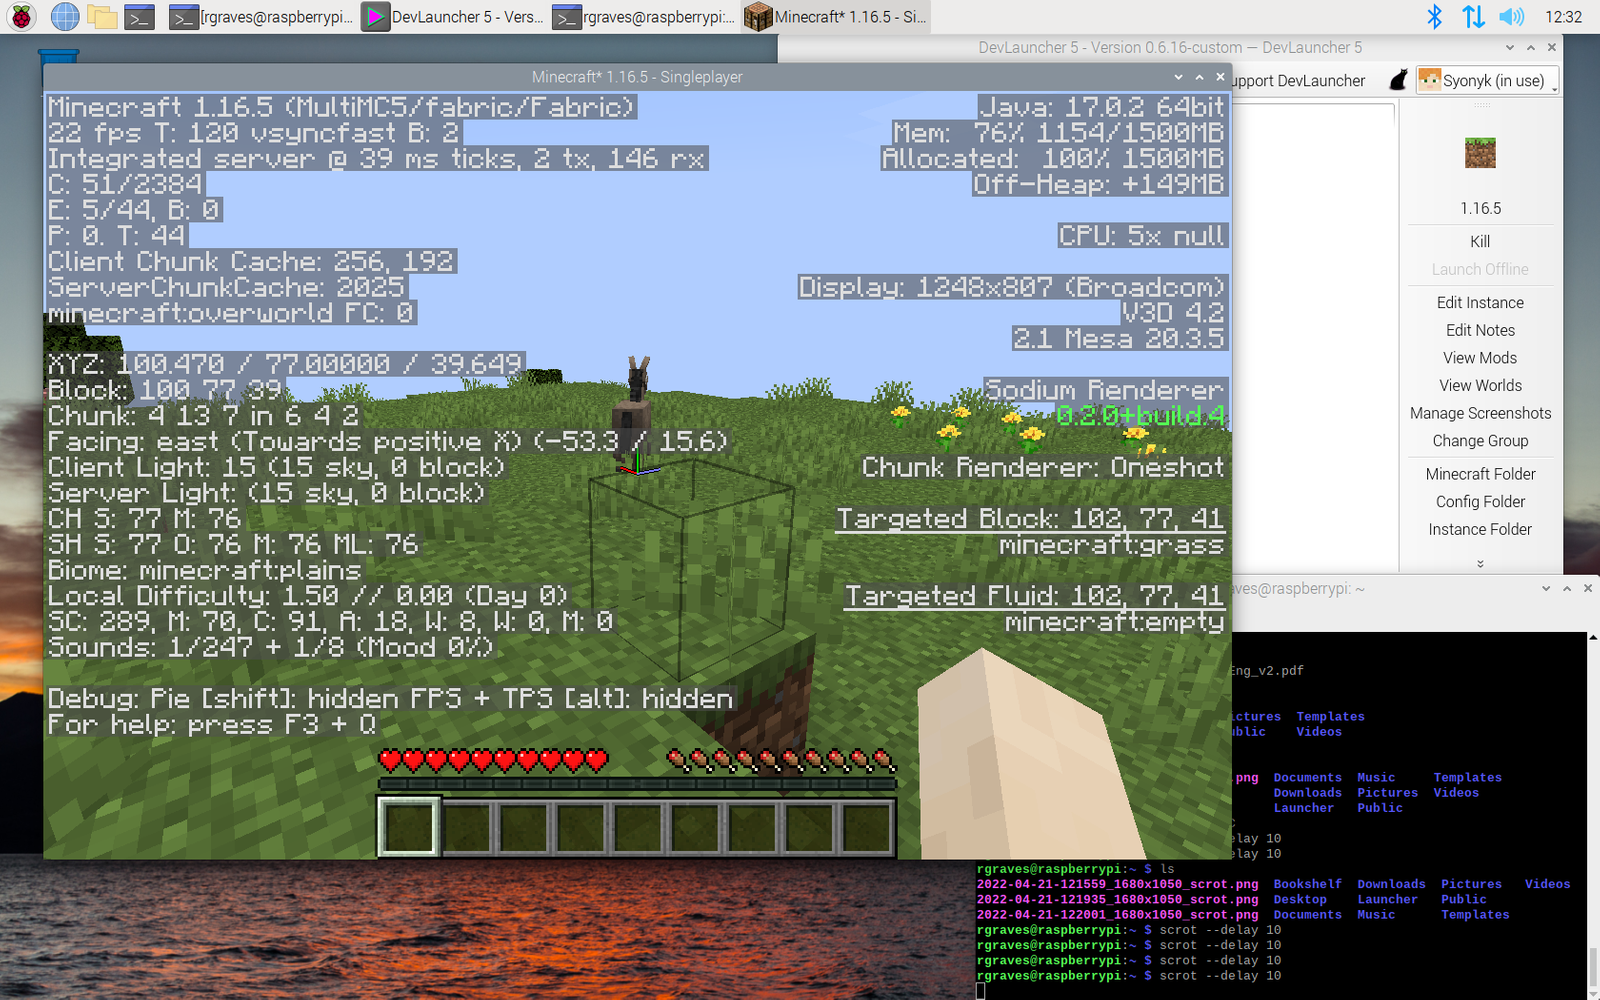
If you play Minecraft (as I do on occasion), and you run little gutless wonder ARM boxes like the Raspberry Pi and ODroid N2+ (as I do consistently), you may have noticed an interesting gap in the connection between the two. Nobody is talking about how to play Minecraft on a Raspberry Pi anymore - or any of the other little small board computers! And nobody is talking about how to optimize it if you’re a little bit short on CPU and a lot short on GPU. As all those thing are in short supply lately, I’ve decided to clear things up a bit!
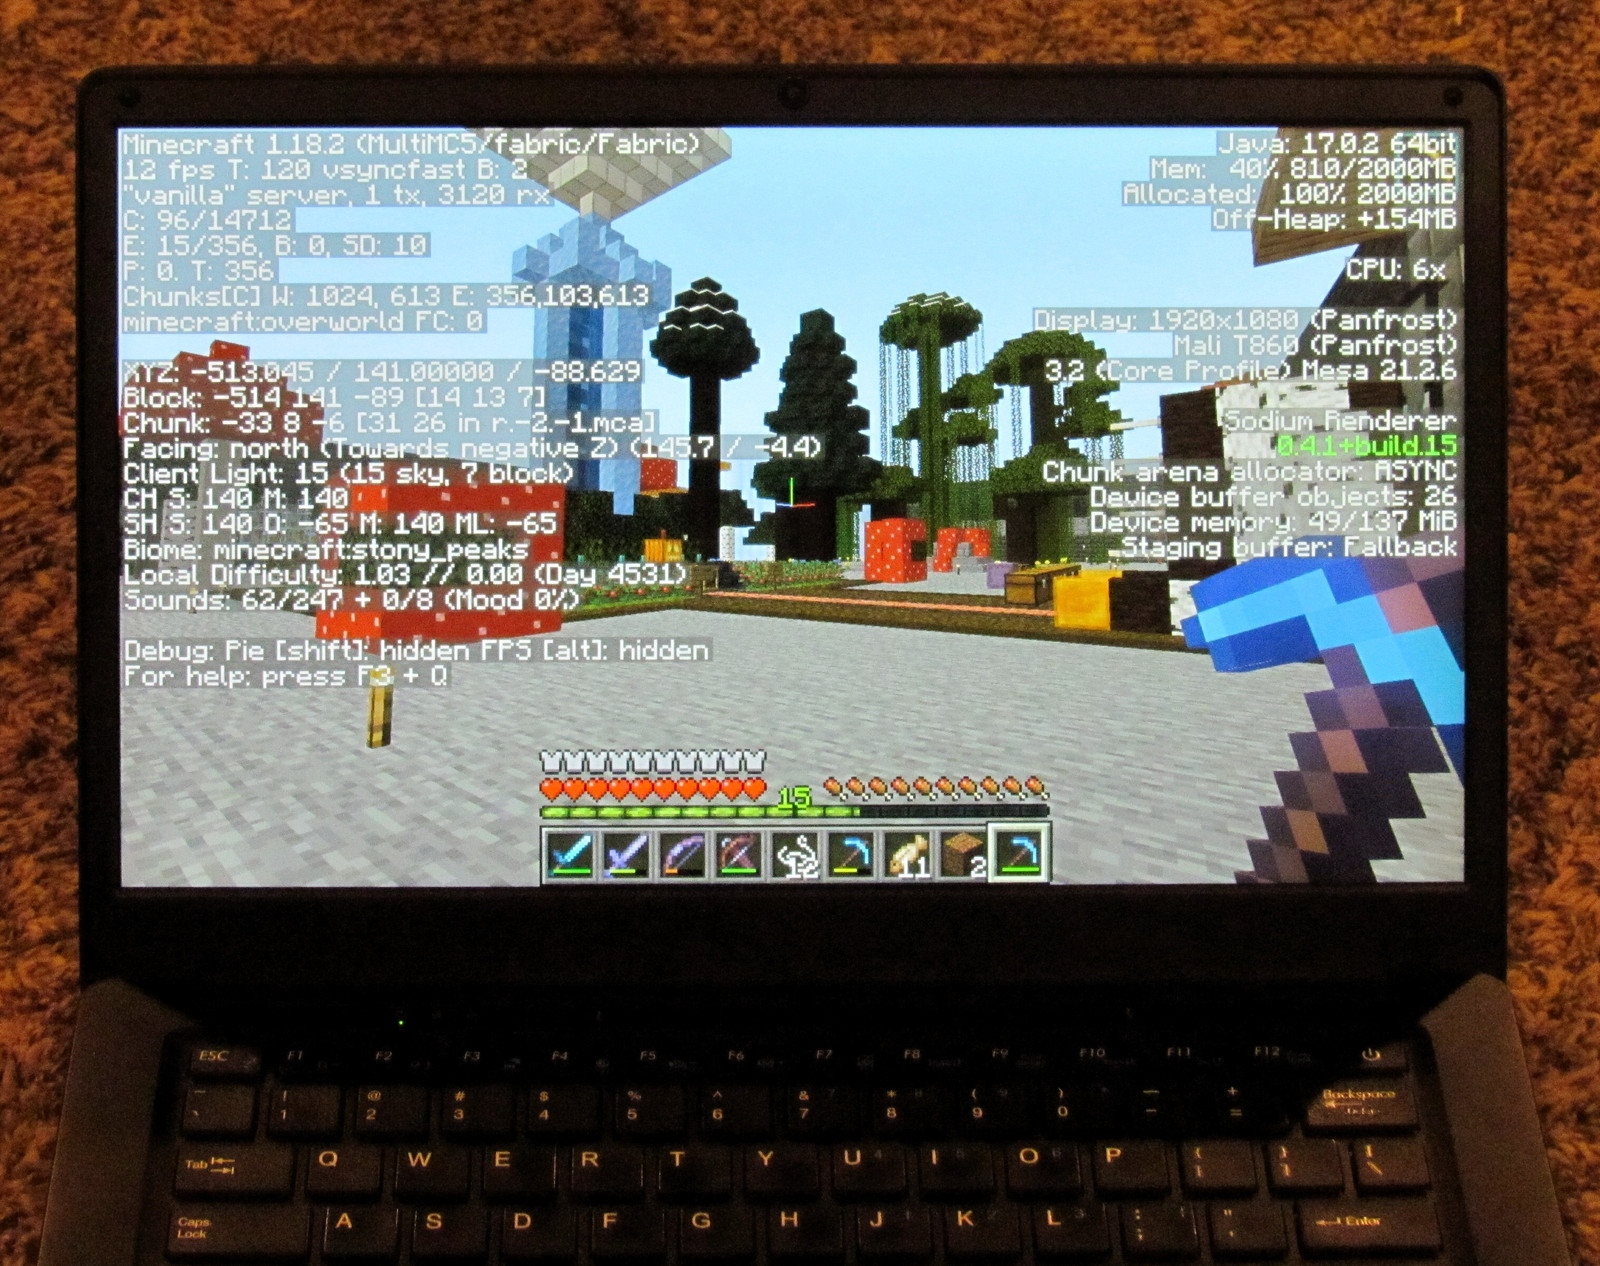
It’s not all good news. The Raspberry Pi 4 lacks the OpenGL version to play anthing past 1.16.5. But, the ODroid N2+ and PBP will play fully up to date Minecraft, and, surprisingly, the PineBook Pro is quite good at Minecraft for this class of machine! It’ll even hold a playable frame rate in fullscreen!
The History of Minecraft on ARM
Minecraft. It’s Java, if you ignore all the mobile and Windows Store and console and other “me too” versions. How hard can it be to run on ARM? It’s been done at various points in time, usually by people who toss out a modded binary or some blobs to download, and then disappear back into the depths never to be heard from again. So, it sometimes works, and frequently doesn’t (or is horribly out of date). Of course, all of these predate the Mandatory Microsoft Minecraft Migration that’s currently under way, so all the directions I’ve found only work with Mojang accounts - not the new, invasive Microsoft account that you either have now, or will soon have.
But it’s not just Java. There are some native libraries related to rendering and such that have to be properly handled on ARM - so, remember, Java runs everywhere, except when it doesn’t.
However, back in 2020, Nicholas Bering created an incredibly useful set of directions over at https://nicholasbering.ca/raspberry-pi/2020/10/18/minecraft-64bit-rpi4/ - and, at the time, they worked for what was current. But it’s a few years old, and it doesn’t cover how to use a Microsoft account.
Times change, Microsoft forces your hand, and so I find myself having to dig through a variety of things to make the process work again. Ready?
Getting a Microsoft Auth Token Stringy Thingy
The first, and probably most annoying step, is getting a Microsoft Auth Token. Various releases of MultiMC and Minecraft have their auth tokens embedded - which helps you none if you’re building it yourself on ARM. So, you’ll need to follow the steps in the MultiMC “NotSecrets” library here. You need to follow the Azure App Registration steps, and get a client ID for your own personal use.
- Sign into the Azure Portal.
- Across the top, you’ll see “Manage Azure Active Directory” - click “View.”
- There should be an “Add” button - add a new App Registration.
- Name it something. It will be for Personal Microsoft accounts only, and have no redirect URI.
- On the left menu, under Manage, select Authentication.
- Enable Live SDK Support and Allow public client flows, then save the changes.
- Go back to the Overview tab, and you should see “Application (client) ID” with a UUID after it. Copy this string, you’ll need it later!
Building MultiMC/Launcher on ARM with Microsoft Account Support
To get things working, you need to build an ARM native version of Launcher - formerly known as MultiMC, with the name changed for some reason or another. I’ll be switching casually between them based on what I’m referring to, but they’re the same thing. Of particular note, this only works on 64-bit OSes - Minecraft no longer supports 32-bit environments as of some while back, so you have to be running a 64-bit OS to have any chance of this working.
I’ve tested these instructions on Ubuntu 20.04, Ubuntu 22.04, and a recent 64-bit Raspbian, but the systems I use tend to have a lot of dev packages installed in the first place, so it’s entirely possible I’ve missed a dependency or two. Sorry, let me know in the comments what you’ve had to add and I’ll see if I can fix it. Minecraft is currently 1.18.2.
sudo apt-get install build-essential cmake qtbase5-dev zlib1g-dev \
  libgl1-mesa-dev openjdk-17-jdk git libgles-dev
The native ARM libraries are maintained by theofficialgman on Github - and we’ll be using the meta-multimc repository for the bits and pieces of the build we need. It’s just a flag during the configuration stage. First, though, we need to get the source.
mkdir ~/Launcher && cd ~/Launcher
mkdir build
mkdir install
git clone --recursive https://github.com/MultiMC/Launcher.git src
Now, you’ll need to put that client secret in! Use your preferred editor, edit src/notsecrets/Secrets.cpp, and change the following line:
QString MSAClientID = "";
to
QString MSAClientID = "[your-secret-string-goes-here]";
Save and exit, and continue with the build process. Here, you’re configuring the build to use the ARM native libraries, building, and installing.
cd build
cmake -DCMAKE_INSTALL_PREFIX=../install \
  -DLauncher_META_URL:STRING="https://raw.githubusercontent.com/theofficialgman/meta-multimc/master-clean/index.json" \
  ../src
make -j4
make install
This should complete without errors… and once it does, you’ll have DevLauncher in your ~/Launcher/install directory. Run it! cd ~/Launcher/install; ./DevLauncher
Depending on your graphical environment, you may have to tell it to use Wayland, not X. If you’re on a recent N2+ OS, this is almost certainly the case.
QT_QPA_PLATFORM=wayland ./DevLauncher
It may then complain about the lack of an appropriate plugin for Wayland. Install it.
sudo apt install qtwayland5
And now things should launch on Wayland.
Log In and Install Minecraft
You should see a list of Java installs - select one. You’ll want Java 17 for a recent version of Minecraft, and I’ll suggest you want to up the RAM by a good bit - maybe 1500MB for minimum and maximum (just set them to the same, Java is garbage collected, though the GC has a major exemption for Java and somehow refuses to collect Java). Enable analytics in the next screen if you care… and, no, I don’t know why an AArch64 Java install is detected as “32” in the Architecture field. It doesn’t seem to matter.
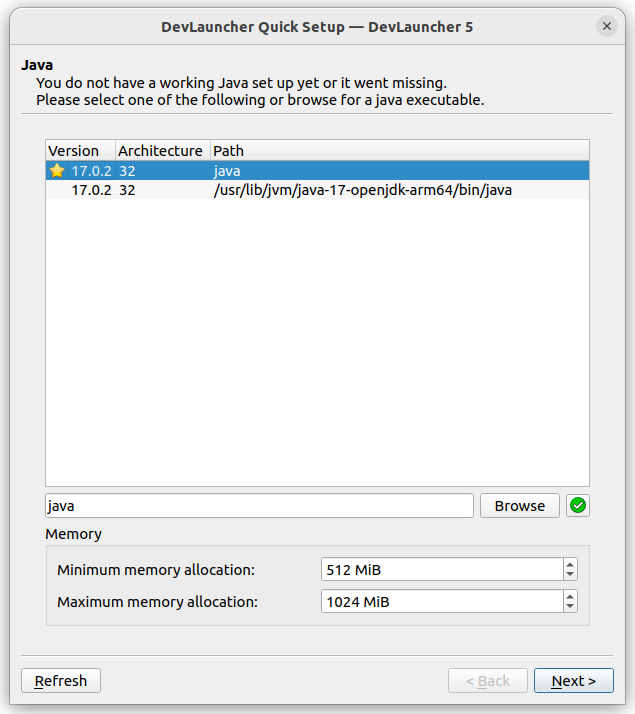
And you should find yourself at the main interface. If you’ve not gotten here… good luck…
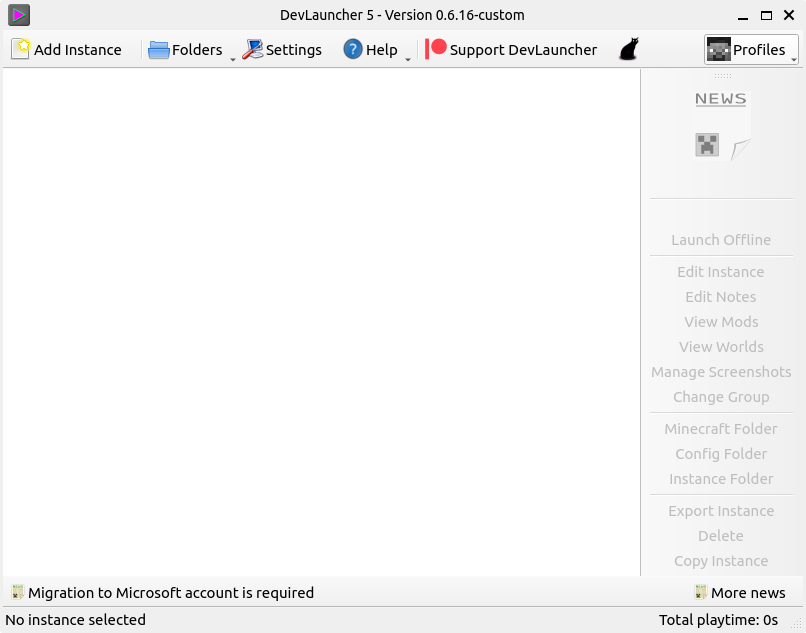
Click Profiles in the top right, and Manage Accounts. If you’ve added the magic string, you should see an “Add Microsoft” button in the top right. Click it. You should see something prompting you to go to a Microsoft link and enter a code - this particular path doesn’t launch the browser for you. Such is life on the bleeding edge. Follow the directions.

Once you approve it, you should see some activity on the message box from Launcher, and eventually have your Microsoft account signed in! Close out back to the main screen.
Next, you’ll add a Minecraft install. Click Add Instance, and select whatever the latest is (assuming you want that version).
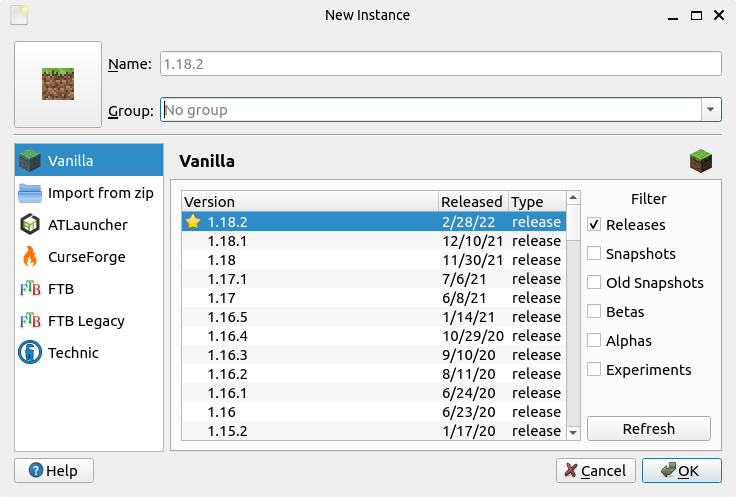
You’ll get an icon in the main area. On the right, click Launch, and it should start downloading the data for the game!
… and then it’s likely to crash.
Overriding OpenGL Settings and Launching Minecraft
So… if you’re lucky (or playing 1.16.5), the game will just launch. However, odds are good that, on most of these gutless wonder platforms out there and 1.18, it’s not going to launch. You’re likely to get an error like this:
GLFW error 65543: GLX: Failed to create context: GLXBadFBConfig.
In more sane terms, this means “You ain’t got the OpenGL version we need, buddy!” Minecraft as of 1.17 needs OpenGL 3.2 - and glxinfo -B will show you that your maximum OpenGL version isn’t 3.2.
OpenGL core profile version string: 3.1 Mesa 21.2.6
But, as it turns out, this isn’t actually a problem, at least with recent Mesa versions - they support OpenGL 3.3, just not perfectly. And you can just lie to the program about your OpenGL version!
Add MESA_GL_VERSION_OVERRIDE=3.2 before your DevLauncher command, and you’ll be on your way!
Of course, if you do that, you may get a shader compiler error:
[Render thread/INFO]: OpenGL debug message: id=1, source=SHADER COMPILER, type=ERROR, severity=HIGH, message='0:1(10): error: GLSL 1.50 is not supported. Supported versions are: 1.10, 1.20, 1.30, 1.40, 1.00 ES, and 3.00 ES'
So, just lie about that too! MESA_GLSL_VERSION_OVERRIDE=150
Your total launcher command may look something like this, with various bits or pieces removed depending on your platform:
MESA_GL_VERSION_OVERRIDE=3.2 MESA_GLSL_VERSION_OVERRIDE=150 QT_QPA_PLATFORM=wayland ./DevLauncher
You now should be able to run Minecraft - but performance may well suck (a few fps, tops). You can turn all the settings down, and it will still suck. So, we keep working on it!
OptiFine and MultiMC
You can skip this section entirely, but as it’s something useful I learned in the process, I’m documenting it. If you just want things working, skip to the next section on Sodium.
OptiFine is the traditional recommendation for improving graphical performance on Minecraft for low power devices, but as of recently, that advice isn’t the best. You’re better off with sodium, which doesn’t care about making things look nicer, only about making them faster on low end devices. OptiFine does more. It’s also a royal pain in the rear to get to extract properly with MultiMC/Launcher, and doesn’t seem to work on ARM - I never managed it.
Once you’ve downloaded it, if you run it, it will ask where your Minecraft install is - and it’s really rather picky about what it looks for in the install before it will let you extract or install the file. If you’re running a reference Minecraft install with the normal launcher, it works great. Otherwise, it doesn’t - and I’ve no idea why they’re such jerks about not letting you extract the file otherwise.
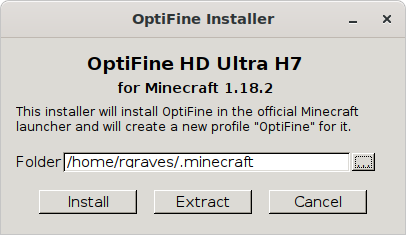
What you need to do if you have a DevLauncher install is to create a fake Minecraft directory that looks like the client. There’s some good advice in a Github gist, but it takes some experimenting to find that which actually works. What you need in your ~/.minecraft folder is a link to MultiMC’s assets directory, libraries directory, and then a versions directory with a couple files from your current version in it.
For 1.18.2, this should do the job, and you can easily modify it for other versions. Run this after you’ve let MultiMC download all the resources!
#!/bin/bash

mkdir ~/.minecraft
cd ~/.minecraft
ln -s ~/Launcher/install/assets assets
ln -s ~/Launcher/install/libraries library
mkdir versions
cd versions
mkdir 1.18.2
cd 1.18.2
ln -s ~/Launcher/install/libraries/com/mojang/minecraft/1.18.2/minecraft-1.18.2-client.jar 1.18.2.jar
ln -s ~/Launcher/install/meta/net.minecraft/1.18.2.json 1.18.2.json
But don’t install OptiFine.
Installing Sodium
Instead of OptiFine, we’ll set things up with Sodium. You should be able to grab the latest version here. This will drop a jar file in your Downloads folder, and it uses Fabric to run. So we’ll install that. Of course, if you’re on a Pi, you’ll want the version for 1.16.5 - it has to match.
Click on your Minecraft instance, and go to Edit Instance. With the “Version” field selected on the left, one of the options on the right should be “Install Fabric.” Do so, selecting the recommended version, and you should see Fabric Loader pop up in the middle.
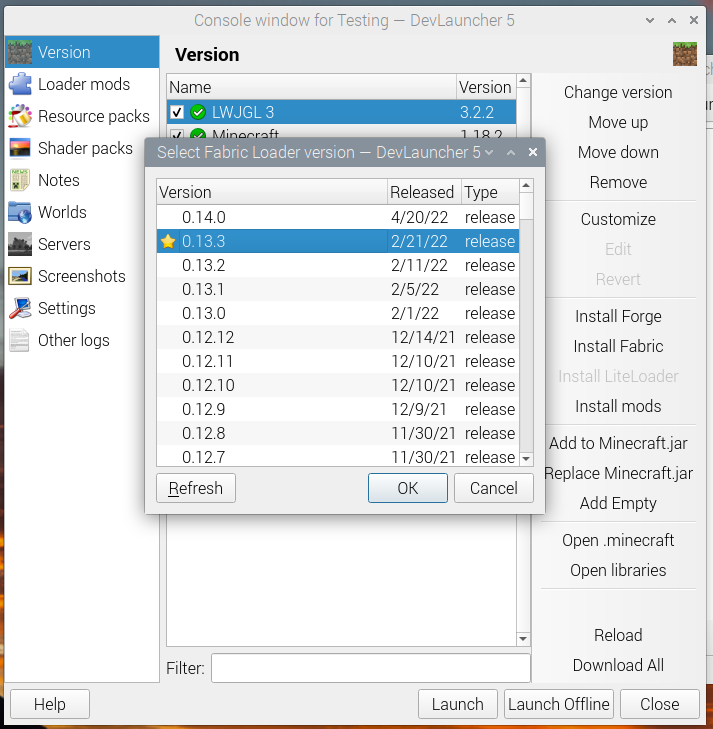
Now, click on Loader mods. Click Add on the right side, and select your Sodium .jar file. This should add it into the mods directory and add it to Minecraft. If it’s gone well, when you launch Minecraft, you’ll now see the some log messages about Sodium, and should see a message at the bottom of the main menu about a modded client. This is good - it means Sodium loaded.
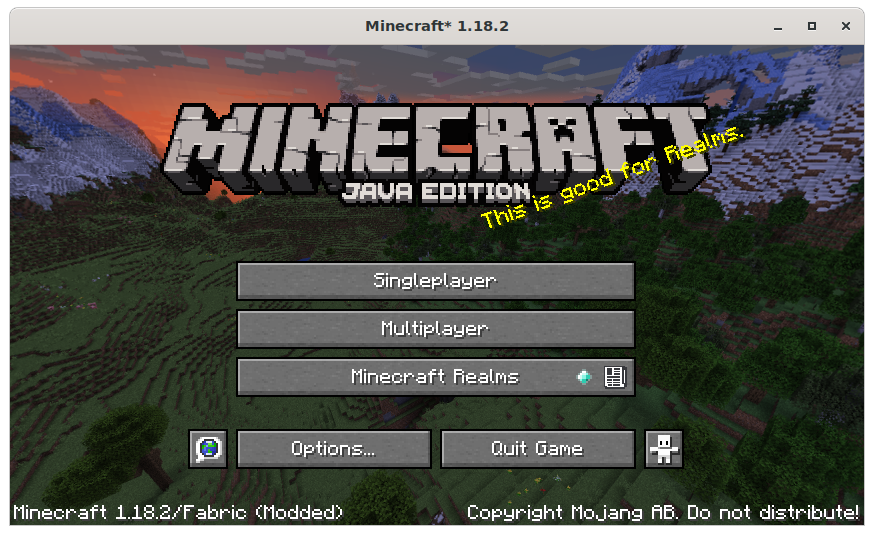
Go to Options. Under Video Settings, you should now have a very different looking options menu from before (1.16.5 will slightly different).
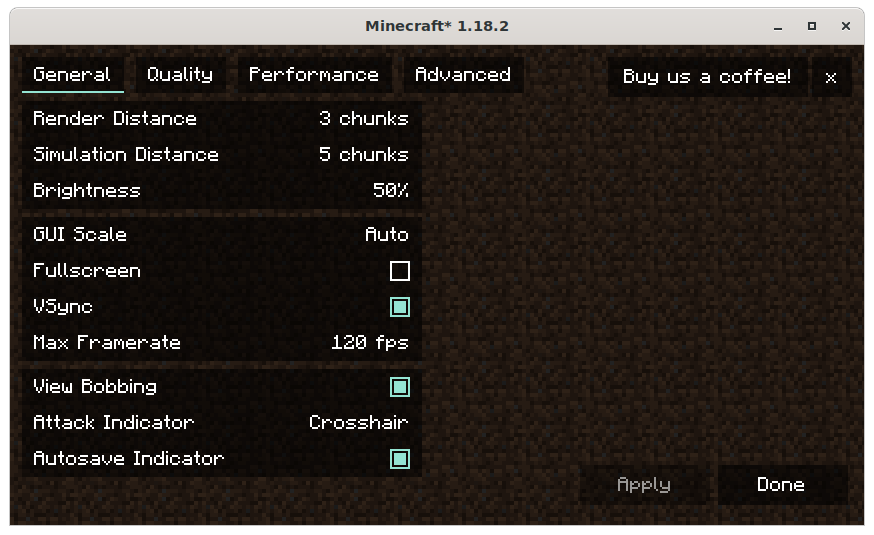
Turn everything down. You can turn it up later once it’s playable, but, to start, turn everything down. Render distance to 2, sim distance to 5 if you’re dealing with a remote server. In the Quality settings, fast graphics, clouds off, weather fast, options off, mipmap levels 0x. Turn on all the performance options, and you should be good! On the Pi4, you’ll need to leave “Use Chunk Multi-Draw” off, or things won’t render properly.
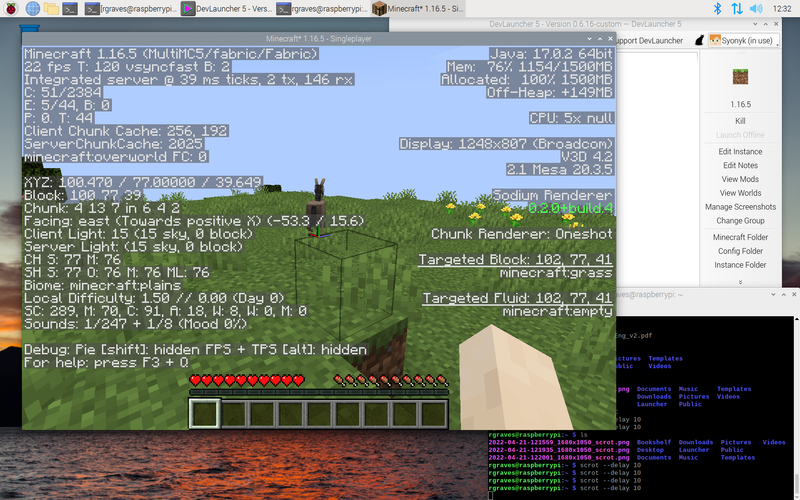
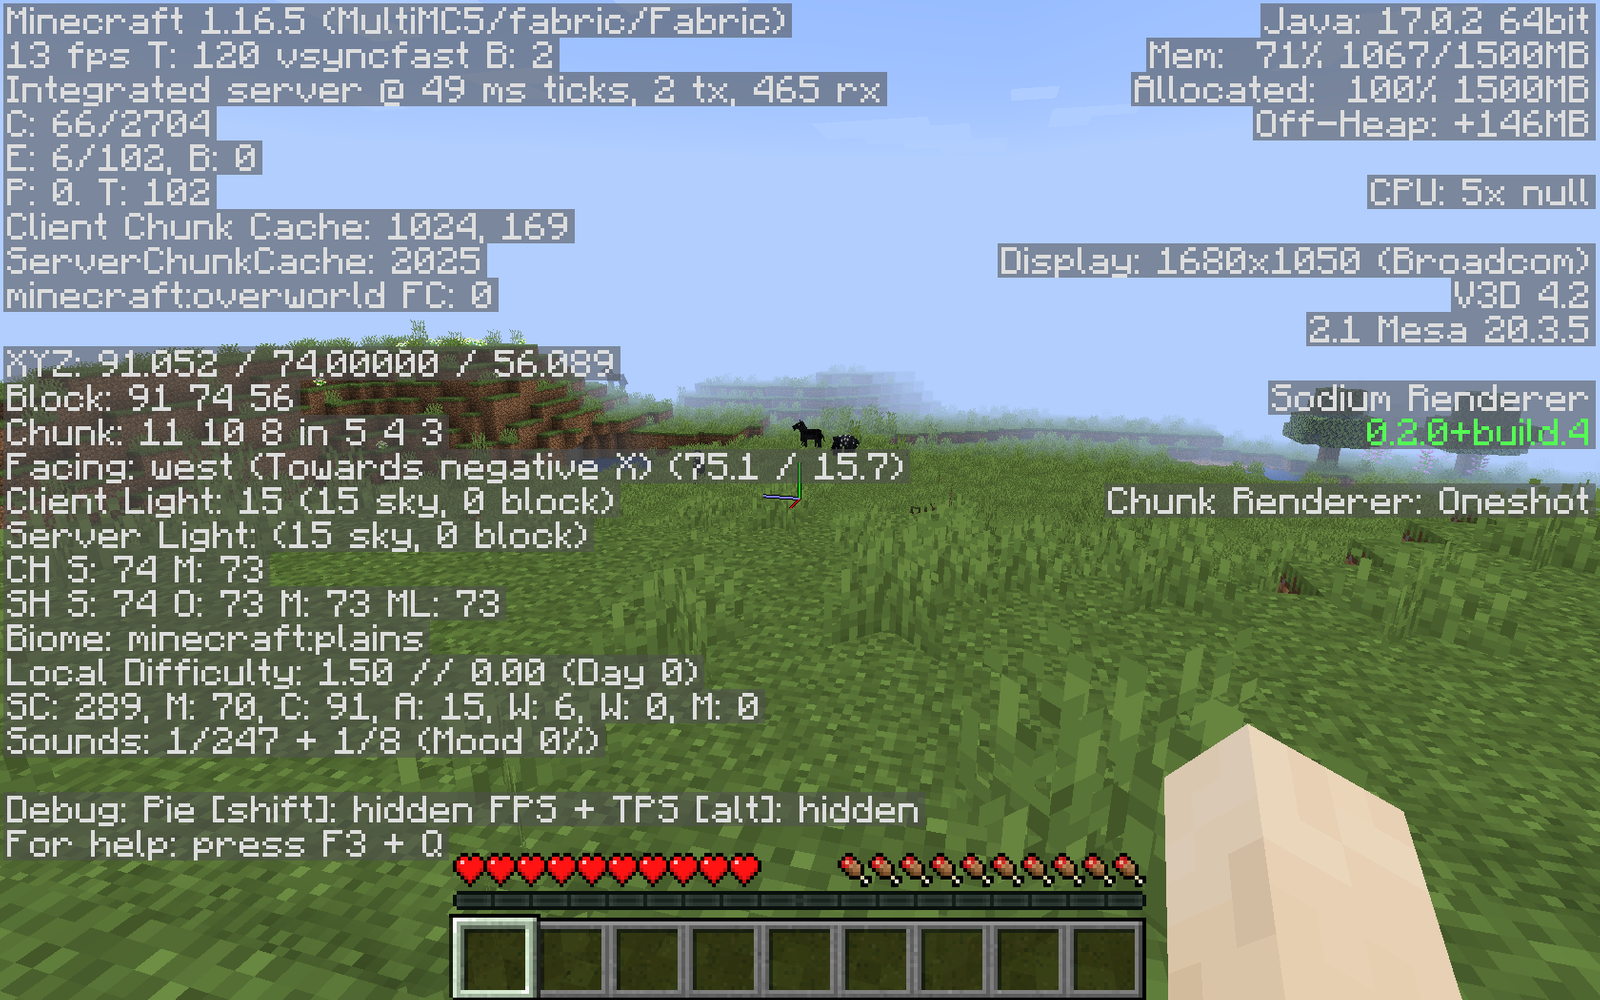
Now try playing things. Hit F3 and you can see frame rates - you should also see that it’s using the Sodium render engine. Performance will be quite low initially, and if you look in the top right of the debug frame, you’ll see memory use just ripping up and down, over and over. This is the initial world loading stage (with tons of Java garbage collection), and it takes a while on a slower machine - but, eventually, it will stop doing that and switch to a gradual increase in memory use (under 5MB/s while standing still), CPU use will drop a bit, and your frame rate should go up!
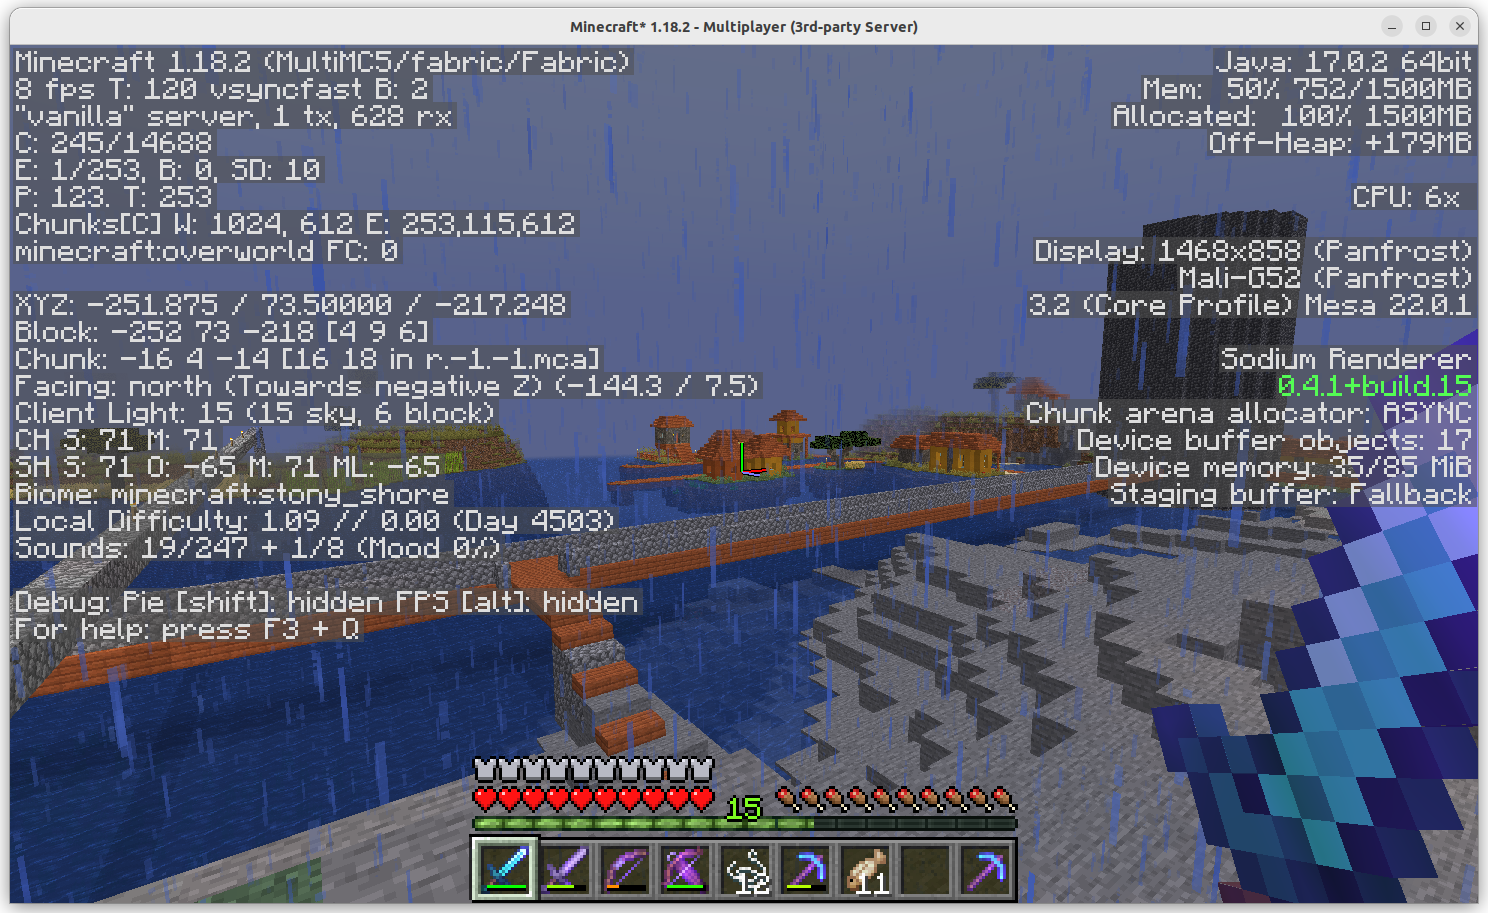
In general, the main slider for frame rate is going to be render distance. Push it up until your framerate drops below what you want to deal with, then drop it back down and you’ll be good.
Is it Playable?
The obvious question for all this, then, is: How playable is it? Can you actually play Minecraft on one of these machines, or is it just a neat party trick?
The answer will depend somewhat on your definitions of “playable,” but I think it’s quite playable! The main limit is just the view distance being “limited at best.” You can set the render distance to 2-3 chunks and be fine, some systems will be playable at 8 chunks, but much beyond that and things will lag down a lot. I find 10-15fps playable for casual Minecraft, though it gets harder if you’ve got something like Efficiency V going and are rocketing through stone. I try very, very hard to avoid combat on this sort of system as well - it’s doable, but only in a pinch.
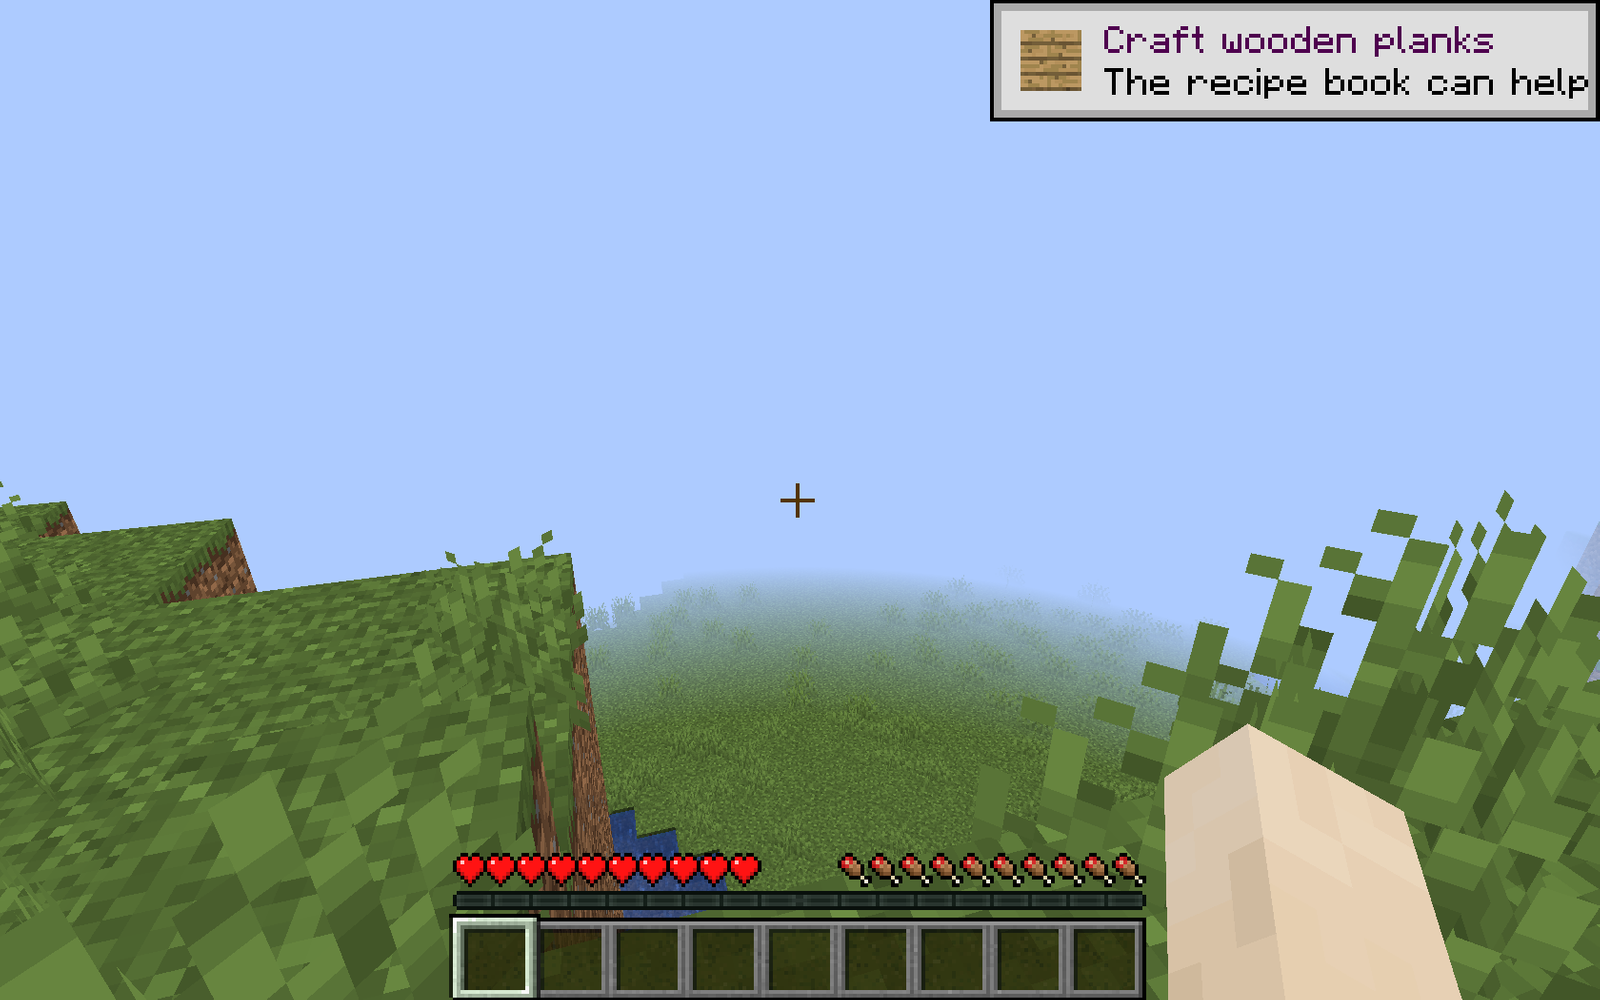
Here’s what a render distance of 2 might look like:
Push that up to 8, and you’ll see a lot more - but at a lower frame rate.
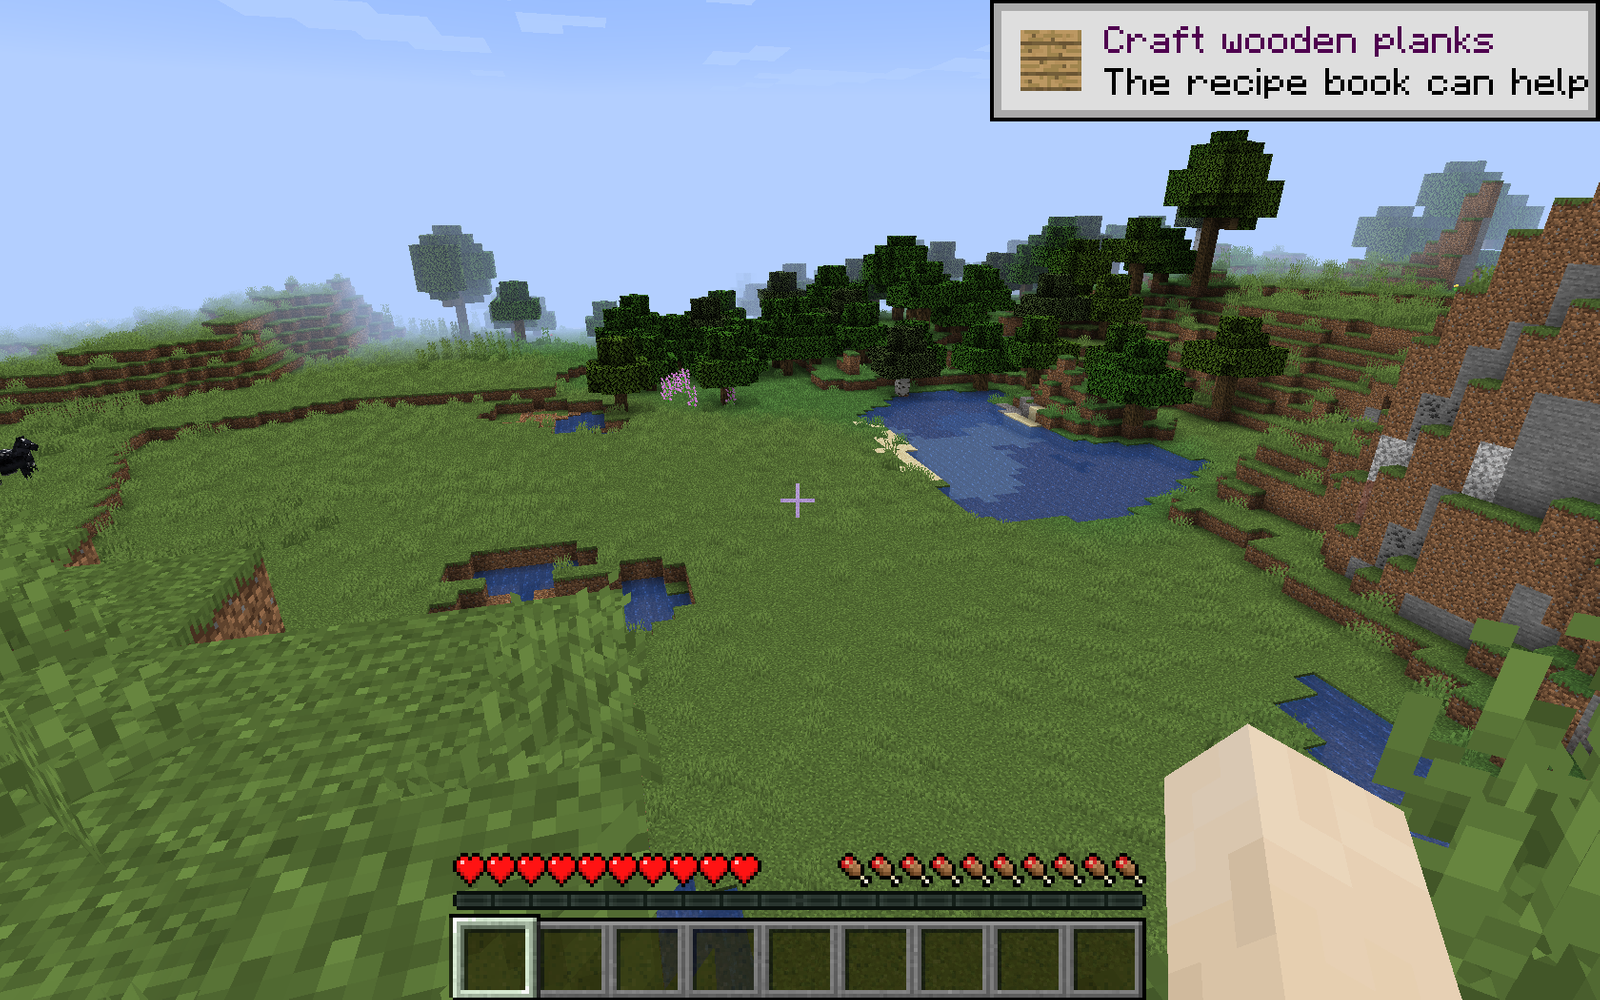
It’s annoying, but we’re far beyond “It’s not that the bear dances well, it’s that the bear dances at all” - you can actually sit down and play Minecraft this way.
The main problem I’ve run into with the N2+ (other than the general GPU memory issues I’ll talk about in another post) is that it can’t run a useful framrate on the 1440p display I have it attached to - it’s playable in a window, but not fullscreen. The Pi and PineBook Pro can both do full screen on their lower resolution displays. Even dropping the N2+ output to the same 1920x1080 resolution as the PineBook Pro, the framerate drops substantially (from about 13-14fps to 6fps) when running Minecraft fullscreen.
The State of the Raspberry Pi 4
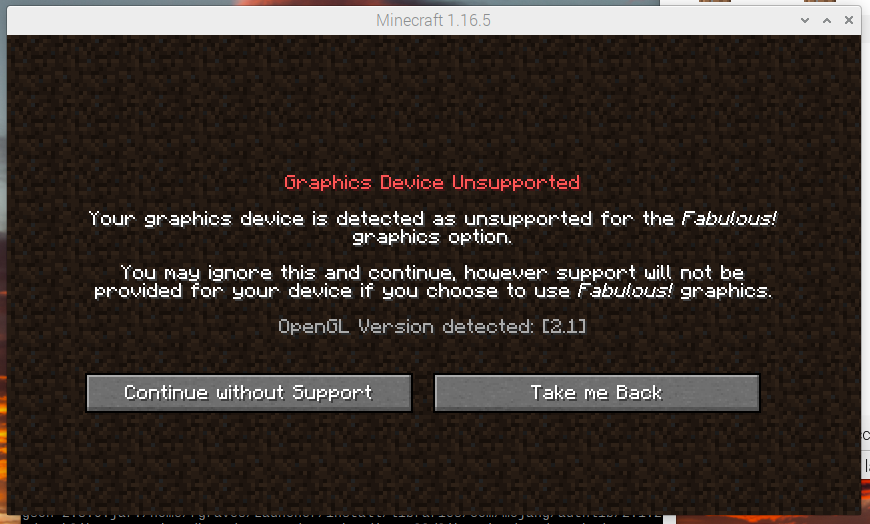
Why can’t the Pi4 play a recent Minecraft? The transition to 1.17 increased the required OpenGL version from ~2 up to 3.2 - and the Pi4 only supports OpenGL 2.1. If you know of any hacks to work around this, please try them and report back, but, as of right now, I’ve run out of ideas to get 1.18 running on the Pi4.
For single player, though, 1.16.5 is fine!
Relative GPU Performance
While I’m here, since I’m talking about graphically demanding applications on a range of small board ARM computers (even if the PineBook Pro is larger, it’s still an ARM SBC in terms of resources), I may as well do some benchmarking! For no good reason beyond “It looks cool and works,” I’m using glmark2.
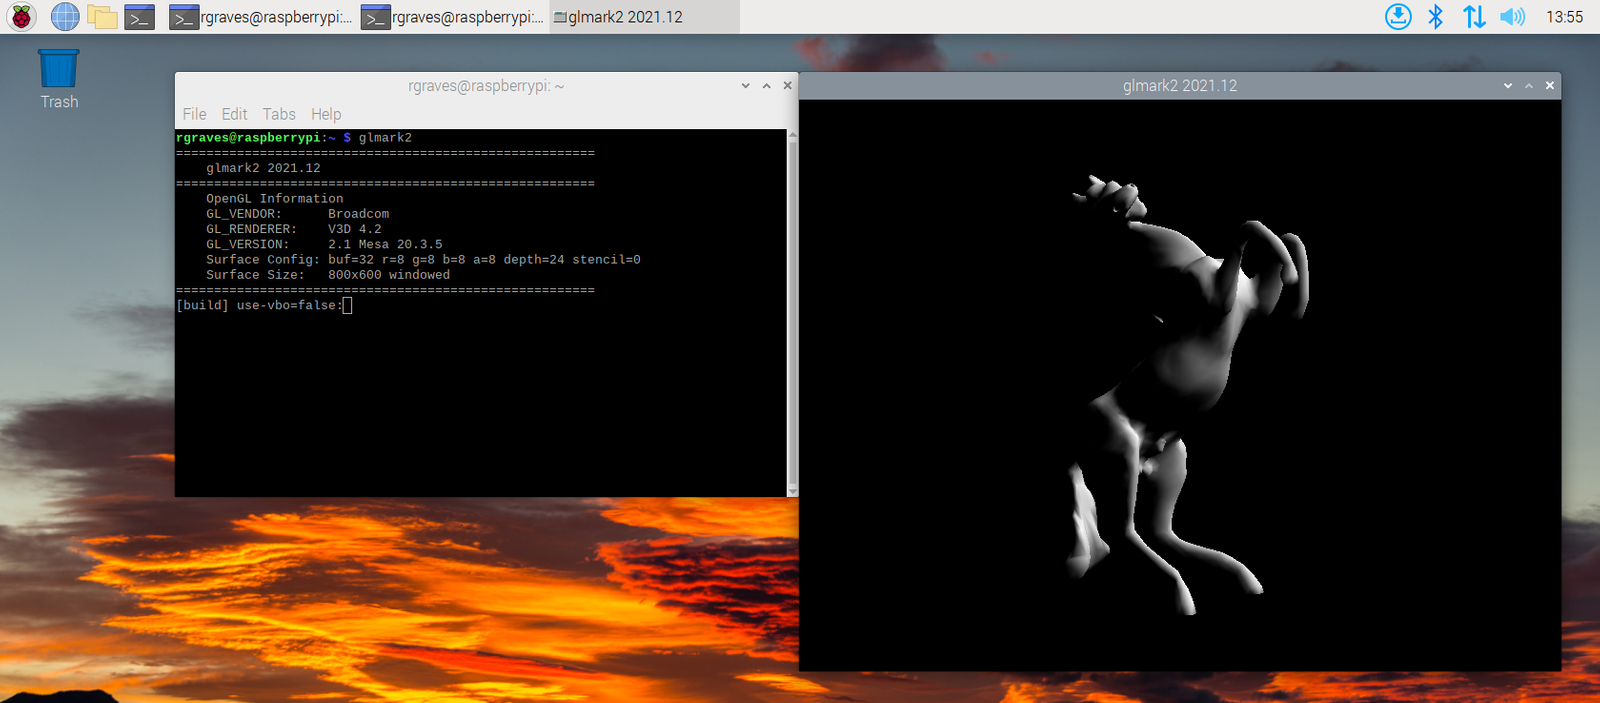
This runs a range of tests and spits out results in a nice, easy to chew on numerical way.
The Raspberry Pi 4, with 64-bit Raspbian, returns a score of 247.
The ODroid N2+, on 64-bit Ubuntu 22.04, returns a score of 608.
And the PineBook Pro, on 64-bit Ubuntu 20.04, returns a score of 309.
Why there’s no practical difference in performance between these systems (they all manage 12-15fps in Minecraft), I have no idea. For further investigation, I suppose…
Play Minecraft on ARM!
Hopefully you’ve found this post useful! Despite being entirely unsupported, it’s certainly possible to play a recent enough Minecraft on various little ARM platforms!
Obviously enough, I’m back into posting, and I have an interesting backlog of material to post in the weeks to come. Most of it is weird corners of computing, but I’ve also done some thinking about what I want to support with computing, and I’ve also gotten an old record player back online - with 3D printing!
Comments
Comments are handled on my Discourse forum - you'll need to create an account there to post comments.If you've found this post useful, insightful, or informative, why not support me on Ko-fi? And if you'd like to be notified of new posts (I post every two weeks), you can follow my blog via email! Of course, if you like RSS, I support that too.
