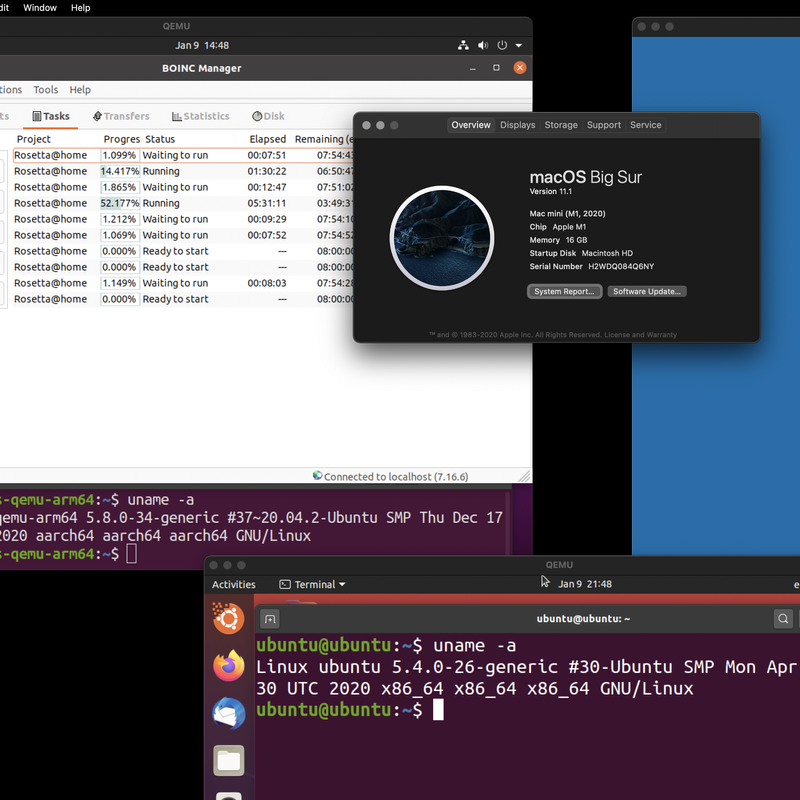
About six months ago, I speculated a bit on what Apple might do with their upcoming (rumored at the time) ARM transition. Apple did it, has shipped hardware, and I’ve had a chance to play with for a while now. I’ve also, as is usual for me, gone down some weird paths - like ARM Linux virtualization, x86 Linux emulation, and BOINC in an ARM VM!
The fastest Linux machine I’ve ever used is a hardware virtualized install on the Apple M1 - and this post covers how to do it!
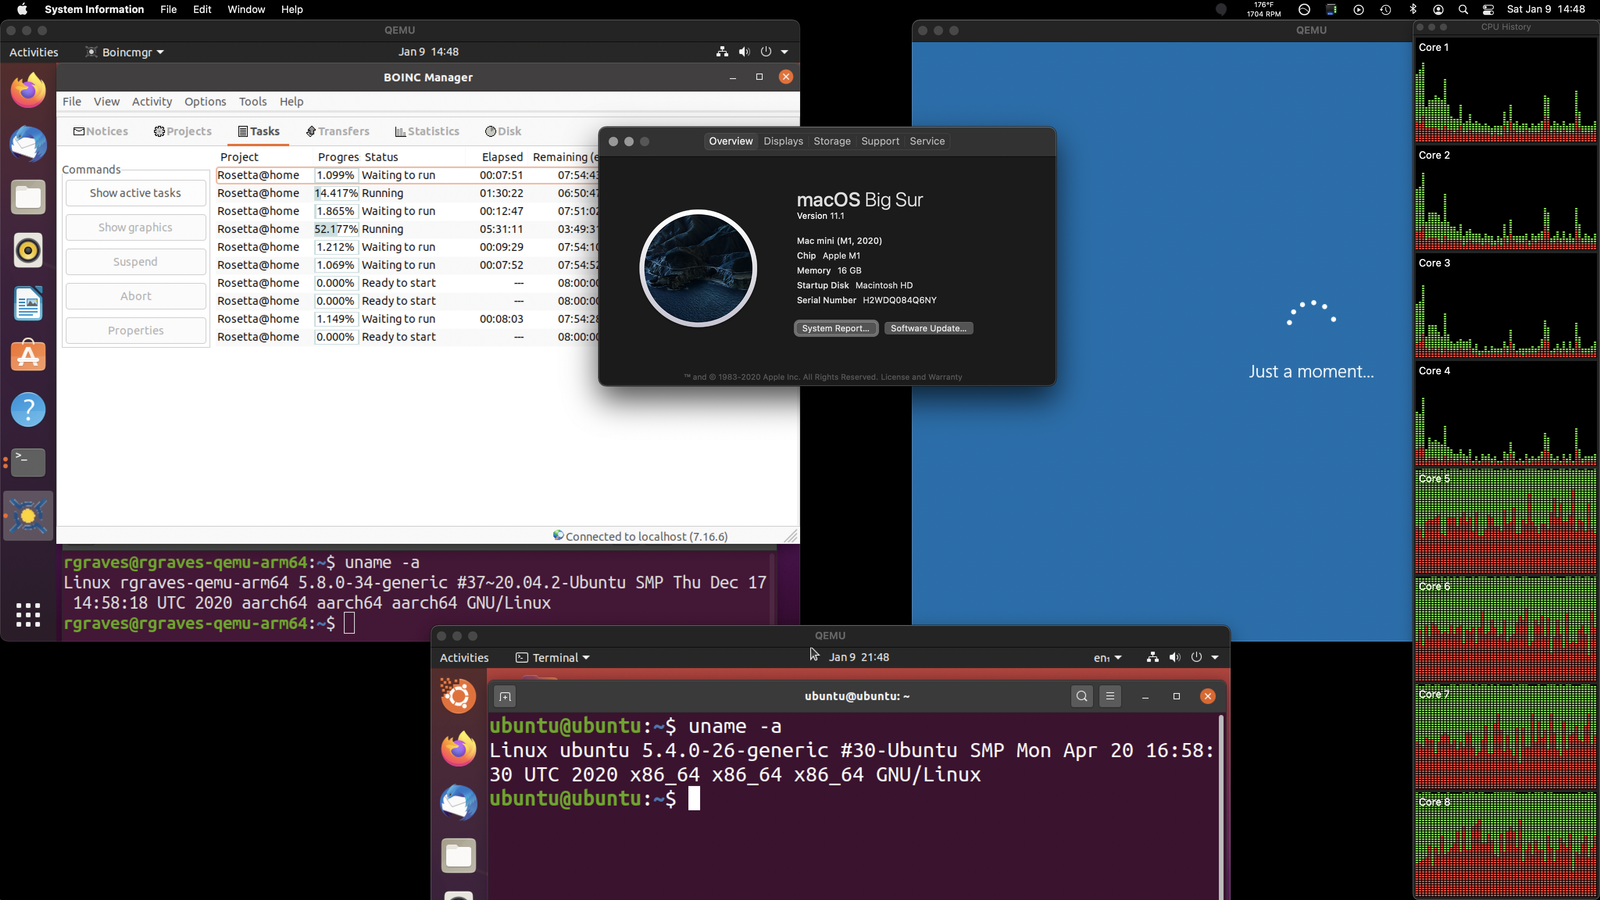
The Short 2020 M1 Mac Mini Review
While I don’t generally make a habit of buying brand new, just-released hardware, I made an exception for the M1 and bought a M1 Mac Mini to replace an Intel Mac Mini (which had replaced a perfectly function 2014 iMac I’d still be running if the monitor hadn’t failed - the display assembly, used, cost $600 in not-cracked condition). The Intel one wasn’t doing most of what I wanted (to say the GPU sucked would be an understatement), I’ve been lusting after a mid-range ARM desktop for a long while, and the fact that things would be broken on it doesn’t bother me - it’s not a production machine for me, so I’m happy to run on the bleeding, slightly broken edge. It’s a common theme with ARM desktop use, especially 64-bit, so this is no different.
How is it? It’s fast. It’s really, really fast. Not just for the power - that’s amazing too, but simple, flat out, using it for stuff. It’s amazing. I figured it would be really good, but it’s beyond good, crossing into the “Yeah, I’ll call this magical…” realm. The fan almost never comes off idle, power consumption (I work in a solar office, remember?) is a rounding error, and it just does what I ask of it in a real hurry.
I mean, it’ll even play Kerbal Space Program with pretty darn good graphics! That’s an x86 game with no native port yet, and it’s not exactly a CPU sipper!
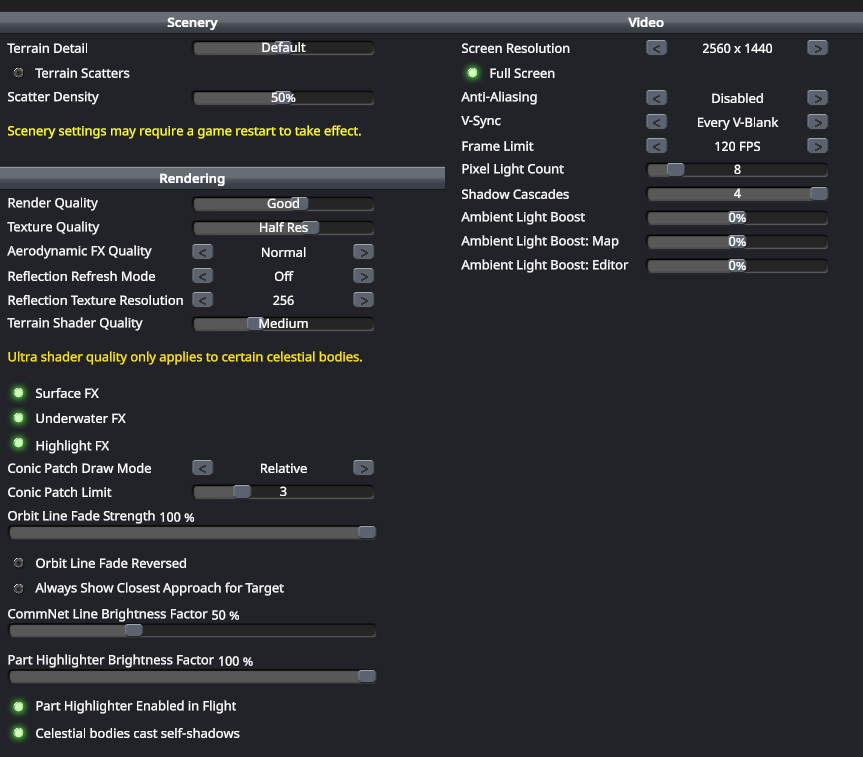
This does mean that, once again, Jeb ends up stuck places he’d probably rather not be stuck. Lock your staging, or a thumb twitch might just leave you 100m above Mun with no descent (or ascent!) stage left attached…

Should you buy one of Apple’s M1 devices? Probably not - wait 6 months for the next round of hardware, and buy then. Most of the software ecosystem quirks will be worked out by then, and just about everything will work. For now, there are enough weird little broken corner cases that I’d suggest holding off unless you’re OK with that and want legitimately insane battery life and performance.
But an awful lot does work, and it works really well.
Yes, yes, I know, your overclocked AMD ThreadBlaster 7970XP, with enough threads, will build the kernel faster on 400W. All this performance is on about 30W, and this is their first pass at it. Just wait…
Rosetta 2: They Did WHAT?
We also have an answer now to the insane x86 translation performance (around 80% of native performance, give or take - and, yes, this does mean that the M1 runs x86 binaries faster than an awful lot of x86 hardware out there). I’ve messed around with running x86 binaries in emulation on ARM before, and got about 10% of native performance on a Rpi4. Painful. Apple’s Rosetta 2 gets a lot of benefit from being a pre-compiling translator (for most cases - it still has to interpret JIT type workloads), but most people figured that would get you to 50% - at best. The ARM memory model is so radically different from x86 that you end up sprinkling memory barriers everywhere to guarantee cross threaded consistency, and that really hurts performance.
The issue is that on x86, if you write memory addresses in a certain sequence, all other cores will see the writes in the same sequence. If you write some blob of data and then write the “Ready!” flag, by the time other cores see the flag change value, you can be certain that the blob of data has been written. ARM has no such guarantees without explicit (and slow) memory barrier instructions, and this is why the x86 emulation on ARM Windows was painful - guaranteeing correctness of a translated binary on a weaker memory model is slow.
As it turns out, Apple isn’t doing it purely in software - they have Total Store Ordering support in their hardware! When the M1 runs a translated x86 binary, the OS just tells the chip, “Hey, use x86 memory ordering for this thread.” Things built natively for ARM can take advantage of the performance gains of the memory reordering, and things that requires strict ordering get strict ordering. It’s a very, very clever way to totally bypass the memory ordering issues with translated binaries, and it’s not a thing in any other ARM chip on the planet (I’d say yet, but I really don’t think this will become a popular thing to implement - perks of Apple building their own silicon).
Onto Virtual Machines: Let’s Build qemu!
Now, to the core of the post: Building qemu to run hardware virtualized ARM Linux! I’m starting with these excellent instructions as a guide, but I’ve got some extra patches thrown in (because it doesn’t run x86 emulation my M1 with 11.1), and I’m doing a few other things in the process.
You’ll need XCode installed, and we’ll be using homebrew to install some of the prerequisites for building qemu. Plus some patches to the source, and… it’s all good fun, I promise! What I don’t promise is that this will work perfectly for you, though I’ll try!
Yes, I know Parallels has a tech preview out, and you still can’t change the resolution of a Linux guest. If you’re fine with 1024x768, it certainly works, but… we can do better with open source!
Installing the Prerequisites: Homebrew and XCode
You’ll need the XCode command line tools (gcc and such) to build this, so if you don’t already have those installed, go ahead and install XCode from the App Store. It’s huge.
I understand you can also install them from the command line, if you don’t want the full install, by running xcode-select --install. That’s the first thing I do with any Mac, so I had them laying around. You may have to agree to some license terms as well - it’s been a while since I had a clean install.
If you use the normal Homebrew install path, you’ll get x86 Homebrew, running under Rosetta. This is fine for most use cases, and it certainly works better than the ARM Homebrew (half the code won’t build under ARM), but it’s no good for ARM native dependencies, and we’re going to be building ARM native qemu.
If you rely on x86 homebrew, well… uh… fix the ARM stuff that doesn’t build? Or install to a different directory, I suppose. I have no great advice on parallel Homebrew installs, sorry.
cd ~
mkdir homebrew && curl -L https://github.com/Homebrew/brew/tarball/master | tar xz --strip 1 -C homebrew
sudo mv homebrew /opt/homebrew
echo 'export PATH="/opt/homebrew/bin:$PATH"' >> ~/.zshrc
source ~/.zshrc
brew update
This will run some git fetches, some builds, and you should generally have a working brew install. Like XCode, this may take a while, depending on your internet connection. My ISPs have been sucking more than usual lately, and I don’t keep a local mirror of Homebrew, so… coffee time.
You should then be able to install the dependencies for qemu:
brew install ninja pkgconfig glib pixman
Fetching, Patching, and Building qemu
Next step: we’re going to download the qemu source, check out the proper version, apply a couple patches, and build it!
The first patch series is the core of the updates - it adds Hypervisor.framework support (Apple’s recent “So, you wanna do hardware virtualization without a kernel module…” framework), adds the ability to sign the output binary to allow it to use that, and various other things related to Apple Silicon support.
The second patch series isn’t actually required to run hardware virtualization, but if you wanted to mess around with the (somewhat awful, but still usable) performance of x86 VMs on the M1, you’ll need this. Apple Silicon prevents memory pages from being both writable and executable at the same time, and this adds the toggles to handle things properly so the JIT engine can work.
If you don’t apply the second patches, and you try to run x86 system emulation, you’ll get the exceedingly unhelpful error “Could not allocate dynamic translator buffer” when you try to run it.
And, of course, if you’re not interested in x86 emulation, you can skip the x86_64-softmmu and i386-softmmu options in the target-list for configure.
git clone https://git.qemu.org/git/qemu.git
git checkout master -b wip/hvf
curl 'https://patchwork.kernel.org/series/400619/mbox/'|git am --3way
curl 'https://patchwork.kernel.org/project/qemu-devel/patch/[email protected]/mbox/'|git am --3way
mkdir build
cd build
../configure --target-list=aarch64-softmmu,x86_64-softmmu,i386-softmmu --enable-cocoa
make -j 8
Sit back, relax, wait… actually, not very long, this system is blazing fast on all 8 cores, and you should have some qemu binaries!
Grab an ARM Ubuntu ISO and an EFI blob, Create a Disk Image
There are plenty of ways to install the ARM version of Ubuntu, but there’s a convenient desktop build now at https://cdimage.ubuntu.com/focal/daily-live/current/ - grab focal-desktop-arm64.iso. You do NOT want the ‘amd64’ version - make sure you get ‘arm64’ or it won’t work!
You also need a EFI blob built for ARM. The instructions I’m working from cover how to build it with your own ARM VM (and include a link to some built ones), but I’ve also uploaded one for you, if you happen to want it: QEMU_EFI.fd
While you could just run the live ISO, there’s no fun in that - create a disk image for the install (you’ll be doing this from the qemu/build directory you were just in, and stick the image somewhere fast). I’ll assume you’ve put the QEMU_EFI.fd file in the same directory.
./qemu-img create -f qcow2 /path/to/Ubuntu.qcow2 40G
The Fun Part: Launch the VM!
Now, let’s light up a VM from the installer CD! It’s Linux, so we’re just using all the virtio devices. Virtio is a way for hypervisors and guests to say, “Look, let’s skip all the pretending that you’re talking to real hardware, which I’m pretending to be. I’m a hypervisor, you know I am, so just tell me what you want me to do and I’ll do it.” It’s far faster than any sort of hardware emulation (on less CPU too), and you should definitely use it. Because we’re running a Linux guest, it’ll just do the right thing!
If you just copy-paste this, it won’t work. Set your file paths properly. This sets up a 4 core VM with 4GB of RAM, which should work even if you’re on an 8GB system.
./qemu-system-aarch64 \
  -serial stdio \
  -M virt,highmem=off \
  -accel hvf \
  -cpu cortex-a72 \
  -smp 4 \
  -m 4096 \
  -bios /path/to/QEMU_EFI.fd
  -device virtio-gpu-pci \
  -display default,show-cursor=on \
  -device qemu-xhci \
  -device usb-kbd \
  -device usb-tablet \
  -device intel-hda \
  -device hda-duplex \
  -drive file=/path/to/Ubuntu.qcow2,if=virtio,cache=writethrough \
  -cdrom /path/to/focal-desktop-arm64.iso
By the way, if you’ve not messed with zsh too much before Apple made it the default, you can use the up/down arrows to edit a multi-line command like this! Super nice!
If all goes well, you should get a quick EFI screen, then a boot loader! If not, check the serial output on the console, because it’s probably telling you something important.
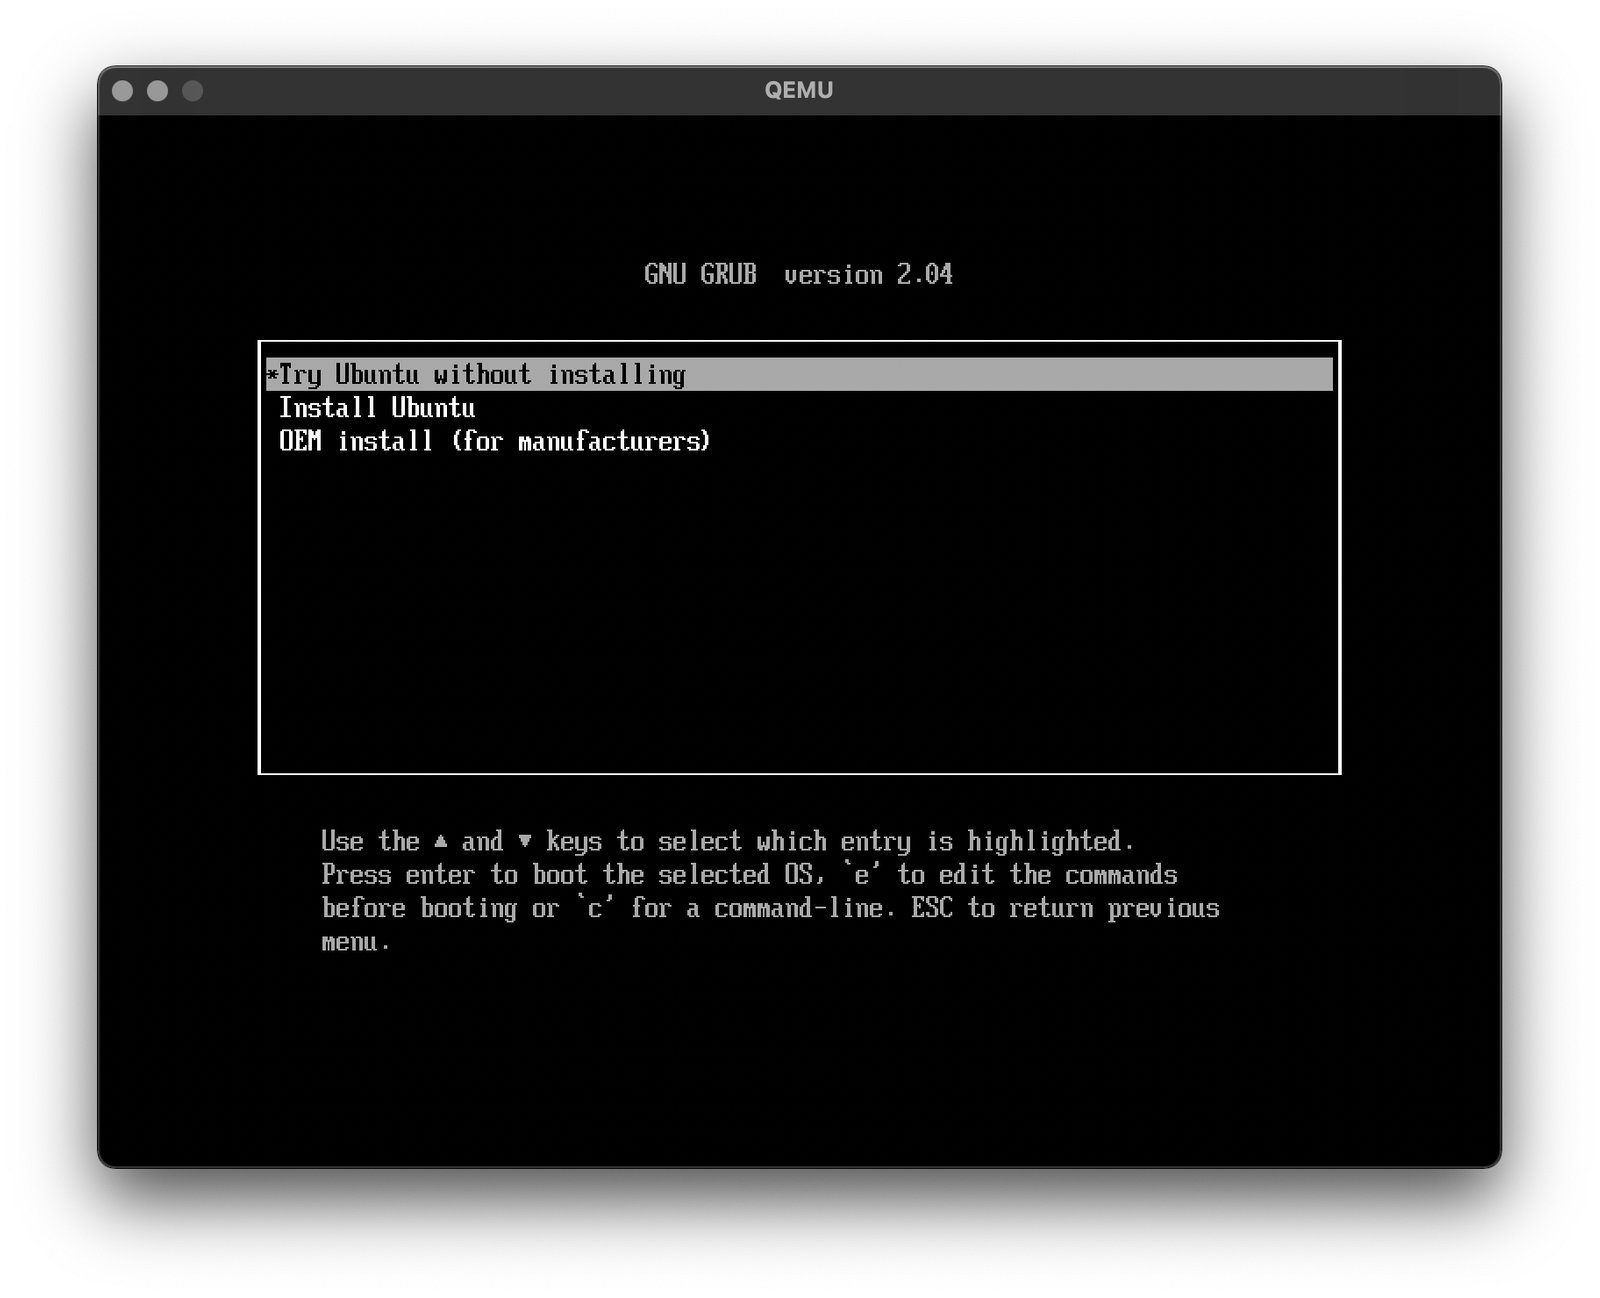
Go ahead and pick “Install Ubuntu” - and you should rapidly find yourself, very soon, in what should be a very familiar seeming installer environment. At some point during the boot process, you’ll probably get a pop-up asking about network access - allow it, if you want network access (you almost certainly do).
qemu is occasionally a bit weird with actually noticing the mouse. If it seems like the mouse isn’t working in the VM (you try to interact with the VM and nothing happens), try switching to another window and back - it should pick it up.
Install Ubuntu. You probably know how to do this if you’re this far into a post about VMs on Apple Silicon.
When you’re done, you should have a native aarch64 VM running wonderfully!
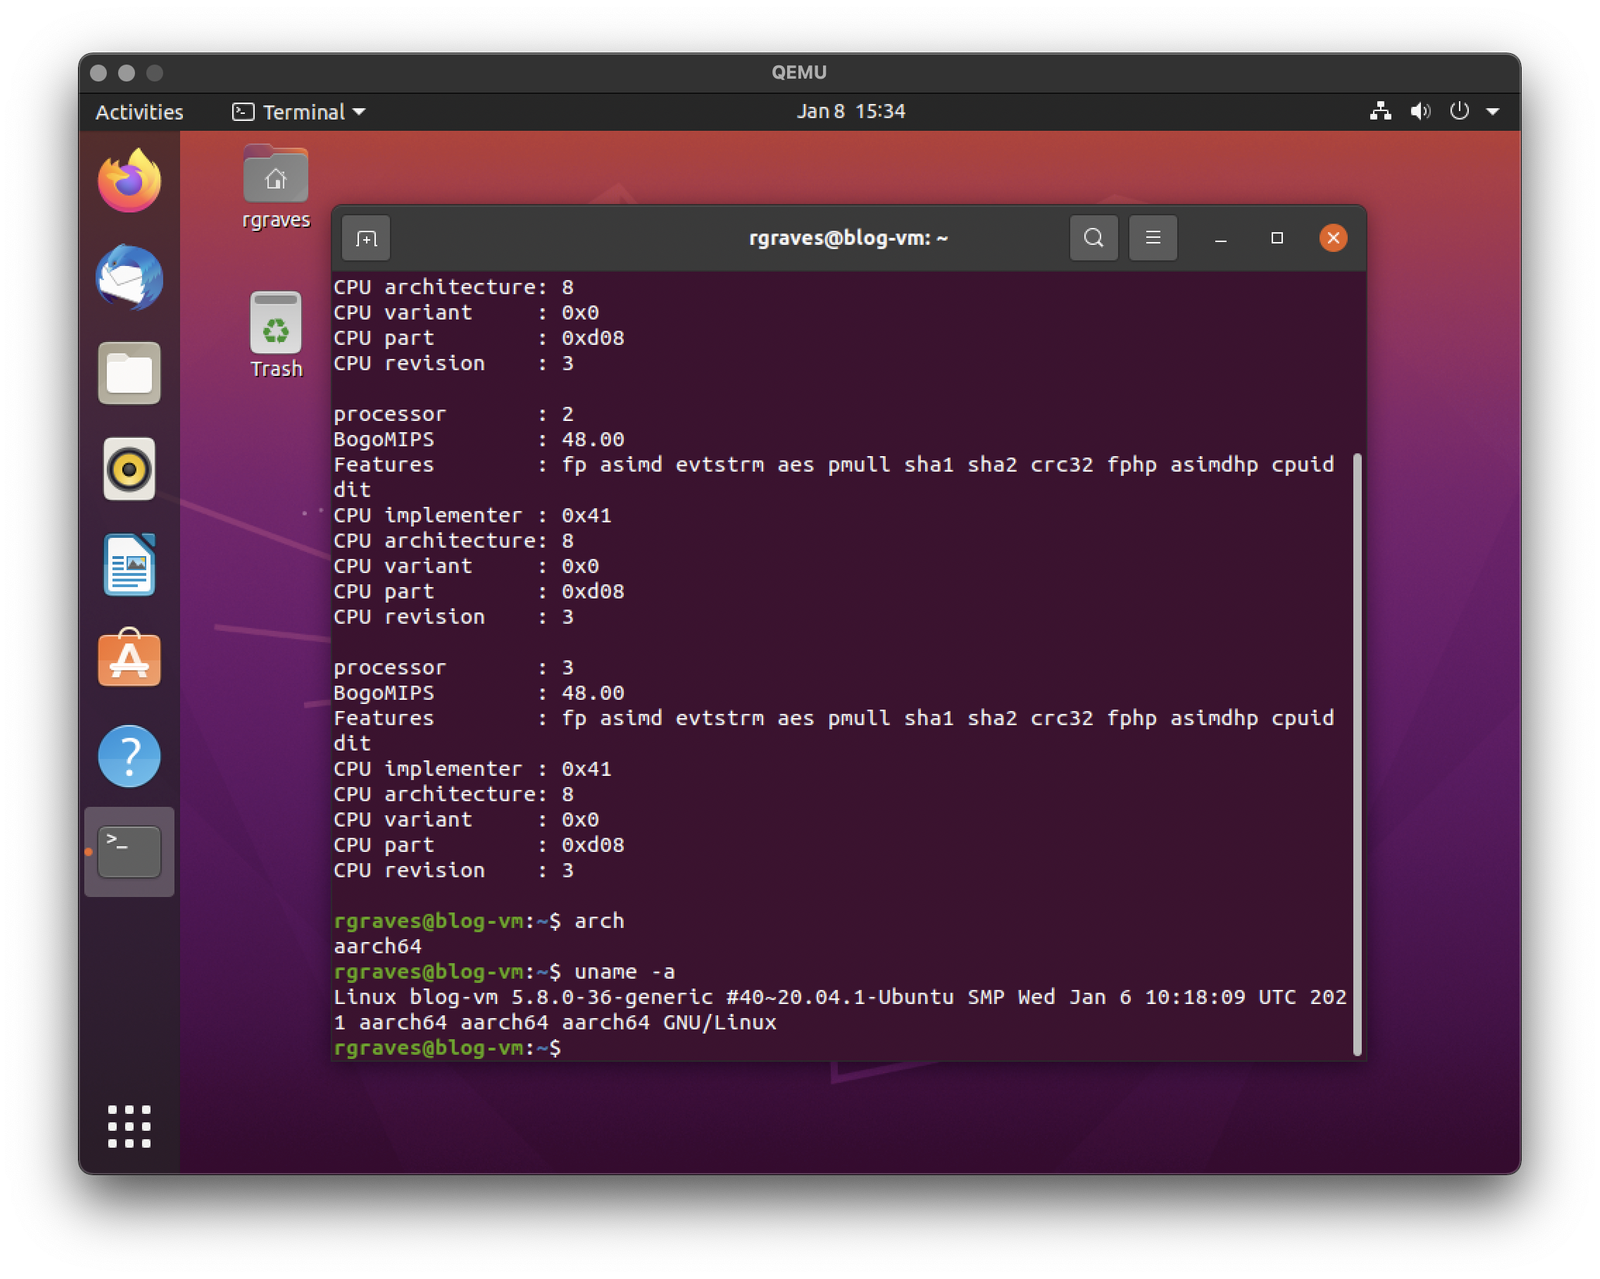
After it’s done, update packages. For subsequent launches, you can skip the -cdrom line, and be on your way! I’ve had poor luck with VMs rebooting in this setup - it seems far more reliable to just shut them down and relaunch.
Video Modes
Disable monitor sleep in your guest. It’s under Settings -> Power, Blank Screen. Set it to “Never.” I’ll probably lock the VM up if it tries for reasons I don’t fully understand.
The first thing most people will do is try to set a sane resolution, and there are plenty of them available. However, the one I really like (2560x1440) is missing for… reasons? No matter, it’s easy to add custom resolutions under Linux in qemu (this works in KVM too).
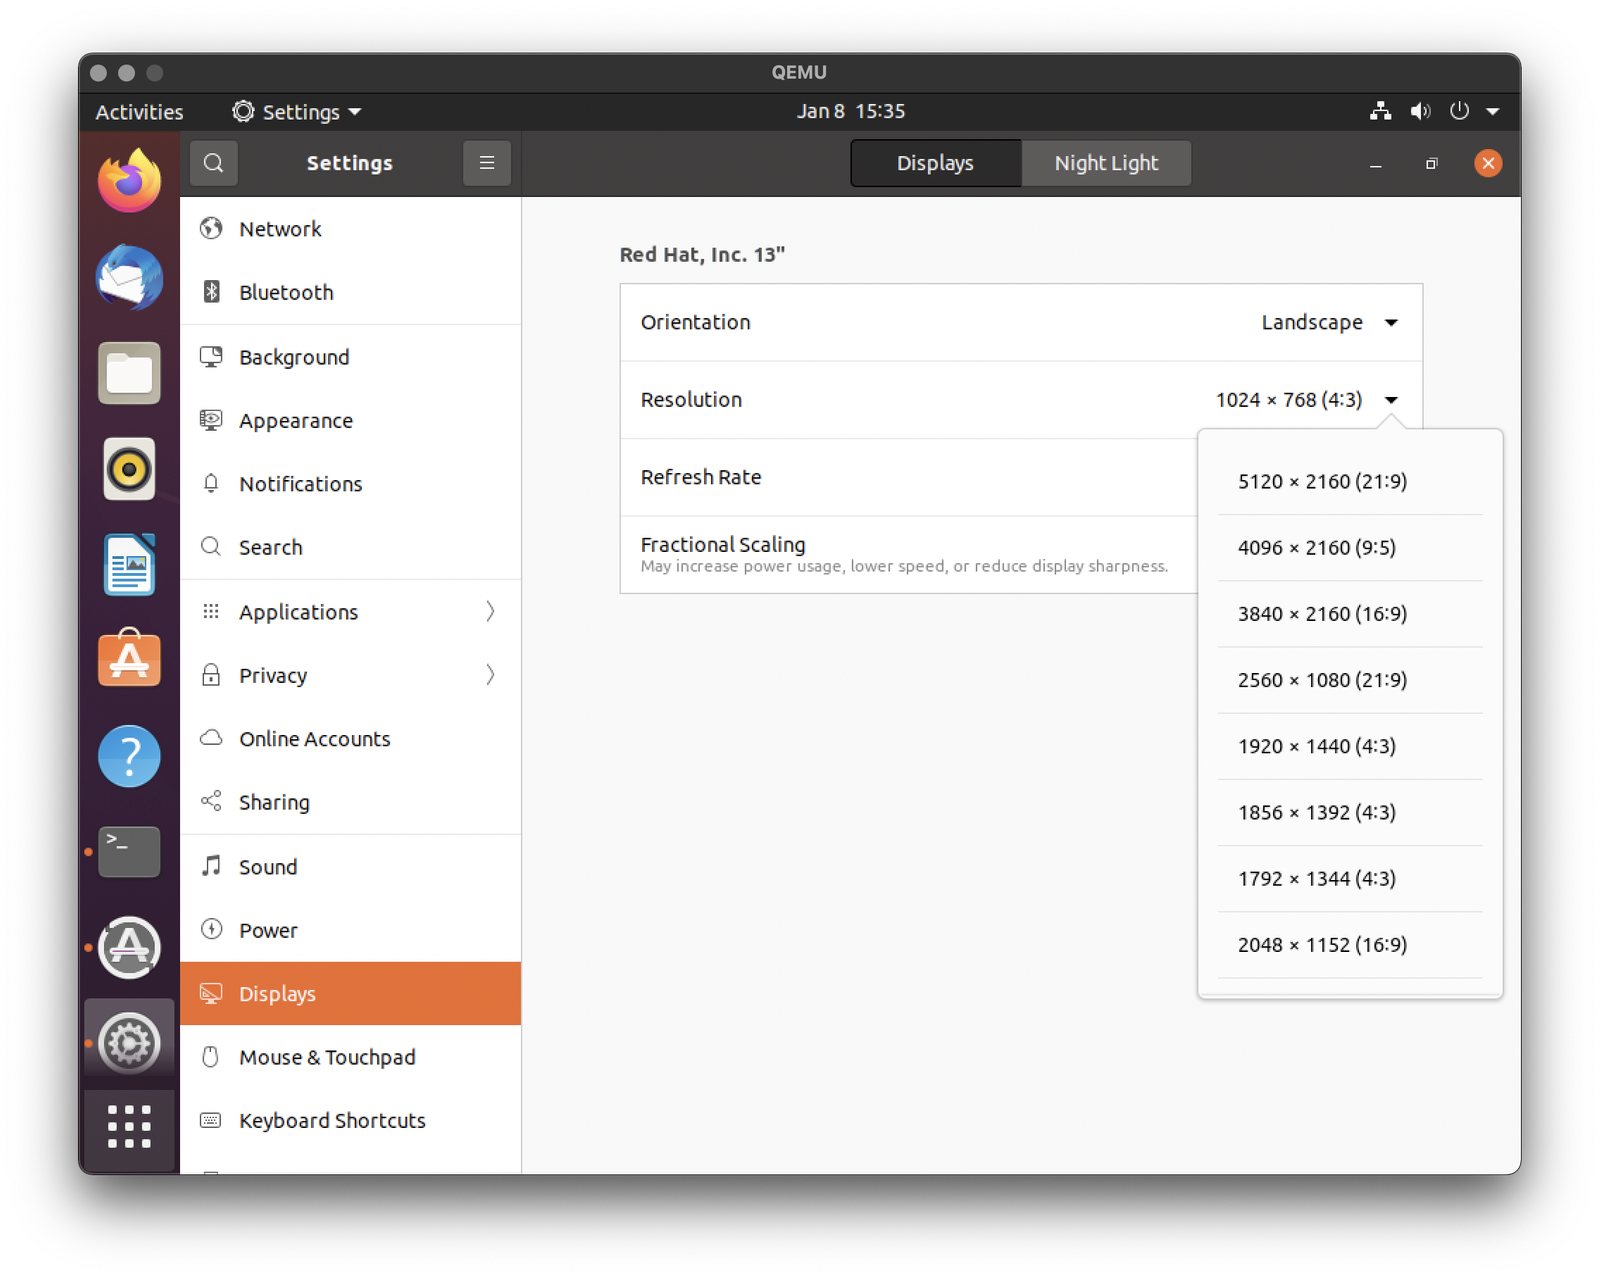
Just create a magic little script called setres.sh with the following contents and call it thusly: ./setres.sh 2560 1440
#!/bin/bash

MODELINE=`cvt $1 $2 | tail -n 1 | sed "s/Modeline//" | sed 's/"//g'`
MODENAME=`cvt $1 $2 | tail -n 1 | cut -d'"' -f 2`
`xrandr --newmode $MODELINE`
`xrandr --addmode Virtual-1 $MODENAME`
`xrandr --output Virtual-1 --mode $MODENAME`
If you fullscreen the VM, I’m not actually sure how to get it de-fullscreened either. Toss it on another display… this isn’t actually an issue for how I use my VMs. I like them full screened, on another display. When in doubt, three fingers up (or F3) ought to get you some sanity.
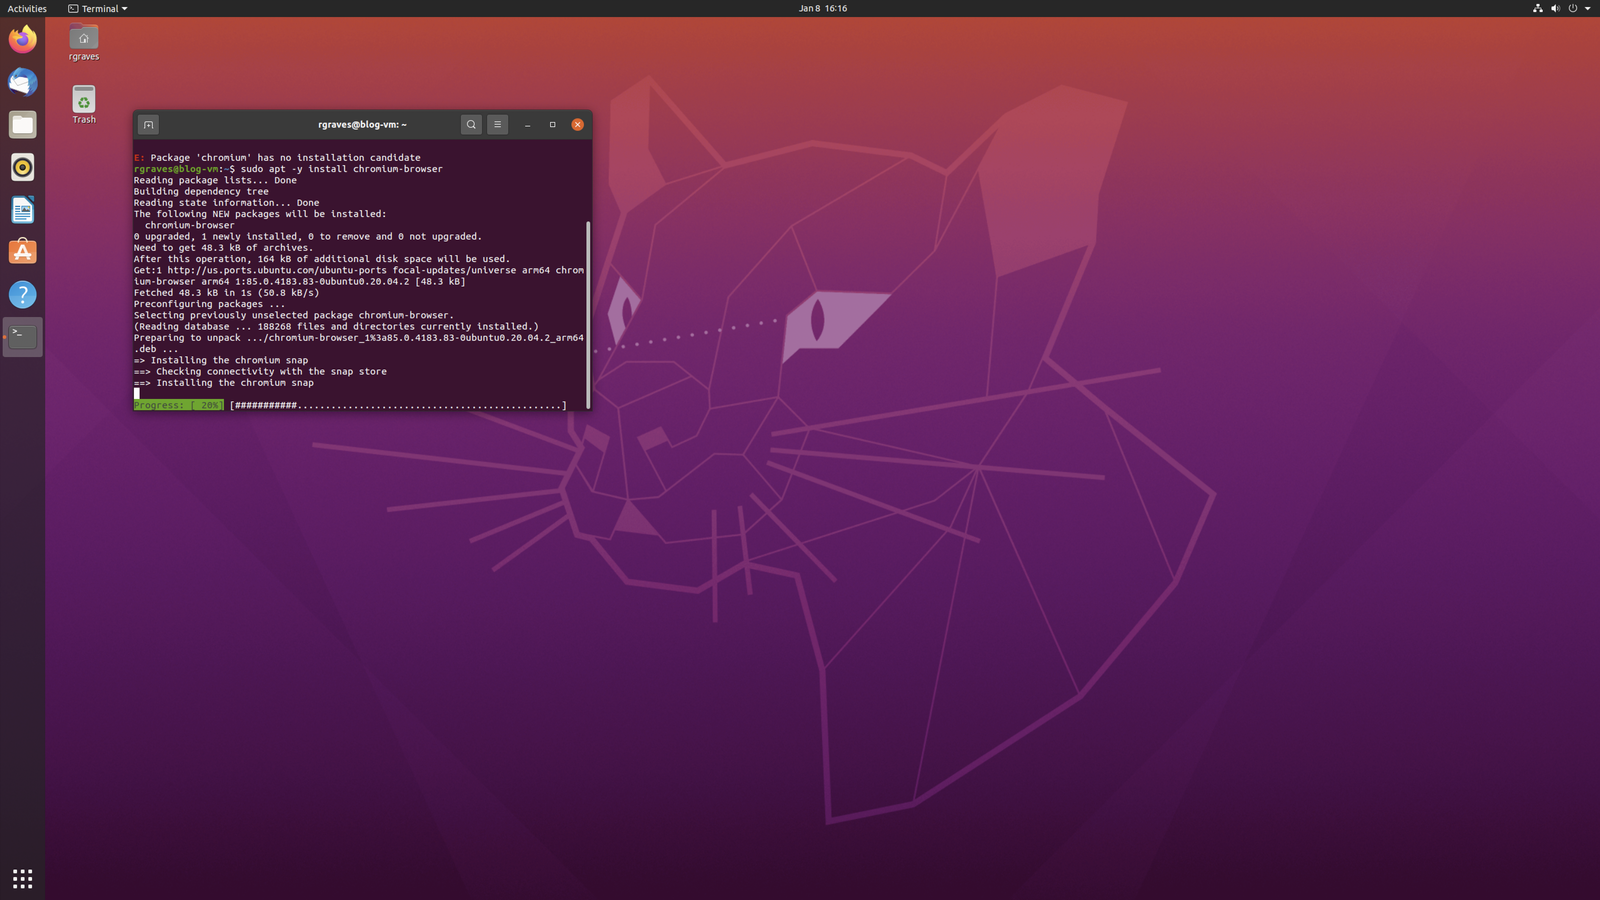
How Fast Is It?
So, we’ve got this Linux VM. Is it actually fast? Can you do real work with it?
Oh Yeah.
I’m not going to go through a full benchmark suite here - I just don’t find it that interesting when this is one of the more-benchmarked CPUs on the planet. But, I’ll toss Speedometer at both (Chrome on OS X, Chrome on Linux). Which is which?
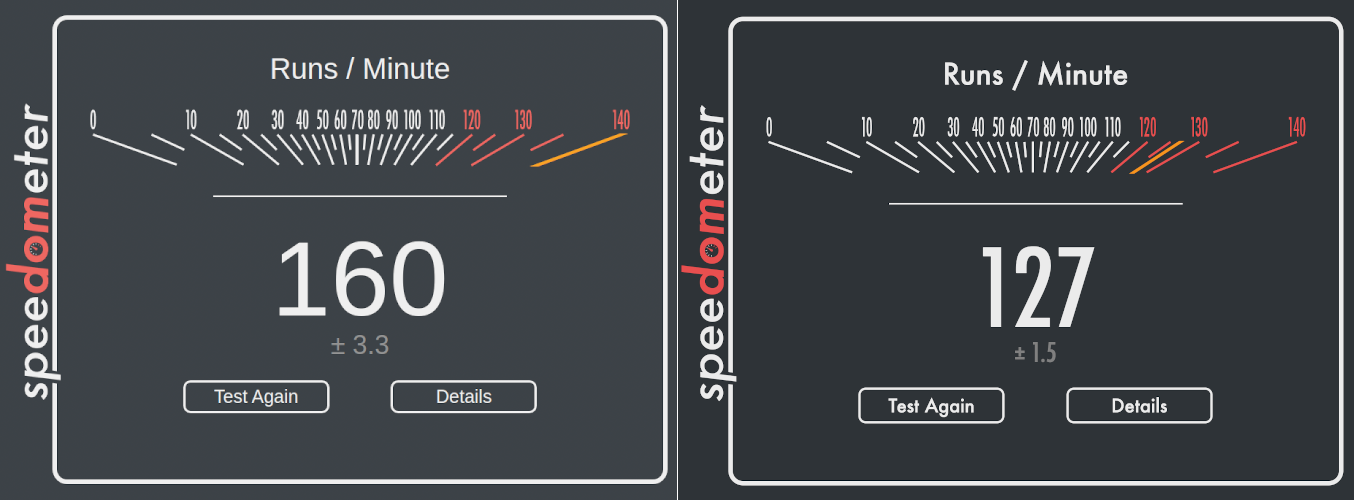
Actually, you’re wrong. Chrome on Linux, in a VM, is faster than Chrome in OS X, by a non-trivial margin, and also pegs the “speedometer” gauge. Take from that what you will.
For reference, a Raspberry Pi 4 (overclocked to 2GHz) gets about 22, and my office NUC, which is hardly a slouch, gets about 75.
And in something less synthetic and more practical, the ARM VM will build (including image processing - I have a lot of that) my blog in 48 minutes, vs 62 minutes for a VM on an AMD 3700X (single threaded in both cases).
Memory Bandwidth is WHAT???
Actually, I lied about benchmarks. I do like memory bandwidth an awful lot, and one of the things that the M1 is supposedly really, really good at is memory bandwidth. Is it? I’m going to use the standard dinky little memory bandwidth tester I use (mbw) on a couple systems I use regularly, and then this Linux VM.
I’ll just run mbw 1024 and graph the average for each of the memcpy types…
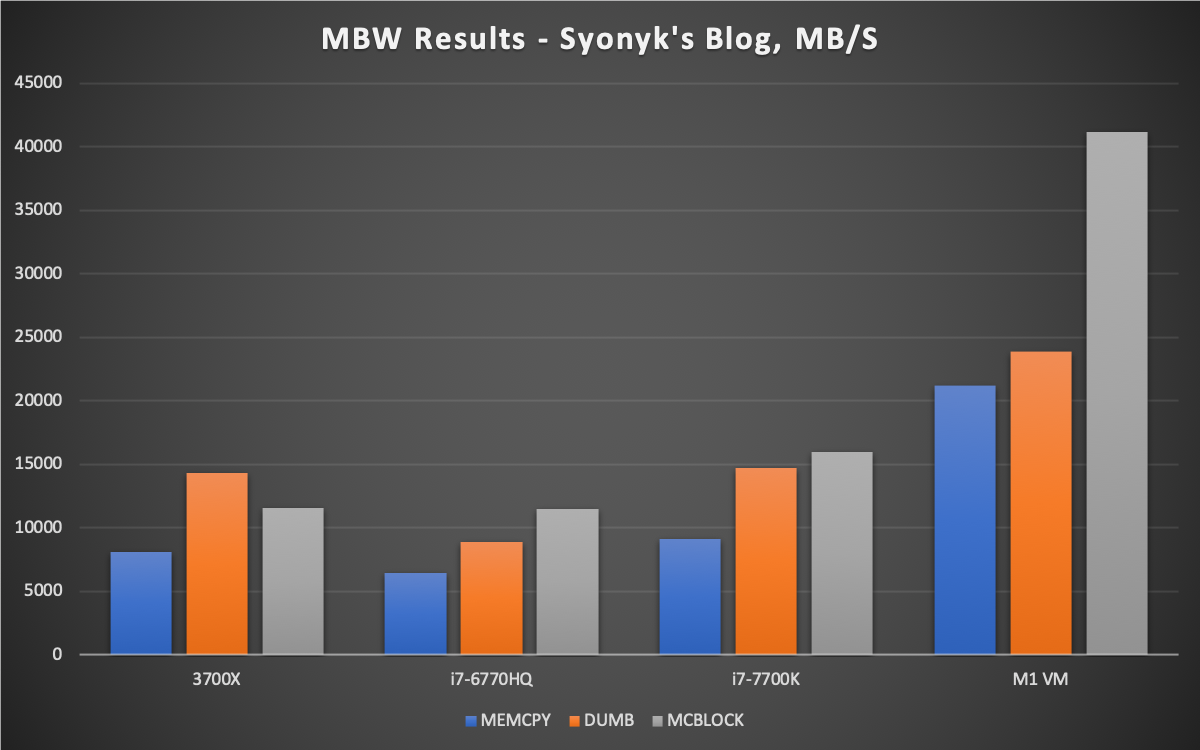
Well then. The 6770HQ has eDRAM, the 3700X I’ll give some leeway to because it’s running slower ECC, the i7-77070K is a decent box, and the VM on a Mac Mini absolutely slaughters them in this test, peaking at 41.2GB/s! It’s a dumb little test, not trying to be terribly clever, because most software isn’t, and it’s just staggering how much faster memory is on this system.
Shall We BOINC?
We shall!
sudo apt -y install boinc boinctui boinc-manager
Fire up the BOINC manager, add Rosetta@Home (I know they have ARM workunits), and watch your system go! Subject to the quirks and such mentioned below about CPU scheduling…
I’ve heard that you can run BOINC with Rosetta2 (different Rosetta, amusingly), and it has problems with memory bloat from the x86 translation layer. No such problems running ARM natively!
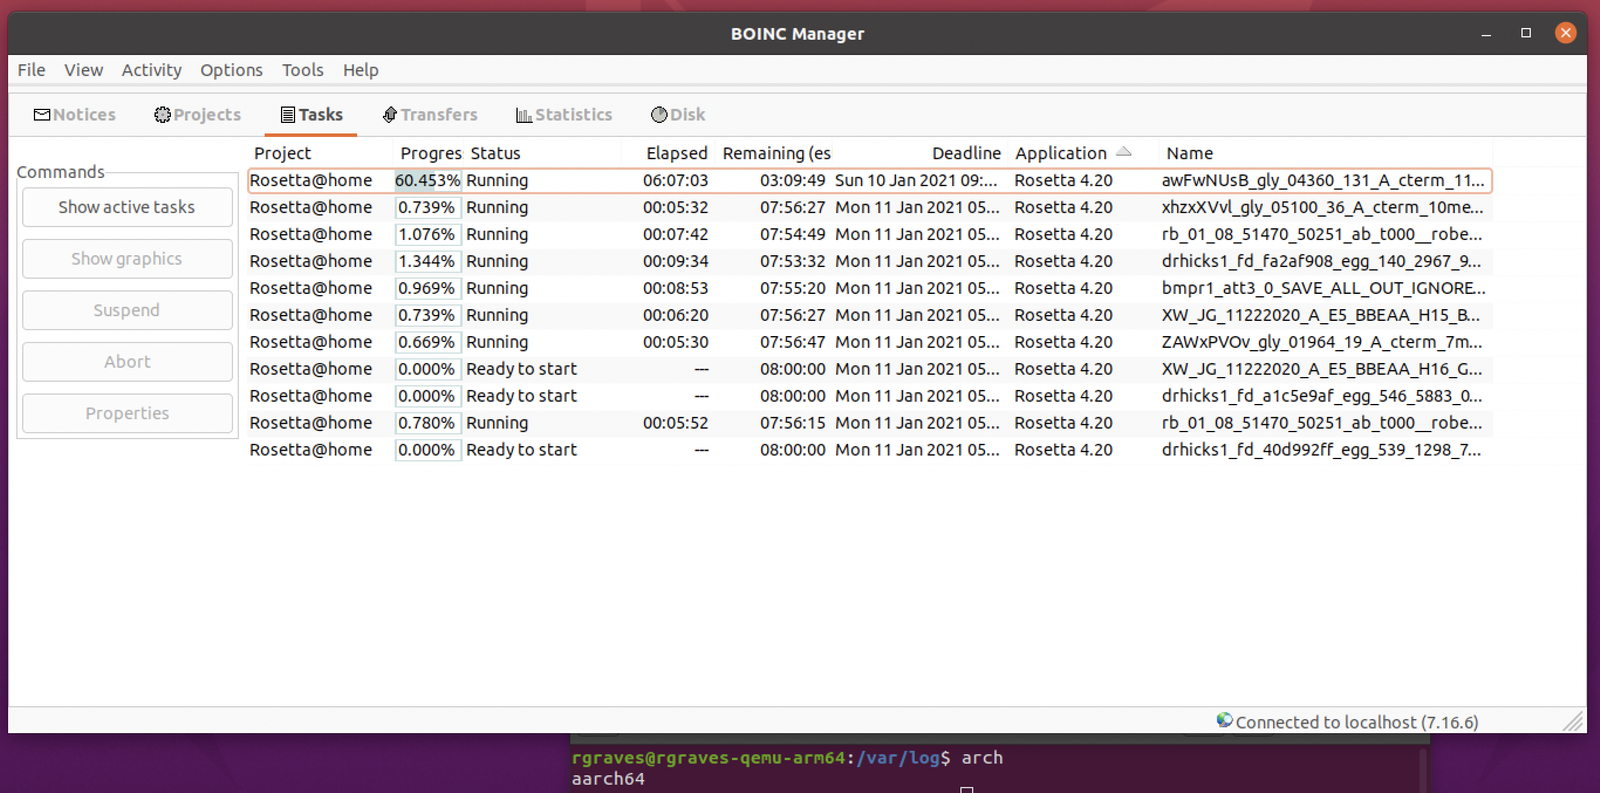
If you really want to let things rip, launch your vm with -smp 8 so it can access all 8 CPUs! As long as the VM window is visible and the screen isn’t asleep and… etc.
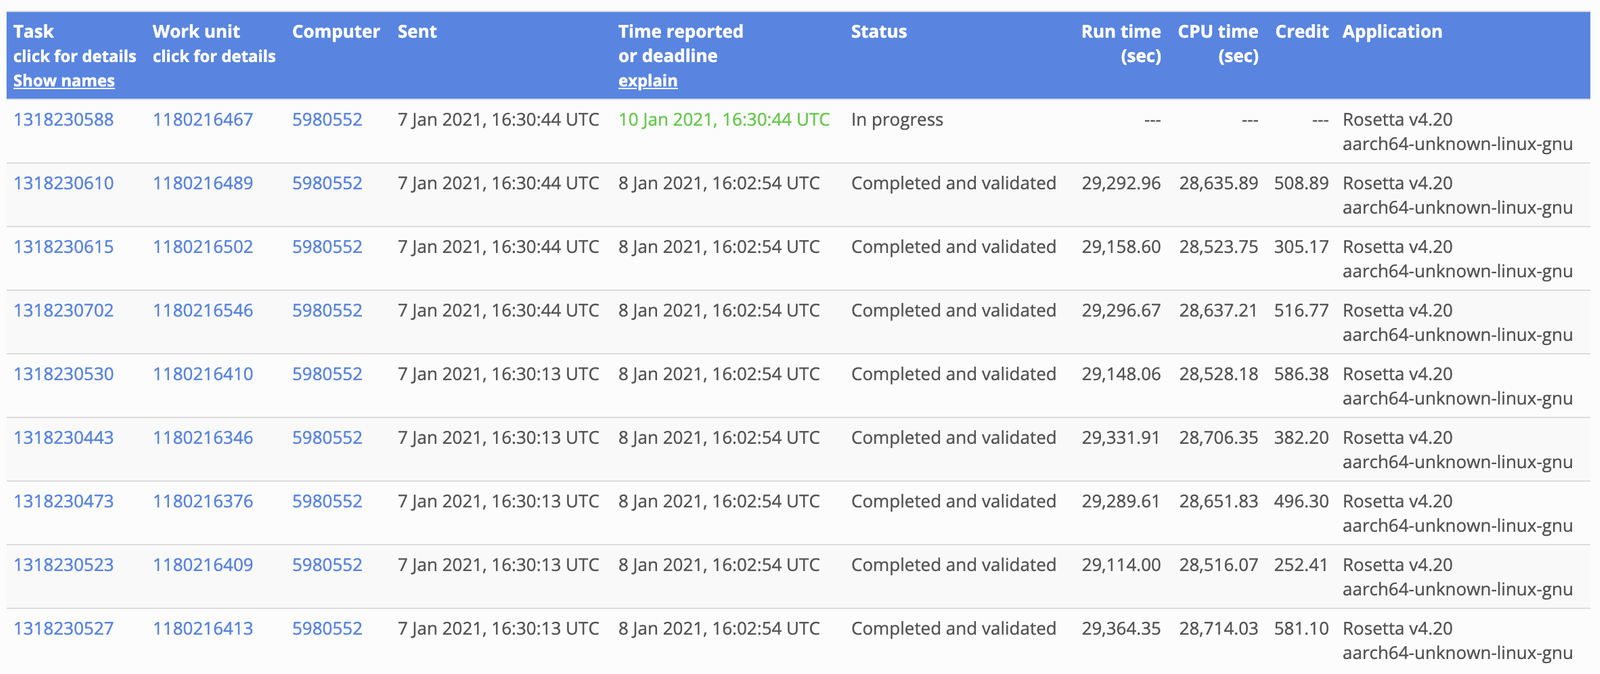
Workunits work!
Quirks of CPU Scheduling on Big Sur
One of the interesting things I noticed here is that CPU scheduling, on the M1s, is really, really aggressive about pushing tasks onto the “efficiency” cores (Core 1-4). If the VM window is visible, it’ll schedule threads on Core 5-8 (the Performance cores), but if you minimize it, or your screen goes to sleep, they get unloaded and everything is shoved over on the efficiency cores - even an 8 core VM. You can see this easily with the CPU history window from Activity Monitor.
With a 4 CPU VM running BOINC, and the display visible, the compute is on the performance cores (as expected). It’s a CPU bound task, thrashing away hard. Performance cores make sense.
But shortly after minimizing it, look what happens! I obviously don’t care about performance on a minimized task, so… bazoop! Over it goes to the efficiency cores.
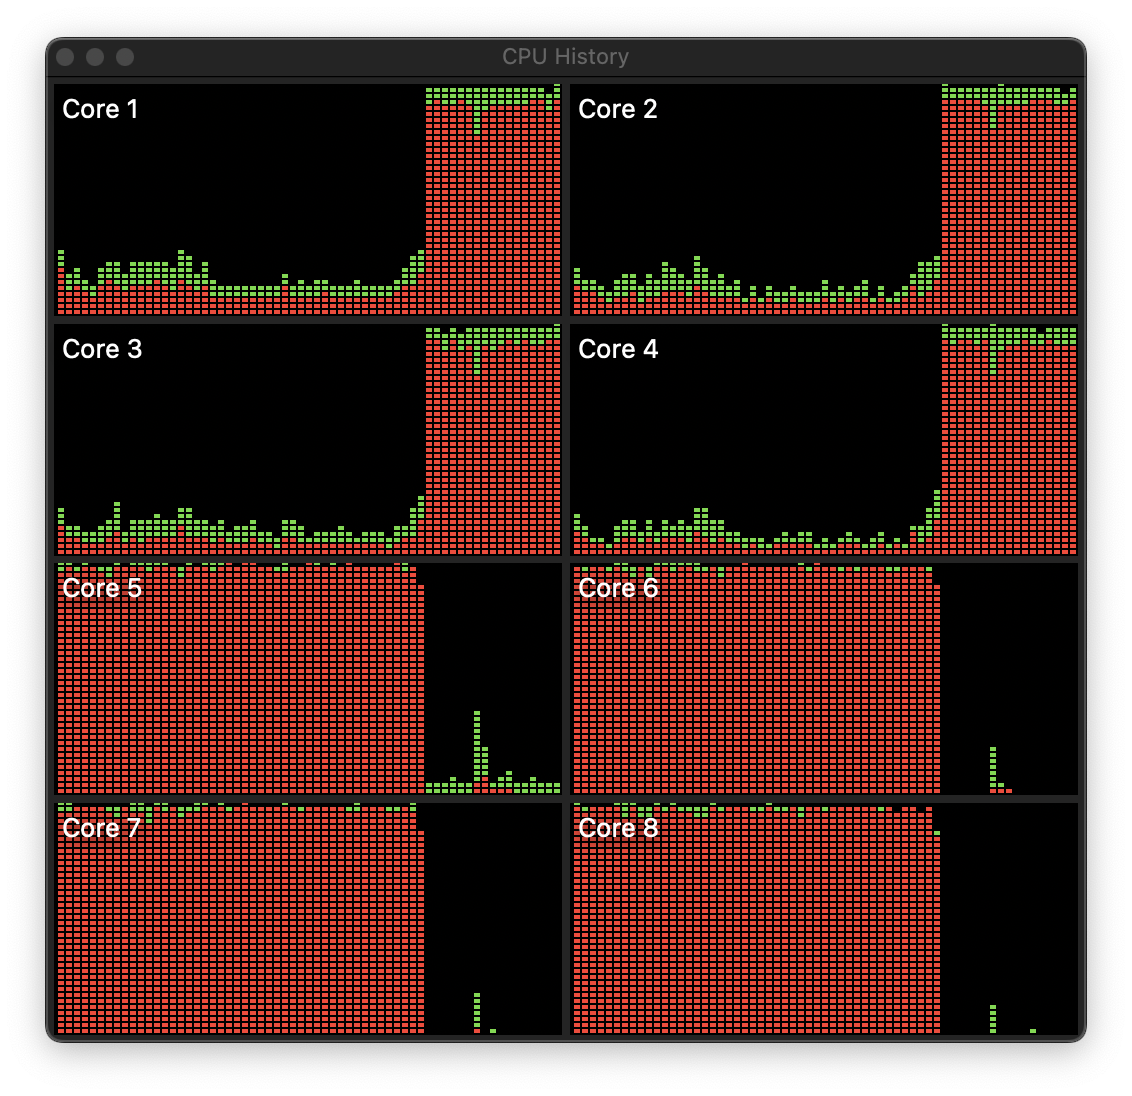
If you give the VM 8 cores, it will stay scheduled across all 8 cores while the machine is up and running, as one might hope. However, as soon as you lock the screen, well…
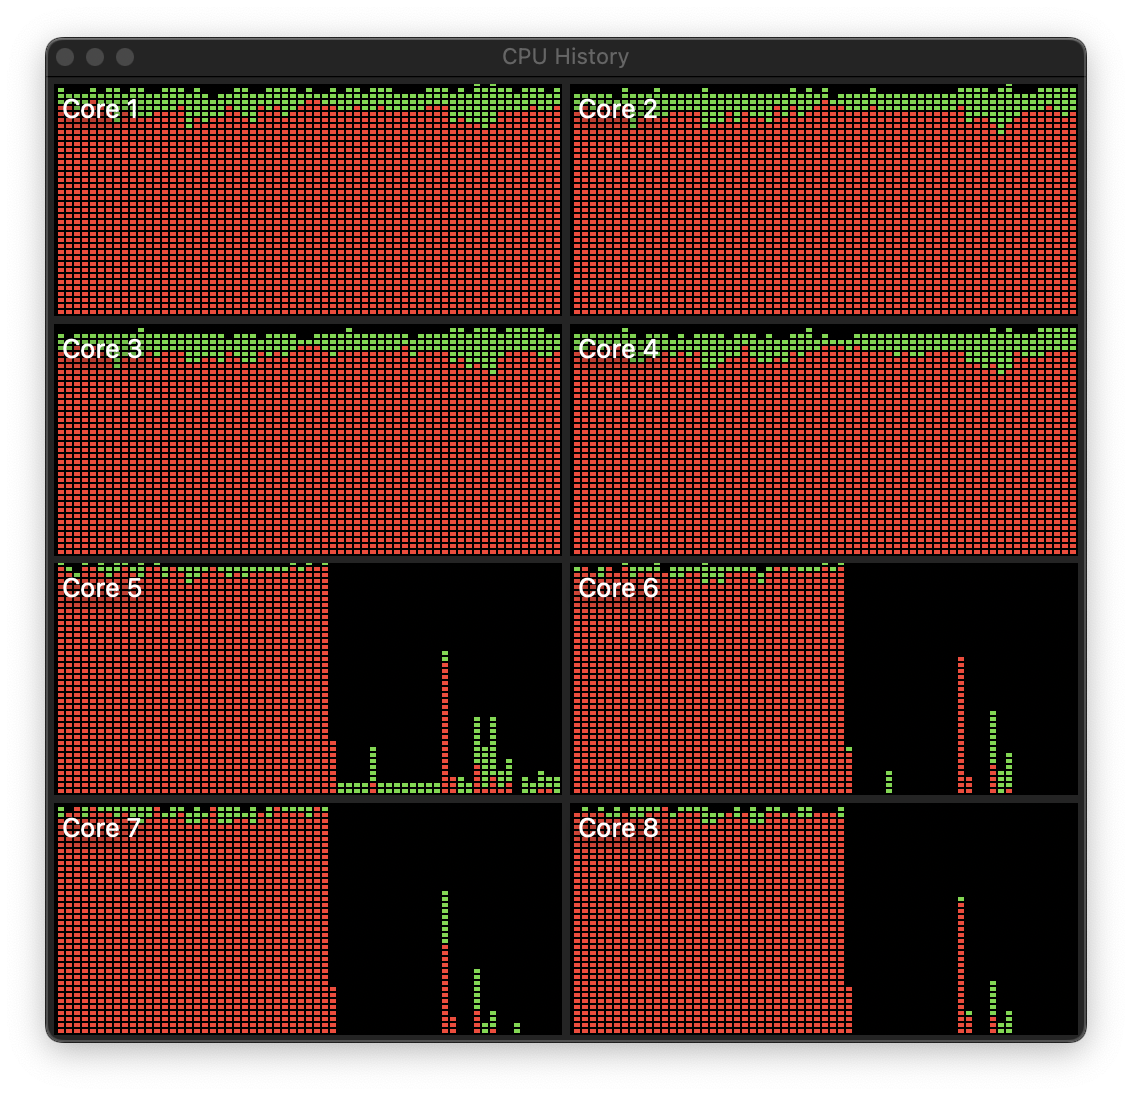
Everything gets pushed over to the efficiency cores. You’ll see the same behavior if the VM is minimized.
Now, I don’t mind so much - my office runs on battery at night, so this is fine with me. But it’s a weird behavior, is certainly inefficient for running a lot of compute, and likely relates to Apple’s application QoS parameters. I expect there’s an easy way to tell OS X, “Hey, go do this thing on the performance cores.” I’m just not exactly sure what it is…
But if you’re wondering how they get such amazing battery life on their laptops? Here’s a major hint - it simply runs almost everything on the efficiency cores if it can. And it seems to work just fine! Unless, say, you’re on AC power and want stuff to just run. I’ll have to work on that.
Finally, x86 Emulation!
With the second set of patches applied, you can also run an x86 VM in qemu. We can skip a few of the parameters for x86, and I’m just running a LiveCD here to make my point, but you can add your disk if you really feel the need.
./qemu-system-x86_64 \
  -serial stdio \
  -M q35 \
  -cpu qemu64 \
  -smp 1 \
  -m 4096 \
  -device virtio-gpu-pci \
  -display default,show-cursor=on \
  -device qemu-xhci \
  -device usb-kbd \
  -device usb-tablet \
  -device intel-hda \
  -device hda-duplex \
  -cdrom /path/to/ubuntu-20.04-desktop-amd64.iso
It’s not fast - but it does work!
If you want to get “proper” SMP, you can add the following and change your -smp 1 to -smp 4 :
--accel tcg,thread=multi
If you do this, you’ll get the following warning:
qemu-system-x86_64: --accel tcg,thread=multi: warning: Guest expects a stronger memory ordering than the host provides
This may cause strange/hard to debug errors
Remember what I said about memory models? Yeah…
There ought to be be some way to request TCO as a userspace process to deal with this - it would certainly be a good use of it. There’s a way to use the TSO Enabler mentioned earlier to do it, but I just don’t feel like building a kernel module for something I’m not going to use regularly.
But it’s a legitimate x86 VM, running Ubuntu 20.04 Desktop, and while I’m not going to call it “fast,” it’s not utterly unusable either. I mean, you shouldn’t use it, but you could.
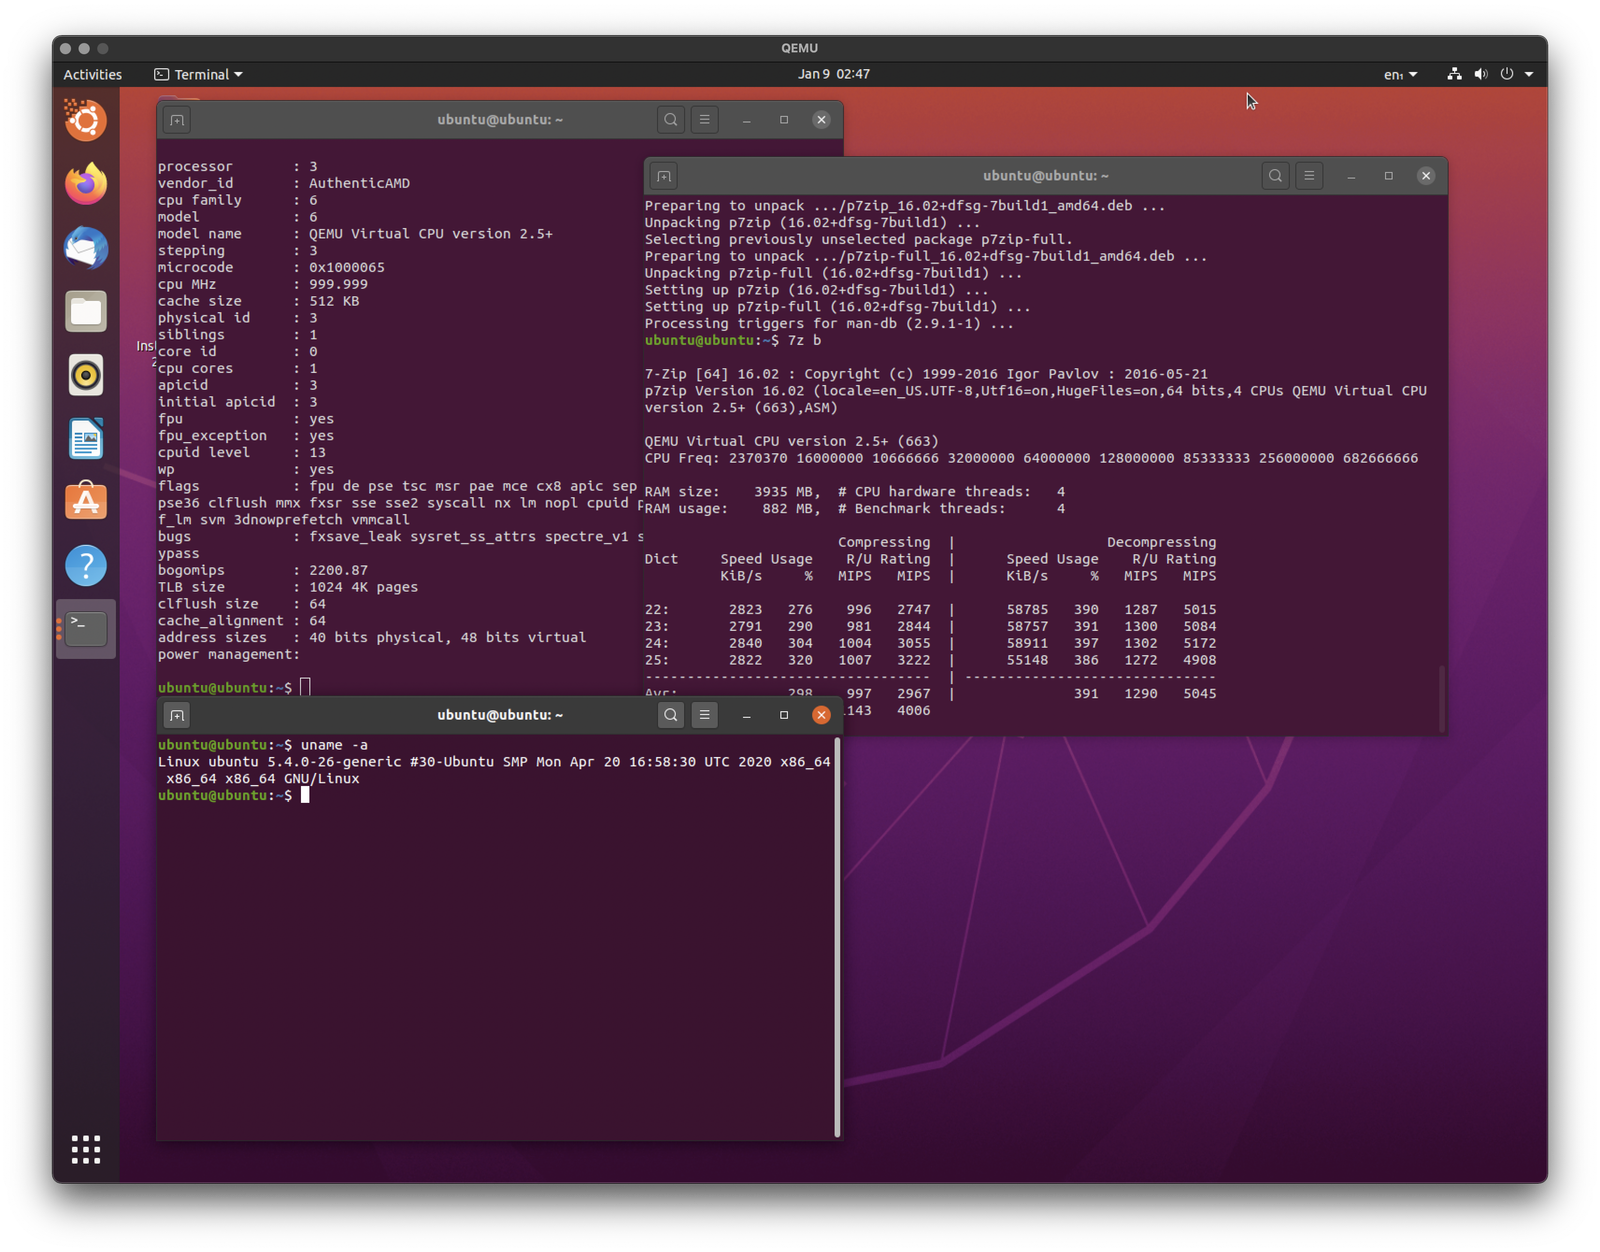
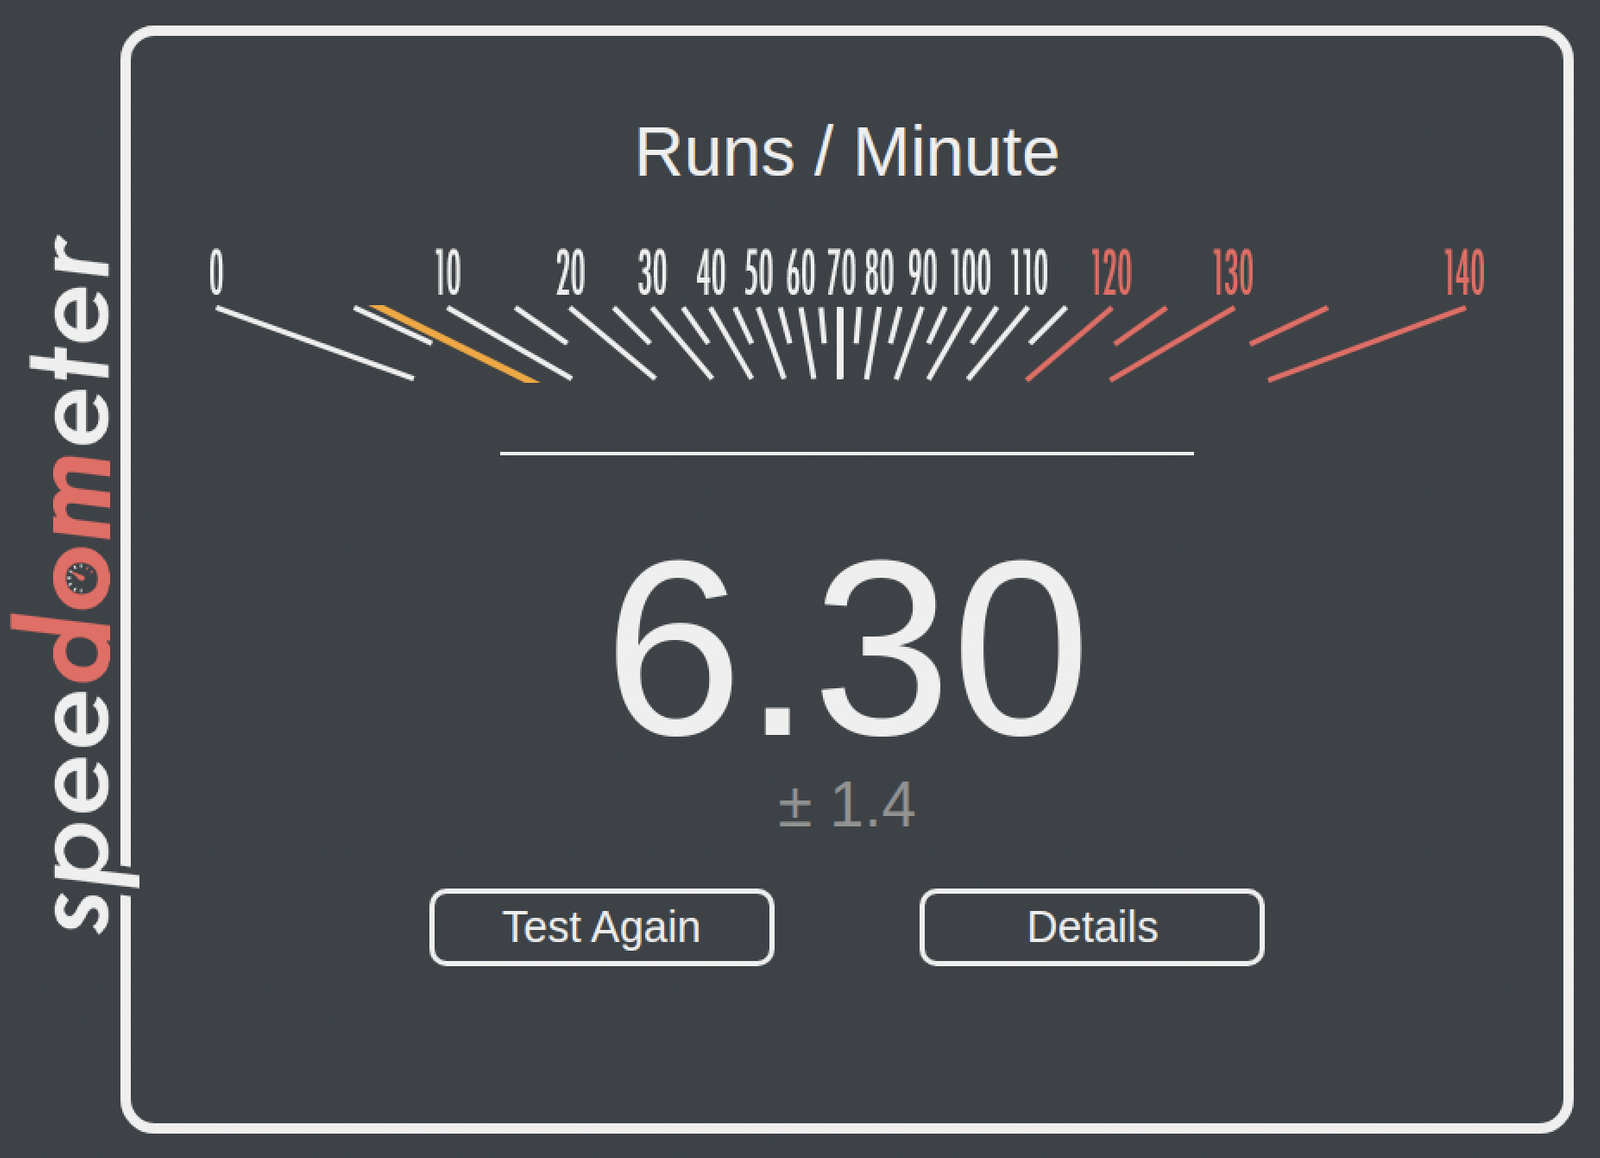
QEMU is doing JIT - Just In Time compilation. It translates the x86 operations into ARM operations, emulating complex things as needed, and then runs those. So performance isn’t going to be anywhere close to native. Browser benchmarks are a double whammy, because the browser is doing JIT for Javascript, which then has to be run through another JIT for the x86 translation, but they do run and complete. It runs, just not terribly quickly. It’s generally comparable to my old netbook Clank, or a Raspberry Pi 3, but performance really varies depending on the task. Definitely not something you’d want to use heavily.
Can it run x86 Windows 10?
Maybe. The installer runs, it reboots and tries to get into Windows…
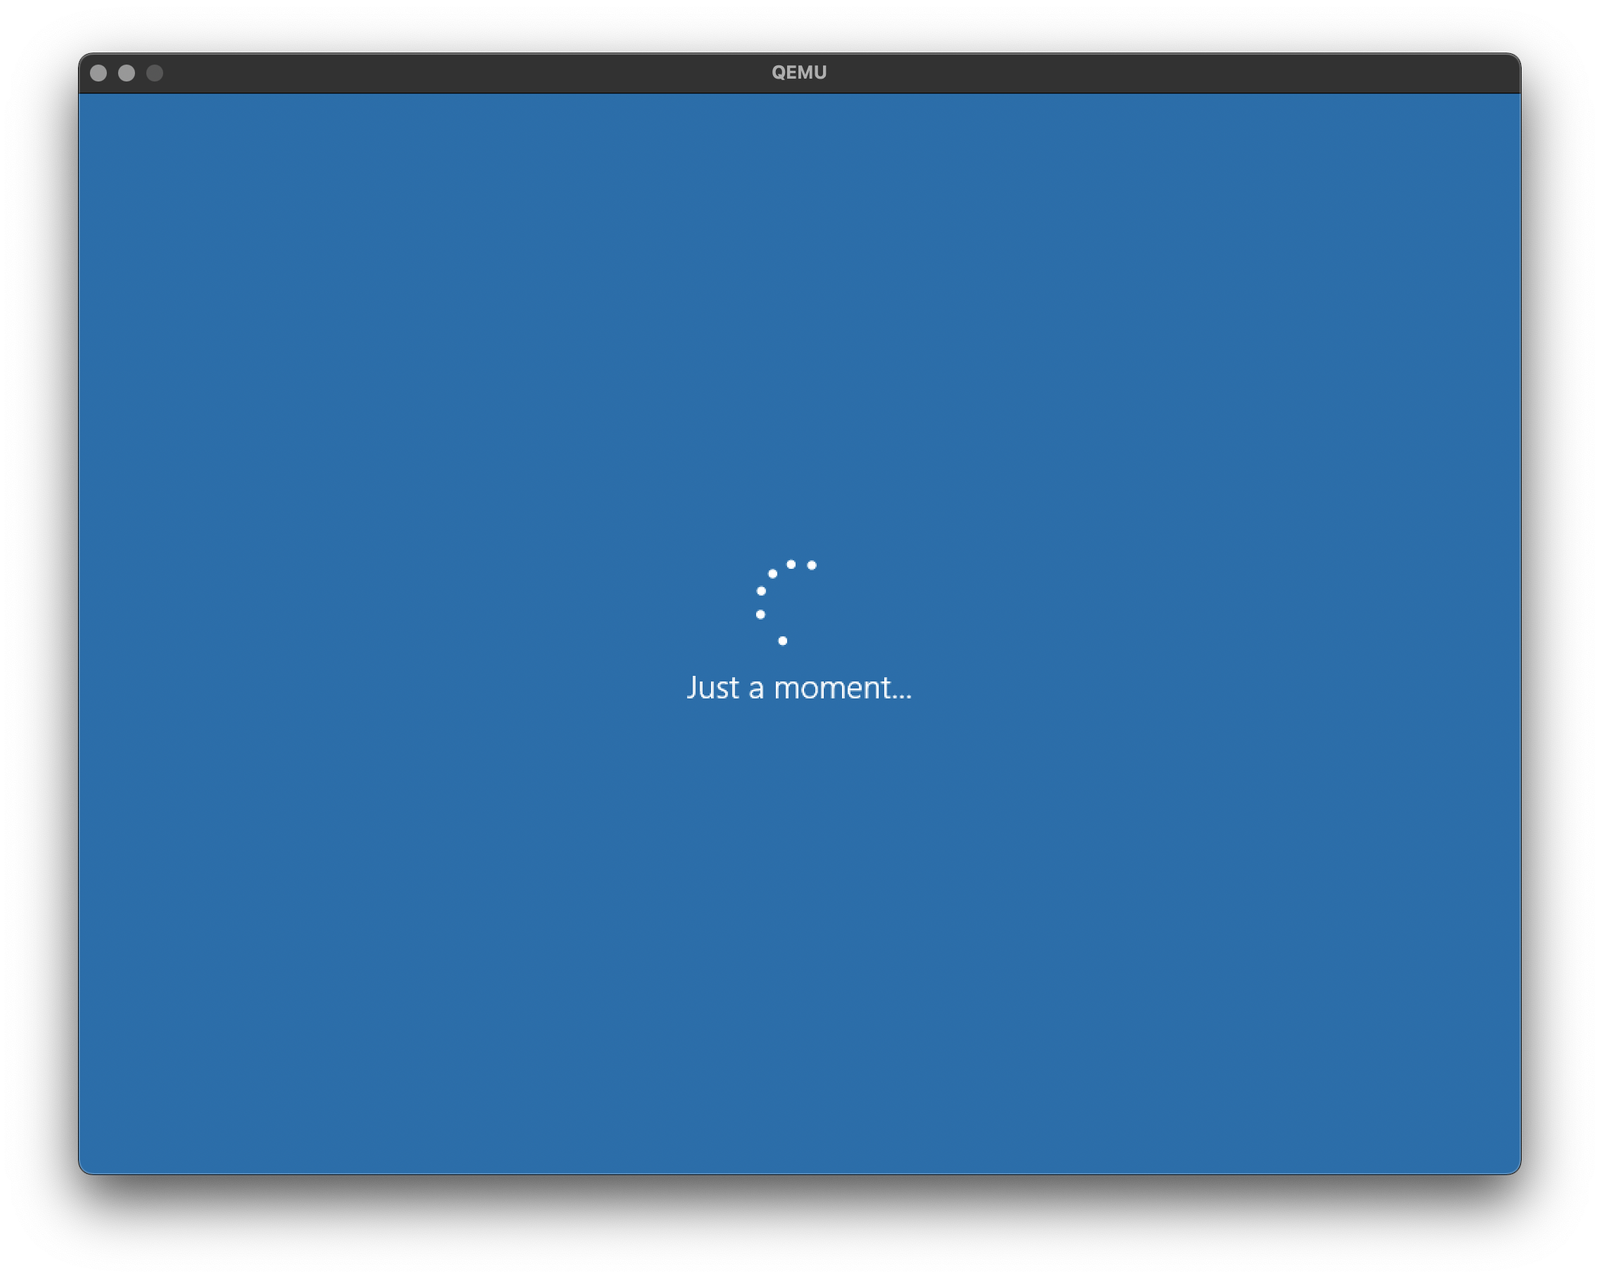
But then hangs - either here, or on a black screen with a frozen mouse cursor. The CPUs are still doing something based on CPU utilization on the host, but the mouse is frozen and a bit of casual poking doesn’t resolve the issue.
So, possible? Maybe. Useful? Almost certainly not, based on the x86 Linux performance.
Of course, you can run ARM Windows 10, if you want, and are willing to fiddle around with drivers and such - I just don’t find such a thing terribly interesting at the moment. But this build ought to do it, and the instructions I’m working from contain information on how to make that work! But, based on other reports, the Win10 ARM build runs fine in a VM, and it will run x86 applications well enough if you really want.
Final Thoughts
From these experiments, we can draw a few conclusions:
-
Wow, the M1 is fast (we already knew that).
-
Linux, in hardware virtualization on the M1, is fast. Like, vastly, hugely, mind-bogglingly fast. Absolutely useful for anything that “needs Linux” on a M1, and very likely the fastest Linux machine you can get right now for single threaded work.
-
The memory bandwidth of the M1 SoC is bonkers.
-
You can run a full x86 system on the M1 - just, very slowly right now. And you probably shouldn’t.
Some Blog Notes
Old readers may have noticed that I’m on a new platform, with new hosting, with a new commenting system. If you find anything that’s not working as it should, the best way to get in touch with me is my Conversation forum. The fine details of the blog layout are still very much in flux. Or, if you just want to participate in a quiet, backwaters, technical forum, feel free to join as well!
However, with this hosting worked out, and at least a somewhat sane workflow worked out, I should be back to posting new content every few weeks. I’m no longer holding myself to any sort of strict publishing schedule, but “every other week on Saturday” seems to be sane and sustainable, so I’ll probably stick to that. You can add your email down below to get an email with every new blog post, should you so desire. You can also follow the blog on Twitter at @SyonykBlog, but I’m pretty conflicted anymore about even using Twitter for that. And, rss should be working.
Comments
Comments are handled on my Discourse forum - you'll need to create an account there to post comments.If you've found this post useful, insightful, or informative, why not support me on Ko-fi? And if you'd like to be notified of new posts (I post every two weeks), you can follow my blog via email! Of course, if you like RSS, I support that too.
