I haven’t posted much about my office lately, simply because there just hasn’t been much to post. It works - very, very well. I have most of the quirks worked out, I stay cool in the summer, warm in the winter, and dry in the rain. Except, my office wasn’t always dry, and it took me a few years to realize this.
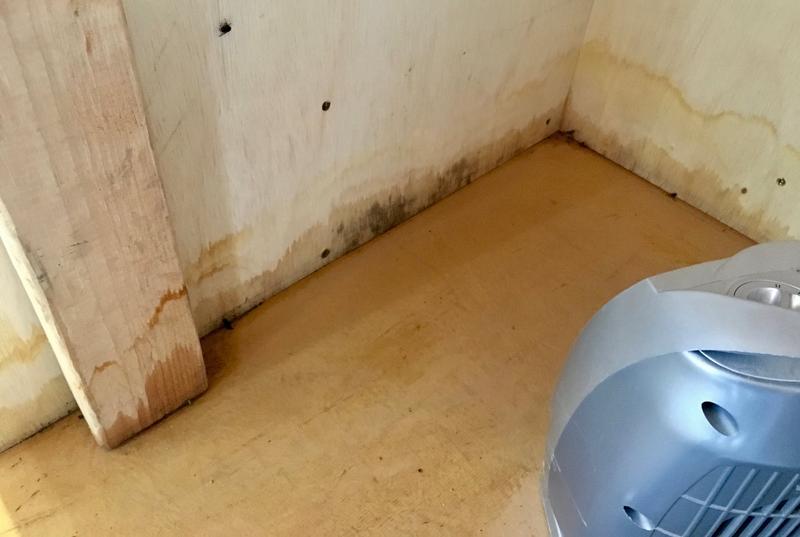
My office door faces south, and if I had rain coming from the south (which doesn’t happen that often), my office was taking on water. I knew it was a bit wet on the inside, but I didn’t realize just how wet a corner (behind some boxes) was getting. No, that’s not a good color to find on your wood.

But, like anything else, I’ve worked out most of the problems and resolved it - I hope!
What happened and how did I work it out? Keep reading!
Solar Offices in the Winter
If you’re new to my blog, I’m “that solar shed guy.“ I work from a Tuff-Shed converted into a solar powered off-grid office. I work out there year round, which means I have to deal with winter. Winter tends to be a time of a lot of clouds and very little sun, which means I get some “generator weeks” in which I make good use of a little generator with an extended run tank. Winter has snow, which was coming under my door the first year. A door sweep fixed that. Spring, however, has a lot of rain - which, it turns out, was coming in via just about everywhere from the front. There were no giant leaks, but there were enough small leaks to be a big problem when the wind was wrong.
I don’t know if any of these problems would happen with a normal Tuff-Shed Pro Studio, but I got mine at a substantial discount because it was a state fair demo shed. From what it seems, the front end of it (door, windows, etc) were rushed at the end, because I’ve had to rework an awful lot of that side of the shed over time. The paint was flaking off, and the windows leaked water. It’s not a hard problem to fix, but it’s not actually one I’d thought about until I realized just how wet things were getting. I’d hope they do a better job with normal builds, but if you’re considering using a Pro Studio, definitely verify that it’s watertight in the front! If it’s not, don’t worry - I’ll offer advice to fix it.
Water Ingress Issues
We had an exceptionally wet spring in 2019, and had some unusual weather patterns that involved the rain coming from the south driven by a very stiff wind. This meant the rain was beating against my door hard, and I finally noticed that things were getting awfully wet on the inside - and tracked down the cause.
I knew I was taking a little bit of water, but I hadn’t realized just how much and where it was going. The water was coming in through the windows and under the door, then rolling along the edge into the corner, where it would wick up the plywood and cause problems. Mold-like problems. Yuck. No good at all.
My little heater is running in the corner trying to dry stuff out. It’s pretty good at it, both moving and heating air, but it couldn’t keep up with the rain. You can see the “high water marks” where water has been in the past. Those aren’t standing water levels - the water just wicks up the plywood.
A bit of closer investigation on a particularly wet, soggy, windy day gave me a useful bit of information: My windows leaked a bit from every joint, and my door simply allowed water pooled outside to freely flow under, where it could run around the inside. Ugh. Time to get solving.

Why hadn’t I noticed the issue before? Storage. I had boxes under my bench, and they were keeping me from seeing the problem. They also had gotten fairly wet, though fortunately the contents were still fine. When we moved, a lot of boxes from the house ended up in my office since there was no better place. We now have many better places, though I’m working on de-crapping (which is an even better option).
Paint Stripping
One of the issues I’d noticed that I resolved during this project: The paint just wasn’t sticking properly on the front of the shed. All the trim around the door and windows was pealing. It was on my list of things to fix, but since I’d have to strip the paint to get the caulk done properly, I started out by stripping it all off.

A paint scraper solved the problem easily - the paint simply wasn’t on there very well. Huge flakes came off, and even the stuff that didn’t come off immediately was fairly easy to remove. I’m guessing they were short on time and didn’t use a good primer beforehand, maybe? Paint failures aren’t my specialty. But a bit of time with a scraper, and the wood was bare (both trim pieces and structural pieces). Bare wood is good for caulk bonding.

Caulk EVERYTHING!
With the paint removed, I set out to caulk up everything. We’ll not discuss some of my early efforts, other than to note that if you haven’t done much caulking, maybe go find something else to practice on first. The windows are done with a clear, flexible silicone caulk designed to bond to window glass. This covers rain running down along the window pane and through the trim work.

For the rest of the joints, I used more of a standard paintable caulk. It’s not pretty, mostly because I didn’t exactly understand the proper technique here. The other side looks better by a bit, and I then had a chance to do some caulking at someone else’s house, and it looks far, far nicer. My office isn’t pretty, I know it, and it doesn’t bother me at all. I recognize that if I were to do it again, it would be a far nicer job, because I know what I’m doing now and know various tricks. Such is the life of learning!

Door Sill Leakage
The caulk fixed the issues with leaking around the windows, but an observation of the behavior during another rain storm indicated I still had a problem - water would run down the door, pool along the sill, and the wind would blow it inside. I had a (duct tape) door sweep, and it really didn’t solve the problem.
Given that I’m not bound by various regulations about door sill designs, I decided to try something that was a more physical blocker - a door sill blocker, plus a wedge to direct the rain over it. If I put a block of wood in front of the door, it would keep the wind from blowing water in, but it would also allow water running down the door to just drain inside. However, if I had a wedge attached to the door so the water drained outside the block… it just might work!
A bit of fun with a table saw gave me the parts I wanted, and a couple coats of paint protected them.
The rectangular block screws down to the sill plate - I pre-drilled all these holes to avoid any potential splitting. You can see that it’s almost, but not quite, up against the door. This blocks the wind and helps keep water on the outside from coming in. But water could still drain down the door.

To go on the door, I built a wedge that sticks out beyond the block - water should, in theory, drain down outside and stay out!

This wedge is secured to the door and is fairly close to the block. There’s a bit of a gap between them that I could seal up if I need to, but with the limited rain I’ve had since I built it, things seem to be staying generally dry on the inside.
I caulked up the seams as well to prevent water from working places it shouldn’t be.

Finally, I added a better door sweep on the inside. It doesn’t really block water, but it helps block any wind that’s trying to sneak around. Mostly, I felt like I should replace the random piece of duct tape with something better. I’ll see how this works, but with both sides blocked, I don’t get a draft under the door, which is nice!

And Paint!
Finally, some paint! The paint I had mixed to match my office trim doesn’t match that well - it’s a good bit darker. I don’t particularly care, because it’s there for protection, not style. It could be purple for all I care (though I’d rather not - I like my muted colors).

After pounding out the old staples in the uprights, I added those back as well. They’re just there for style - they don’t actually matter. But I have them, so I may as well reinstall them.

Life in a Solar Shed
Is good.
There just hasn’t been much of interest to report. It is doing exactly what I hoped, being a great place to work on a wide range of projects, comfortably, all year round. The lab bench is a great spot to work on small electronics and battery packs, and my desk with the monitors works for any sort of technical/programming work. I’ve finally wall mounted everything (monitors and computers), which helps keep my desk tidy and gives me more workspace. For computers that aren’t wall mountable, like the Jetson Nano, they’re on little plywood shelves behind the monitors.
Power isn’t a problem except for “generator week” most winters. The rest of the year, my plan to overpanel means I don’t have to worry about power at all. Despite that, I’m adding more panels at some point to add yet more power - I’ll be increasing my Folding@Home and BOINC output by some margin in the spring. Also, I’ll eventually be charging a battery trailer out there.
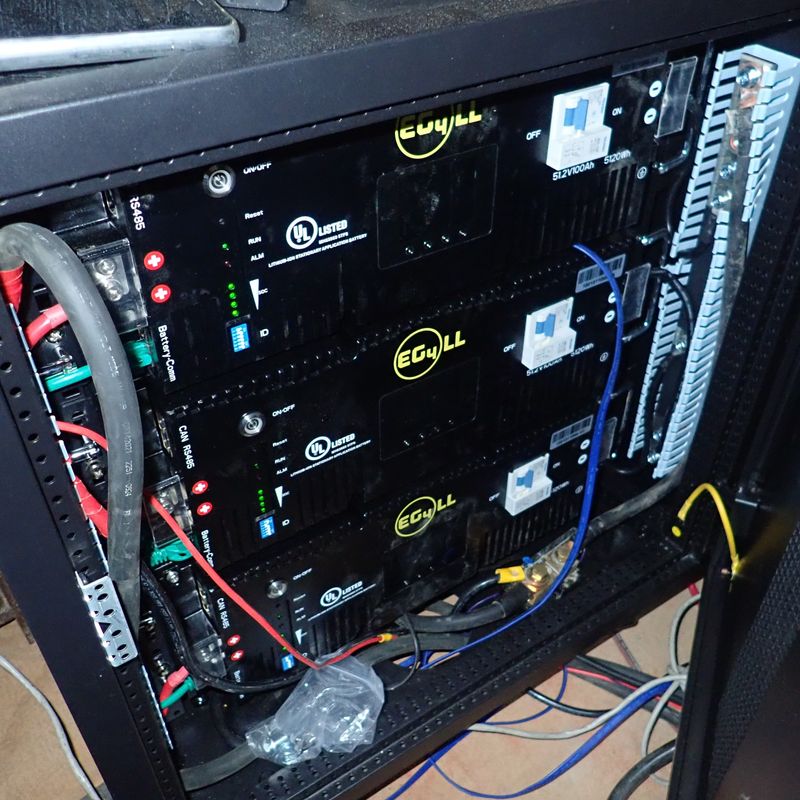
The batteries are on their third year and still behave perfectly. I water them two or three times a year, and have been going through 1-2 gallons/yr of distilled water (for the full pack). In the summer, with long days, I’ll skip doing a full absorb cycle every day, only doing it every 2-3 days. The rest of the days, the charger starts the day at the float voltage. This helps keep the battery temperature down and also reduces water use, as it keeps the pack below the gassing voltage. Since I don’t use much of the battery capacity during the summer, there’s not any real downsides to this.
My air conditioner and heaters cover both winter and summer nicely, though I would use a different air conditioner with what I know now. The heat pump capability is almost entirely worthless, because it stops working below 40F. If it’s above 40F in the morning, my very well insulated office is perfectly fine. If I actually need heat, it’s below 40F by a good margin. An inverter drive air conditioner would also be nice. My unit is pretty overpowered for the space and bangs on and off quite a bit. It’s hard on the compressor motor, and it would be slightly more comfortable if the unit could run steadily at a low power to maintain temperature. But it will certainly keep things comfortable in there!
I still heat on propane, and go through a few gallons a winter. Were I to design things again, I’d probably find space for a direct vent propane heater in there - the ventless unit just dumps exhaust into my shed air, so I leave a window open with a small fan venting things while the heater is running. Towards the end of last winter, I bought a nice kerosene lamp, so I’ll probably use that for some heat this winter too (and light in the early mornings before the sun comes up).
Otherwise… really, it’s just about the perfect workspace. Anything I want to do, I can do in there, and if I have reasons to modify it, the plywood walls make it trivial to bolt new things up. I don’t have to find a stud, I just have to screw into the wall. Even larger monitors on arms just have to go into the plywood.
Comments
Comments are handled on my Discourse forum - you'll need to create an account there to post comments.If you've found this post useful, insightful, or informative, why not support me on Ko-fi? And if you'd like to be notified of new posts (I post every two weeks), you can follow my blog via email! Of course, if you like RSS, I support that too.
