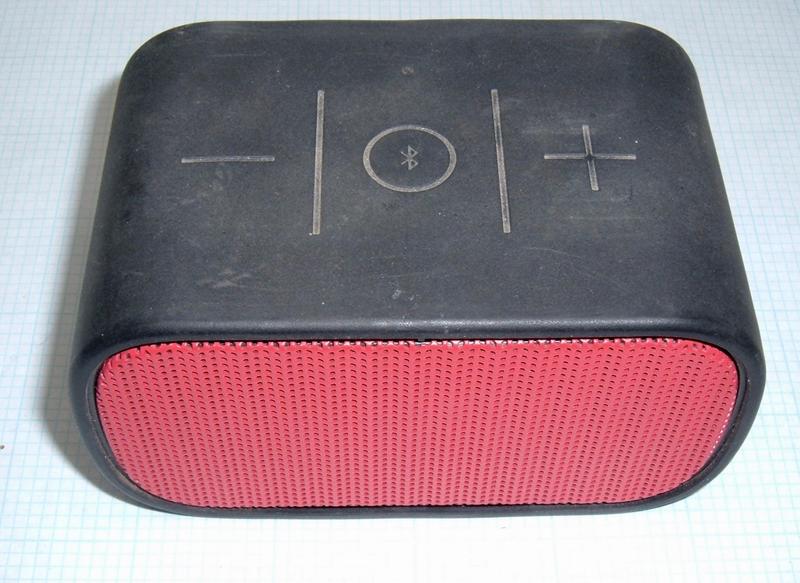
I’ve not found a great teardown of a UE Mini Boom - and, especially, nothing talking about battery replacement. The Mini Boom is an older Bluetooth speaker that was quite popular some while back - and they’re not particularly well documented. So, of course, I ripped into mine.
This little gizmo is a perfect example of “nearly unmaintainable consumer crap,” and I’m going to rip on it as I go - there is no reason to build something this hard to work on, and I think it’s irresponsible for consumer product companies to build stuff this way. It’s hard to get apart, you can’t get it back together without heroics, it doesn’t look the same after you get it back together, and… I just don’t understand why you’d do this. It’s not even waterproof, which is a common excuse for hard-to-take-apart things. It’s got glue, it’s got soldered connections where headers would make sense, and it’s just a pain to work on. On the plus side, they did design it to last - but, seriously. Don’t build things like this.

Anyway, what’s inside? How do you get inside, anyway? Keep reading to find out!
The UE Mini Boom
The Mini Boom showed up in 2013 or so, and has been a fairly popular bluetooth speaker since then - the bass is decent (helped by the case design), the battery life is decent enough, and it’s just an acceptable little knock around speaker. They put out enough sound to fill a small room, and are useful enough outside, though it’s not by any means a massive speaker - the twin drivers just don’t move that much air. If you want to pair multiple of them together, you can (this feature mostly existing to drive buying more than one, instead of just buying a bigger speaker, as far as I can tell).
The driver size doesn’t really matter, though - the audio chip only seems to support SBC over Bluetooth (it’s an old, somewhat crappy audio codec), so unless you’re using the aux in port, it’s not like an amazing signal gets into the device in the first place. It’s not audiophile grade audio, but then this isn’t an audiophile grade speaker either. This is a “toss it in your bag and take it with you” speaker.

Looking at the (somewhat worn) specs on the bottom, we see this is a part 886-000015, model S-00136, FCC ID JNZS00136. It’s got a UL listing, and, interestingly, I see no ROHS markings. Based on having to resolder a wire I popped loose from a speaker while messing around, I believe it - the solder didn’t behave like lead-free solder. I hate the lead free stuff, so I’m excited, if a tiny bit confused about how they got that through in 2013.

Opening the Speaker
There’s no obvious way into the speaker - because there’s seriously no obvious way in. You just have to start digging.
You have to remove the rear grille to get access to the screws, so may as well start there. The least-destructive way I found was a flathead screwdriver, coming from the charge/power port opening. Push the screwdriver in, pry gently at the corners and you should get the grille to come up. Be careful - you don’t want to bend it up more than needed. Work around the edges until the grille comes free. If you put too much force on the screwdriver, you’ll pop a corner free and bend the whole thing up - don’t do that.

You’re fighting glue - get used to it on this project. You’ll see some globs of it come out on the sides as you work it out. Once you’ve gotten the whole thing clear, try to flatten it back out as best you can - it won’t look the same when you’re done, but you can get close enough to not be obvious under casual inspection. Under the back, there’s a layer of a thin felt-like fabric that serves to hide the screws and plastic.

Under all this, you get the back plastic - and a lot of screws. You’ll need a skinny screwdriver to get into the outer four, which release the front case. You’ll need just a regular screwdriver for the inside four, which release the circuit board. Remove all of them, should you want inside, because everything is soldered together and doesn’t come apart.
Given the rest of the unit, I’m somewhat surprised that they used screws instead of just gluing the whole thing together. It’s really not an easy unit to pull apart and work on.

Next, remove the rubber wrapper. This is one of the more annoying parts, because you have to stretch it out, and it’s held on with double stick adhesive that doesn’t come off cleanly. It’s a mess. There might be a way to take things apart without removing it completely, but I’m not convinced.
In any case, this is a teardown, so off it comes. I’m hoping some heat will shrink it back into place properly…

I had to really stretch it to get it off. You can see the small circles of double stick on top for the buttons. This whole thing is a mass of double stick tape. I’m guessing it was originally heat activated - put the rubber around, index it in place somehow, then a big heat gun shrinks the rubber back into place. Experimentally (from the reassembly), it is a heat shrink rubber, so I’m assuming that’s part of the assembly process.

The top buttons are below these plastic-sprung disks. I’m always interested by what you can do with interesting cut patterns - springs, fuses, all sorts of neat things! Plus, hey, more screws! Again, you might not need to pull these, but I did. Start pulling, once all the screws are out, and you’ll hear some foam ripping, and eventually get inside. Hopefully.

If you’re having trouble getting the board out, push on the power button and aux in port. That should free stuff up enough to get everything out. You have to bring the whole front (the speaker side) and board out as one part, because they’re connected together with just about enough slack to assemble the thing, not enough to be helpful.

Inside the UE Mini Boom
You’ll notice two things on the inside: Solder, and foam. Everything is covered in an open cell foam with adhesive on the outside, and everything is soldered together, with the exception of the battery. It’s not terribly convenient to work on, though it’s also rather explicitly not designed to be worked on.

With the guts more completely out, you can see the speakers. The markings are E15-00454-01 4Ω 5W 14E09P - and the only things I find meaningful are the 4Ω impedence and 5W power rating. I’m not sure there’s any way this speaker is going to push 10W through the pair, and, based on the fact that these units don’t seem to blow their drivers out, I’m guessing they’re somewhat conservatively run (portable speakers like this often spend their lives at maximum volume, and it’s not at all hard to find used ones of certain brands with blown drivers at your local pawn shop). It’s a loud speaker for the size but not insanely so. You can see the board, with everything nicely soldered in place, and the battery is the yellow taped thing on the underside. There’s not a huge amount of spare room in this speaker.

The top of the “main case” contains a flexible rubber diaphragm. This transfers pressure from the back side of the speakers in the main case to the big “bass” port - and, in that it’s rather stiff, serves as a quite effective mechanical low pass filter. This helps with the speaker’s “boom” - it seems most of the UE “boom” series speakers have something similar, and, while I’m not a professional audio reviewer, it seems to work. The speakers move a respectable amount of air for the size.

The main logic board takes up most of the case. I’ll dig into the components a bit later, but the lower left IC is the audio amp, the square chip in the center is the power controller, and the chip half-buried under foam on the right is the main bluetooth IC and system controller. A collection of inductors in the top left pairs with some capacitors for power handling, and the inductors are nicely “gooped” with something. Sometimes inductors (coils of wire wrapped around a core) will “sing” in audible frequencies, and it’s downright annoying - I’ve had some inductors replaced on my office charge controller for this very problem. Almost all the wires are wrapped in foam for acoustic reasons. Does it actually matter? No idea, but you won’t hear wires buzzing around or flapping into the side of the case, that’s for sure!

The back of the logic board, with the power switch, aux in port (remember 3.5mm jacks? Pepperidge Farm remembers!), and the micro-USB charge port. I’m quite excited to see the plastic support above the USB port - this adds a rather significant amount of strength to the port, and prevents it from flexing up and failing like many ports do - especially if they’re getting knocked around, like might happen with a rather robust rubber coated speaker. I like seeing things like this - it really does make a substantial difference in the longevity of the product, because if this port fails and the unit won’t charge, 99.99% of them will just go in the trash.

At first glance, the connection to the top case board looks like a standard socketed connection you could remove. Wrong! It’s all soldered in place. I assume the connector was easier to solder than the bare wires, but would a socket have made the unit that much more expensive? I suppose if it’s not designed to be repaired…

Over on the other end, more glue. The inductors are glued together, and the wires leading to the speakers are glued in with what looks and feels an awful lot like hot glue. They shouldn’t come out easily!

The Battery
If you’re curious about the battery, it’s a Logitech 1700mAh 704060 battery - of a variety nearly impossible to find a replacement for, of course. Mine didn’t seem to be charging properly, so I figured it was shot and went to replace it.
If you’re curious, 704060 means (in battery sizing terms) 7mm thick, 60mm long, 40mm wide - and measurement indicates that this is correct here.

The connection to the rest of the board is the only removable connection in this whole unit - I’m surprised it wasn’t soldered on, but that has some safety issues (shorting out batteries during assembly, even with a protection board, just isn’t a good idea). It’s a three wire harness - negative, positive, and a thermistor lead that’s probably a 10kΩ NTC thermistor (I didn’t test it - turns out, this battery is still in good shape).

I’d initially thought I would have to replace the battery, but some measurement showed that it was just on the low side - too low to charge, apparently. The battery management IC supports a trickle charge, so perhaps I was just impatient, but I attached some leads and manually charged it up from 2.5V or so. I normally won’t recharge drained lithium, but this wasn’t too deeply discharged, and I knew it hadn’t been drained for that long (I just forgot to plug it in when I used it a month ago). As a general rule of thumb, I won’t put a charge on anything below 2.0V, and if it’s below 2.5V, I’d better have a clue as to when it got there or I won’t charge it.

After bringing the voltage up and letting the system charge it, I was surprised to see the fully charged voltage isn’t actually 4.2v - it’s about 4.12V! This is great for longevity - lithium is most stressed at fully charged or fully drained, and not fully charging extends the battery life. For a portable speaker, it’s safe to assume they’ll be fully charged regularly and left in that state for use - so not charging to 4.2V is genuinely excellent.
With that bit of knowledge, I decided to test the capacity - and was quite surprised to see that after several years, this battery still holds 1600mAh! I only cycled it down to 3V, and it wasn’t even fully charged (4.2V) to start with, so I think this cell is still at nearly full capacity - which is quite impressive given the age and general lack of care I’ve offered this speaker.
You can find similar sized replacement batteries if needed. Going a bit thicker would be fine.
Components
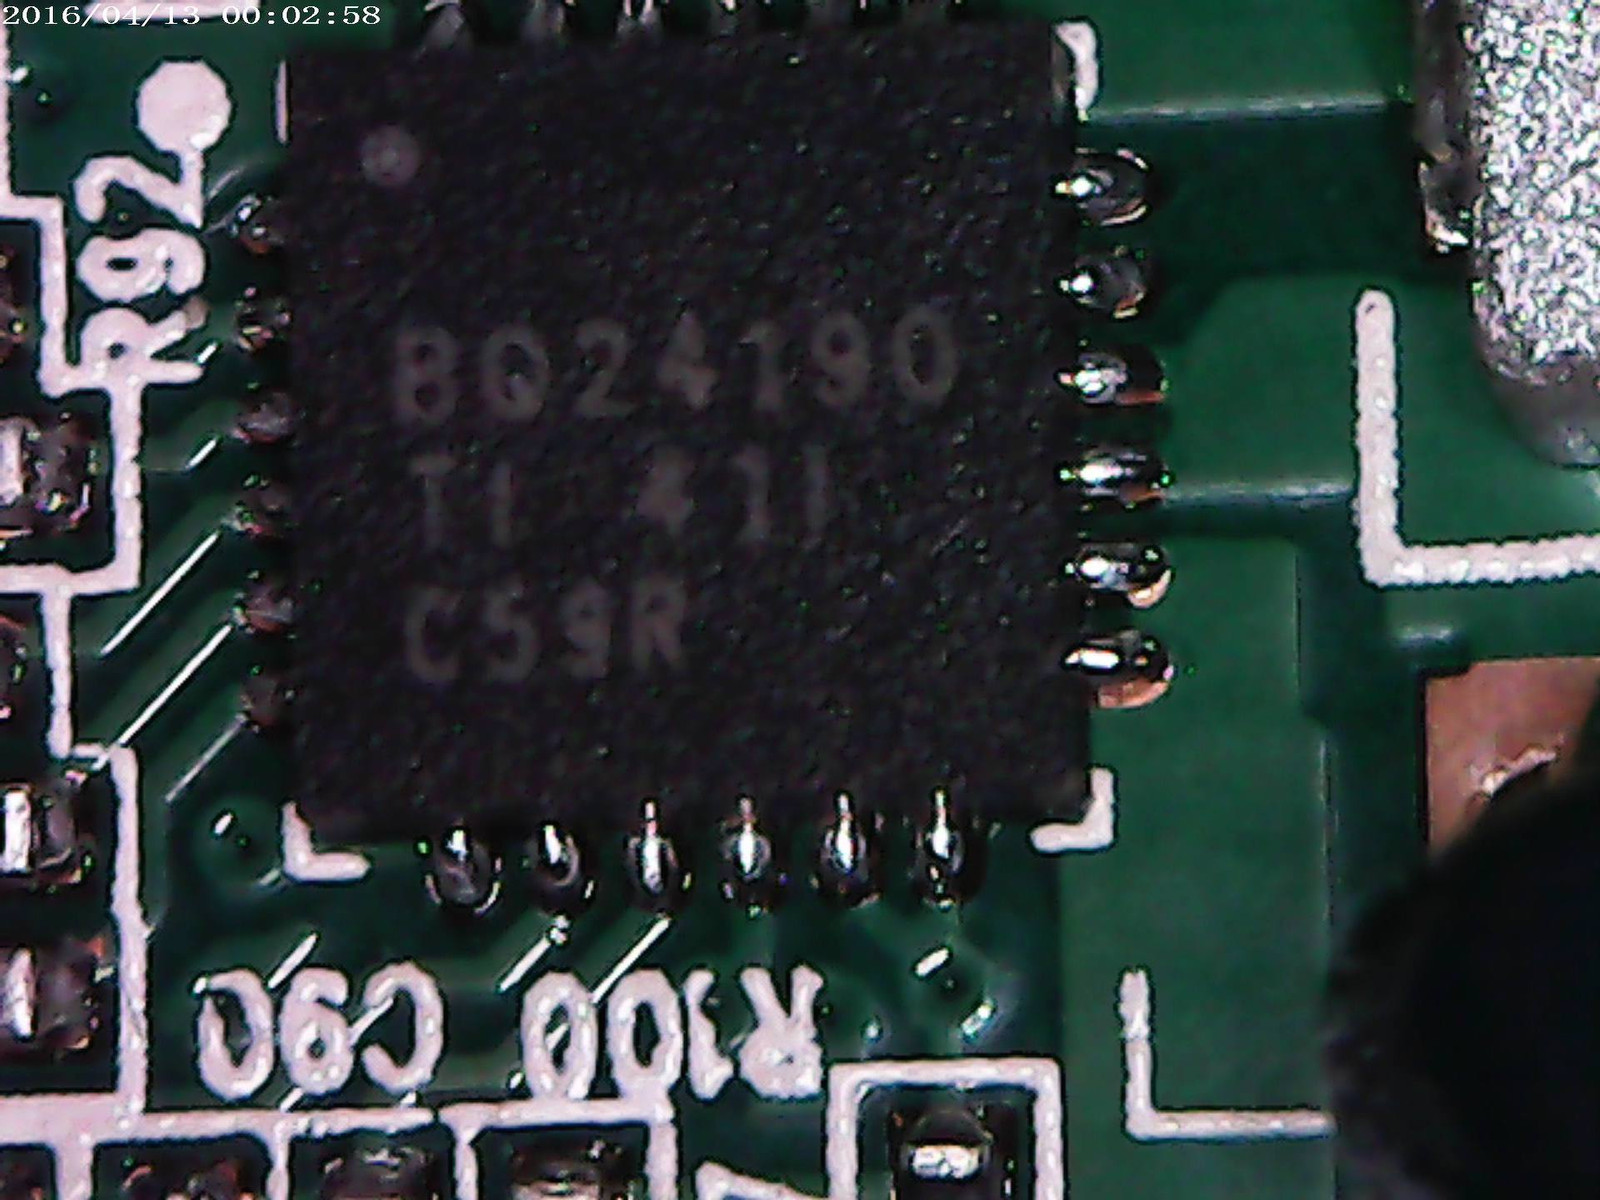
I have a little magnifier gizmo (to be reviewed in the future) that improves my ability to get detailed board shots and component shots - so I’ve used it for a few of the ICs on the board. I can’t identify all of them, but I found datasheets for at least a few.
The TPA3130 is a Texas Instruments (you can see their nice logo in the top left) Class D stereo amplifier. It’s rated at up to 50W into a 4Ω load, but that’s at 21V - and this system is running at a far lower voltage. A Class D amplifier is a PWM based signal amplifier - it outputs the amplified signal as a pulse width modulated signal, which is then turned, with some low pass filters, into the analog waveform fed to the speakers. They’re not always amazing in terms of audio quality, but they are very efficient compared to other types of amplifiers - and for something that’s designed to run a long while on a fairly small battery, that matters a lot. This one supports power limiting (helpful to avoid overheating your driver coils), AM signal rejection, and a variety of other nice things - read the datasheet if you’re curious.

The main Bluetooth chip (and central command of the device) is a CSR8670. Unfortunately, the CSR8670CG is a far older version than the current version, and doesn’t appear to support some of the nice features in the current iteration (like AptX and AAC - I tried and failed to use those to talk to it).
This is a pretty standard little microcontroller for this sort of purpose - it’s a Bluetooth audio controller chip. In a Bluetooth audio speaker.

Finally, the power management - a Texas Instruments BQ24190 4.5A battery charger IC. This is both a charge controller and an output regulator that will maintain a minimum system voltage as the battery discharges (typically 3.5V). You can dig through the datasheet if you care for details, but it’s a nice little unit that does quite a bit, and is controllable over I2C (with some clear similarities to some of TI’s other battery management ICs I’m familiar with).
So, that’s about it - the guts of a UE Mini Boom!
Reassembly
Is the reverse of disassembly. Seriously, just shove it all back in, screw it together, and shove the glued in grille back in place.
I can report that the rubber is heat shrink, so use a hair dryer, heat gun, hot air rework station, or whatever you have handy to shrink it back on, and it should look more or less fine when done. You’ll be able to tell it’s come apart, but it won’t look too bad.
Final Thoughts
I really don’t like the trend towards unmaintainable consumer products, but I will say that this is a very well designed piece of unmaintainium. The big thing that usually limits lifespan on a product like this is the battery, and after 5 years, an awful lot of neglect, and generally treating it as a disposable speaker… the battery is still doing perfectly fine. They’ve taken a conservative approach to the battery charge voltage, and that’s a great decision for longevity.
Audio quality… I mean, what did you expect? It’s an old Bluetooth speaker using a fairly crappy (but standard) audio codec to feed a Class D amplifier, in a small plastic body. You’re not going to get audiophile grade sound out - but that’s not the point at all. The point is to toss it in your backpack and drag it out to the beach, your deck, wherever. And, for that, it works quite well!
If your battery has died, it’s a pain to get apart, but you can replace the battery with some heroics, and compatible replacement cells do exist. However, before you try that, leave it on the charger for a couple days and see if it will trickle charge things back up. The trickle charge current is really, really low, so it takes a while.
But it would be really, really awesome if companies would stop building stuff quite this hard to work on.
A Quick Note on Emails
It’s occurred to me that my email notifications aren’t going out properly - Feedburner quit about… oh, 8 months ago, and I maybe sort of didn’t pay attention. Now that Google Plus is going away, I’m working on fixing that. If you haven’t been getting emails, sorry. If you get a few extra… also sorry, but the hope is to have get this fixed in the next week or so, such that you get emails when new posts go up. The subscription box is over there in the right column, and, ideally, I’ll have it fixed soon.
If anyone has good suggestions for post-Google-Plus ways to notify people of posts other than email, that don’t involve using weaponized social media, I’m all ears. Whatever I use would be “post notification only,” not an interactive way to reach me - sorry.
Comments
Comments are handled on my Discourse forum - you'll need to create an account there to post comments.If you've found this post useful, insightful, or informative, why not support me on Ko-fi? And if you'd like to be notified of new posts (I post every two weeks), you can follow my blog via email! Of course, if you like RSS, I support that too.
